

Step 1: Creating a WhatsApp flow in Webex Connect
To create a WhatsApp flow, you must have access to Webex Connect tenant integrated with Webex Campaign. If you do not have access to the Webex Connect tenant, please reach out to your account manager for assistance.
Prerequisites:
-
A WhatsApp application - It is necessary to create a WhatsApp application in Webex Connect before sending a WhatsApp message. The process of creating an application can be found in the Webex Connect documentation - Create a WhatsApp Asset.
-
After creating the application and submitting it for approval, contact your account manager or support team to get it approved. Once the application is approved, any flow that you create will be associated with this application. Based on your use case you can create multiple applications and associate flows with those applications.
-
A Data Stream - Apart from Webex Connect and Webex Campaign integration, a Data Stream has to be created to allow the exchange of information for the WhatsApp channel. Please contact your account manager or support team to create a Data stream.
The steps involved in creating a WhatsApp flow are:
- Create a Service
- Create a WhatsApp flow
- Publish the Flow in Webex Connect (it will be accessed from Webex Campaign)
- Copy the Service Key (it will be configured in Webex Campaign)
To create a WhatsApp flow, follow these steps:
- Log in to Webex Connect platform and click Services tab. It will display all existing services. Within a Service, a flow must be created.
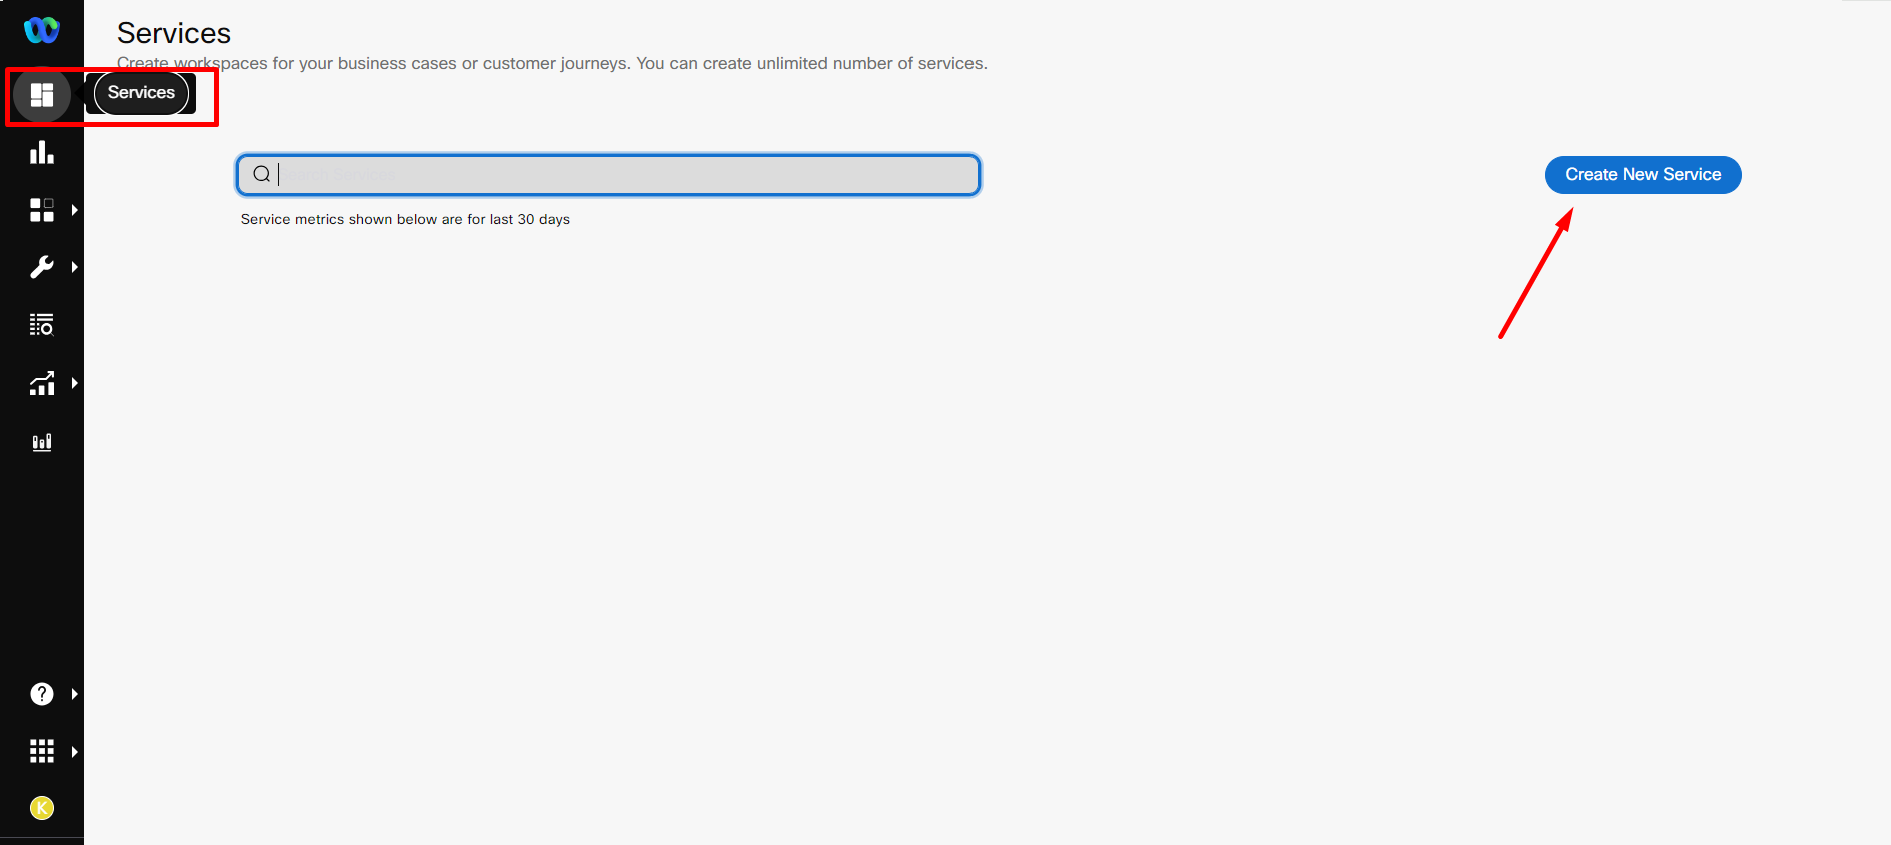
- To create a new Service, click Create New Service and enter a name. Click Create.

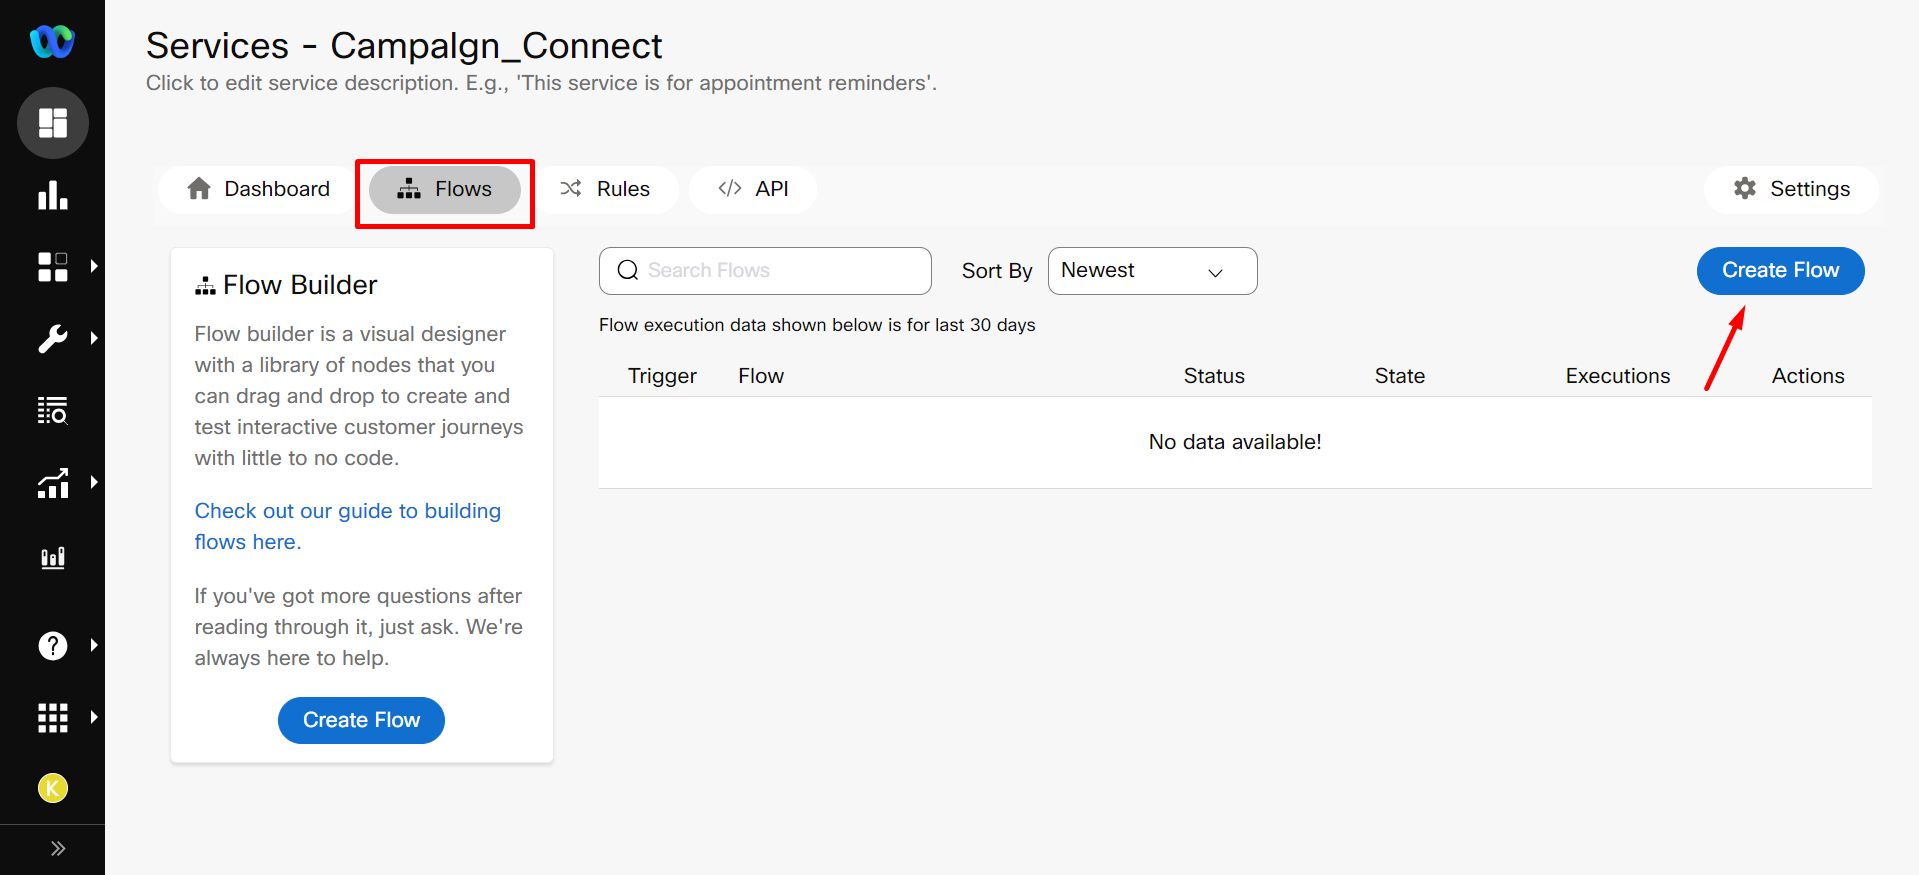
- Click Flows tab and click Create Flow.
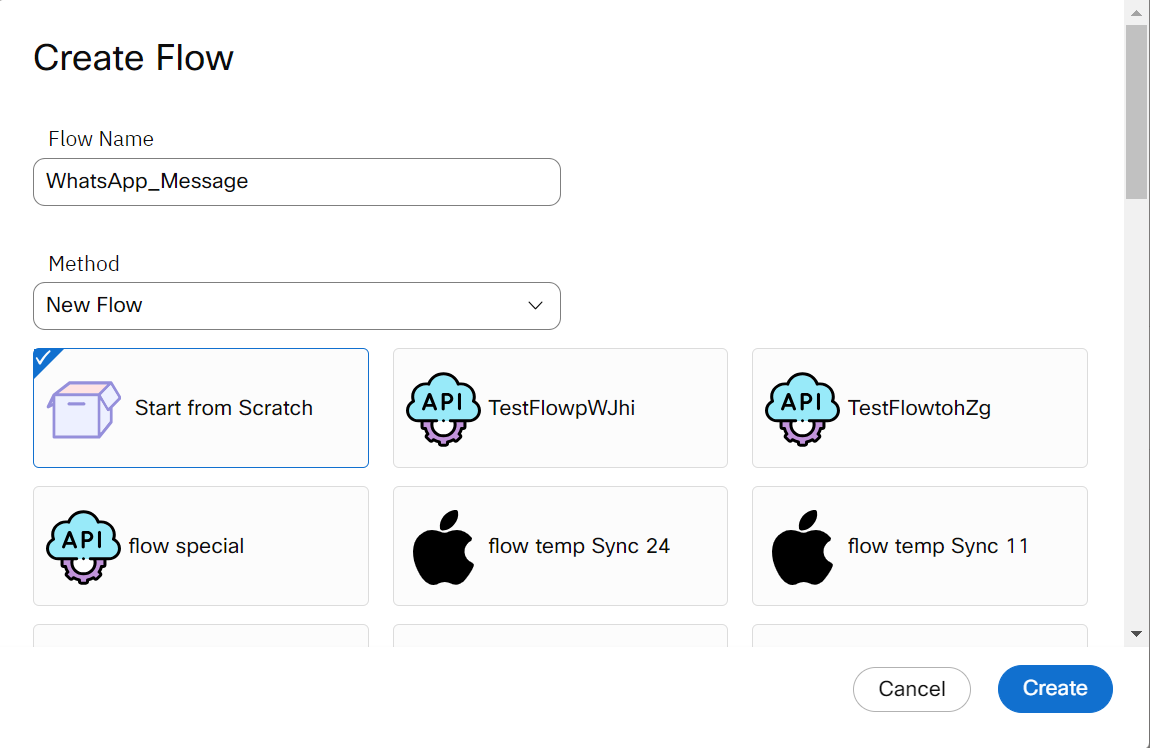
- Enter a Name for the flow and ensure Method as New Flow and Start from Scratch are options selected. Click Create.
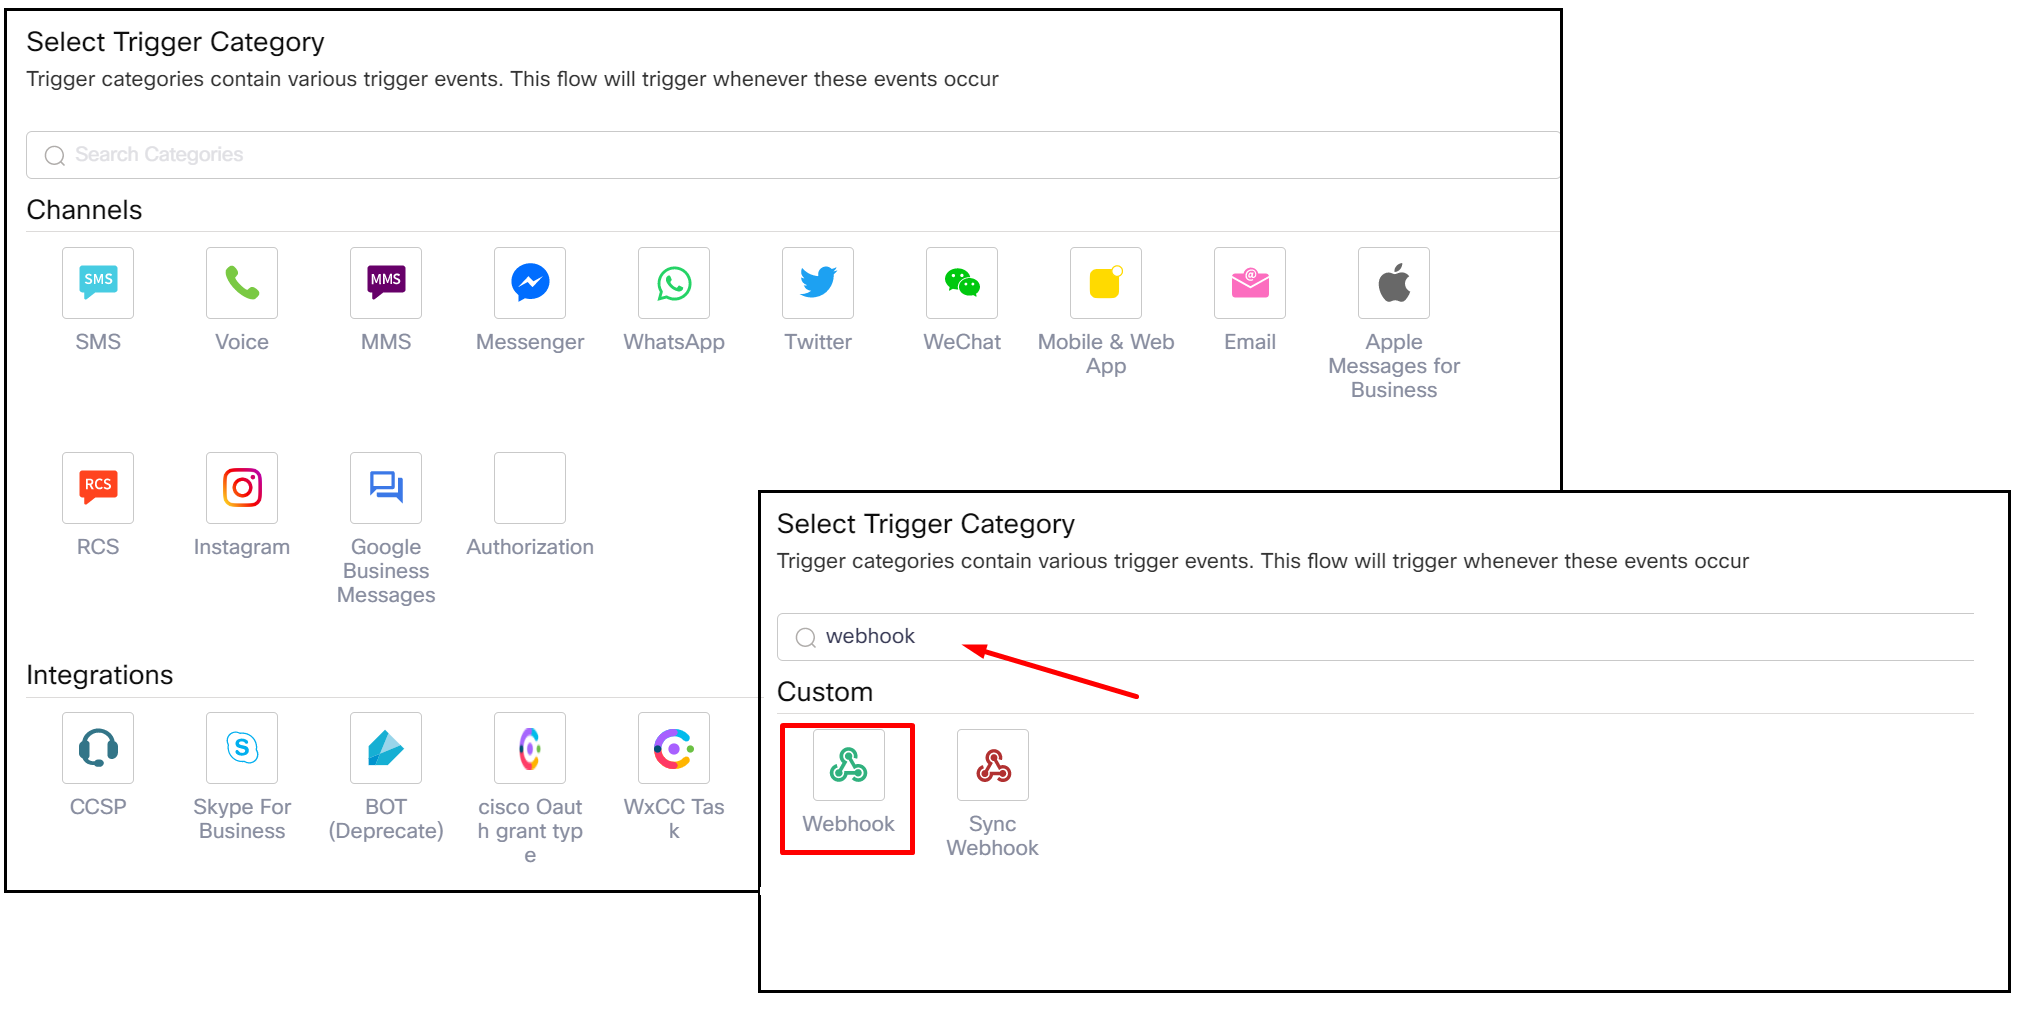
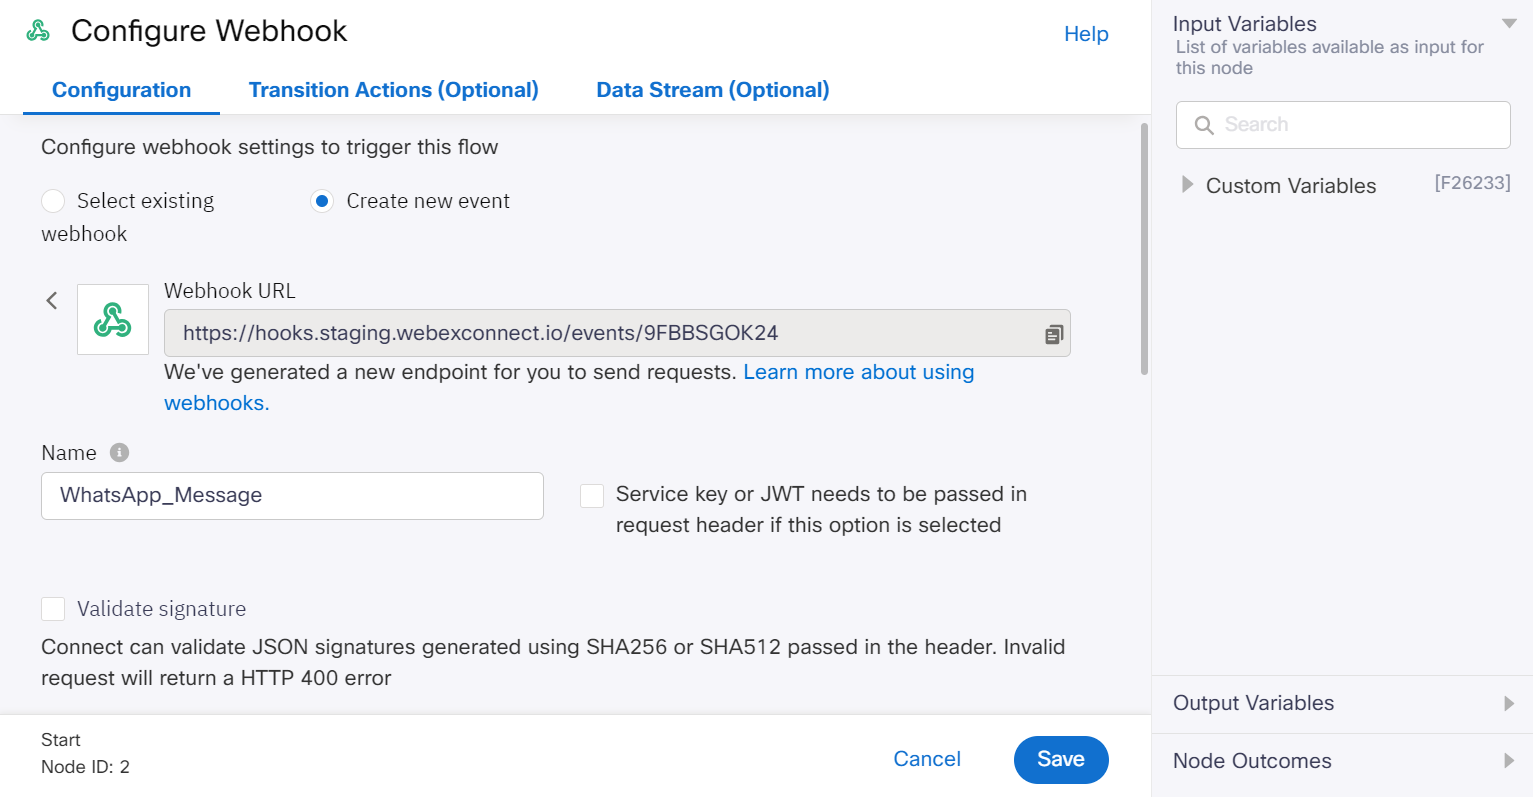
- This screen will display a list of channels and integrations. Search and select the trigger category as Webhook.
- Select Create new event and enter a name for the Webhook and click Save.
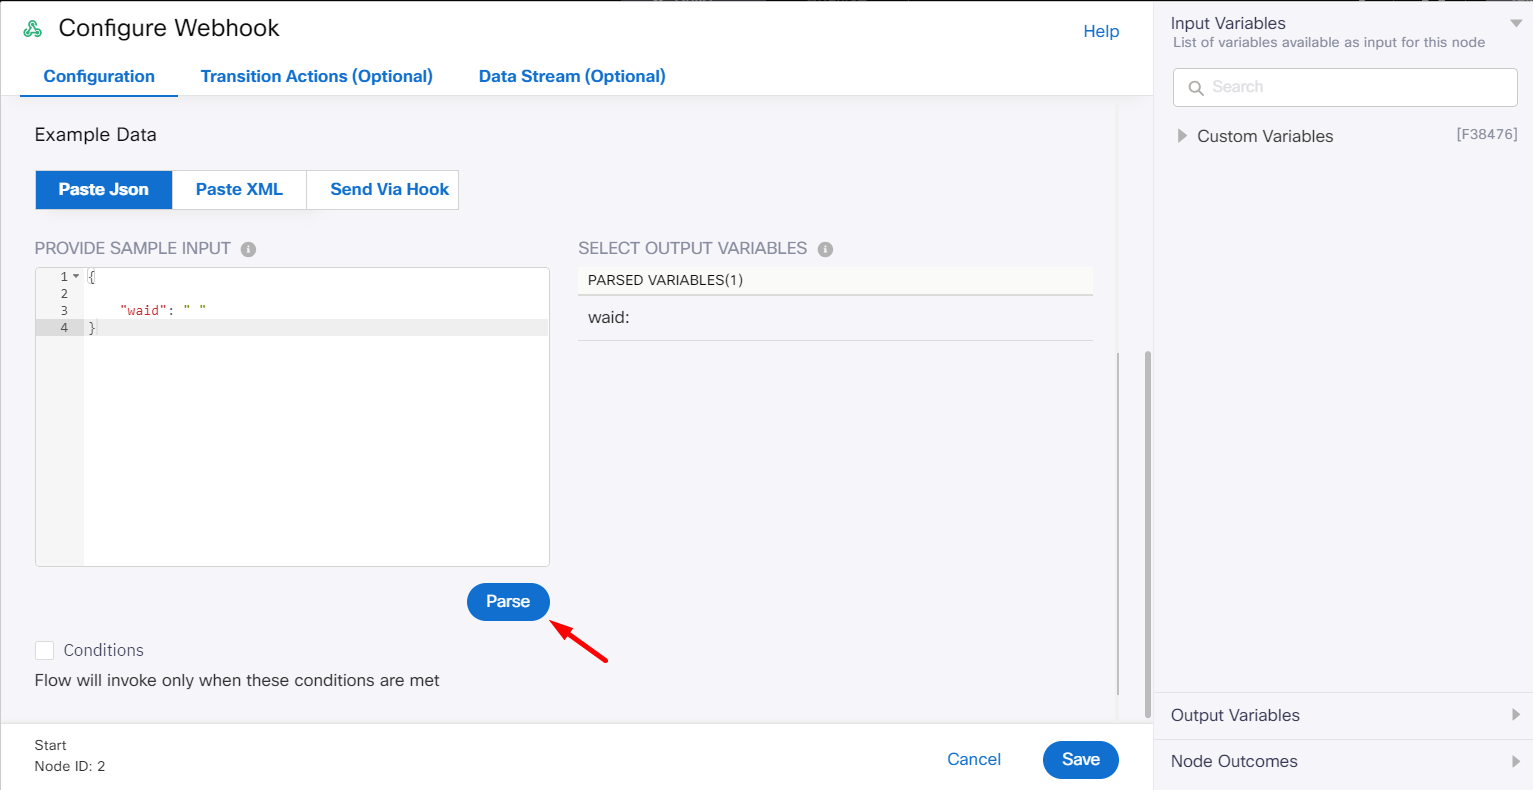
- Scroll down and enter a sample JSON and click Parse.
{
	"waid": ""
}
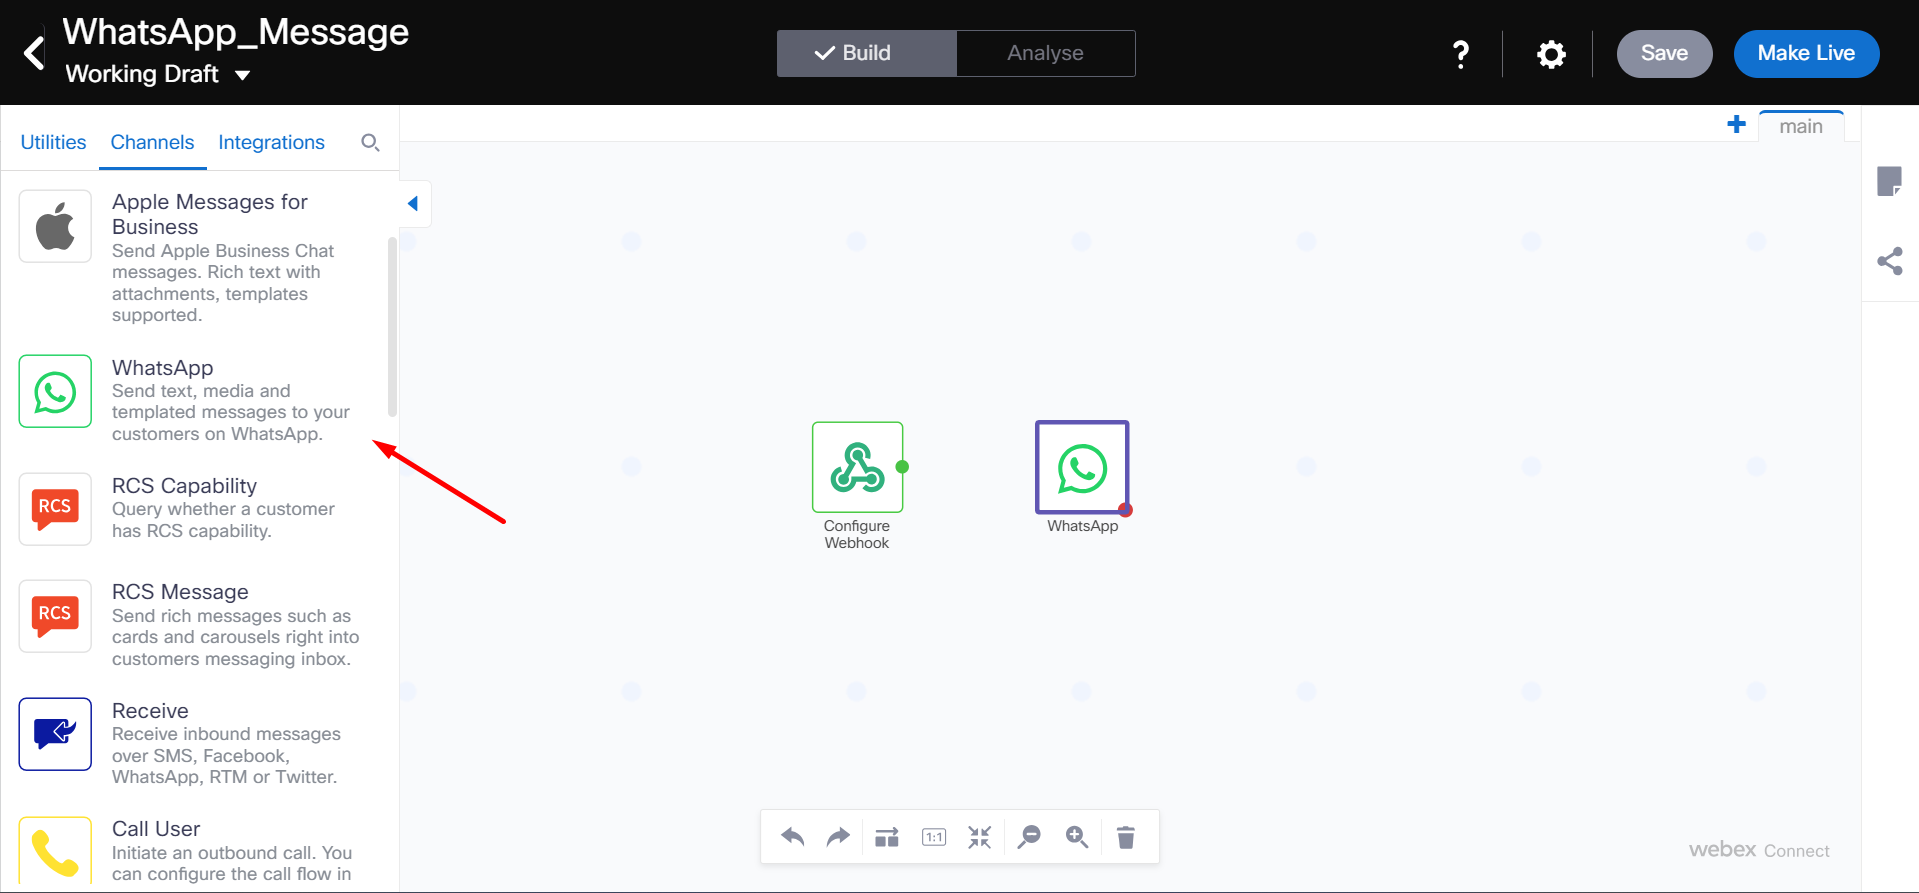
- The flow creation canvas will be displayed. From the Channels tab, drag and drop the WhatsApp node onto the flow canvas.
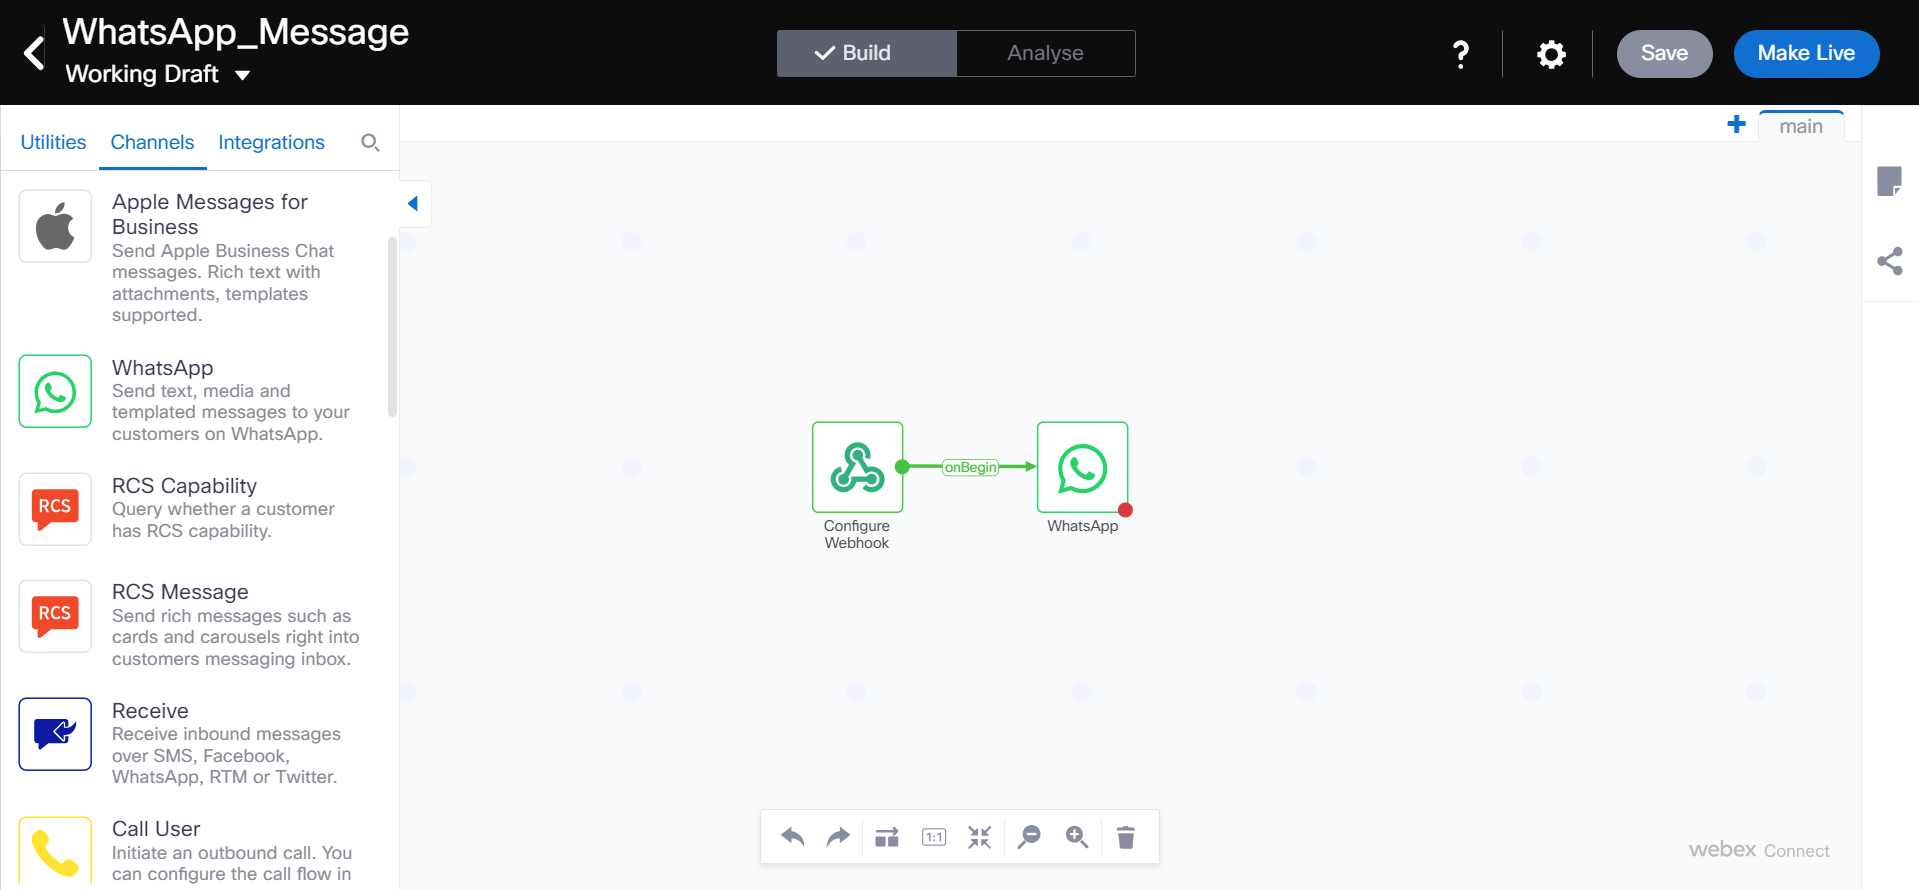
- Join the Webhook node and WhatsApp node by drawing the green dot onto the WhatsApp node.
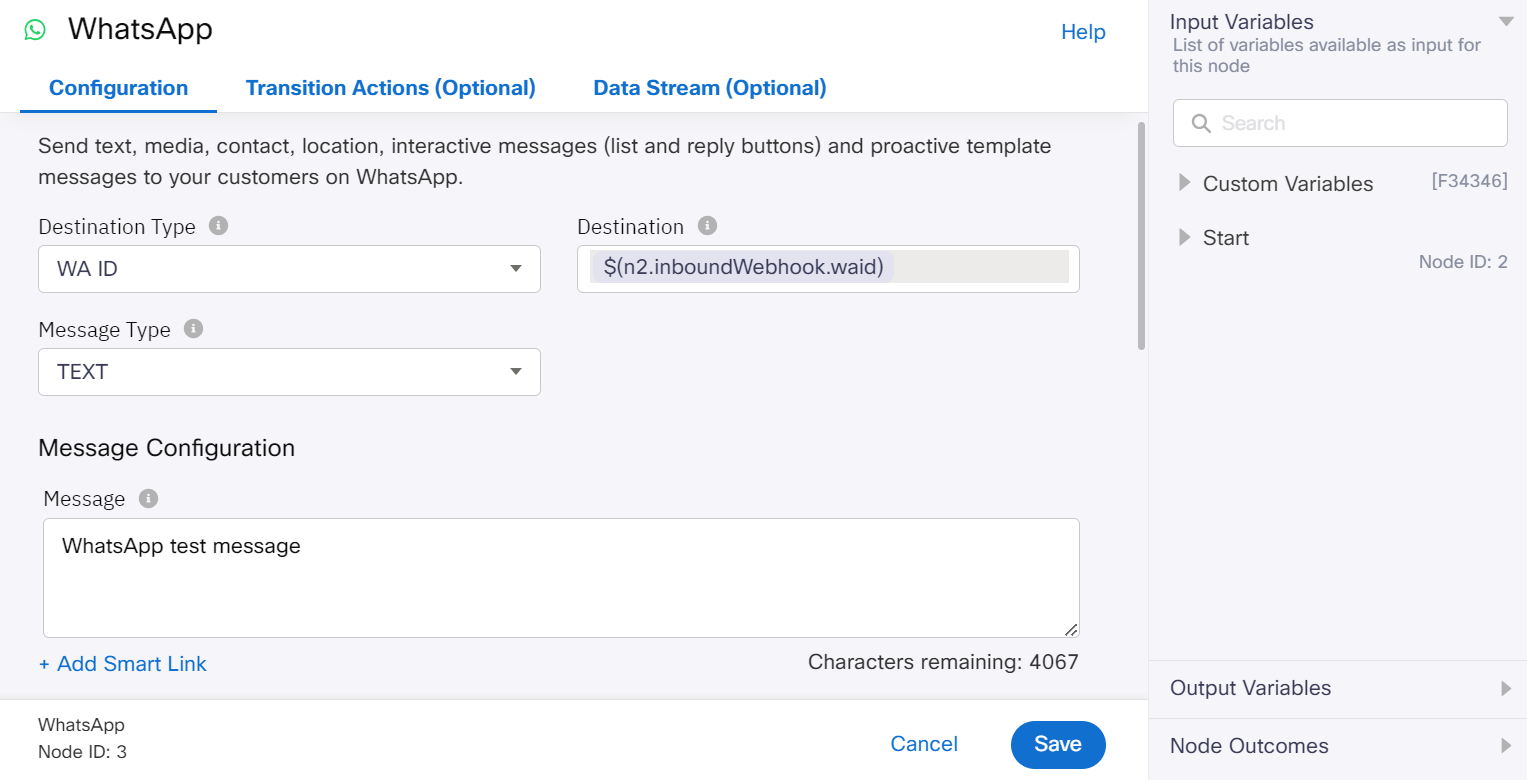
- Double-click WhatsApp node and configure the details as shown below:
- Destination Type: Select WA ID from the dropdown list.
- Destination: Enter $(n2.inboundWebhook.waid).
- Message Type: To send a simple text message you can choose to select Text and configure the Message.
- Message Configuration: Configure the text message.
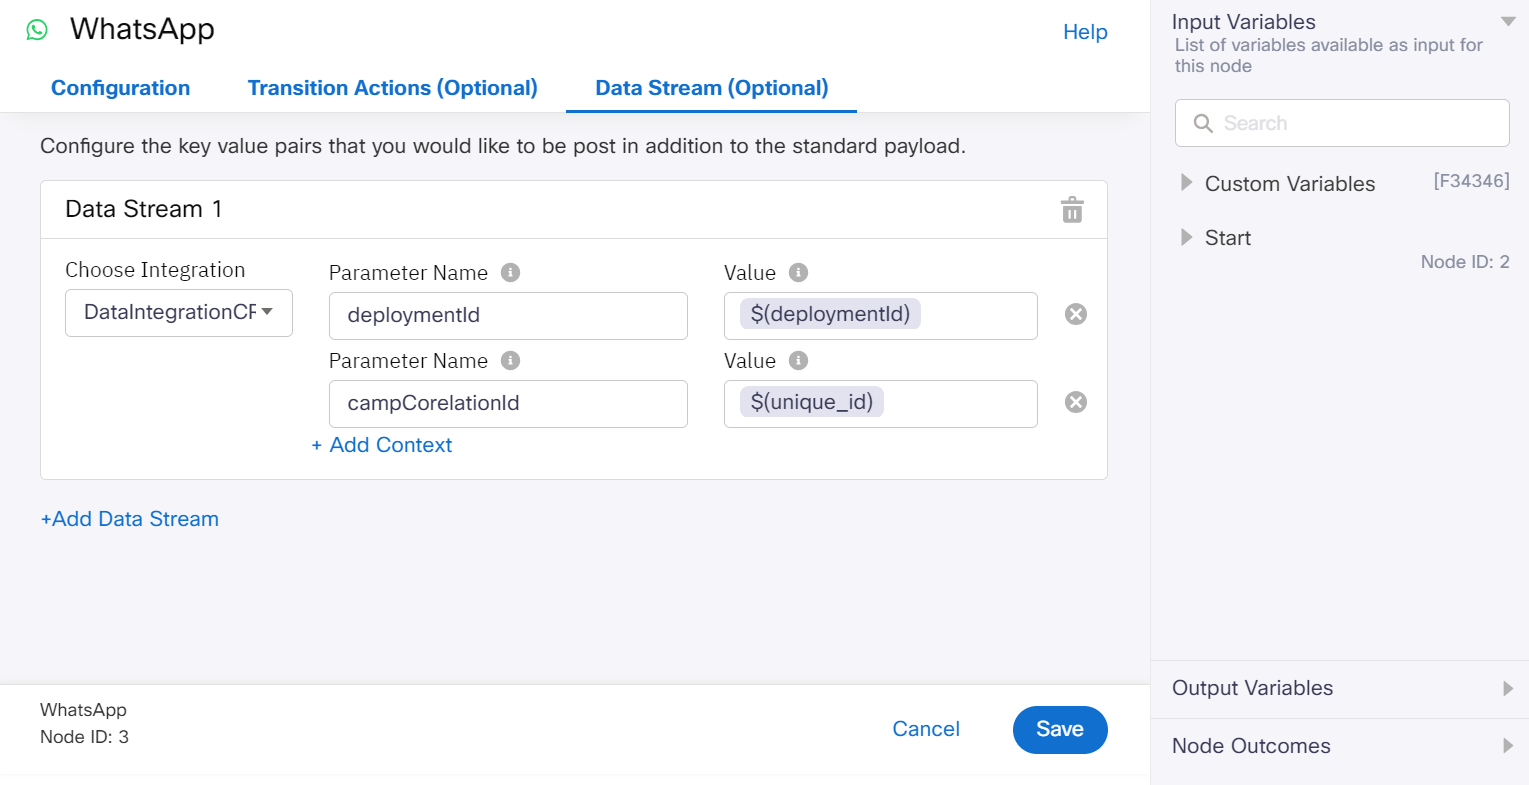
- Click Data Stream (Optional) tab and configure the details as shown below:
- Choose Integration: Select the pre-configured integration from the list.
This Integration has to be configured by the support team. Please contact your account manager.
- Configure the Parameter Name and Value as shown below:
| Parameter Name | Value |
|---|---|
| deploymentId | $(deploymentId) |
| campCorelationId | $(unique_id) |
- Click Save.
- Configure the WhatsApp Message node Events. Drag and drop the green dot. The event screen is displayed. From the Node Event drop-down, select OnSuccess and then select the success code and message as 101 from the Flow Result drop-down.
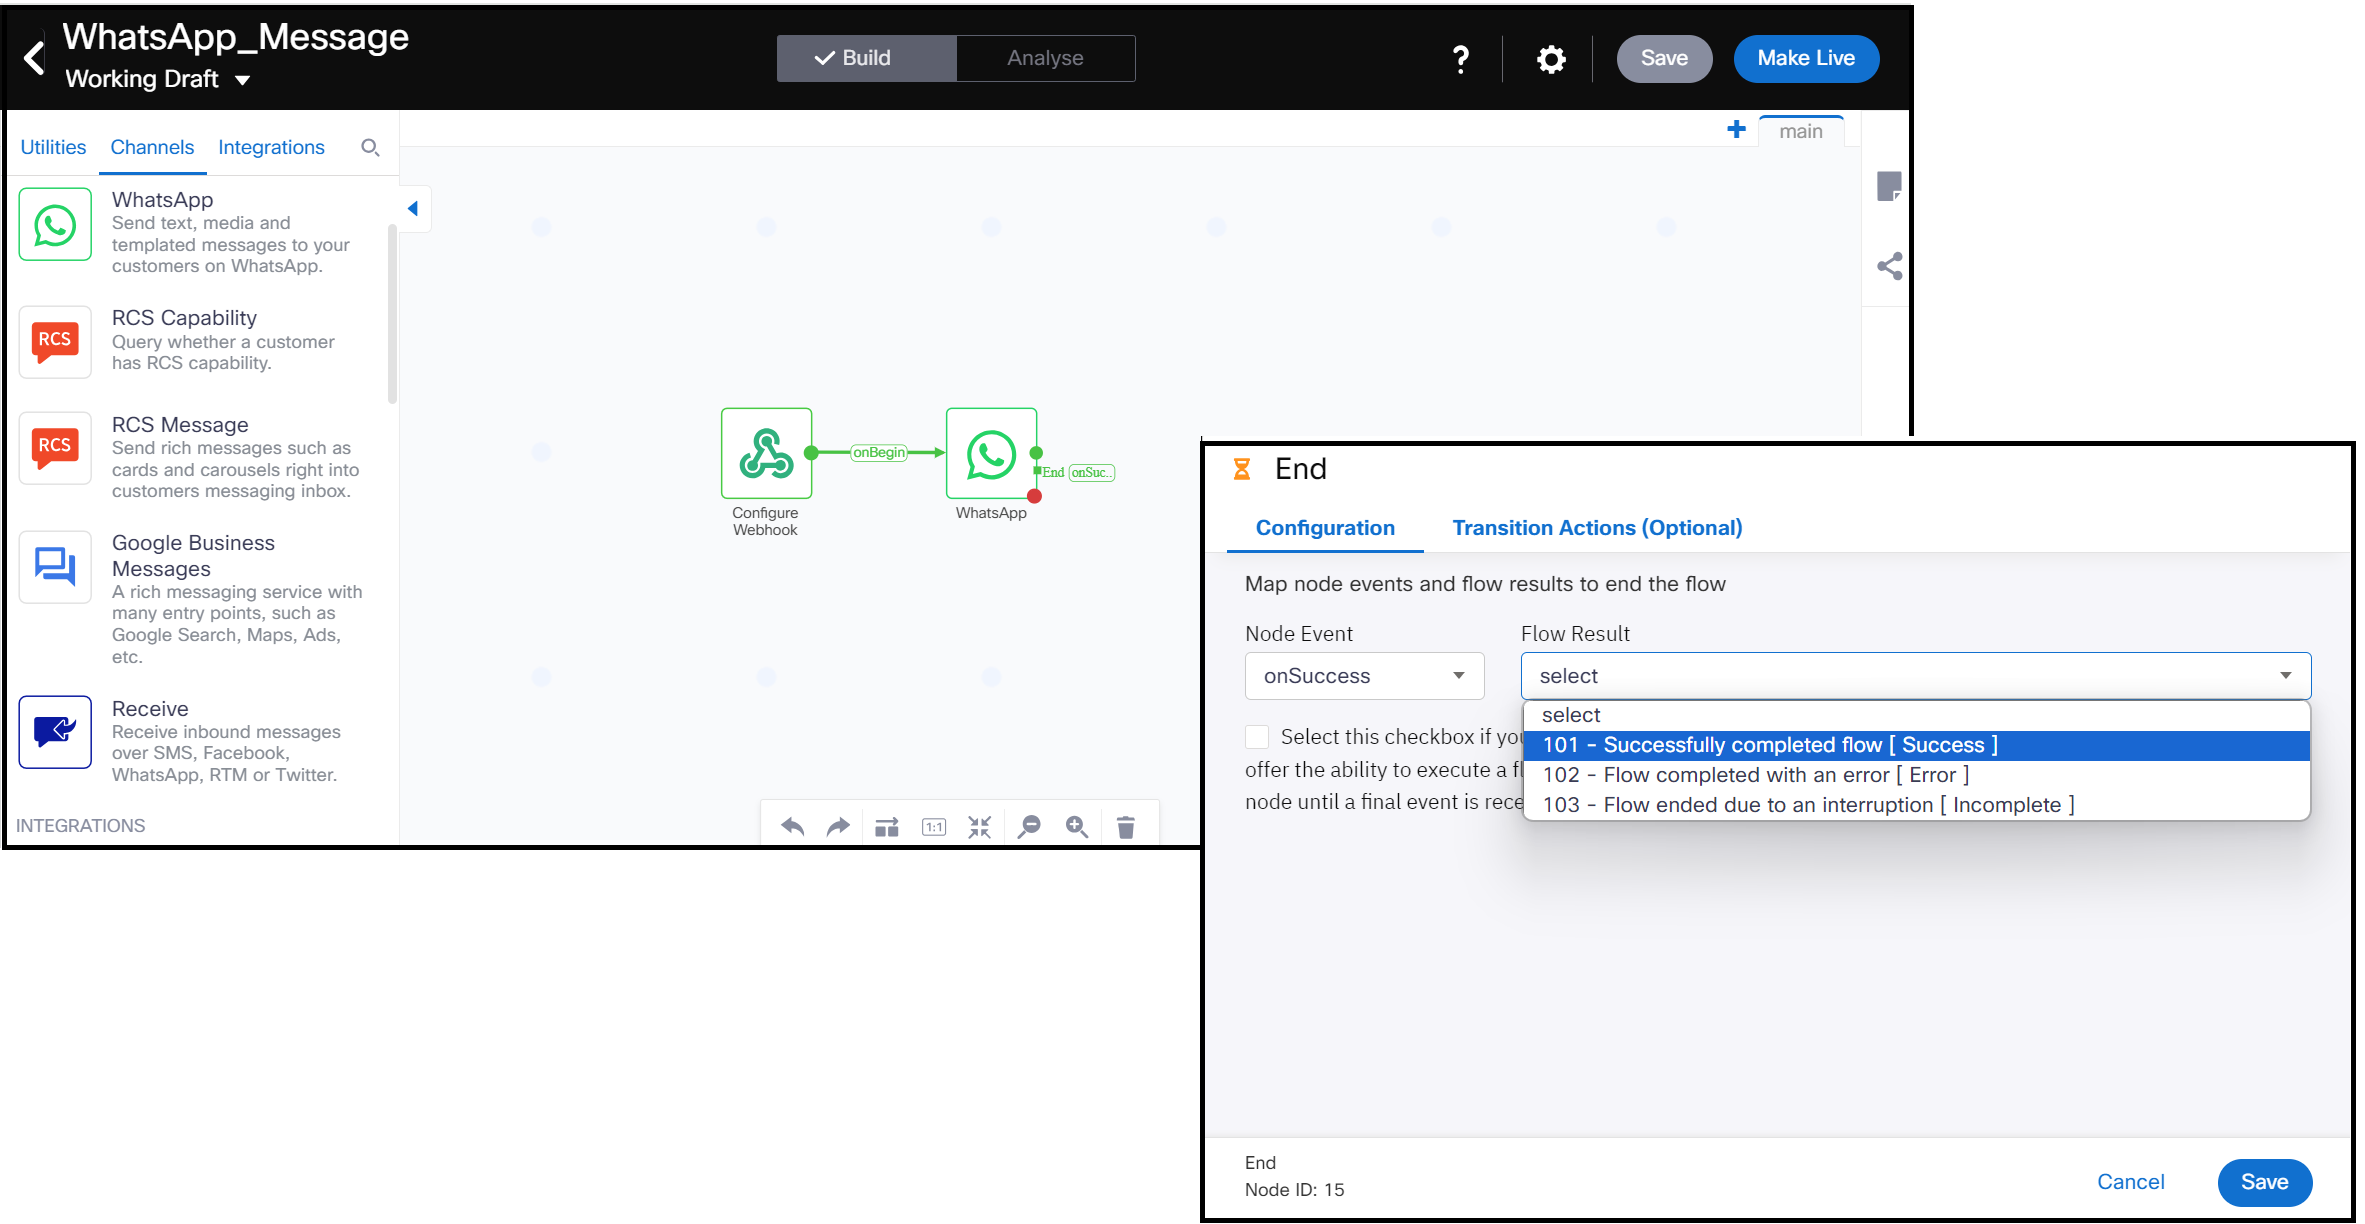
- Configure the onPolicyFail and onError events.

- Click Save.
- Click Make Live. This action is required to make the flow accessible from Webex Campaign.
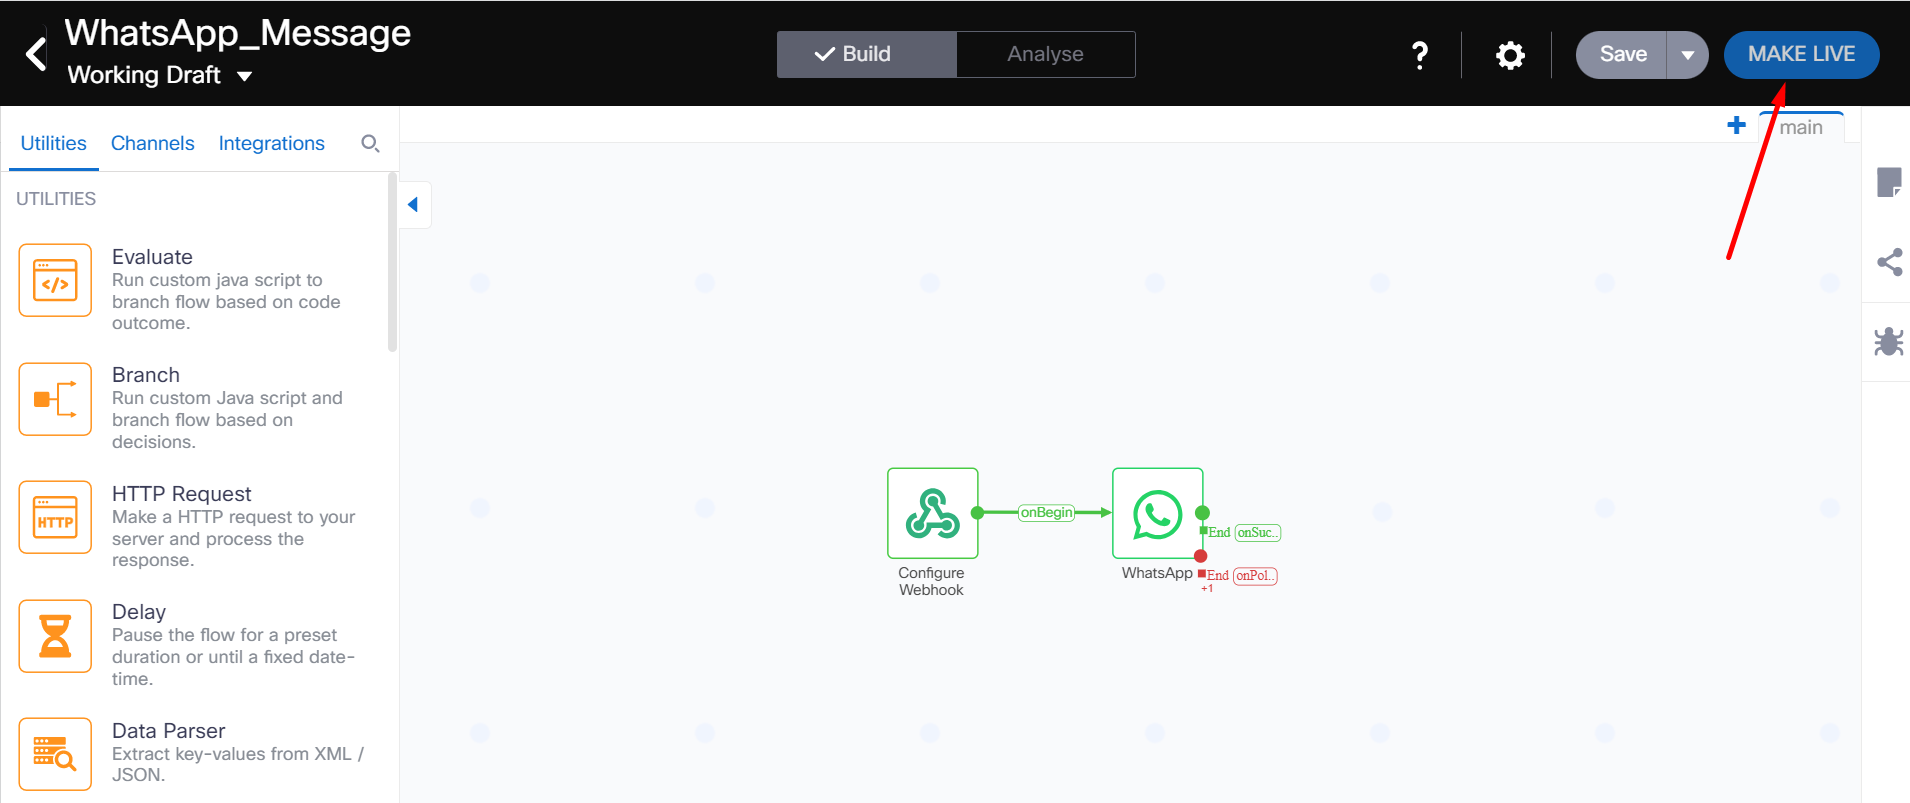
- On the Asset Configuration screen, select the WhatsApp application that was created before creating a flow and click Make Live.
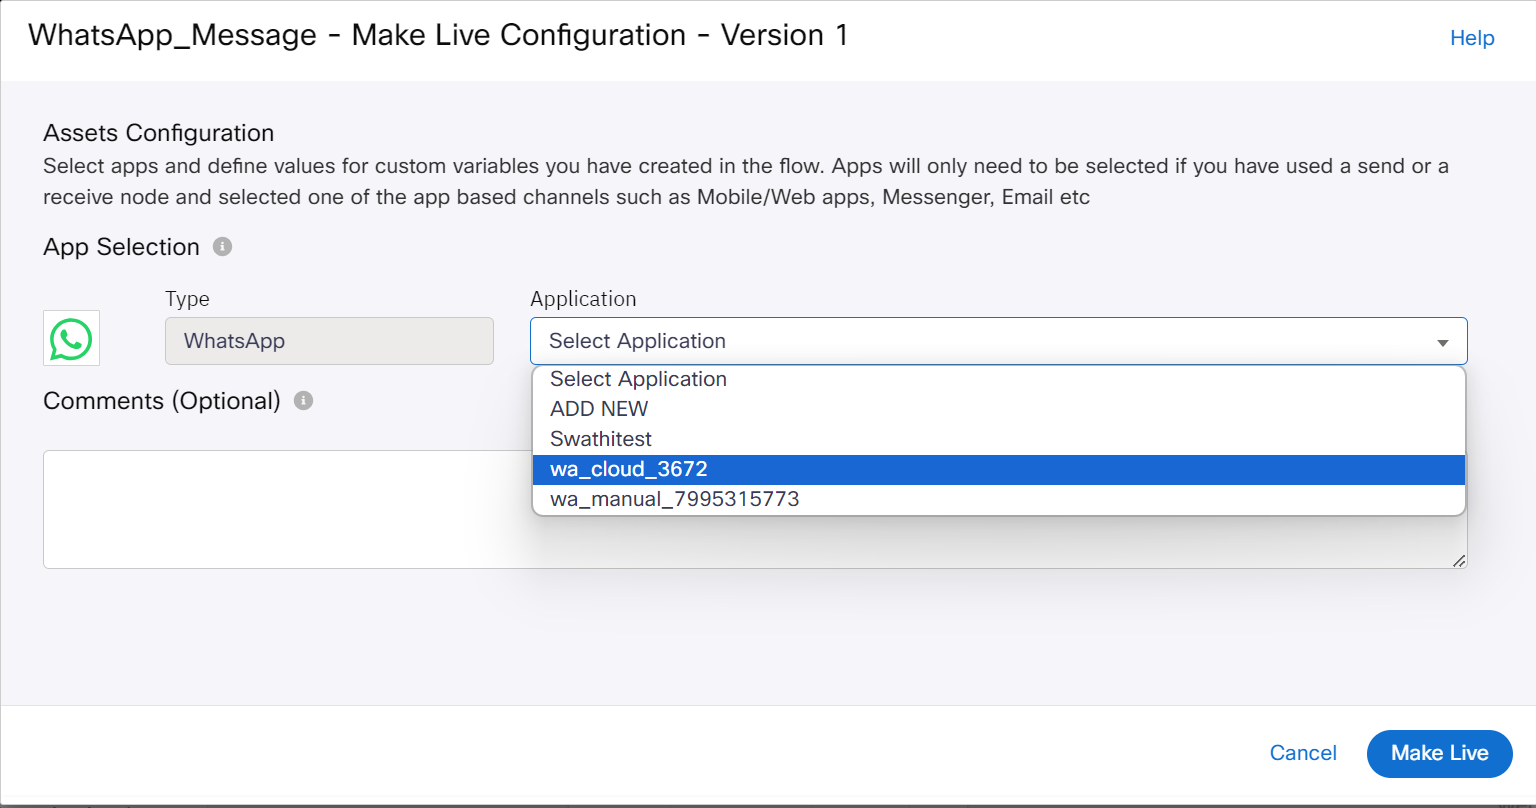
The WhatsApp flow is now accessible from Webex Campaign.
To explore all the options of the WhatsApp Message node and to create complex flows, refer to Webex Connect documentation - Whatsapp Message node.
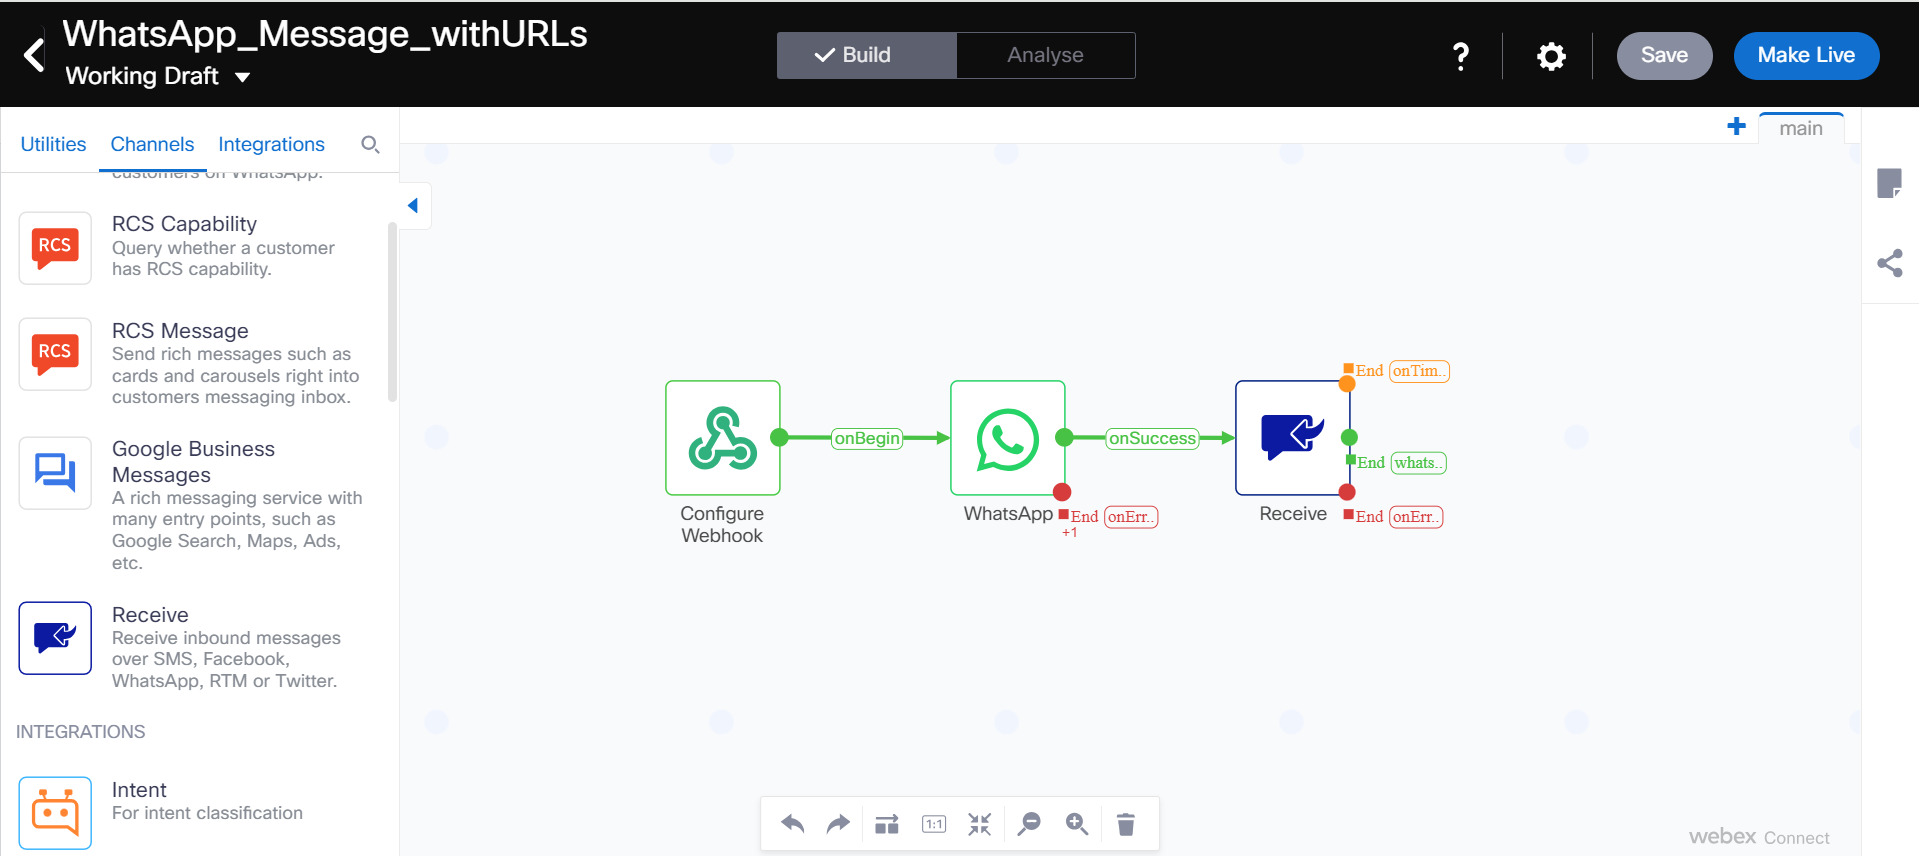
Configuring Receive Node
If your use case is to send WhatsApp messages with URLs and capture the user clicks, then add a Receive node.
- Add Receive node onto the canvas. and join WhatsApp Message node and Receive node as shown below.
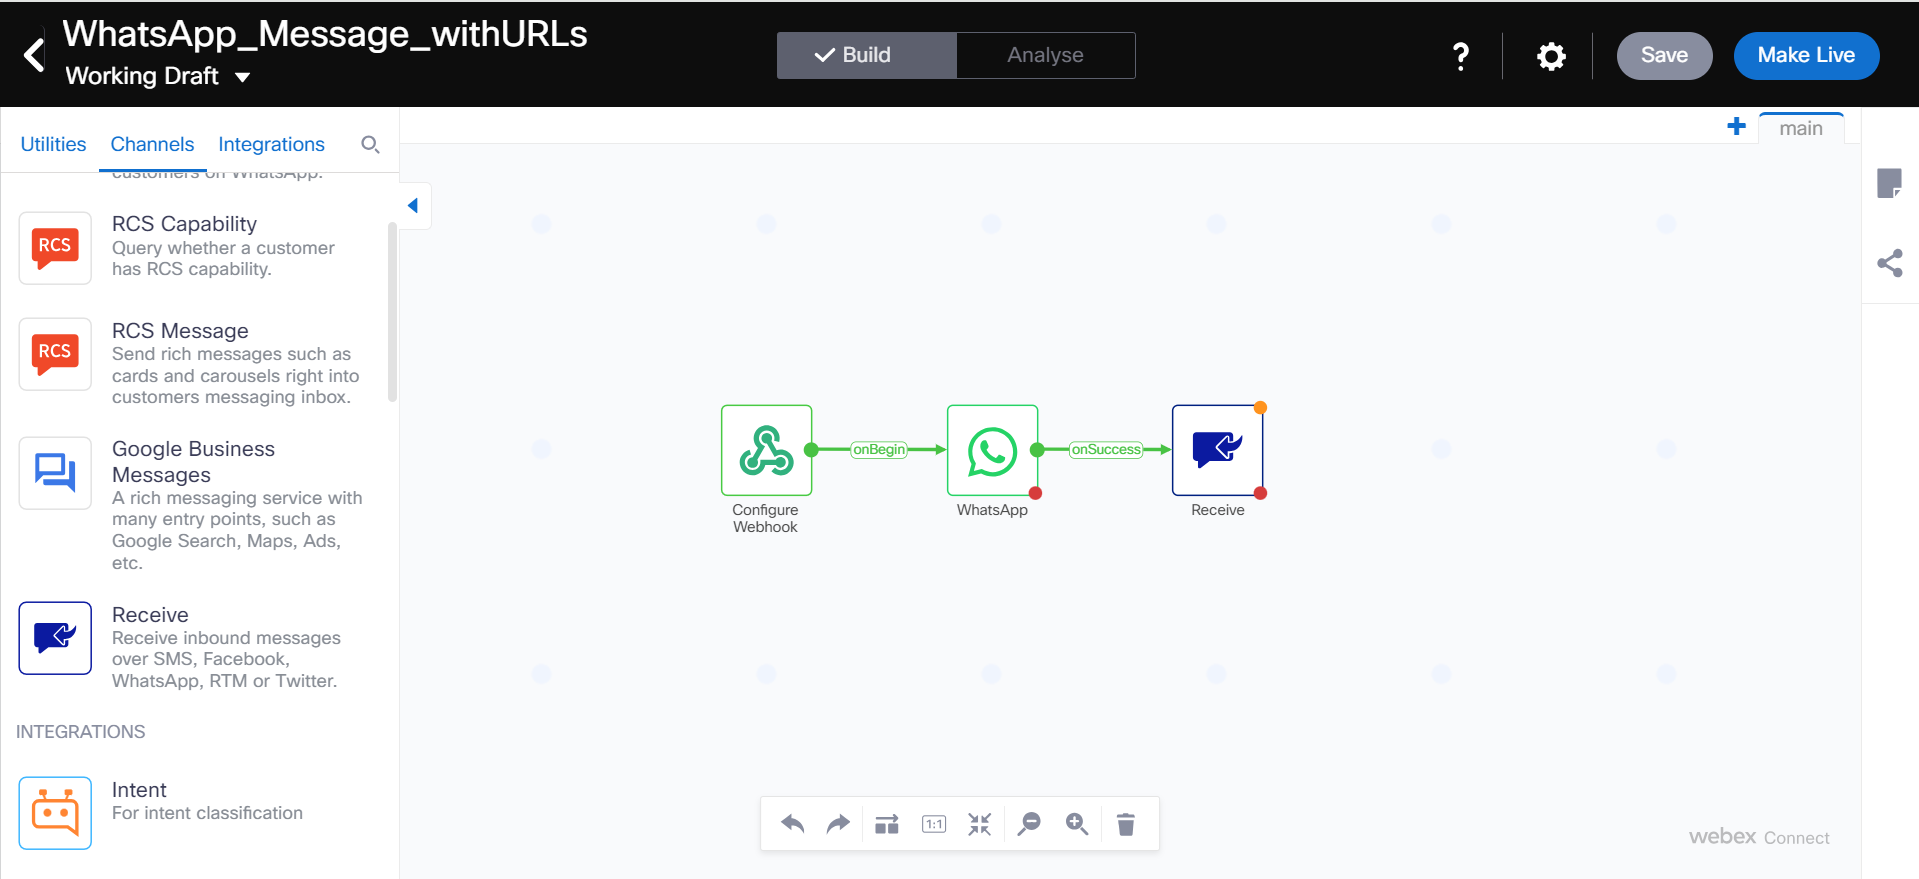
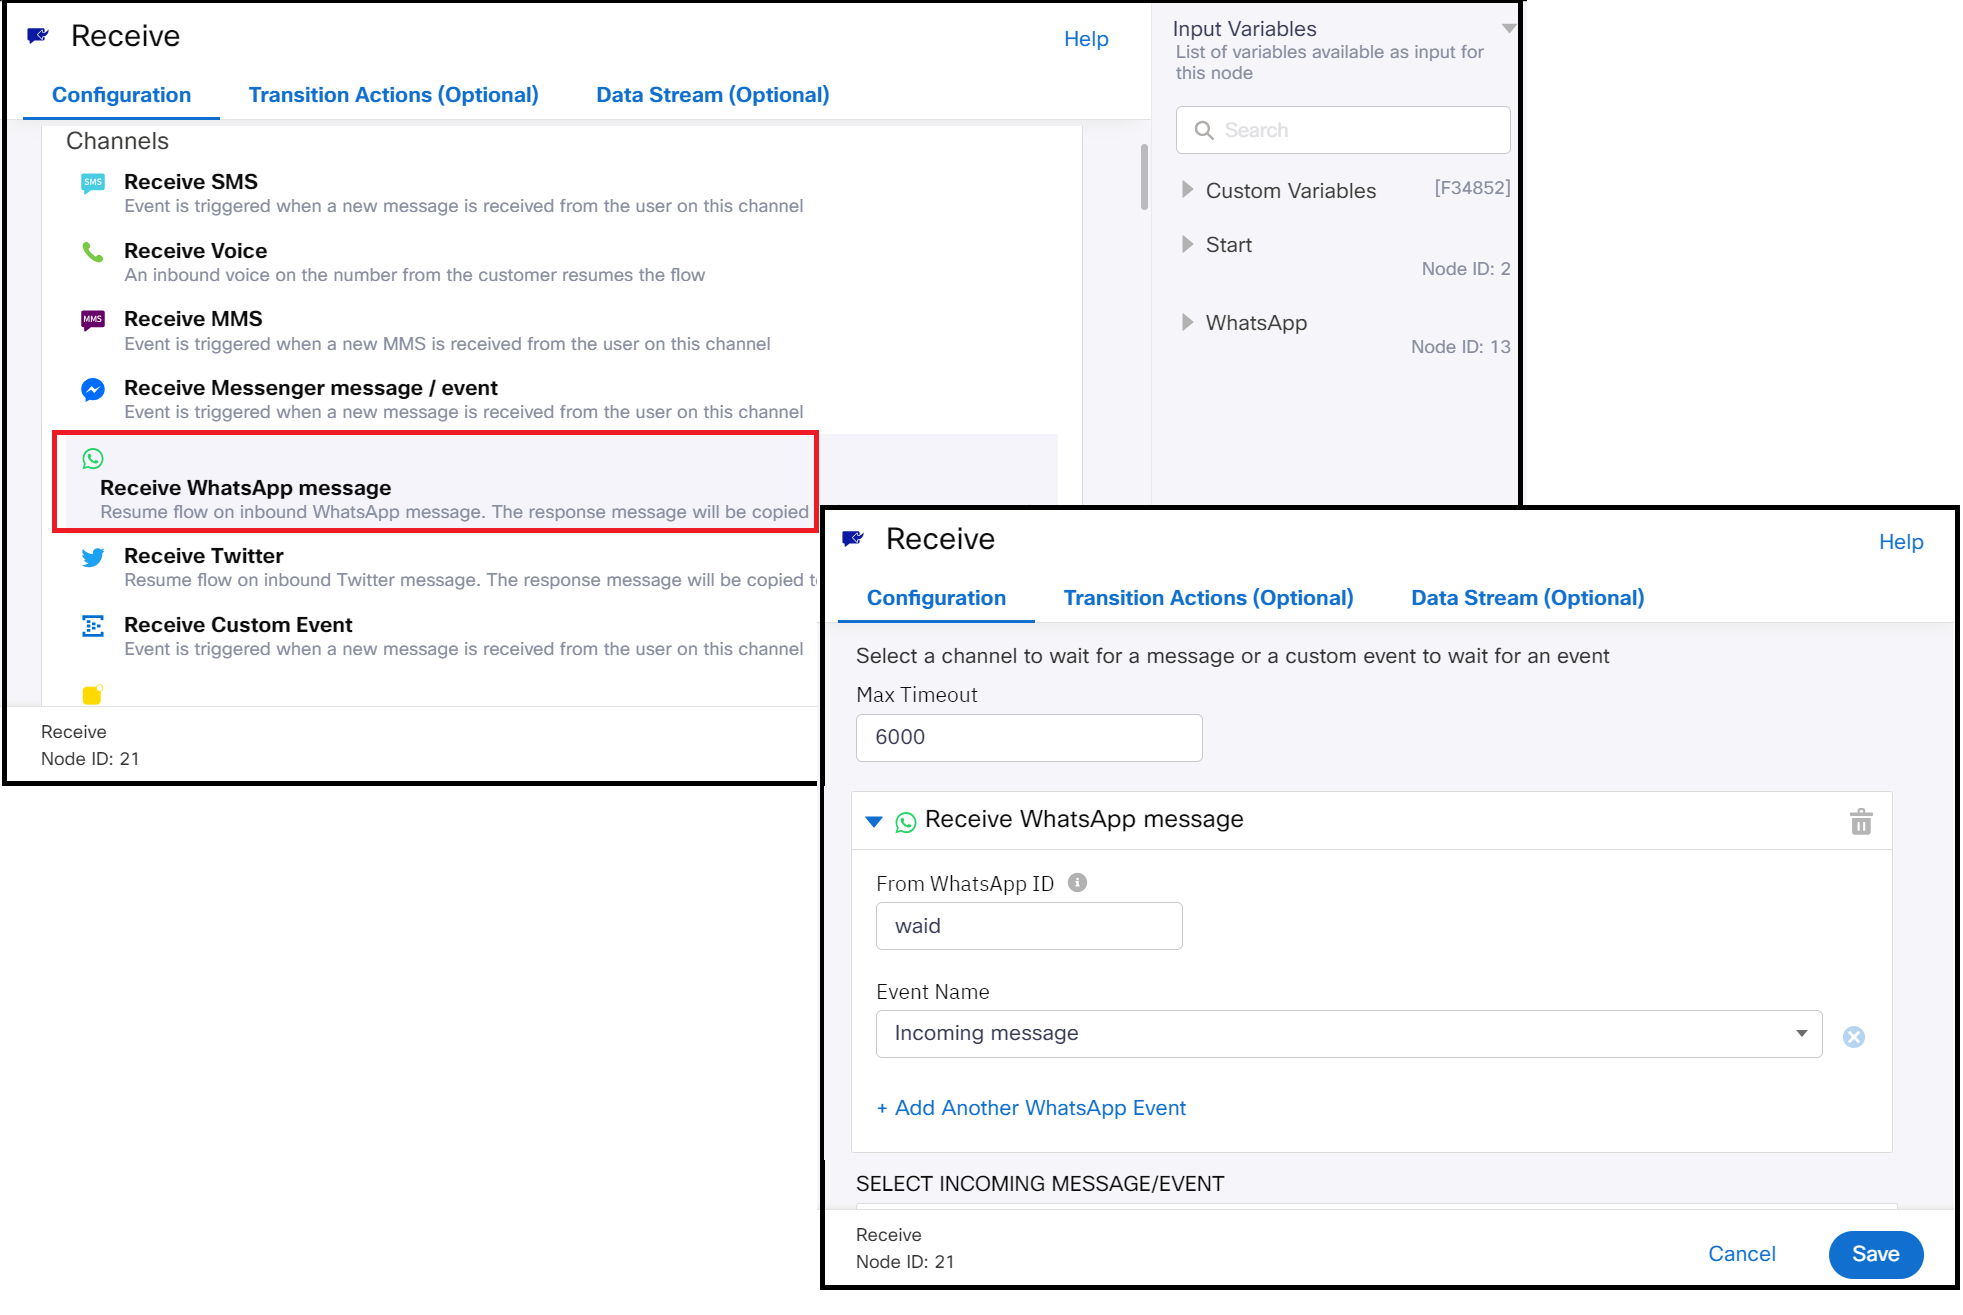
- Double-click Receive node and select Receive WhatsApp message. The Receive node configuration screen appears.
- Configure the details as shown below:
- Max Timeout: Enter the duration in seconds, for which the node waits to receive a message on the WhatsApp channel. If there is no incoming message within the specified period, the flow exits the node from the onTimeout event.
- From WhatsApp ID. Enter the value as $(waid).
- Event Name: Select Postback from the drop-down.
- Click Data Stream (Optional) tab and configure the details as shown below:
- Choose Integration: Select the pre-configured integration from the list.
This Integration has to be configured by the support team. Please contact your account manager.
- Configure the Parameter Name and Value as shown below:
| Parameter | Value |
|---|---|
| deploymentId | Enter the deployment id of the Webex Campaign WhatsApp Shell deployment. If the WhatsApp deployment is not yet created then you can leave this empty and update it later once the deployment is created in Webex Campaign. |
| campCorelationId | Enter $(unique_id) |
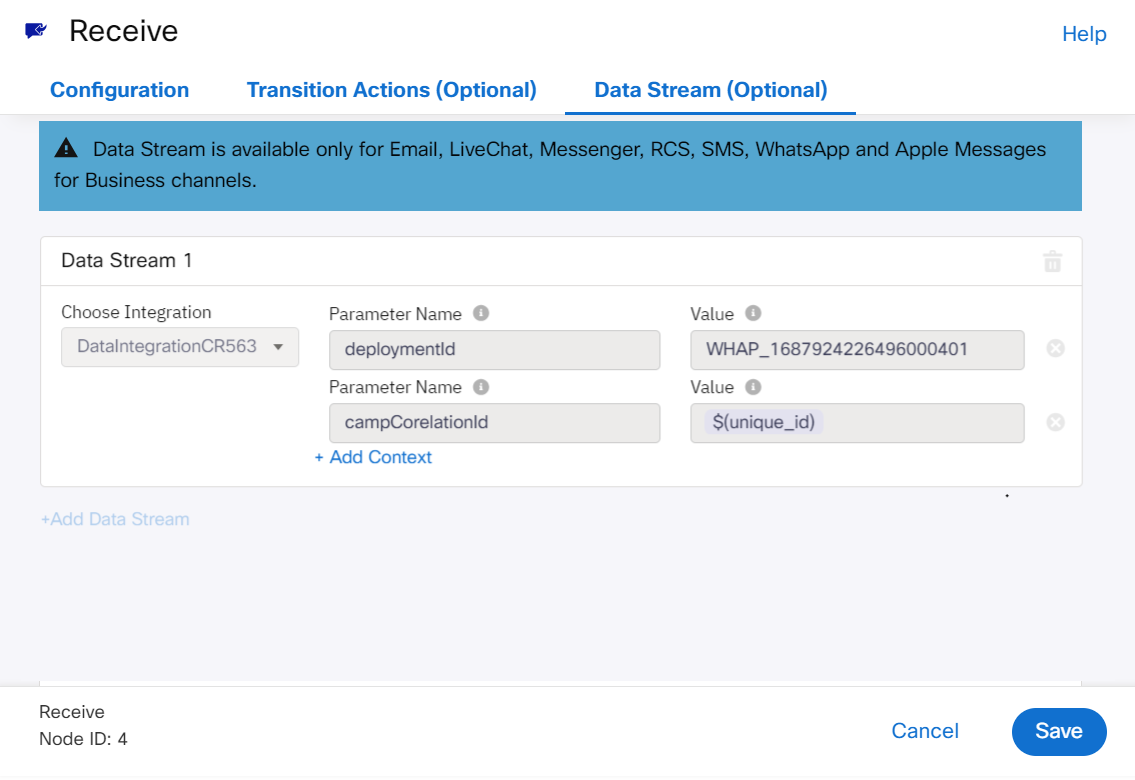
- Click Save.
Configuring Receive node Events
- Configure the Receive node Events. Drag and drop the Orange dot. The event configuration screen appears. From the Node Event drop-down, select onTimeout and then select 103 from the Flow Result drop-down. Click Save. Similarly, configure the Green and Red dots.
| Dot | Event | Flow Result |
|---|---|---|
| Orange | onTimeout | 103 - Flow ended due to an interruption [incomplete] |
| Green | whatsapp.onpostback | 101 - Successfully completed the flow [Success]. |
| Red | onError | 102 - Flow completed with an error [Error] |
- Click Save.
- Follow the step numbers 15 and 16 above and publish the flow.
Copying the deployment Id
The deployment id will only be available in case the next step (WhataApp deployment) is already completed in Webex Campaign (WhatsApp shell deployment creation).
Once a WhatsApp shell deployment is created, the deployment Id has to be updated in the Receive node in Webex Connect flow.,
To copy the service key, follow these steps:
- Go to Webex Campaign and click on the campaign in which the WhatsApp deployment is created.
- Click on the WhatsApp deployment. The deployment details will be displayed.
- Copy the deploymentid and paste it in the Receive node > Data stream (optional) > value field of the deploymentid parameter.

Copying a Service Key
Once a WhatsApp flow is published, you have to copy the service key. This key has to be configured in External action in Webex Campaign.
To copy the service key, follow these steps:
- Go to the service in which the WhatsApp flow is created and click API tab. Select Auth Type as Service Key.
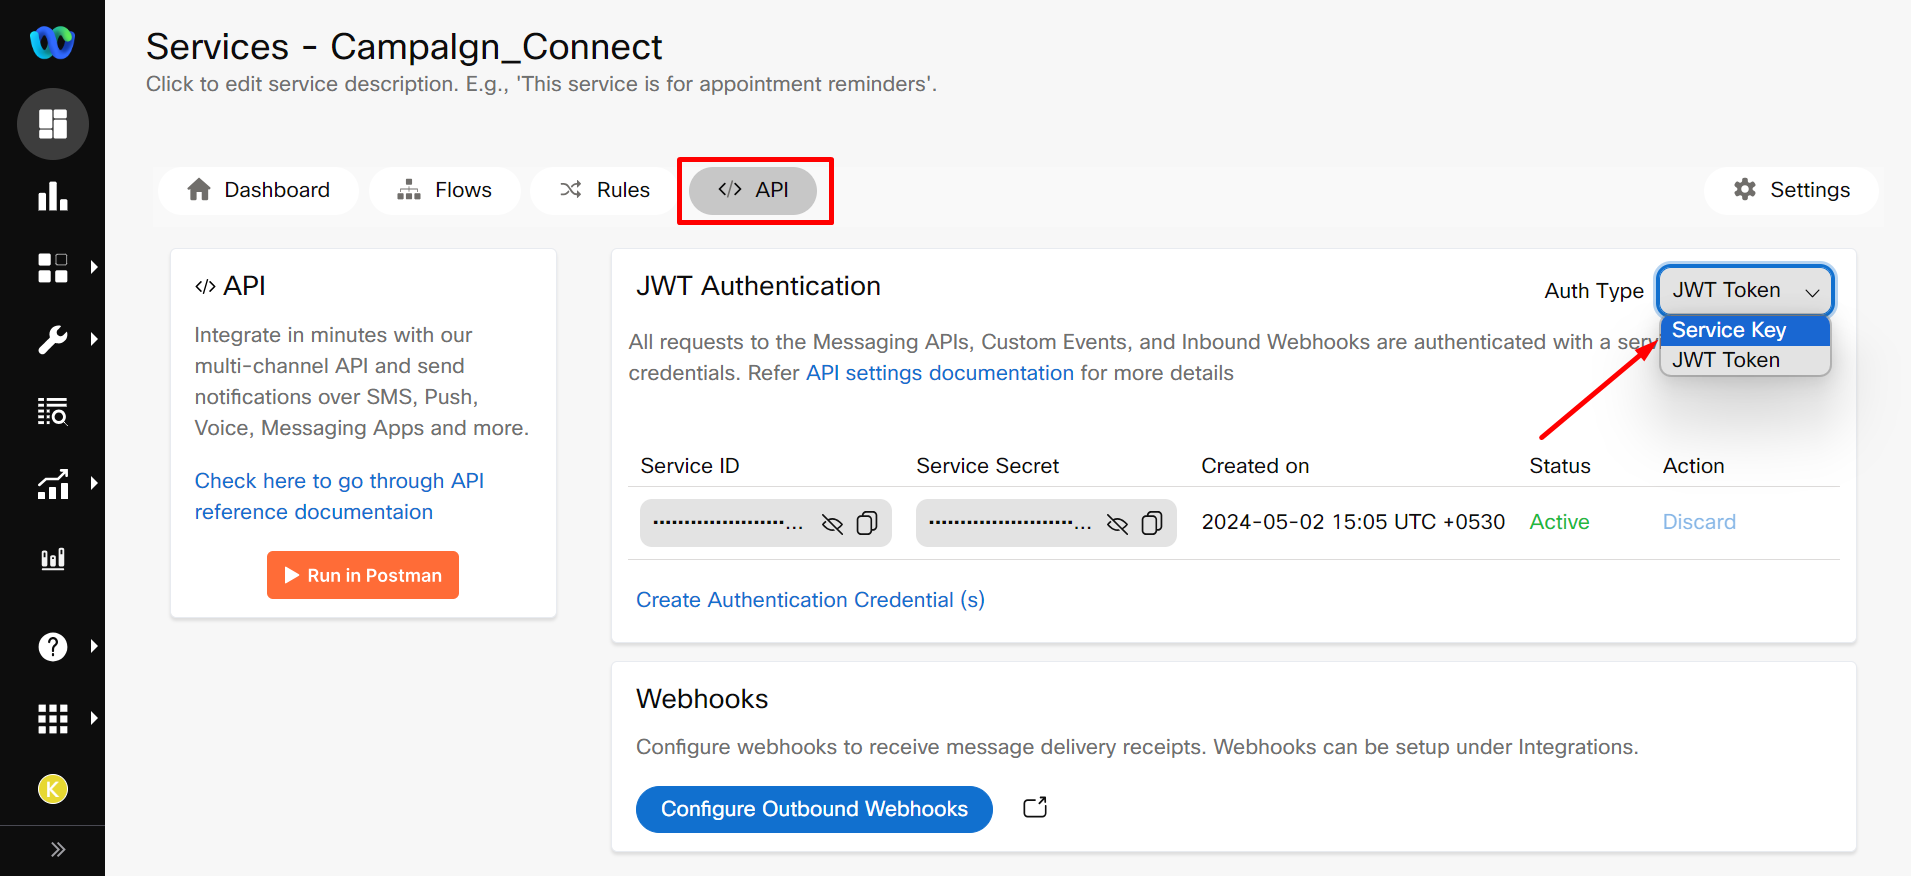
- On the Service Key details screen, click copy icon of the Service Key.
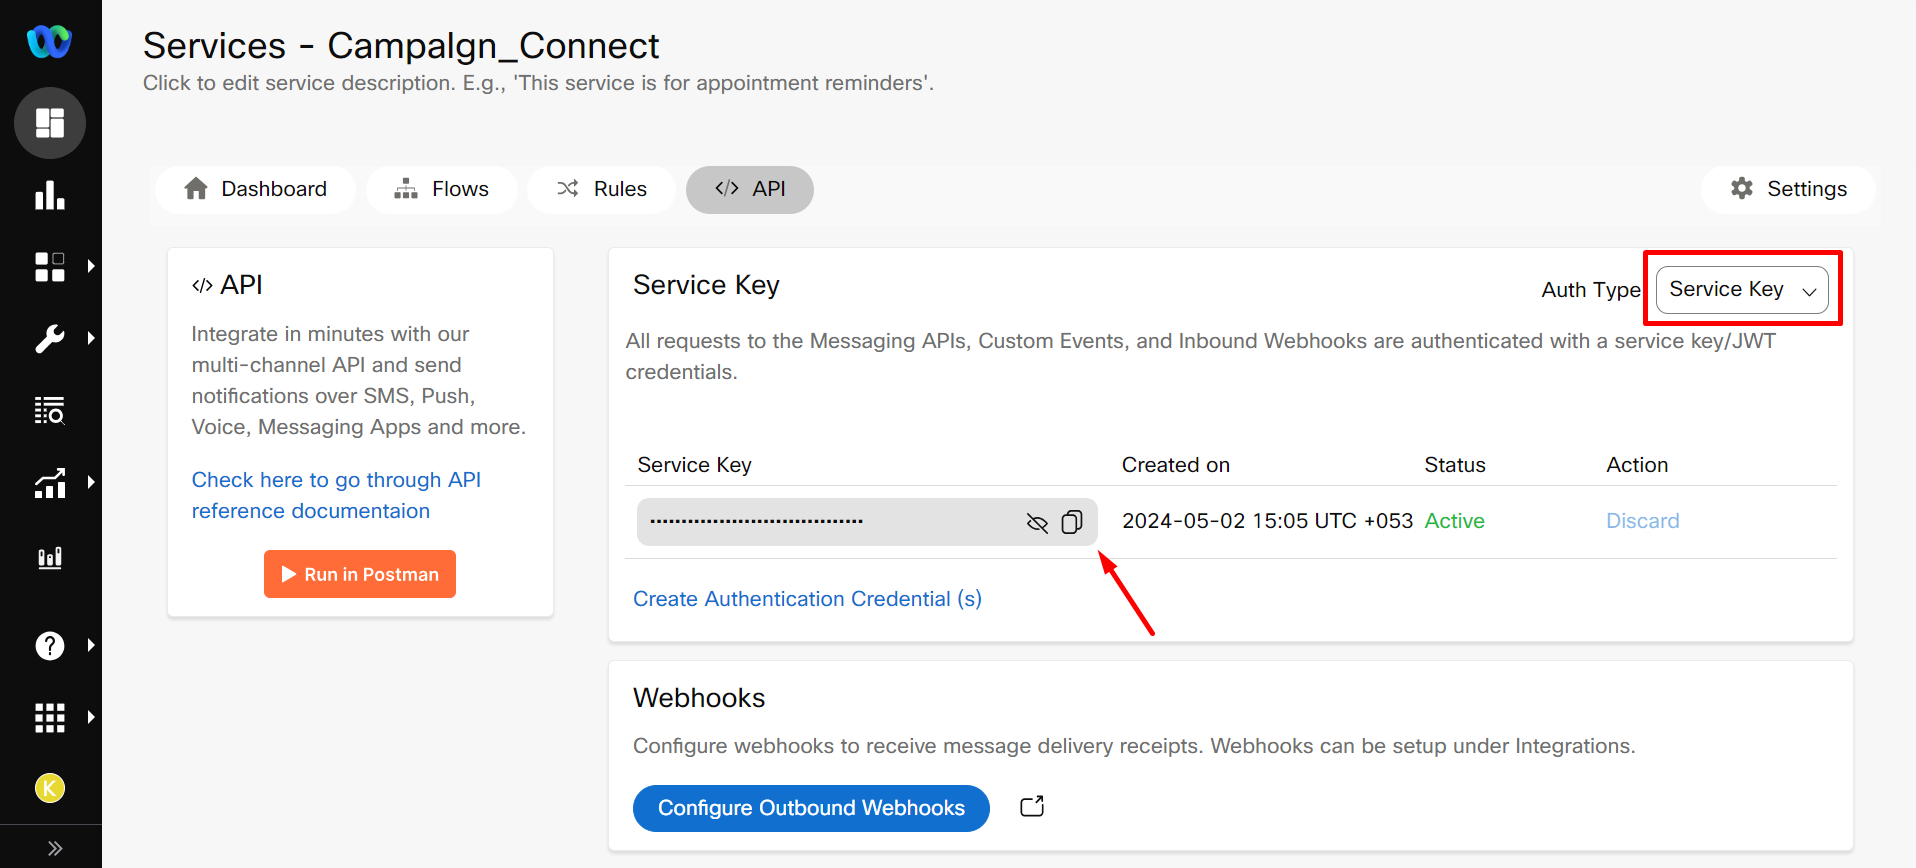
Keep this Service Key handy as it will be configured in External Action in Webex Campaign.
Updated over 1 year ago