Creating Instant Follow Up On an Event
An Instant Follow Up deployment can be created based on the Event.
Prerequisite: A campaign should already be available to create a deployment.
Step1: Create a Deployment
Follow these steps to create an Instant Follow Up Deployment:
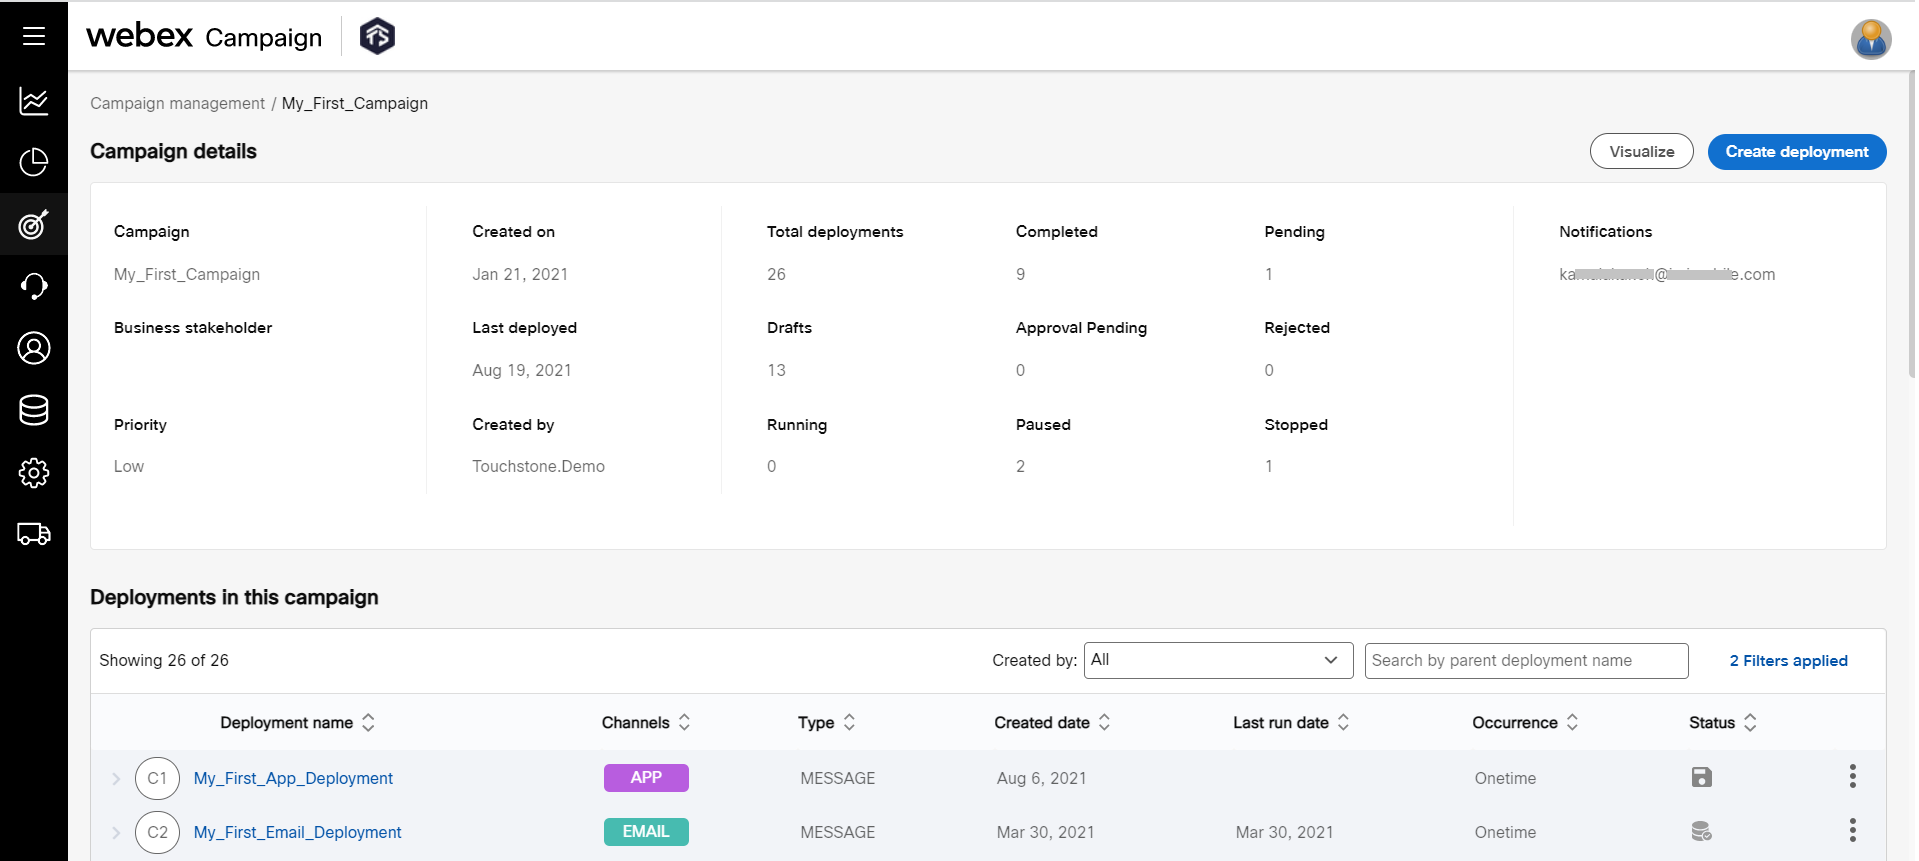
- Navigate to Campaign Management > Campaign List screen and click on the campaign in which you want to create a deployment.

- Click Create deployment on the campaign summary screen that appears. The campaign summary screen will display the status of all the deployments of the campaign.
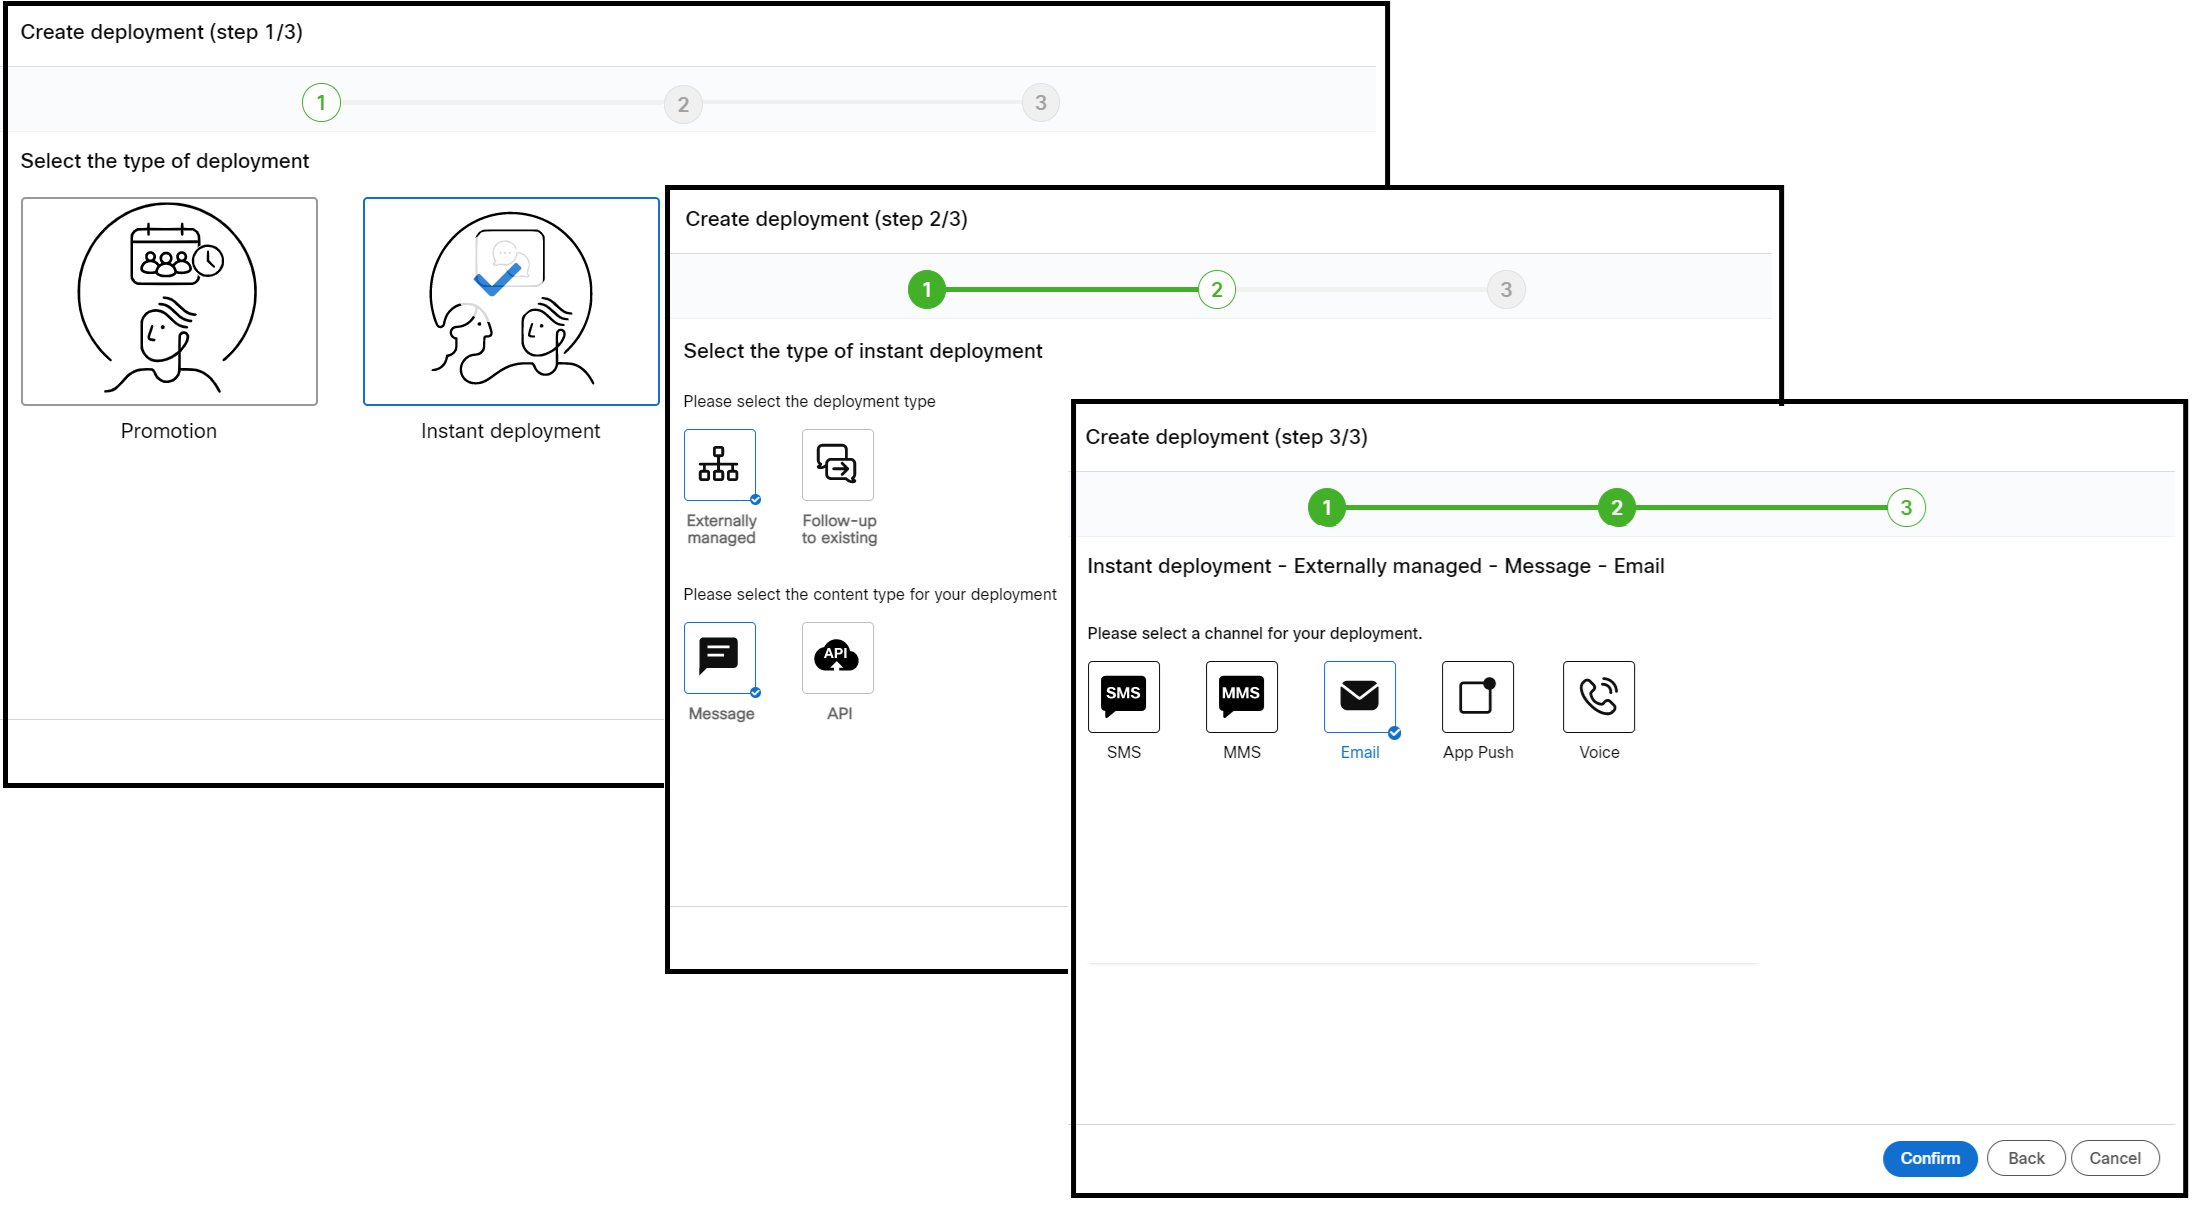
- Select the deployment type as Instant deployment.
- Select the type of promotion as Externally managed and content type as Message.
- Select the required Channel.
For this tutorial, I will select the Email channel.
Step2: Choose Your Recipients
The recipients of the deployment will be invoked by the Externally managed event. To know more on creating an event, go to Events section.
Step 3: Select the Trigger Node
In this step, select how the trigger should be invoked. Drag-drop the Event node onto the Real time trigger node.
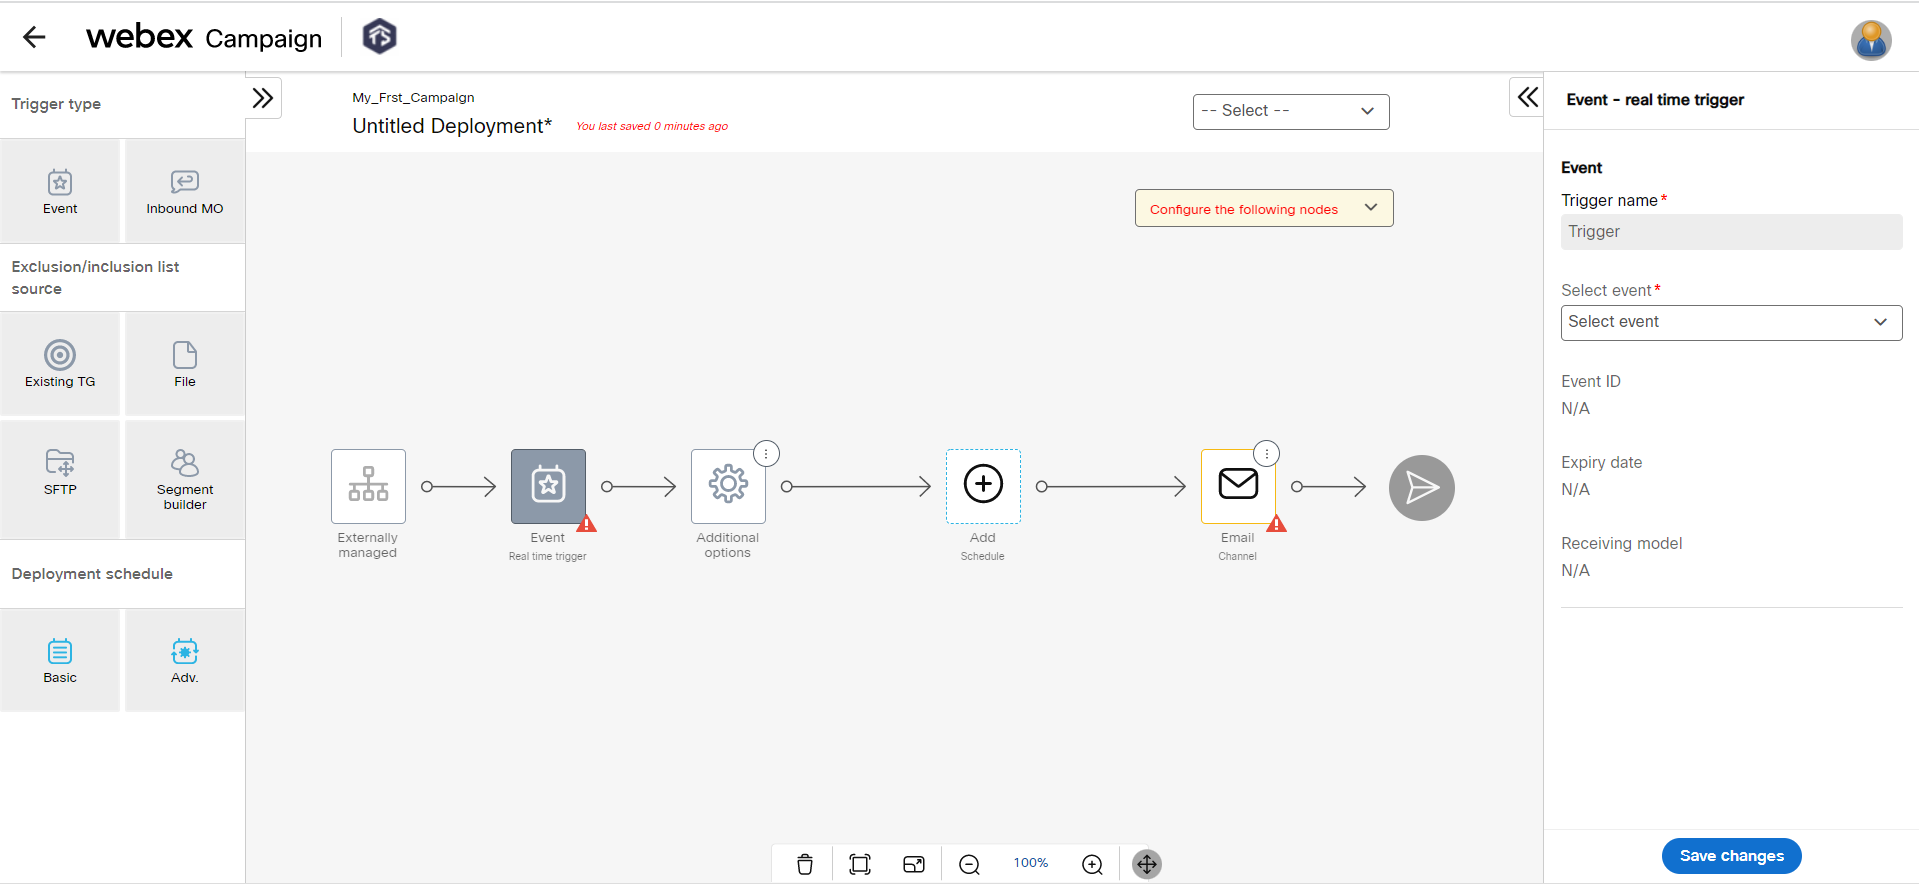
To configure the Event node:
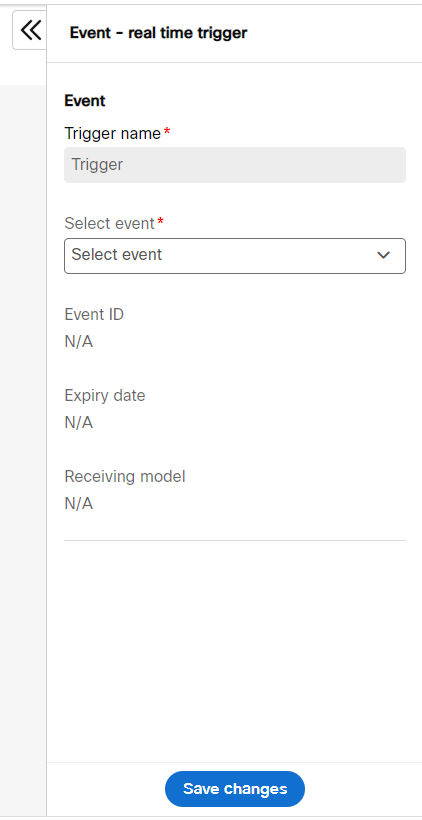
- Select the Event node. From the right panel, select the Event from the drop down.
- Click Save changes.
Step 4: Create a Schedule
In this step, select a schedule for the deployment. For this tutorial, we will run the deployment Immediately as soon as the deployment is activated.
To configure the schedule:
- Drag and drop the Basic node onto the Schedule node.
- Select the Basic node. From the right panel, select Start date and End date.
- Select the Timezone and Routerfrom the respective drop-downs. The router is predefined when the tenant is created.
- Click Save changes.

Step 5: Configure Exclusion Day/times
During the exclusion day or times, the deployment is paused temporarily and resumes once the exclusion day or time lapses. The exclusion day or time is set by the administrator that is applicable to all campaigns across the tenant. To add a custom exclusion day or time, configure this node.
For more information on exclusion day or times, go to Exclusion Days / Times section.
For our tutorial, we will proceed with the default exclusion day or times. Select the Days/ times Exclusion node and click Save changes.
Step 6: Create Your Message
In this step, the content is configured. You can also add links and personalization to the content. We will proceed with a simple Email message. To know more about Email Content configuration, go to the Email Channel Node section.
To configure the simple Email content:
- Select the Email node. From the right panel, click + Add. The Email content configuration screen appears.
- Click Choose from template and select a template from the Email Template list screen.
For this tutorial, I have already created a template with the name "My_First_Email_Template". - Click Confirm.
- Enter the Email Subject and click Save & proceed.
- (Optional) Click on the Preview and test to preview the deployment. For more information, go to Preview and Test section.
- Select a Default sender ID from the drop-down.
- Click Save changes.
Now all the nodes are configured.
Step 7: Save the Deployment
In this step the deployment can be saved as a Draft or ready for Activation. The Reporting Tags are mandatory to activate a deployment. If you are not sure of the Reporting Tags that should be used, you can save the deployment and come back later to select the Reporting Tags.
To save the deployment as ready for activation:
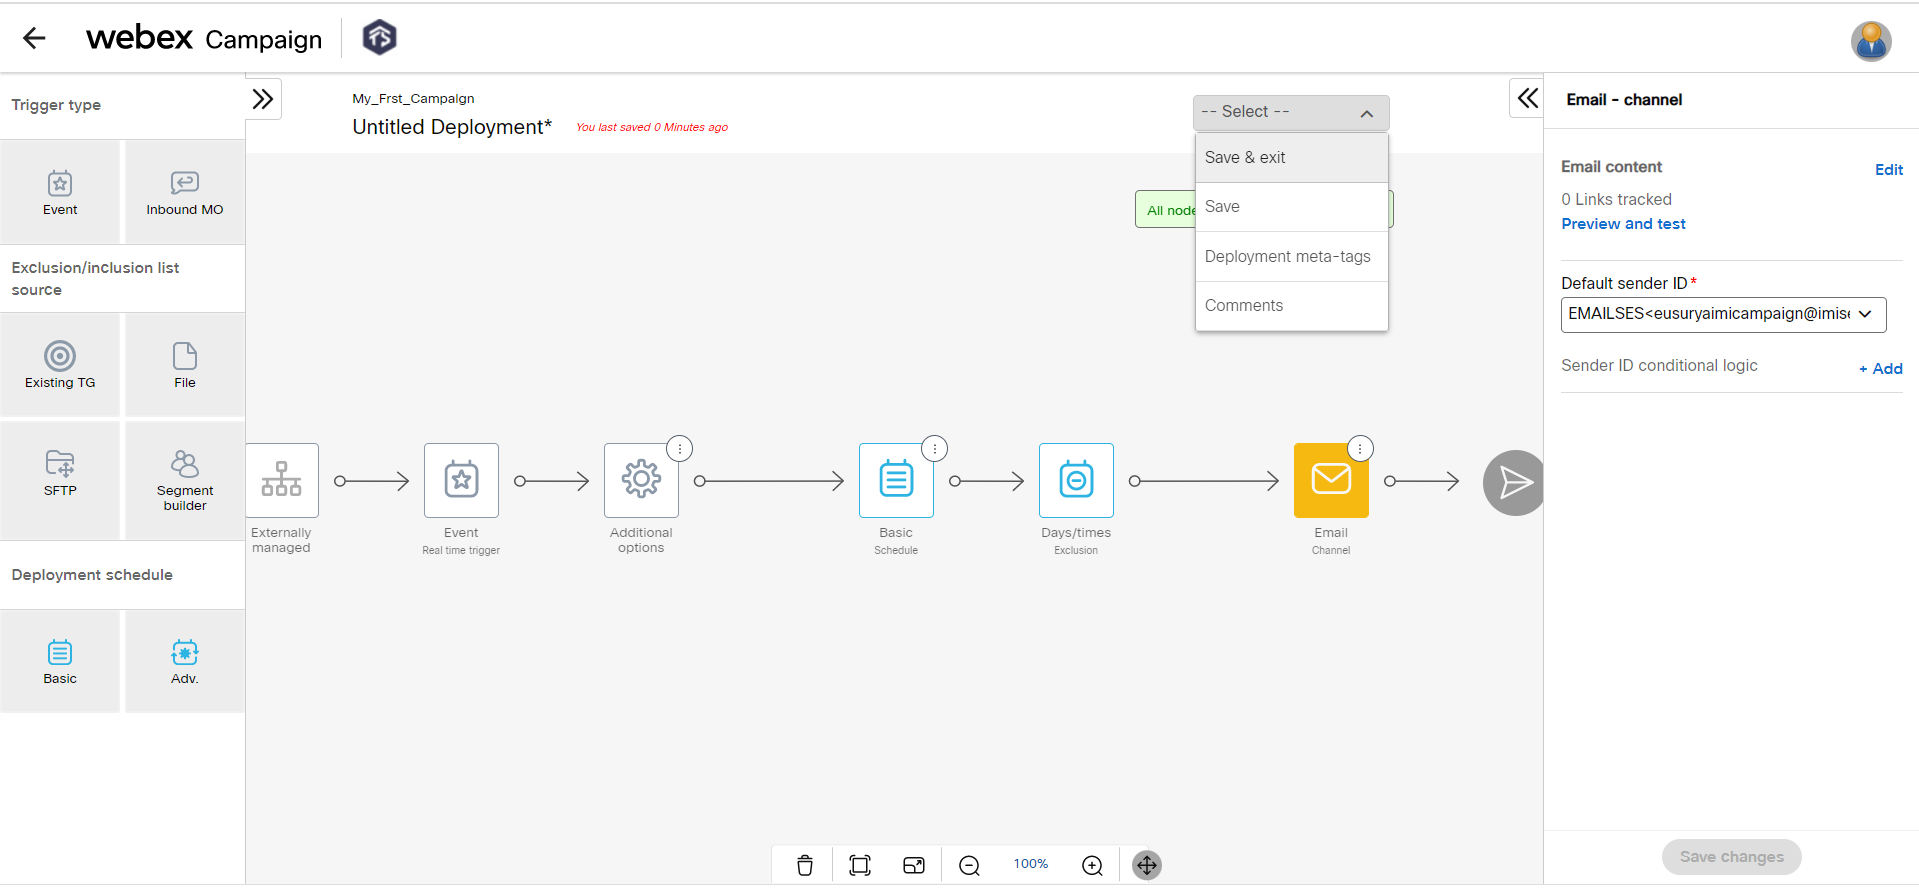
- Select Save & exit. The Save deployment screen appears.
- Enter a name for the deployment.
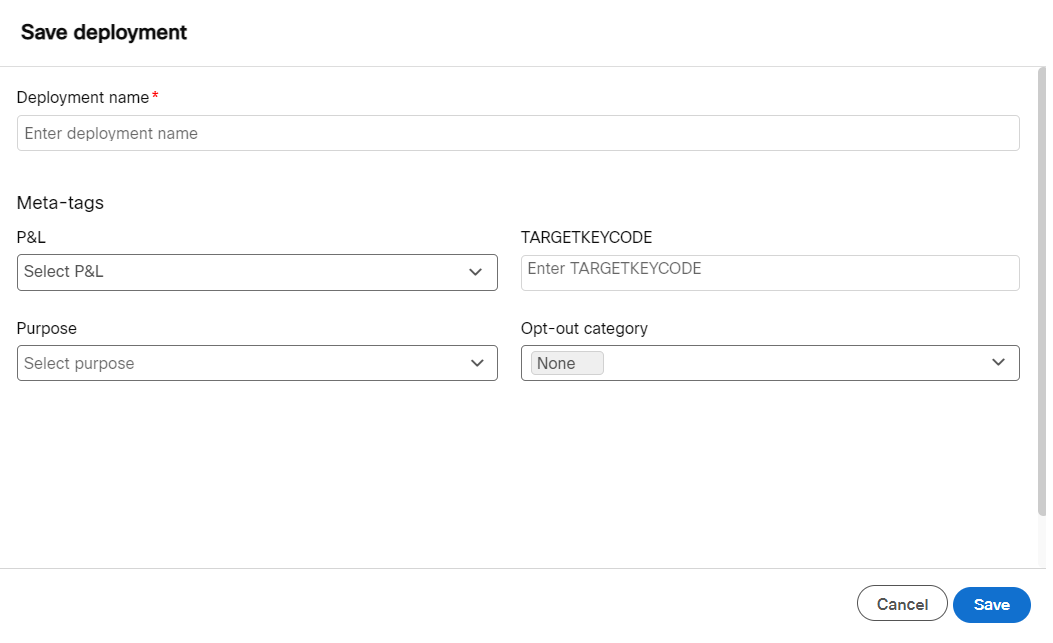
- Select a P&L to which you want to associate this deployment.
- Select one or more purposes from the Purpose drop-down.
- Click Save.
Now the deployment is ready for activation.
Step 8: Activate the Deployment
On the Campaign List screen, click the ellipses icon of the deployment and click Activate. You will receive notifications for various stages of the deployment.
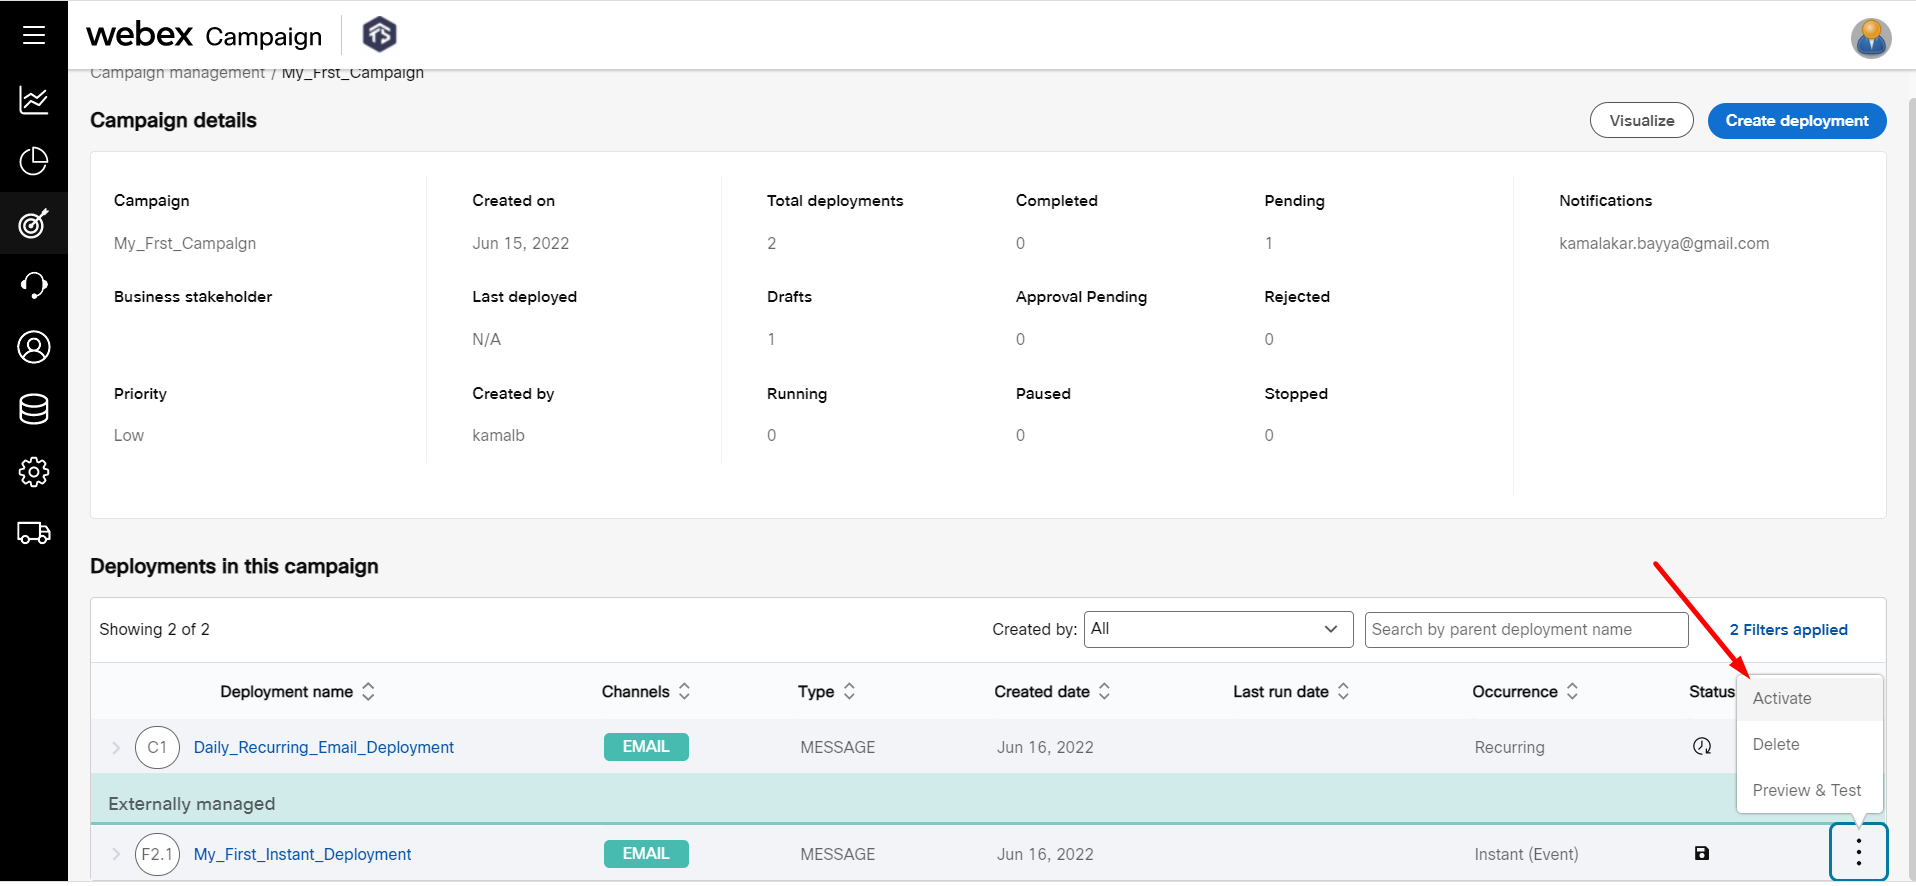
If the user does not have permission to approve their own created deployments, then instead of Activate button, you will notice Send for approval button.
Updated 12 months ago