

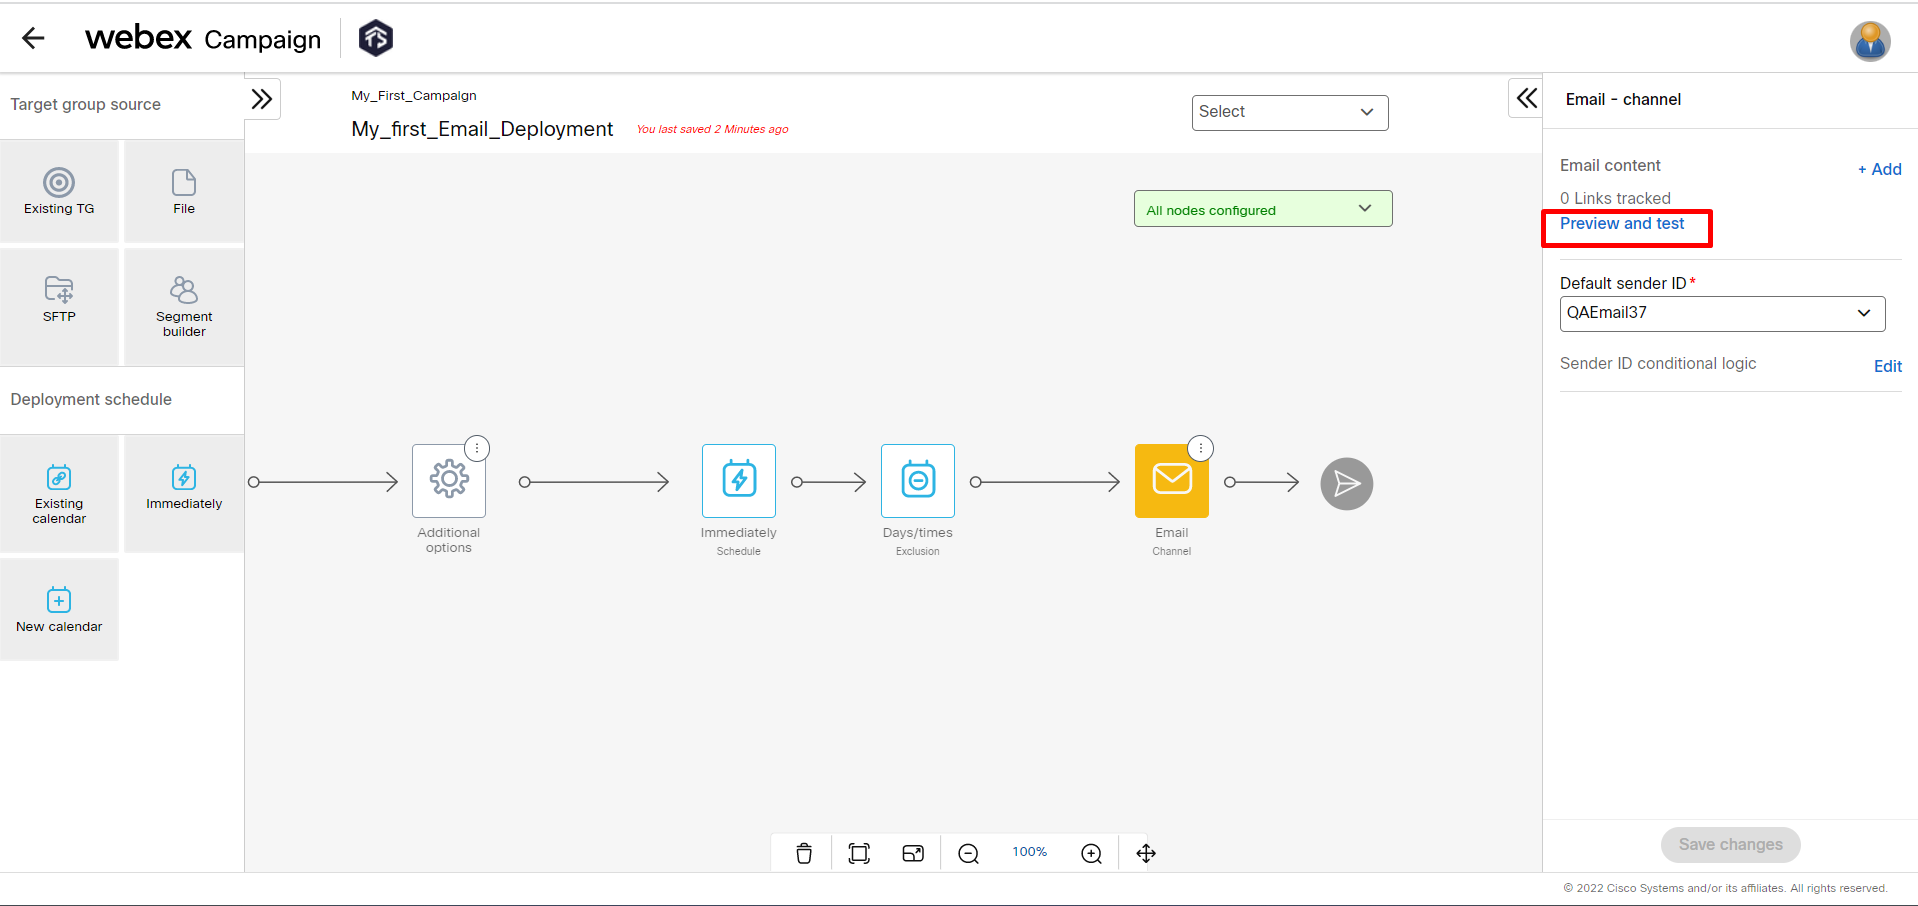
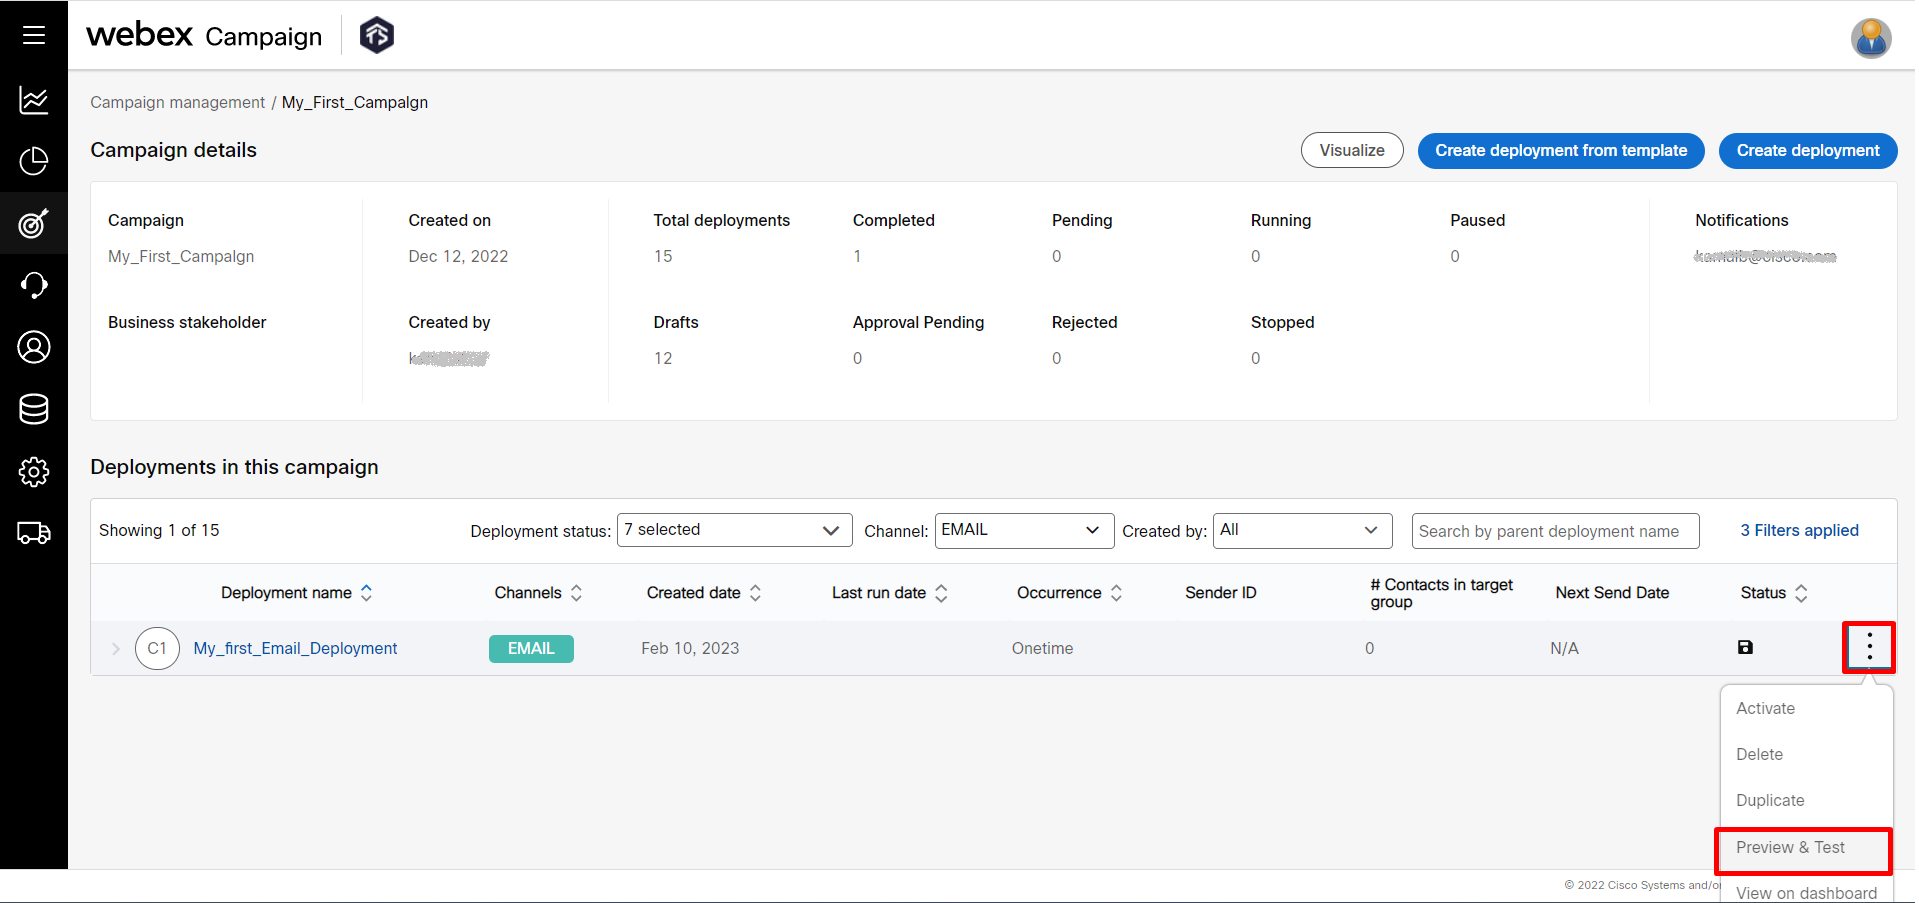
Preview and Test Email
You can preview and test the email deployment from any of the below shown methods:
Method 1 - After saving the Email node on the deployment canvas, click Preview and test link.
Method 2 - On the Deployment list screen, click the ellipses icon of the deployment you want to preview and click on the Preview and test option.
Method 3 - On the Deployment list screen, click on the required deployment. Click Preview& test button.

When you click on the Preview and Test option using any of the above mentioned methods, it opens in a new tab where you can preview and download to view in your system. You can send the Email to test contacts that are already configured in the Webex Campaign.
- Click on Next and Previous buttons to preview how the message is shown to the displayed contact. This is useful if you have used conditional content or Personalization in your Email Deployment.

- Click HTML and Text tabs to preview the content.

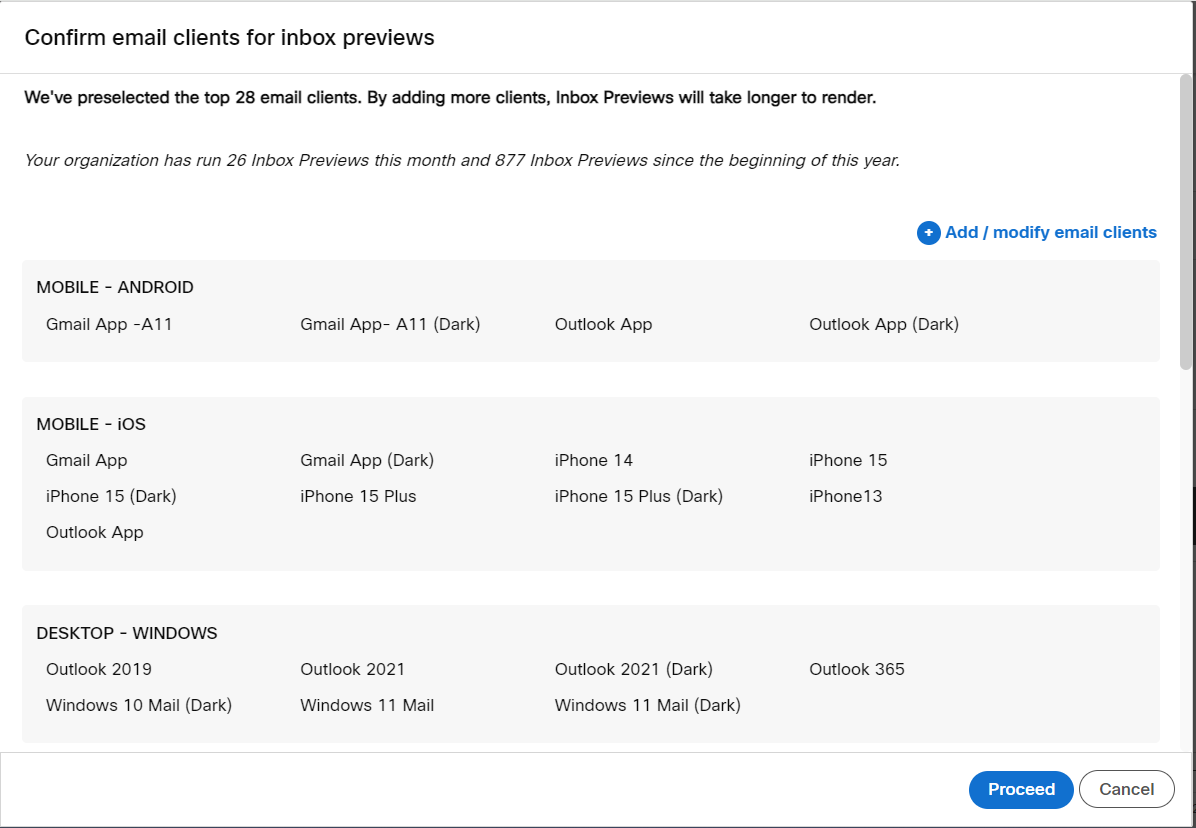
- To test in other email clients, click Inbox Previews tab. Click Select Email Clients.

- (Optional) Click + Add/modify email clients to select or unselect the Email Clients.
‘Webmail – AOL’ and ‘Webmail – Comcast’ email clients are not available for Inbox Previews if your account is hosted in AWS-UK or AWS-Ireland. These email clients are available only if your account is hosted in AWS-USA or AWS-Canada.
- Click Proceed to generate the previews with the displayed clients.
- Click the respective client to verify the content.

- Click Send a test email. The Send a test email screen appears. Select Test contacts and Router from the respective drop-downs.

- Click Send.
The Email message will be sent to the selected test contacts.
Updated 8 months ago