

Additional Options node - Promotion Deployments
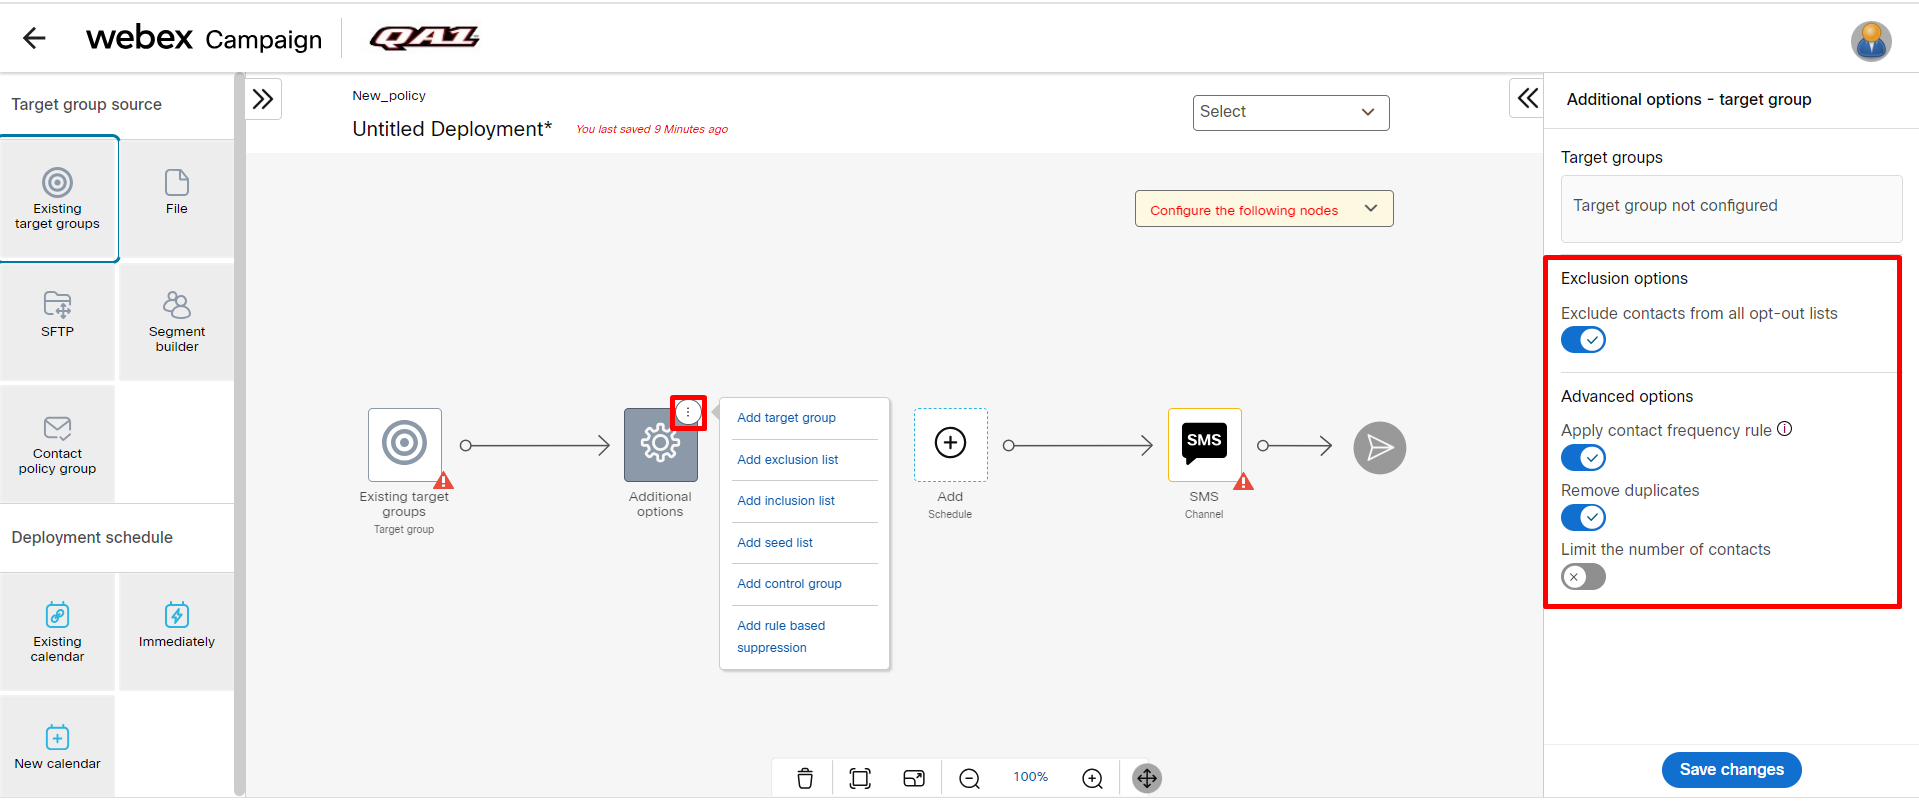
The Additional options node helps you add the additional nodes that you can configure for a target group, such as control group, additional target group, seed list, exclusion list, and rule-based suppression list.
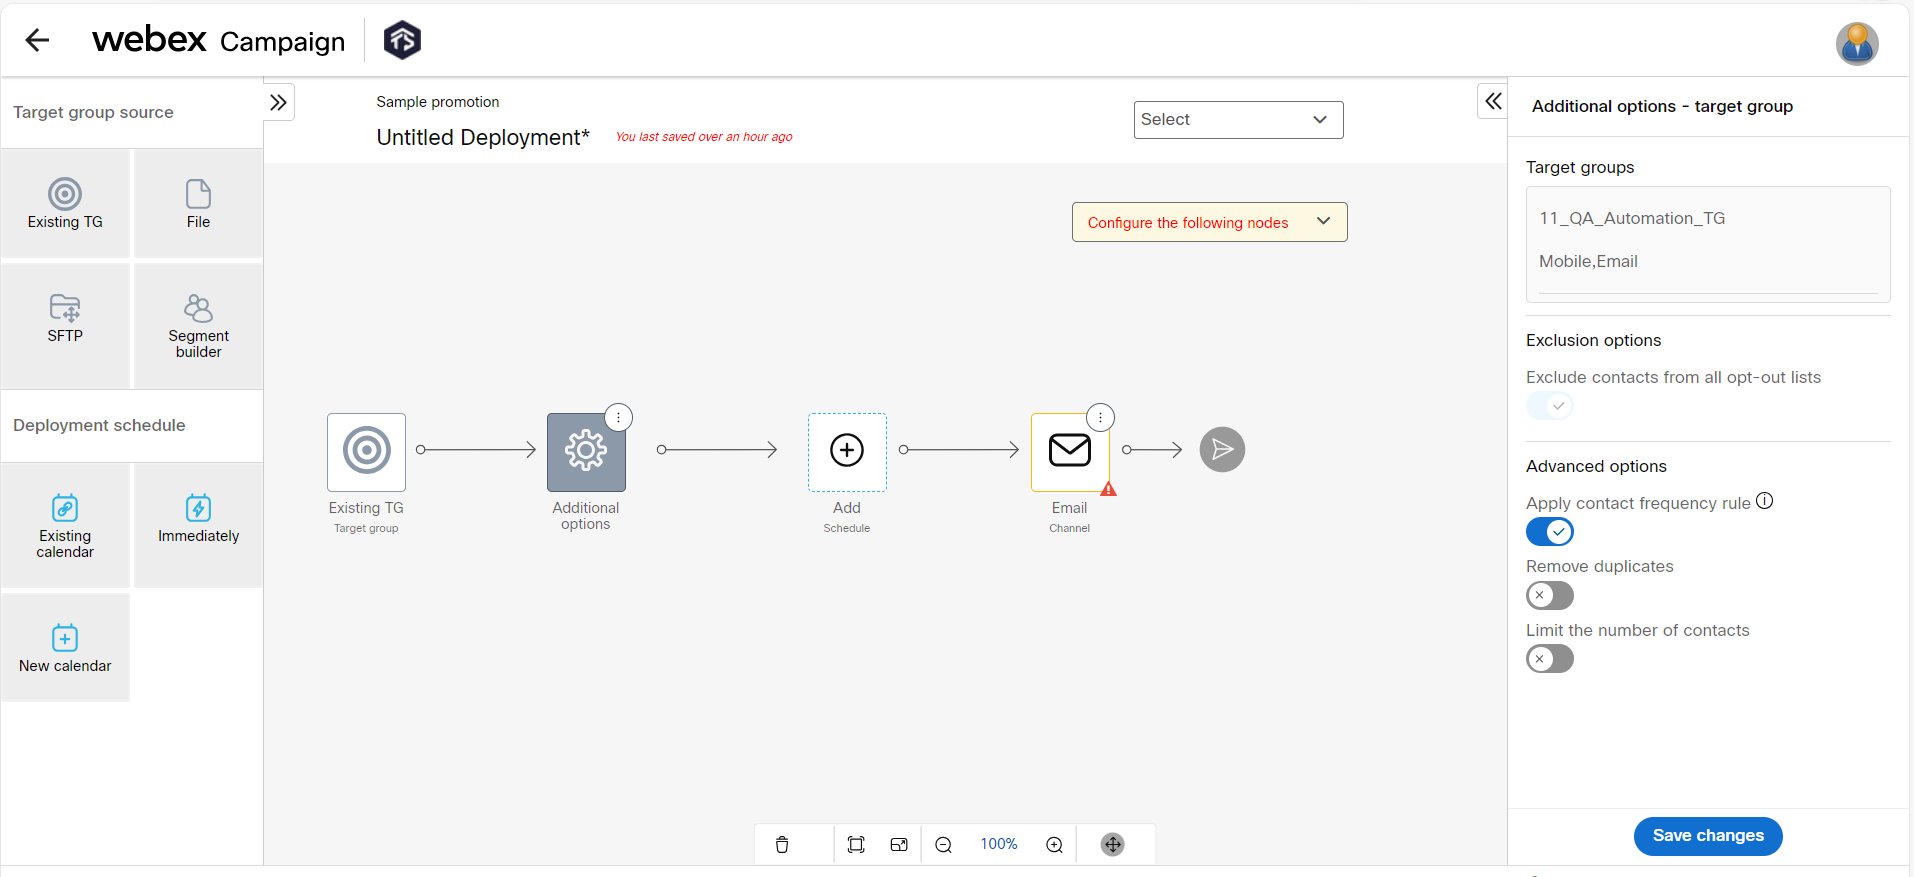
Exclude contacts from all opt-out lists
Webex Campaign provides the capability to create and apply multiple opt-out lists, enabling the filtering of contacts from Target Groups prior to sending a deployment. You can create a separate opt-out list for each communication channel. In the case of the email channel, you have the option to create opt-out lists based on category level. This functionality is utilized for the purpose of handling contacts who have unsubscribed from specific channels or specific types of communication.
This option allows you to send specific deployments to all recipients regardless of their previous opt-out preferences, ensuring comprehensive communication outreach when needed.
This option may not be available to all users. Users who have been specifically authorized to disregard organizational opt-out lists will have access to this capability. The accessibility of this feature is determined by the permission granted to individual users during their account creation.
In essence, only users with the appropriate permissions can utilize this feature to bypass opt-out restrictions and send campaigns to all recipients.

For more information refer to the Opt-out management section on creating, applying, and managing opt-out lists.
Apply contact frequency rule
A contact frequency rule is used to control the maximum number of messages sent out to audience contacts depending on the channel and message purpose for defined time windows. This can help prevent sending more than the desired number of messages to the contacts and avoid messaging fatigue.
A rule can be enabled or disabled during the creation of deployment. For example, it may be necessary to turn off the contact frequency rule when an important service message needs to be sent to all customers, regardless of their marketing communication preferences.
For more information refer to the Contact Frequency Rules section on creating, applying, and managing a contact frequency rule.
Remove duplicates
Enable this option to remove duplicates from the Target Group based on MSISDN for SMS and MMS channels and Email ID for the Email channel.
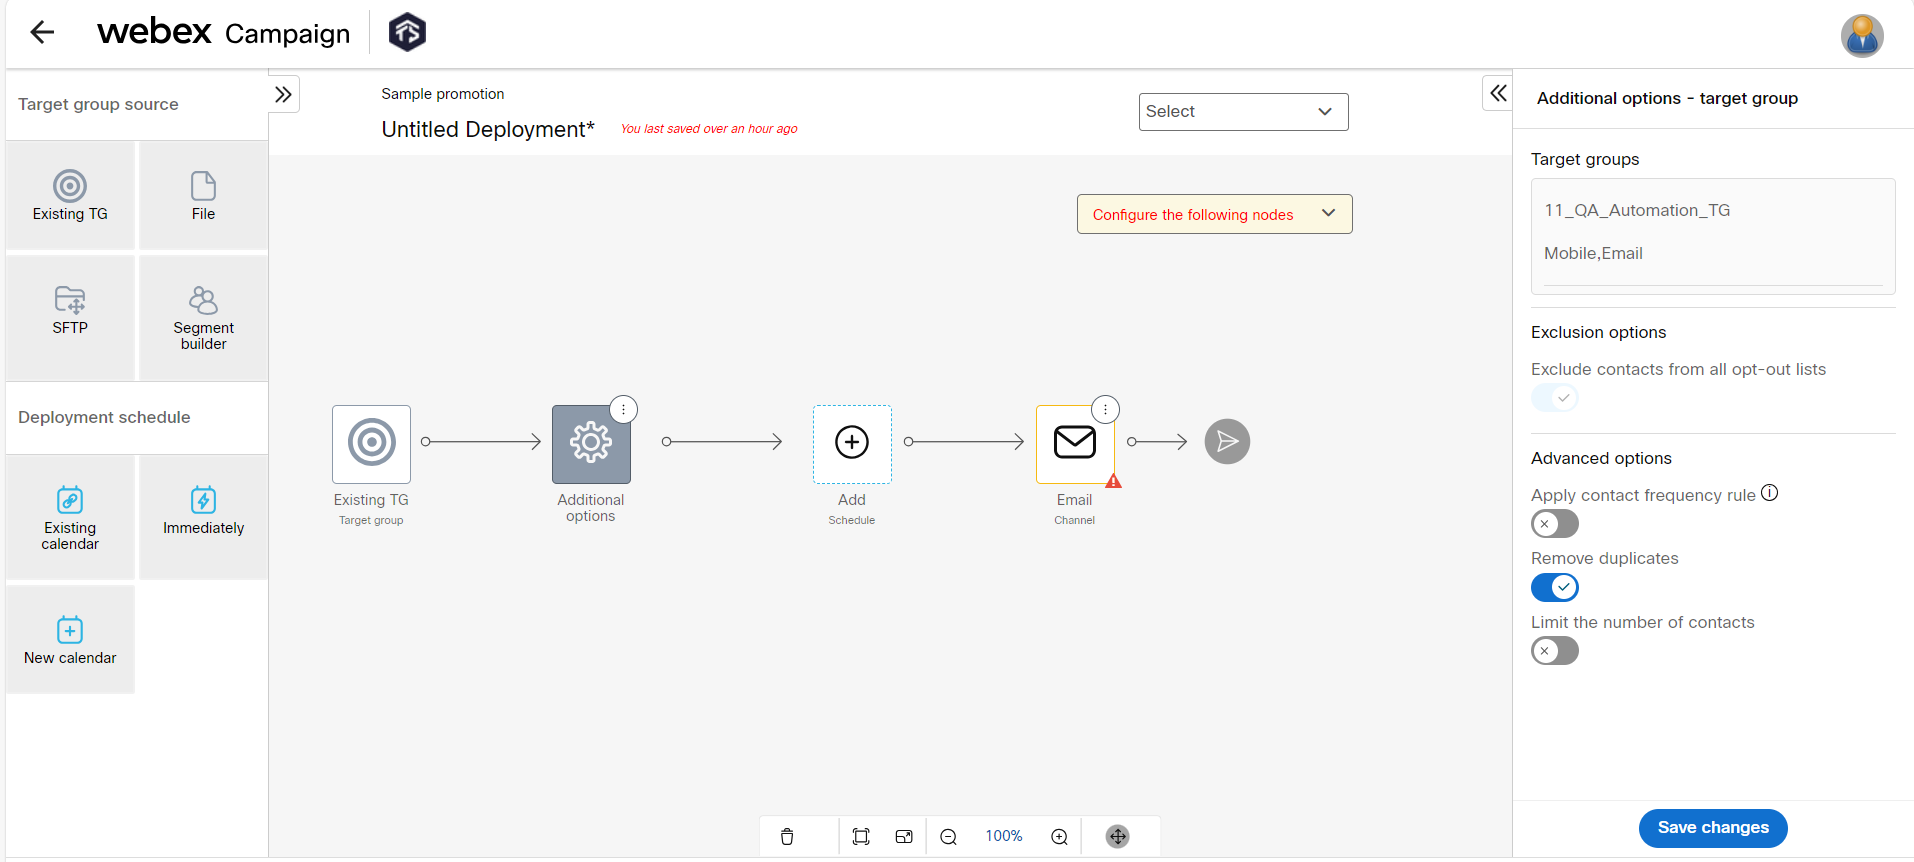
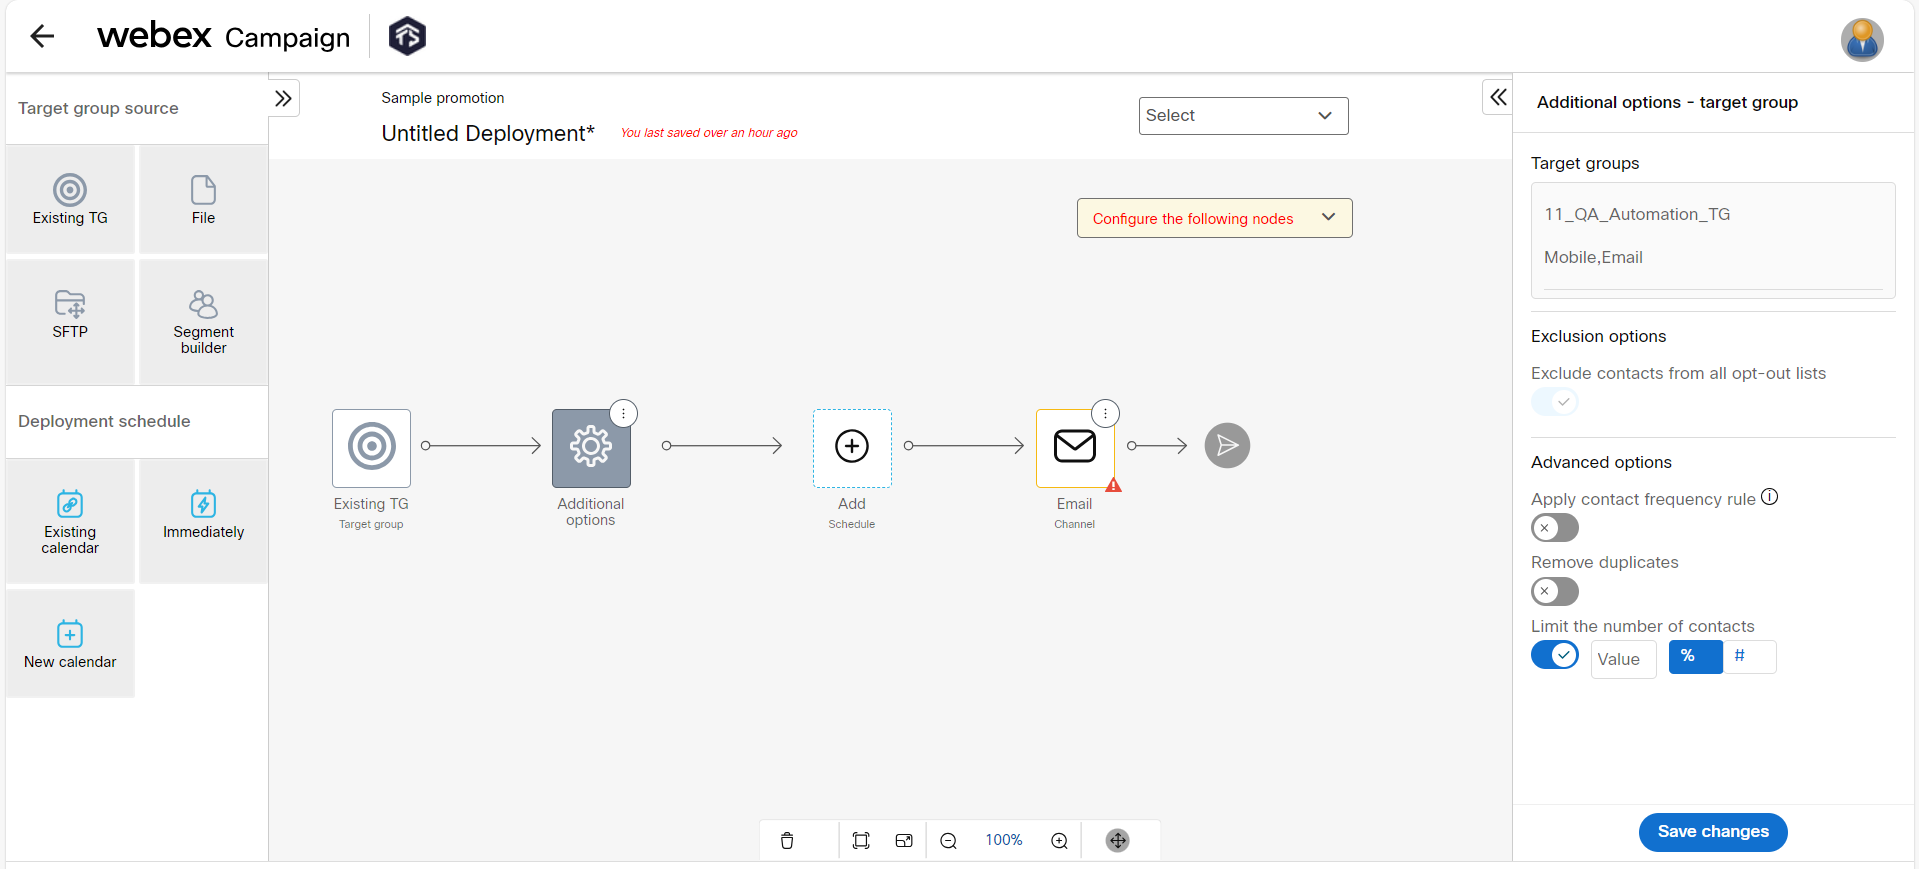
Limit the number of contacts
This option is used to limit the number of contacts of the target group.
Once this option is enabled, you will have the option to enter the value and select % or absolute number of contacts of the target. Enter the value and click Save changes.
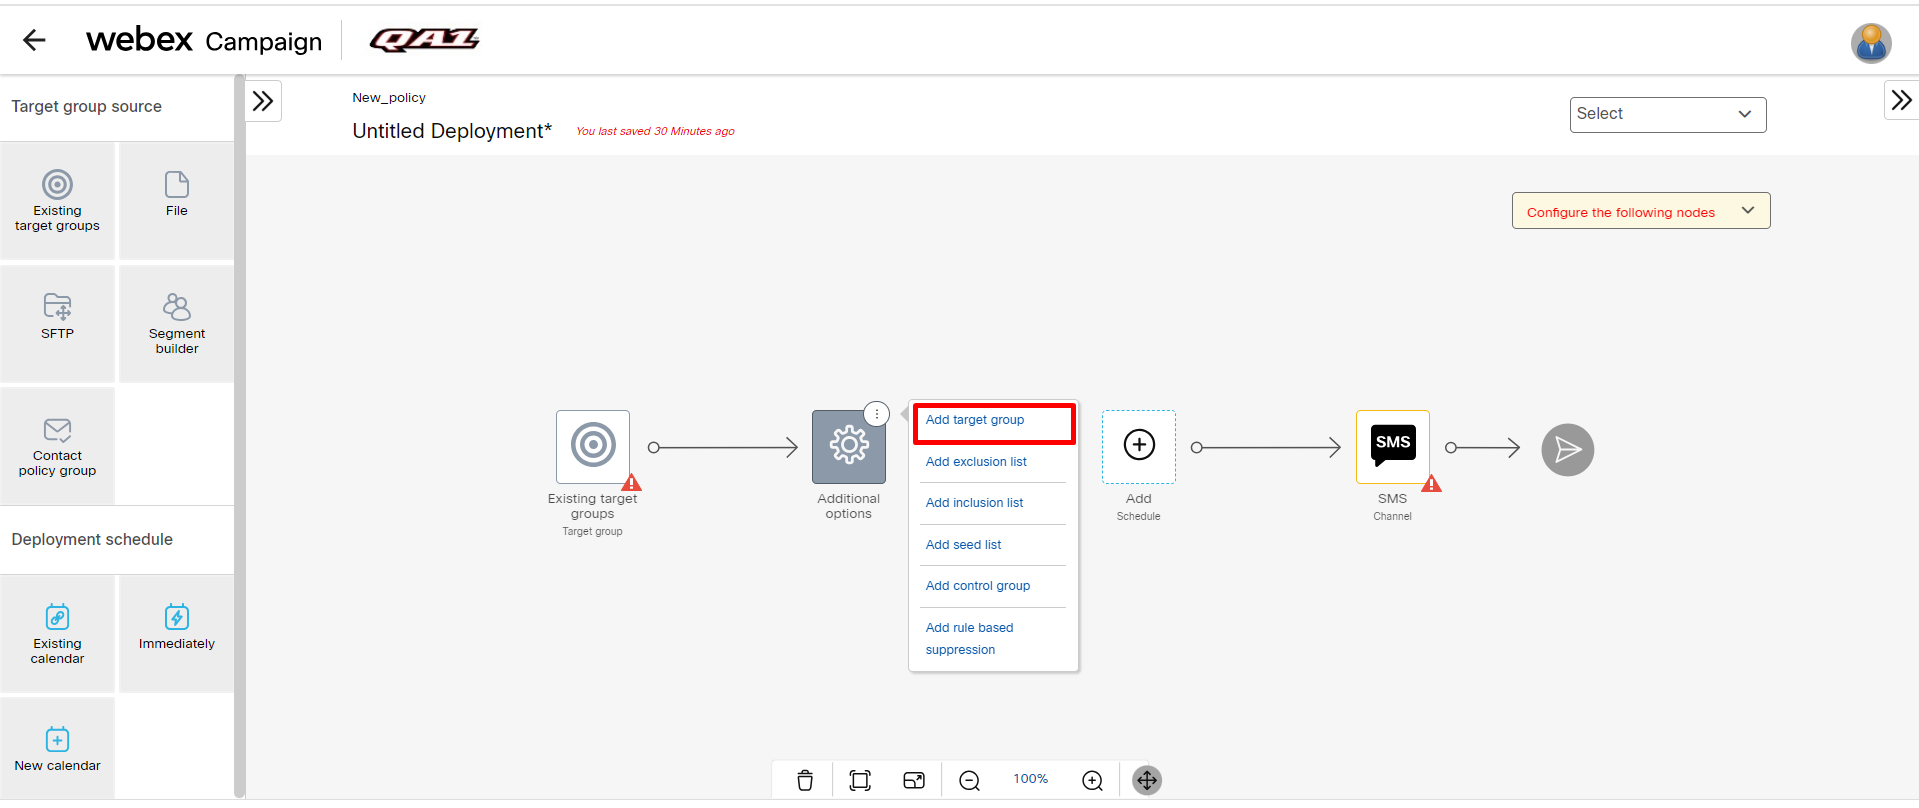
Add target group
This node allows you to add an additional target group. Follow the below steps to add an additional target group:
- On the Additional options node, click on the ellipses icon,
- Click Add target group. You can add additional target group nodes.
- Drag-drop the required target group source onto the target group node. The headers of the additional target group should be the same as the primary target group.
- Select the Target Group node and configure it from the right palette.
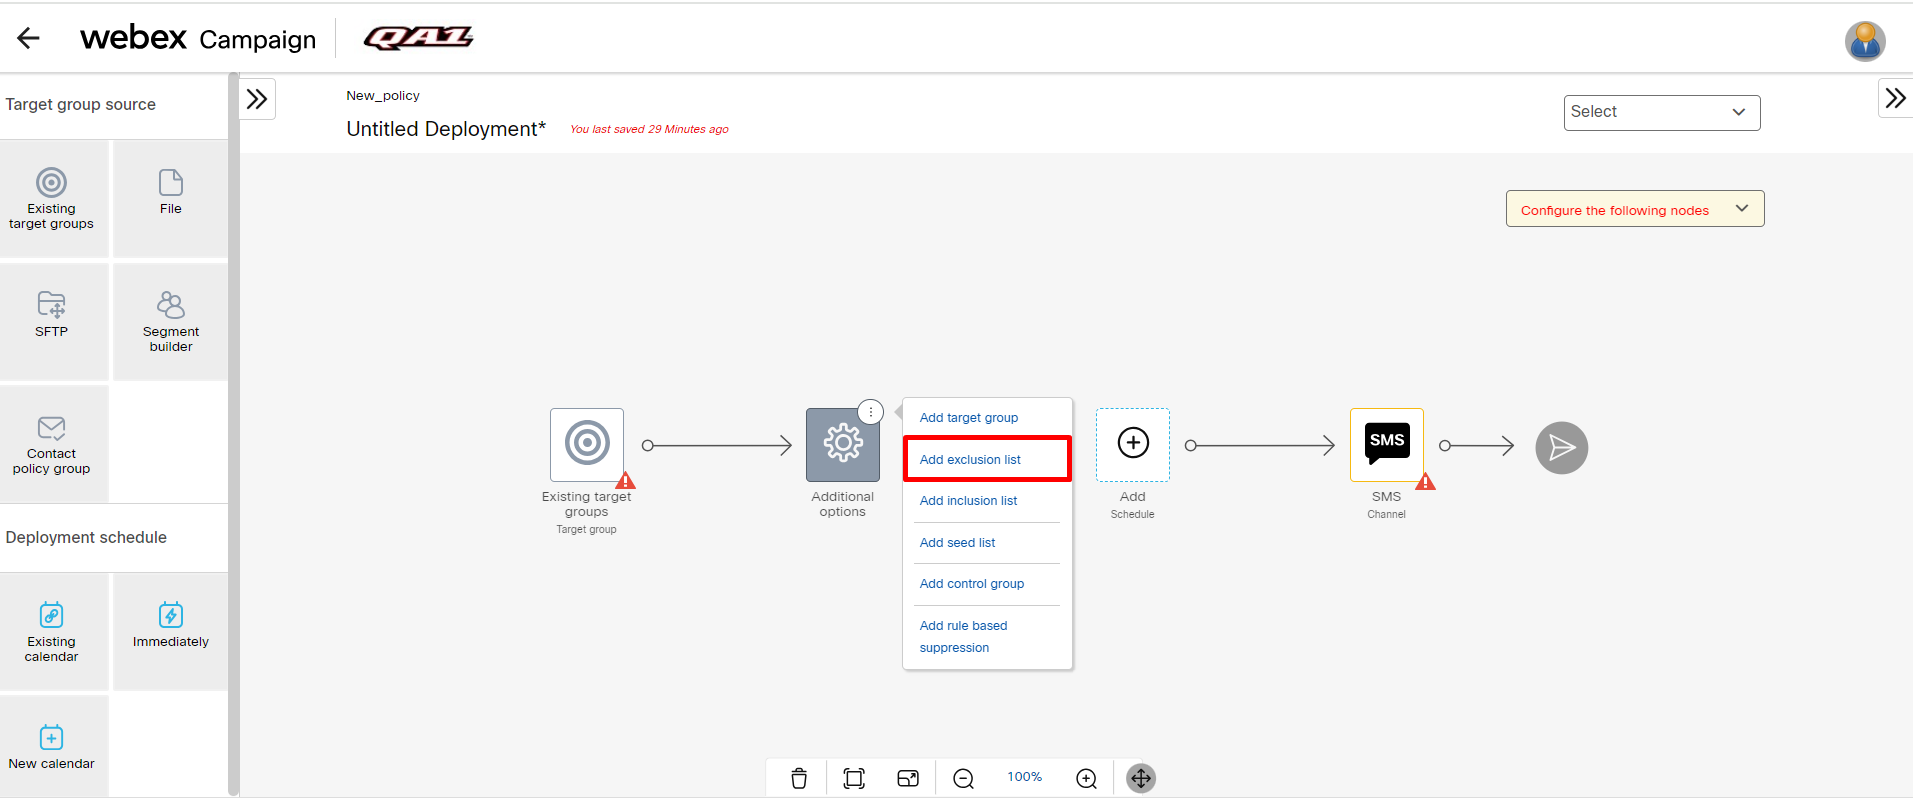
Add exclusion list
This node allows you to add exclusions. When a deployment is scheduled, the contacts in the exclusion node are excluded from the deployment. To add an exclusion node follow these steps:
- On the Additional options node, click on the ellipses icon,
- Click Add exclusion list. You can add multiple Exclusion nodes.
- Drag-drop the required target group source onto the Exclusion node.
- Select the Target Group node and configure it from the right palette.
Add inclusion list
This node allows you to add a contact policy as an inclusion list. This is a tenant-specific feature; it is useful for those clients:
a) who use both Webex Campaign and Webex Connect for their various marketing and non-marketing use cases and
b) who use the optional module within Webex Connect called ‘Contact Policy’ to store and manage their customers’ opt-in and opt-out preferences for receiving communications via specific channels.
To use this node integration of Webex Campaign with Webex Connect's 'Contact Policy’ module is mandatory. Please contact your account manager.
An ‘Inclusion list’ can be configured within the ‘Additional options’ node for SMS and Email Promotions deployments. While configuring such a deployment, you can select a ‘Contact Policy Allow List’ as the ‘Inclusion List’ when the Target Group source is ‘File’ or ‘SFTP’ or ‘Existing TG’.
This feature is currently only available:
a) for SMS and Email channel ‘simple promotion’ type deployments
b) for clients who use Webex Connect as their SMS channel gateway.
The use case supported by this feature is as follows: You have a Target Group file to be used for sending out SMS or Email communications; and you want to scrub this file against a specific ‘Contact Policy Allow List’ stored within your Webex Connect tenant to ensure that you comply with the SMS or Email channel opt-in preferences of your customers.
How to use this feature (i.e. use a ‘Contact Policy Allow List’ as an ‘Inclusion list’ while configuring a deployment):
a) When creating an SMS or Email Promotion deployment, you can drag and drop any of the following 3 nodes on the ‘Target group’ placeholder node in the central canvas: ‘Existing TG’ or ‘File’ or ‘SFTP’. Then click on the ‘Save changes’ button on the right-side properties panel for that Target group node.
b) Next, click on the 3-dots menu on the ‘Additional options’ node. Among the 6 actions available, click on the newly introduced action of ‘Add inclusion list’.
c) Then, a new placeholder node called ‘Add inclusion’ will appear to the right of the ‘Additional options’ node.
d) Next, drag and drop the newly introduced ‘Contact policy group’ node from the left panel onto the ‘Add inclusion’ placeholder node. This is the only node from the ‘Target group source’ nodes that you can use as an ‘Inclusion list’.
e) Next, you will need to click on the ‘Add’ link on the right-side node properties panel to select one of the allow lists. These allow lists would have been retrieved in the morning into Webex Campaign from your Webex Connect Contact Policy module.
f) Next, you will need to save the ‘Contact policy group’ node. Next, you will need to configure the schedule and SMS content nodes as usual; then save the deployment and activate it as usual.
g) When you activate this deployment, Webex Campaign will push the personalized SMS message to the MSISDN found in each record within the Target group via Webex Connect and it will also pass to Webex Connect, the ID of the ‘Allow list’ that you have specified as the ‘Inclusion list’.
h) In turn, before every message is pushed to the mobile operators’ SMS networks, Webex Connect will check against the specified ‘Allow list’ that the MSISDN’s CONSENT value is still ‘true’ and the value of the ‘EXPIRES’ field is still in the future. Thus, Webex Connect will automatically suppress the messages to those MSISDNs which have opted out , even if such MSISDNs are present in your Target group file.
Add seed list
Seed lists are the lists of contacts that can be attached to deployments along with a target group, but these contacts are reported separately. Usually ‘seeds’ would be a group of stakeholders internal to an enterprise, who need to be informed before the deployment is executed and wish to receive a copy of the deployment. This may include company internal employees and marketing agencies.
Users will have the option to configure a wait time of up to 60 minutes between Seed and Target Group deployment. This provides users’ one final opportunity to check/QA a deployment before it is deployed directly to the target group and also serves as an early warning of imminent deployment.

To add a seed list node follow these steps:
- On the Additional options node, click on the ellipses icon,
- Click Add seed list .
- From the right palette, click + Add and select a seed list.
- Enter the wait interval between seed execution and deployment execution.
- Click Save changes.

A seed list can be added to Email onetime and A/B deployments. On the Dashboard, the seed list will be shown separately for each of the Variants as well as for the Winner Deployment.

Add Control Group
This node allows you to add a Control group for the deployment A Control group is a subset of the configurable percentage or absolute value of the target group contacts. The control group will be prepared randomly from the Target Group. When this option is configured, the deployment will not be sent to the Control group.
After the deployment runs, the results can be compared to the activity of the Control Group against the activity of the Targeted Group.
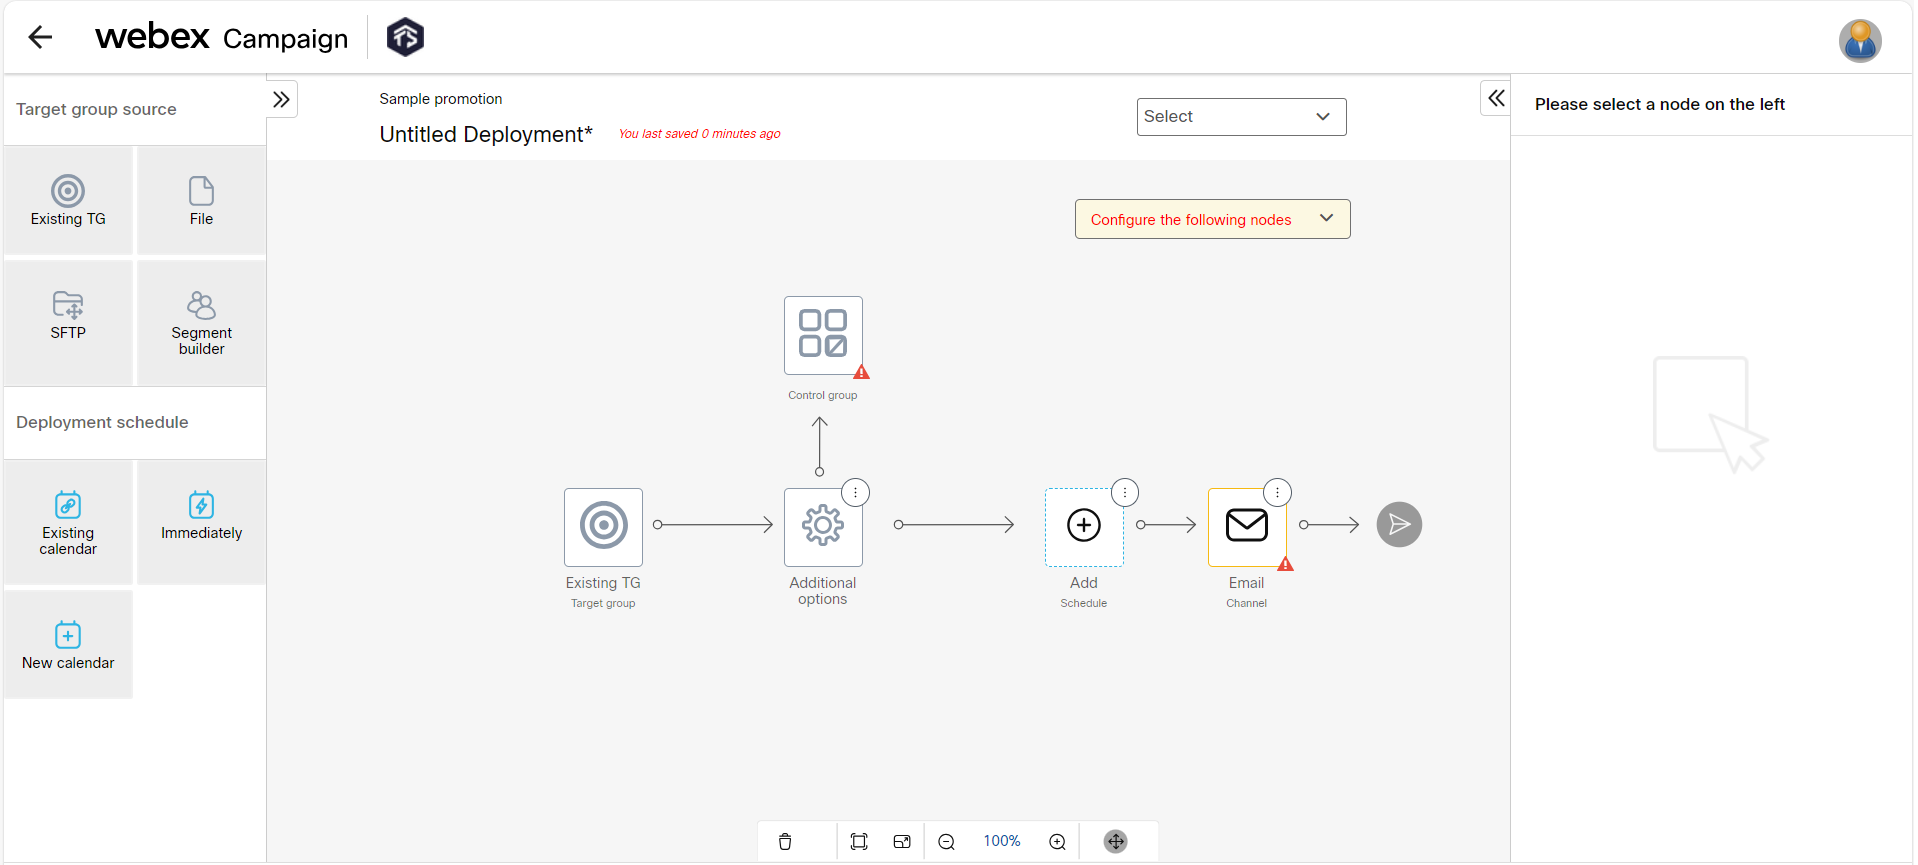
To add a Control Group node, follow these steps:
- On the Additional options node, click on the ellipses icon.
- Click Add control group .
- Select the Control Group node and configure an option from the right palette. The options are:
- Absolute Value from TG: Select this option to enter the absolute value from the target group.
- Percentage of TG: Select this option to enter the value in terms of the percentage of the target group.
- Profile Attribute value: Select this option to apply a condition on a Profile-based Target Group. This option is not available for TGs whose source is File or SFTP. It will appear for a target group that is created using the Segment Builder. That means you have to define a segment on profile data and then copy the segment to a TG using Copy segment definition to a dynamic TG.

Add Rule Based Suppression
The Rule Based Suppression node is used to suppress contacts from the target group who meet defined conditions in the rules that are part of rulesets. A ruleset can contain one or more rules. To learn more about Rule Based Suppression, click here.

To add a Rule based suppression node, follow these steps:
- On the Additional options Node, click on the ellipses icon,
- Click Add rule based suppression .
- Select the Rule based suppression node. The right palette will display the applied rule sets.
- Proceed with the default rule sets set by the administrator or delete them and add a new rule set as required.
- To add a new rule set, click +Add and select the required rule sets.

Updated 8 months ago