

Advanced Calendar
A calendar's start date and end date cannot be in the past. The end date cannot be more than 2 years into the future.
You can create a calendar from the Schedule node in the deployment builder screen.
Follow these steps to create an advanced calendar:
- Navigate to Campaign management > Calendars and click + Add new. The Create calendar screen appears.

A calendar can also be created from Schedule node on the deployment creation screen.
-
On the Create calendar screen, enter details for the following fields.
- Calendar type: Select the calendar type as Advanced.
- Name: This is a system-generated name. You can choose to enter a new name or proceed with the name that is displayed.
- Timezone: Select the time zone required to deploy in.
- Start date (valid from): Select the start date.
- End date (valid until): Select the end date.
- Dates of the month: Select the dates of the month required for deployment. For example, if the deployment is to deploy on the 20th, enter “20” here. If the deployment is to deploy on any eligible day within a month, enter 1-31.
- Eligible weekdays: Select the days of the week required for the deployment.
- Start time: Select the calendar start time.
- End time: Select the calendar end time.
- Batch size: This feature can help you implement 'throttling' for your outbound messages. If your outbound messages contain a call to action (for example, a link to a website or an instruction to call into your contact center), then this feature may help prevent performance issues on a website or prevent your contact center being overwhelmed with calls.
Enter the required batch size. If the Batch size is entered, select whether the Batch size is by the absolute value or the percentage of the target group. - Batch interval (minutes): Enter the interval in minutes between batches. The time between the previous batch's completion and the next batch's beginning. It does not take into account the time taken to complete the batch with any given TPS.
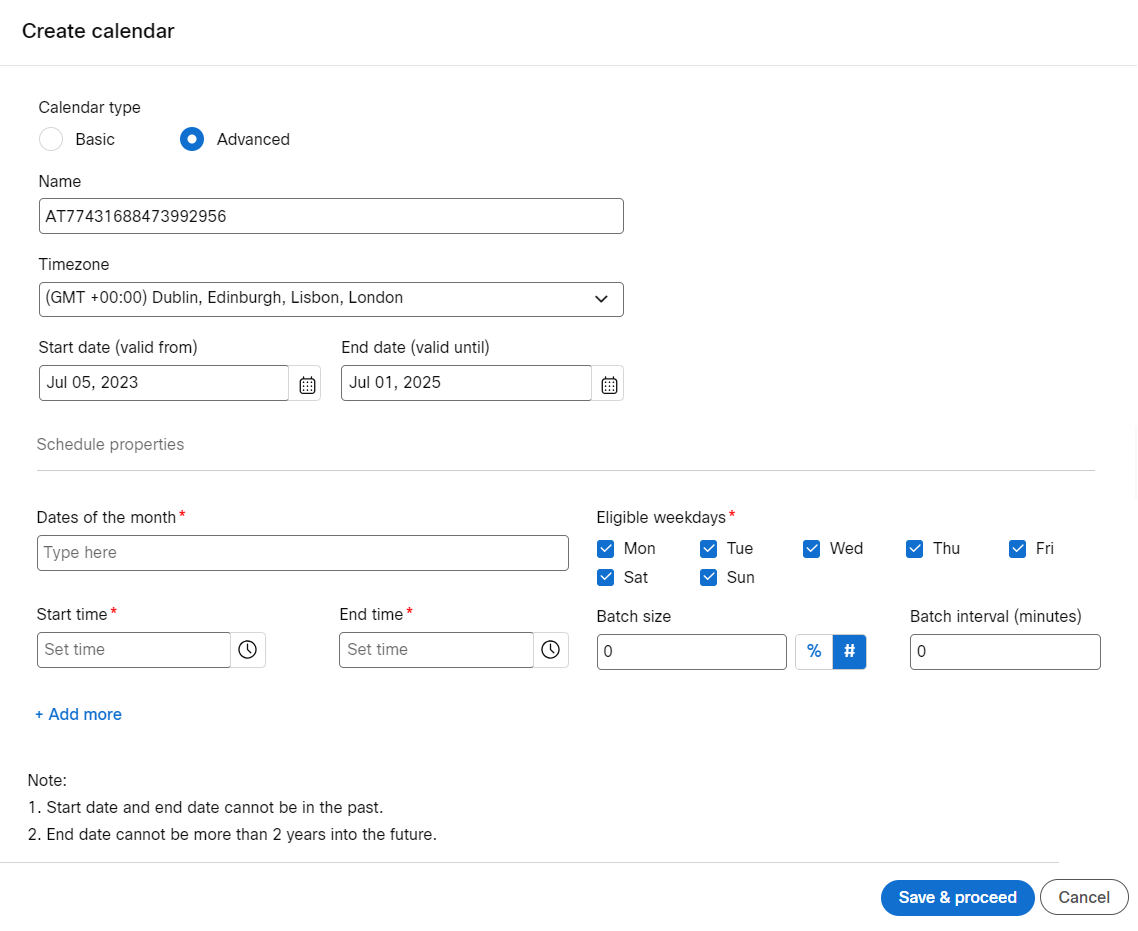
- Click Save & proceed.
Updated 8 months ago