Creating a simple In-App Deployment
In this tutorial, you’ll learn how to create and run an In-App deployment.
To create an In-App deployment, there are some prerequisites that need to be completed. If your username is assigned with an admin role, then you can complete all the steps to create a deployment. If your username is assigned to a role that has limited permissions, then you can create a deployment and send it for approval. Upon approval, the deployment can be activated.
Prerequisites for In-App deployment:
- Access to Campaign management section
- A Campaign
- A target group
- An In-App flow created in Webex Connect
- A Purpose
- A P&L
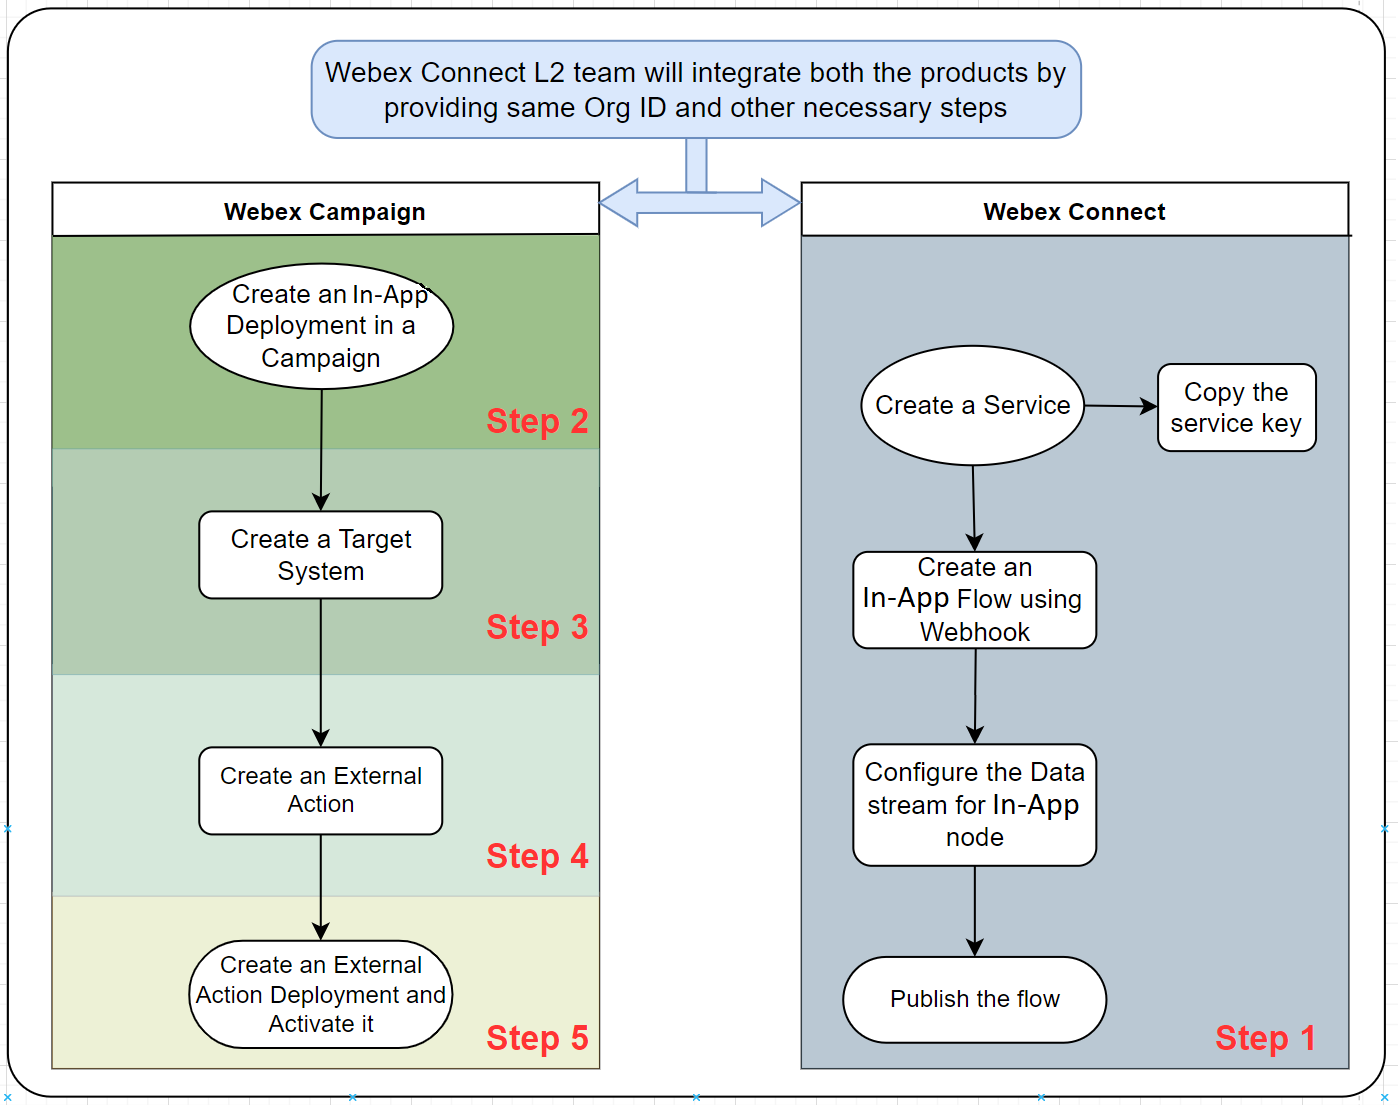
The key steps for creating an In-App application are:
- Step 1: Creating an In-App flow in Webex Connect
- Step 2: Creating an In-App Deployment
- Step 3: Create a Target System
- Step 4: Create an External Action
- Step 5: Create External Action Channel Deployment
Following is the visual representation of Webex Connect and Webex Campaign integration and the necessary steps to create a Simple In-App deployment:

Updated 12 months ago