Events
Events are regular transactional activities performed by customers or business systems in real-time. Webex Campaign is capable of automatically capturing such real-time events, (either through an API or via periodical transaction batch processing - i.e. SFTP) to immediately push personalize/dynamic messages to customers on any channel.
Through Webex Campaign event configuration, a user can create a set of pre-defined events, with or without mandatory parameters, and link them to specific campaigns.
The SFTP based mechanism is an alternative way to execute event-triggered campaigns within Webex Campaign. The data that is expected by Webex Campaign remains the same as specified in the REST API request signature. The only difference is that in this case, the data is made available within a file that is dropped at a specified SFTP location and these have to be available inside the files.
This is useful for clients who do not have the technical resource available to write the code for an API client to invoke the Event API. The advantage of this mechanism is that multiple events can be raised via a single file, but the downside is that the files from the SFTP location are picked up only at a minimum interval of 1-min (this time interval is configurable).
For information on Event API, refer Event API documentation.
Add a New Event
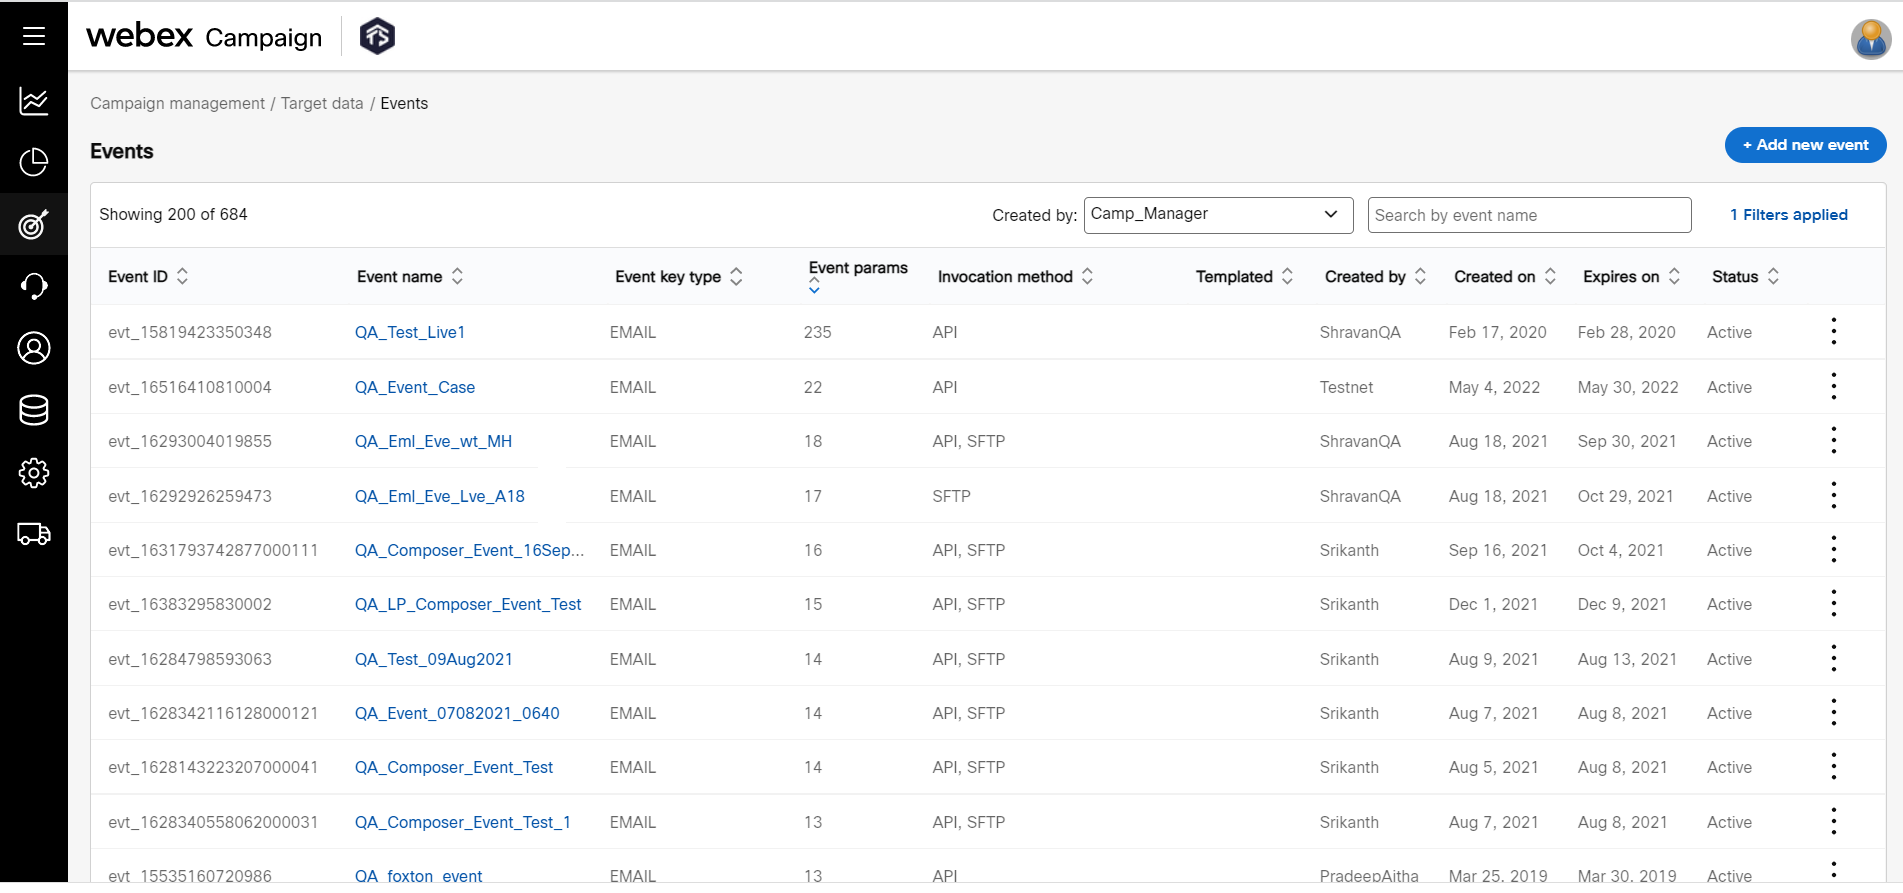
- Navigate to Campaign management > Target Data > Events list screen and click +Add new event.
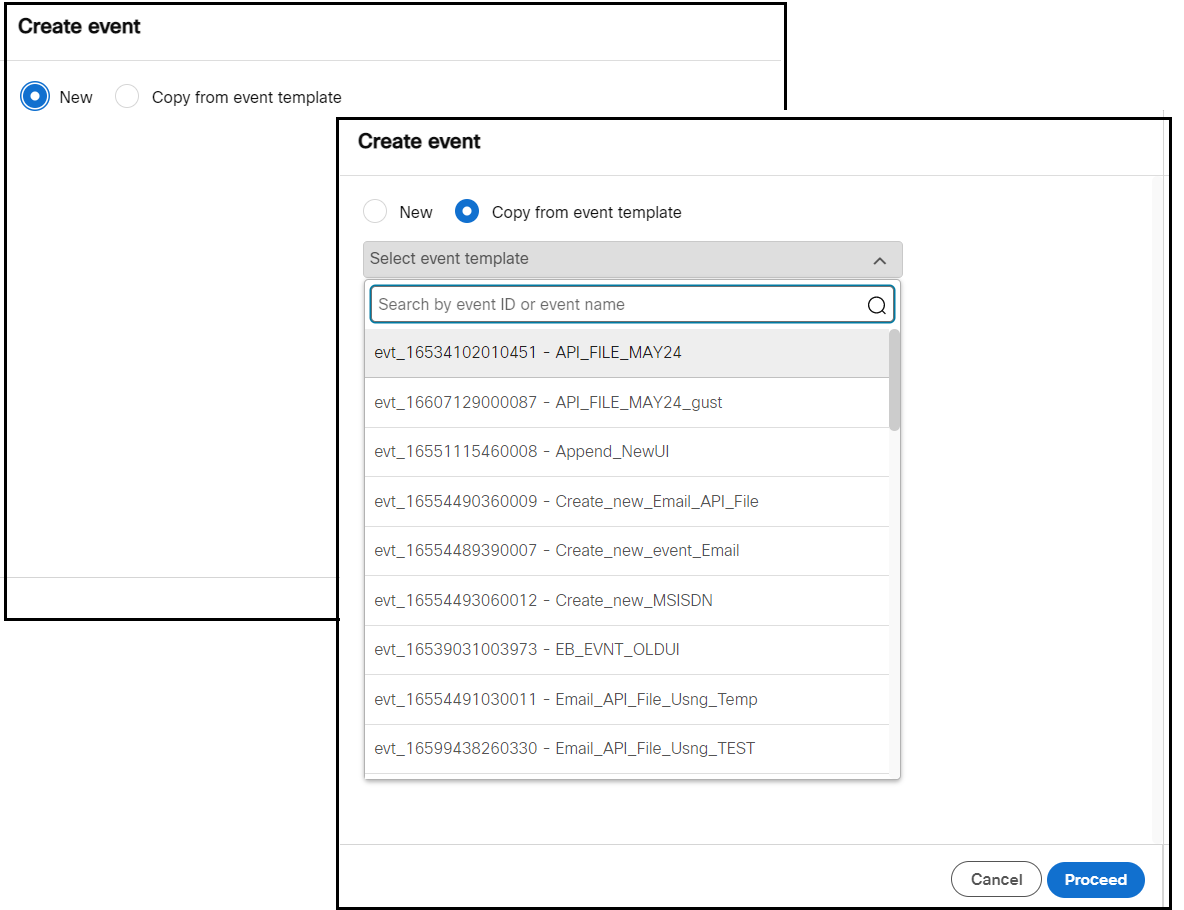
- Select New to create an event and click Proceed. If you want to use a template created by others select Copy from event template.
To be able to see the list of available event templates, set the value of the ‘Created by’ filter to All on the Events list screen.
- On the Create event screen, enter details for the following fields.
- Event name: Name of the Event.
- Event type: The type of transaction that raised the Event. For example, Customer Activity, Customer Life Cycle, and Customer Opt-In /Out.
- Valid until: Enter the event validity date (Event expiry date).
- Description: Enter a description for the Event.
- Event key type: Select the key with which the event should be authenticated.
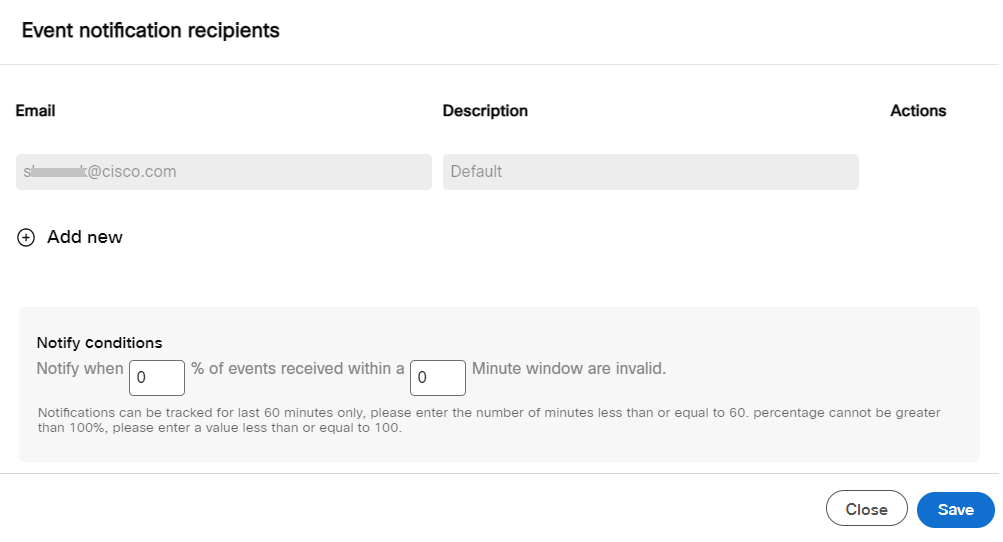
- Notification: Click Configure link. The Event notification recipients screen appears. Click Add new and enter the Email and Description of the recipients and configure notify condition. Click Save.
- Event invocation method: Select the mode in which Event is to be executed. The options are
- API: In this mode, the Event transactions are processed instantly on an Event’s occurrence through an API.
- File drop: In this mode, the Event transactions are collected and processed periodically in a given interval from the configured SFTP location. Select this option if the Event data is to be processed in batches.
- Save as template: Select this checkbox to save any event as an ‘event template’ and then use this template when creating a new event definition.

- Click If event invocation method is API accordion. If you select API as your Invocation method, then read the information carefully and proceed accordingly.

-
Click If event invocation method is file-drop accordion and enter the details for the following fields.
- SFTP server: Select the SFTP server from the drop-down.
- File location: Enter the folder path available in the selected SFTP server, from which the files will be picked up. The supported file formats are .csv and .txt.
For example, project1/sms_channel/2020/january/sample.txt. The sample.txt file will be picked up. If you do not mention any file name, then all the files available in that folder will be picked up. However, you cannot drop a file with the same name again, it will not be picked up for processing. - Field separator: Select a field separator that is used for reading the columns in the file.
- Time Interval: Enter the time interval in which the Event details from the SFTP should be fetched.
- ** After file is processed: Select how the processed files should be handled.

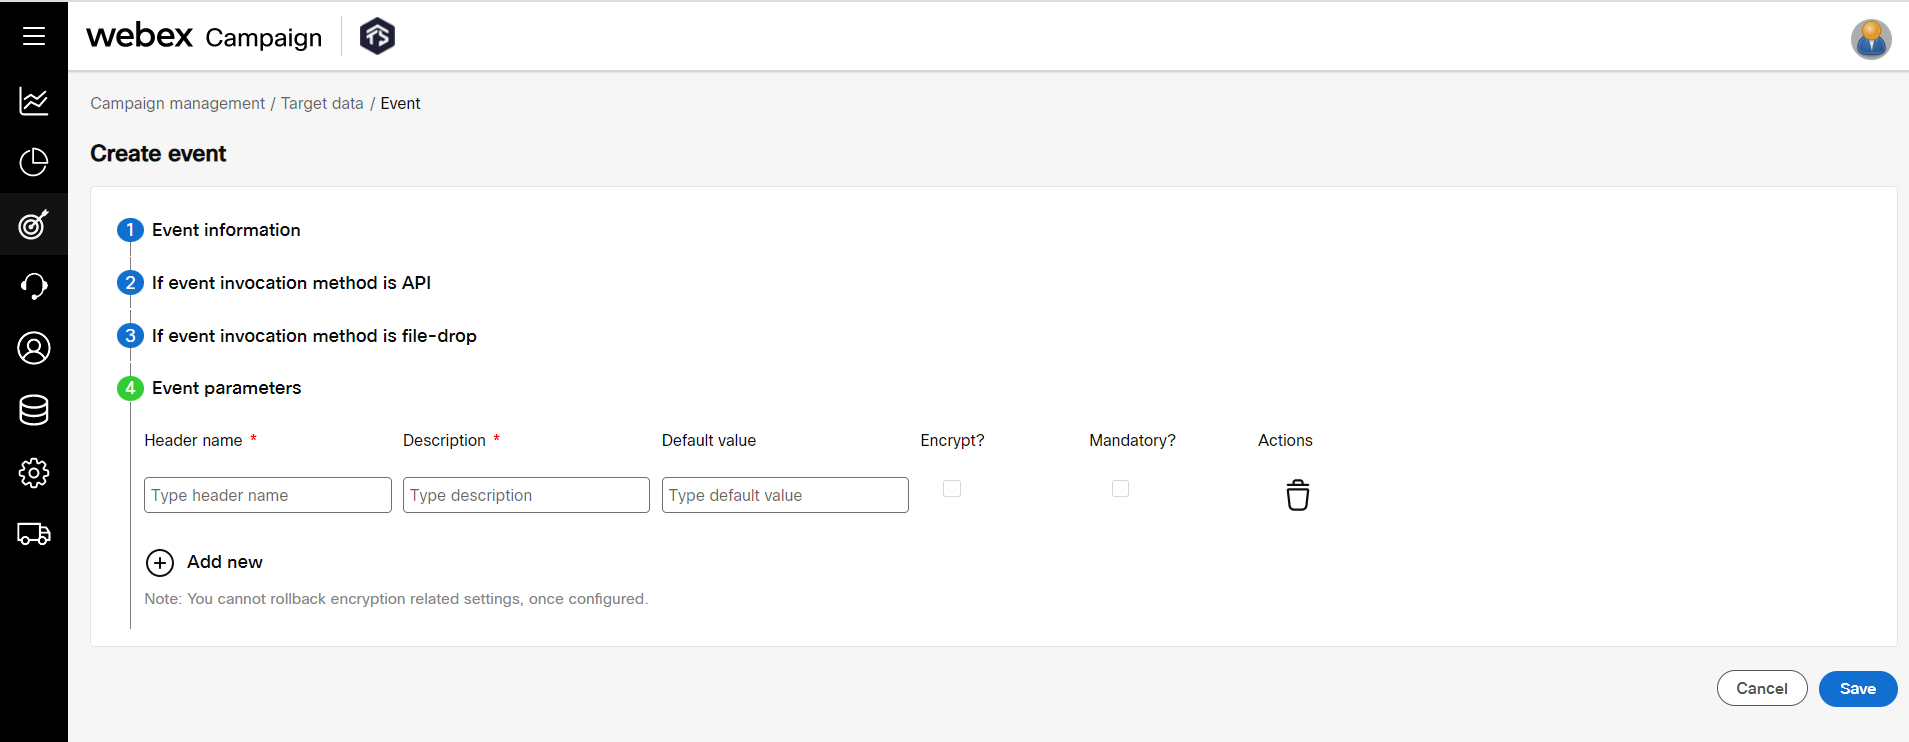
- Click Event parameters accordion and enter the event parameters required for processing the Event.
- Header name: Enter header name.
- Description: Enter the description.
- Default value: Enter the default value of the header.
- Encrypt: Select the checkbox to encrypt a header. Once the encryption is enabled, it cannot be changed at a later stage.
- Mandatory: Select the checkbox if the header is mandatory.
We recommed you to enter the header names in upper case and without underscores (_). Headers entered in lowercase or with underscores may not work within the Landing page composer.
- Click Save.
You can also refer to API behavior when mandatory parameter and optional parameters are passed and when not passed in the API request.
Below is the sample file format
MSISDN,EMAIL,FIRSTNAME,ACCOUNT,....
9832234242,[email protected],Lee,1234,……
Event invocation for MMS Event Campaigns by the file-based method
Drop the file into a pre-defined SFTP location. The sample file can be as shown below with an additional header of MMSCONTENTPATH and its associated file path.
MSISDN|EMAIL|SUBID|FIRSTNAME|UTI|BRAND|COMMSCHANNEL|CELL_CODE|PANEL01|PANEL02|PANEL03|PANEL04|PANEL05|PANEL06|PANEL07|PANEL08|PANEL09|PANEL10|PANEL11|PANEL12|PANEL13|PANEL14|PANEL15|FLEX1|FLEX2|FLEX3|FLEX4|FLEX5|FLEX6|FLEX7|FLEX8|FLEX9|FLEX10|FLEX11|FLEX12|FLEX13|FLEX14|FLEX15|MMSCONTENTPATH

447xxxxxxxx1|[email protected]|1xxxxxxxx1|Asxxxxok|"15091565369_DR0000000XXX_EM_07xxxxxxxx1*EML_TESTCAMP"|EE|EM|TARG_EML_TESTCAMP|A|A|N|N|A|||||||||||Ashok,||||||||||||||jupiter/[campaignid]/[uniqueid-msisdn.txt]

447xxxxxxxx2|[email protected]|1xxxxxxxx2|Txxxxxn|"15091565369_DR0000000XXX_EM_07xxxxxxxx2*EML_TESTCAMP"|EE|EM|TARG_EML_TESTCAMP|A|N|N|A|A|||||||||||Tarun,||||||||||||||jupiter/[campaignid]/[uniqueid-msisdn.txt]

447xxxxxxxx3|[email protected]|1xxxxxxxx3|Murthy|"15091565369_DR0000000XXX_EM_07xxxxxxxx2*EML_TESTCAMP"|EE|EM|TARG_EML_TESTCAMP|A|N|N|A|A|||||||||||Murthy,||||||||||||||jupiter/[campaignid]/[uniqueid-msisdn.txt]
The JSON content in the uniqueid-msisdn.txt should have:
- SMIL file
- Required media content in base64 encoded format.
Below is the JSON format to share content:
{
"smil": "<?xml version=\"1.0\" encoding=\"utf-8\"?><smil><head><layout><root-layout backgroundcolor=\"#
FFFFFF\" height=\"1920\" width=\"1080\" /><region fit=\"meet\" height=\"100%\"
left=\"0%\" top=\"0%\" width=\"100%\" id=\"Asset\"/><region fit=\"scroll\" height=\"20%\"
left=\"0%\" top=\"80%\" width=\"100%\" id=\"Text\"/></layout></head><body><par
dur=\"2s\"><text src=\"TXT_MMS1.txt\" end=\"2s\" region=\"Text\"/><img src=\"IMG_MMS1.gif\"
end=\"2s\" region=\"Asset\" /></par></body></smil>",
"TXT_MMS1.txt": "url(data: text/plain;base64,<encodedbase64textcontent>)",
"IMG_MMS1.gif": "url(data: image/gif;base64,<encodedbase64imagecontent>)"
}
Edit or Delete an Event
An Event can be edited when the associated deployments are in Draft, Completed, Stopped, Paused, and Rejected states. If the event is associated with more than one deployment(s) and if any one of the deployments is in the Running state, then editing is not allowed.
An event cannot be inactivated or deleted if it is associated with a deployment.
The Valid Until date can be edited if the deployment is in 'Pending', 'Approval Pending', 'Paused', 'Draft, 'Stopped', 'Rejected, and 'Running' state. The Event Parameters can be edited if the deployment is in 'Draft, 'Stopped', 'Rejected, or 'Paused', state.
Follow these steps to edit an Event.
- On the Events list screen, click on the ellipses icon of the required event.
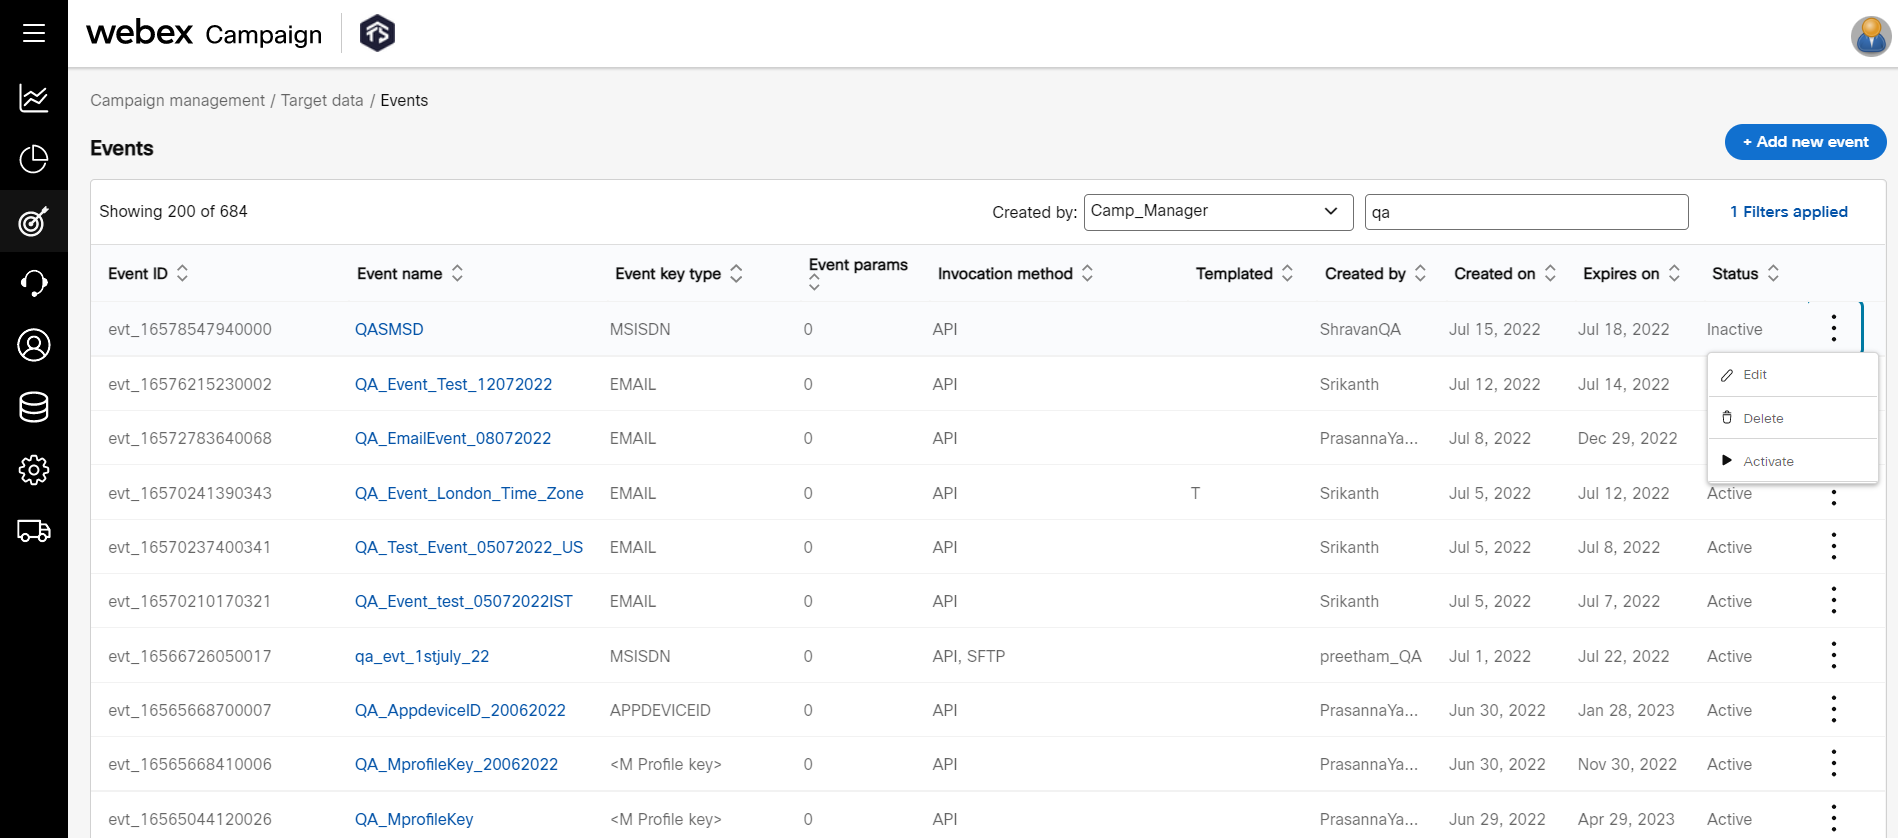
- To edit an event, click Edit. If the event is associated with an active deployment, then you can only edit the event validity end date.
- To delete an event, click Delete.
An active event cannot be deleted. You must deactivate and then delete the event.
An Event cannot be inactivated/deleted if it is associated with a deployment.
- To deactivate an event click Deactivate.
Updated 3 months ago