How to setup category-level unsubscribe management for email
Overview
Webex Campaign allows users to manage opt-out lists separately for different programs or groups of communication. It could be as simple as having a "Marketing" category or your marketing program may have multiple subscription categories that you want customers to be able to opt-in and out of.
Webex Campaign can generate unsubscribe links for each category you want to manage unsubscribes for and allows users to populate them into their email content. These links, once clicked by recipients, will redirect them to an unsubscribe confirmation page, where upon confirmation, they will be added to the category specific opt-out list.
This article will guide you through setting this process up end-to-end for each category.
Step 1 - Create a category level opt-out list
Ensure you have created a category level opt-out list that corresponds to the category you want to manage opt-outs for.
Step 2 - Create a category level opt-out page
There are 2 options here.
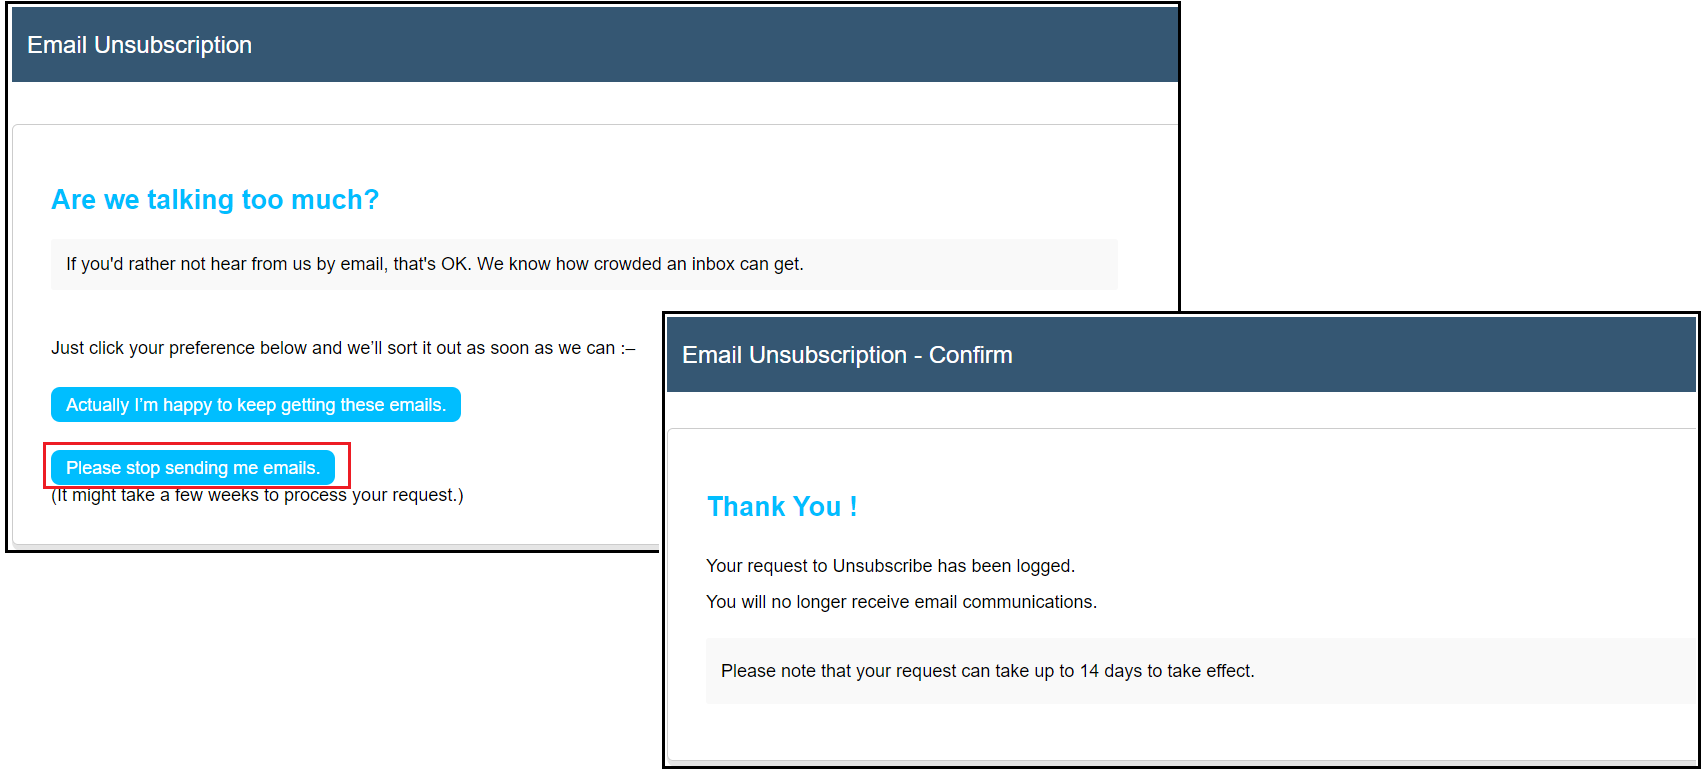
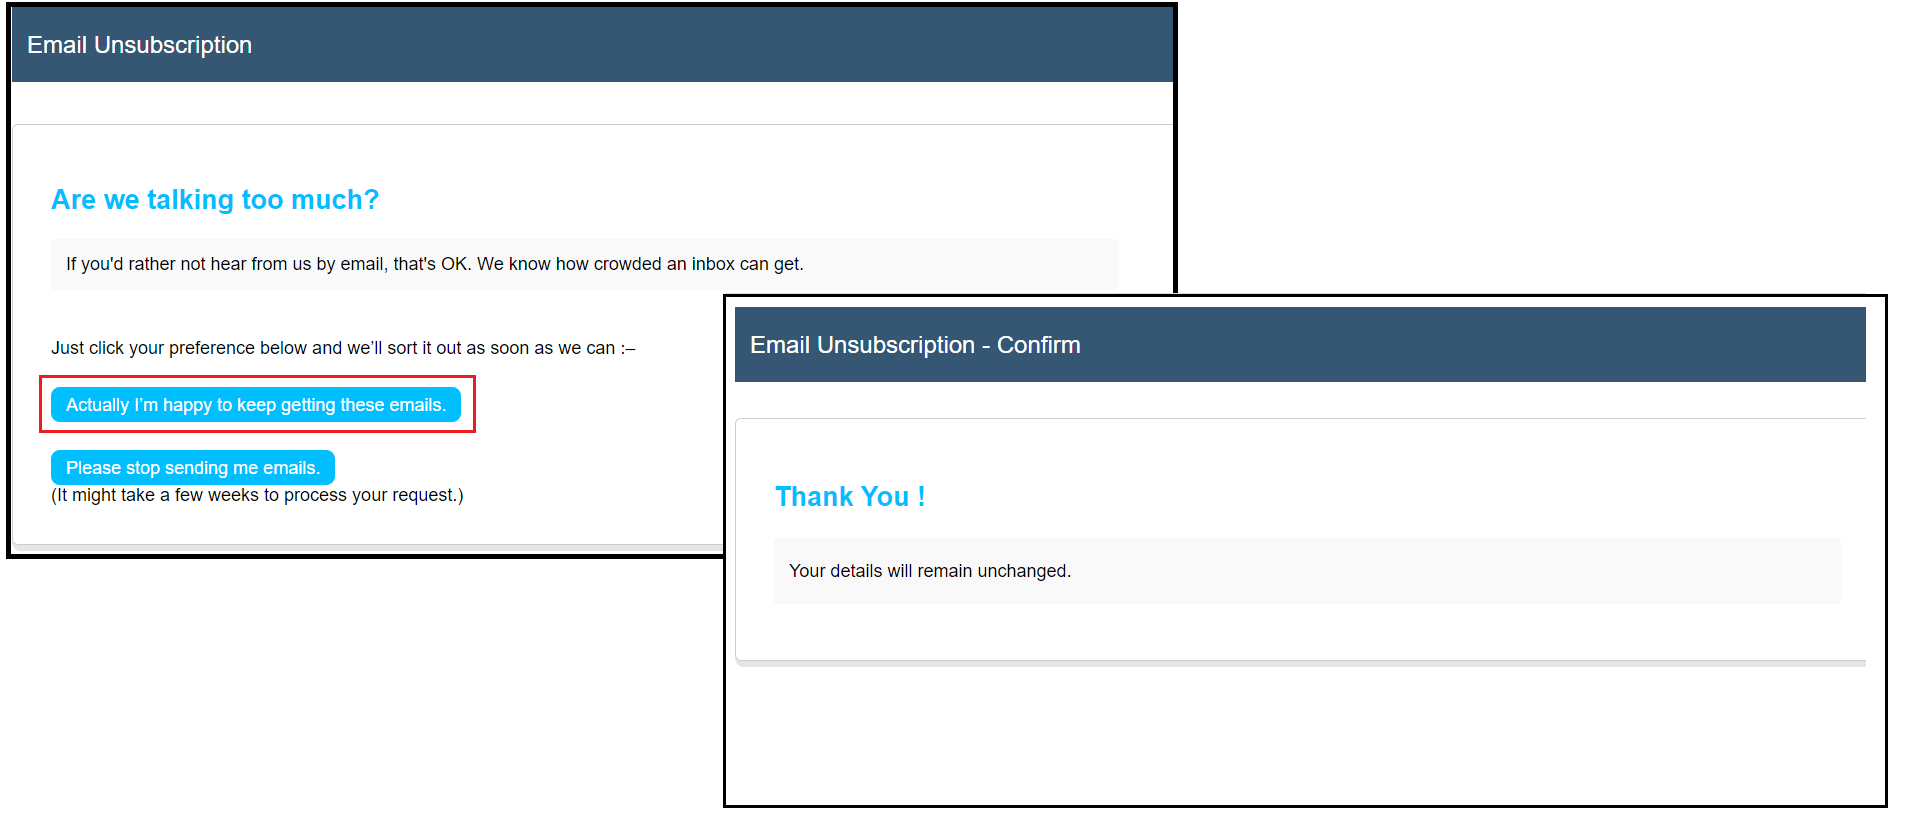
- Default Pages:Webex Campaign provides generic opt-out pages out of the box (screenshots below). If you want to use these pages, no further action is needed to use these in your deployments.

If the email recipient confirms that they wish to proceed with the unsubscribe request:

If the email recipient changes their mind and does not wish to unsubscribe
The default unsubscribe landing page mentions that "Your request can take up could take up to 14 days to take effect". However, the email is actually added to the category-level opt-out list immediately after the email recipient clicks on the link within the email. The wording on the default landing page deliberately gives some leeway to you in case you have an already live running deployment which may have the email recipient in its target group.
- Custom Pages: If you want to apply your own branding and wording to these unsubscribe pages, you can design your own unsubscribe Landing Page using the drag-&-drop Landing Page composer or HTML editor.
- Your custom unsubscribe page should have a confirmation button, where recipients will confirm their unsubscribe request. This button should be configured to have the following URL structure, where you'll need to replace the Domain URL, Tenant Name and Category store name params based on your details:
https://DOMAINURL/externalaccessweb/EmailUnsubscribe?operation=unsubscribe&tid=$(ref_trans_id)&unsub_type=0&store=TENANTNAME_CATEGORYSTORENAME - You should also configure a confirmation page, which customers will be redirected to after clicking the aforementioned confirmation button, confirming they are successfully unsubscribed.
- You should also configure an error page, which customers will be redirected to after clicking the aforementioned confirmation button, if there is an error unsubscribing them.
- Your custom unsubscribe page should have a confirmation button, where recipients will confirm their unsubscribe request. This button should be configured to have the following URL structure, where you'll need to replace the Domain URL, Tenant Name and Category store name params based on your details:
Limitation
At present, Webex Campaign only supports a single common landing page for 'confirmation' and 'error' pages. Therefore, you will need to use generic wording on these landing pages without referring to a specific opt-out category.
As such, if you have already configured your 'confirmation' and 'error' pages for another category, or for the email channel as a whole, you won't need to set up new ones for each new category.
- Request the Webex CPaaS Tech Support team to enable those custom unsubscribe landing pages instead of these default unsubscribe landing pages.
Please include the name of your opt-out category and the name of your 3 pages in the request.
Please allow approximately 1 week for this process.
Step 3 - Add the category-level unsubscribe link to your email content
-
Navigate to your template in either Email Composer, HTML editor or the email content in your email node in the deployment builder.
-
Find where you want to insert the category-level unsubscribe link in the HTML code or editor.
-
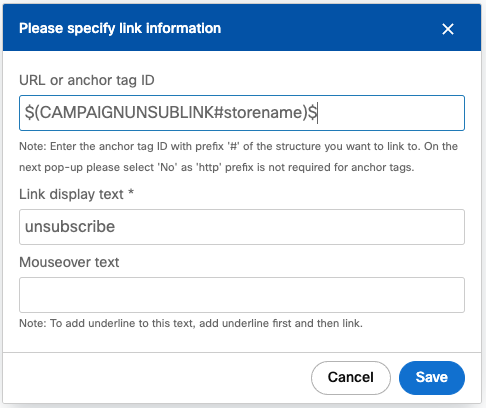
If adding to a template in Email Composer, select the text/button and enter the replacement parameter $(CAMPAIGNUNSUBLINK#storename)$ where you will need to replace "storename" with the name of the category-level opt-out list you created in Step 1.
E.g. if your category-level opt-out list is named "Marketing", then your unsubscribe replacement parameter will be $(CAMPAIGNUNSUBLINK#Marketing)$
-
If adding to a template in the HTML editor in Message Template, add the replacement parameter $(CAMPAIGNUNSUBLINK#storename)$ (where you will need to replace "storename" with the name of the category-level opt-out list you created in Step 1) as the URL href.
-
If adding directly to your email content in the Email node during deployment creation, find the Search/Select landing page links drop-down and select the required opt-out category. The link will look like CATEGORY {user created category name} UNSUBLINK. Clicking this option will add the following HTML snippet to wherever you have clicked within the HTML, which you can edit to your requirements:
<a href="$(CAMPAIGNUNSUBLINK#storename)$">CATEGORY storename UNSUBLINK</a>
-
-
Save your content.
Updated 12 months ago