

Creating an External Action Deployment
In this tutorial, you’ll learn how to create and run an External Action deployment.
External Action deployment allows you to call an action that is configured in the deployment. That action can be used to invoke any third-party APIs to perform any desired action. Let us understand this channel using a use case "Making a group of people be eligible for an offer".
For example, let’s say on a particular Sunday, filter the customers who purchased items worth more than $ 1000 in the IKEA store and create a target group. This target group is used to set a flag to those customers in your CRM system through your CRM API and offer an additional discount or cross-sell other products.
Prerequisites for an External Action deployment:
If your username is assigned with an admin role, then you can complete all the steps to create a deployment. If your username is assigned with a role that has limited permissions, then you can create a deployment and send it for approval. Upon approval, the deployment can be activated.
- Access to Campaign management section
- A Campaign
- A Target Data for Ext. Action Channel
- A Configured External Action
- A Purpose
- A P&L
Step 1: Create a Deployment
A deployment is a set of instructions to process a campaign under the parent campaign.
To create a deployment:
- Navigate to Campaign management > Campaign List screen and click on the campaign in which you want to create a deployment.

- Click Create deployment on the campaign summary screen that appears. The campaign summary screen will display status of all the deployments of the campaign. For more information on creating a deployment, go to Creating a Deployment section.

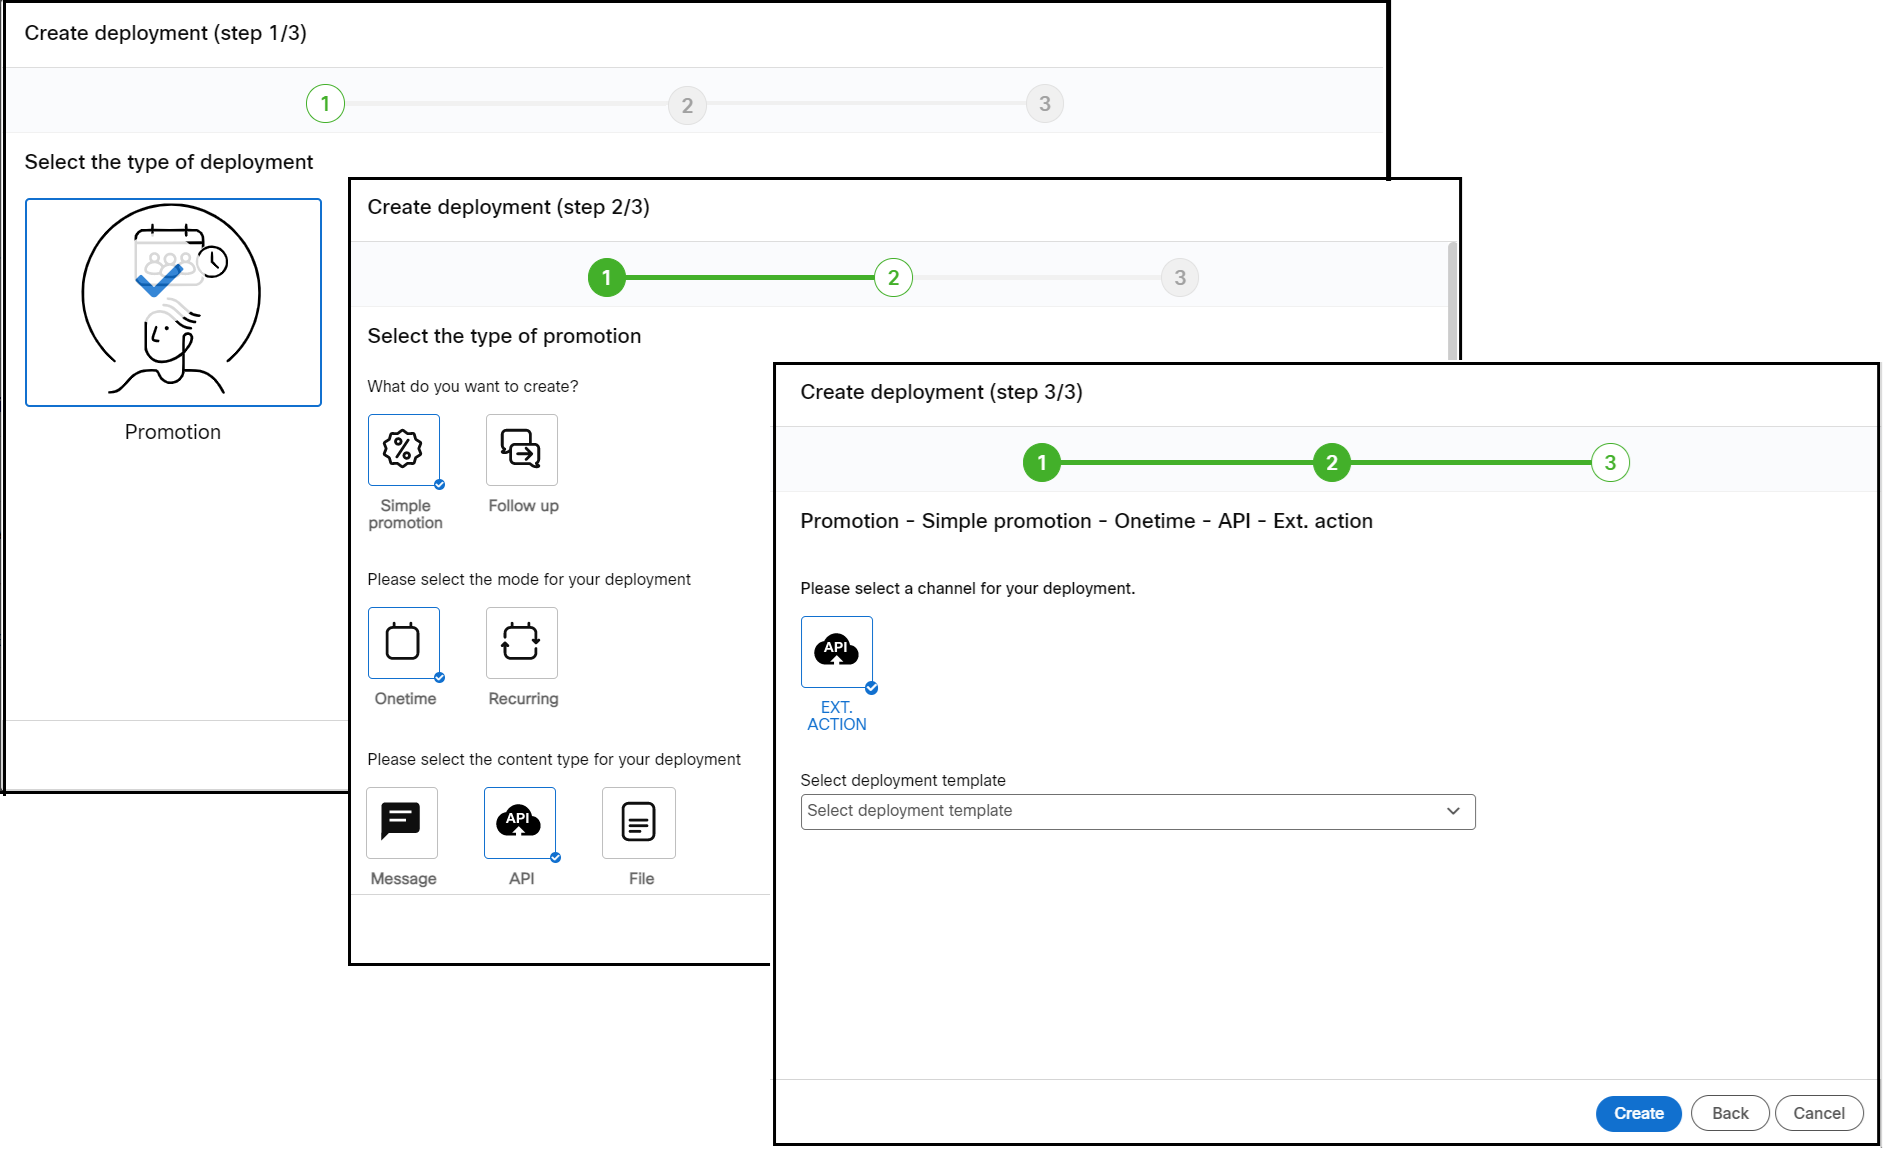
- Select the Deployment Type as Promotion.
- Select the Type of promotion as Simple promotion, mode of deployment as One time , and content type as API.
- Select the channel as Ext. Action and click Create.
- The Deployment creation screen appears. You have to configure each node in the deployment creation screen.
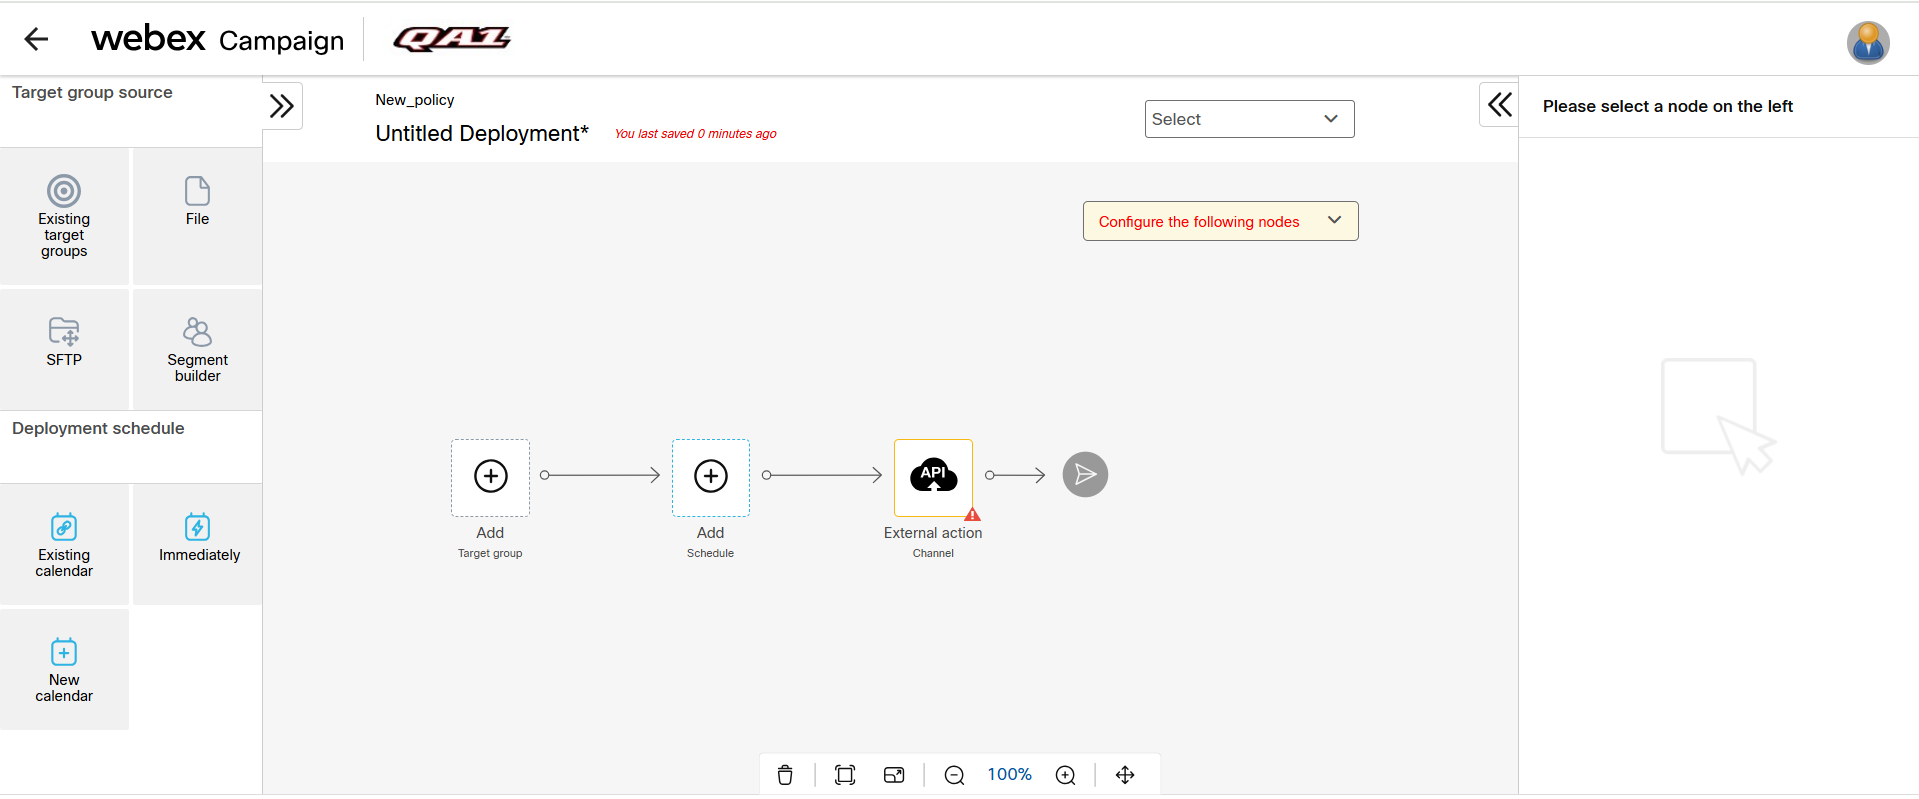
The left panel displays different nodes that can be used to configure a node, The nodes are grouped based on their usage. When you select a node the right panel displays the configuration options.
Step 2: Choose Your Recipients
In this step, the recipients of the campaign are selected. As mentioned in the prerequisites, a target group should already be uploaded to the Webex Campaign.
To select the recipients of the campaign:
- From the Target group source , drag-and-drop the Existing TG node onto the Target Group placeholder. We have chosen the Existing TG node because the target group is already uploaded as a prerequisite. For more information on adding a target group from different nodes, go to Target Group Source Nodes section.

- Select the Existing TG node and click + Add from the right panel.
- Select the target group that was uploaded.
- Click Save & proceed to close the target group screen.
- Click Save changes.
Now the recipients are successfully configured for the deployment.
Step 3: Create a Schedule
In this step, select a schedule to send your campaign immediately, or create a schedule (a date and a time) to run the deployment in the future. For this tutorial, we will run the deployment Immediately as soon as the deployment is activated.
The TPS for External Action deployment is calculated automatically after selecting the External Action.
To configure the schedule:
- Drag-and-drop the Immediately node onto the Schedule node.
- Select the Schedule node. On the right panel, click Save changes.

Step 4: Configure Exclusion Day/Times
During the exclusion day or time, the deployment is paused temporarily and resumes once the exclusion day or time has lapsed. The exclusion day or time is set by the administrator that is applicable to all campaigns across the tenant. To add a custom exclusion day or time, configure this node.
For more information on exclusion day or times, go to Exclusion days / times section.
For our tutorial, we will proceed with the default exclusion day or times. Select the Exclusion days/ times node and click Save changes.

Now the schedule is successfully configured for the deployment.
Step 5: Configure External Action and Parameters
In this step, configure the previously created external action and the parameters.
To configure the Ext. Action node:
- Click + Add . The External action configuration screen appears.
- Select the required action. You will need to select one of the pre-configured External actions.

-
Click Select..
-
The selected action will be displayed in the right panel. The next step is to configure the Event success and failure responses and Parameters. Click +Add.

- Select an Event to be triggered when you receive a successful response from the API.
- Select an Event to be triggered when you receive a failure response from the API.
- Click Edit . The Configure parameters screen appears.

- Select the value from the fields and click Save.
- Click Save changes to save the node.
Now all the nodes are configured.
Step 6: Save the Deployment
In this step the deployment can be saved as a Draft or ready for Activation. The Deployment meta tags are mandatory to activate a deployment. If you are not sure of the Deployment meta tagsthat should be used, you can save the deployment and come back later to select the Deployment meta tags.
To save the deployment as ready for activation:
- Select Save & exit. The Save deployment screen appears.

- Enter a name for the deployment such as My_First_Deployment.
- Select a P&L to which you want to associate this deployment.
- Select one or more purposes from the Purpose drop-down.
- Enter a Deployment code.
- Click Save.

Now the deployment is ready for activation.
Step 7: Activate the Deployment
On the Campaign list screen, click the ellipses icon of the deployment and click Activate. You will receive notifications for various stages of the deployment.

If the user does not have permission to approve their own created deployments, then instead of Activate button, you will notice Send for approval.
You can go to the Dashboard section to view the performance of your deployment.

If you have questions, please contact your Webex Campaign account manager or Cisco Webex technical support team by phone or email:
- Europe / Middle East / Africa:
- Phone: +44 (0) 1494 750 600
- Email: [email protected]
- North America:
- Phone: +1-855-324-0970
- Email: [email protected]
Updated over 1 year ago