

Additional Options node - Instant Deployments
The Additional options node helps you add the additional nodes that you can configure for Instant deployments.

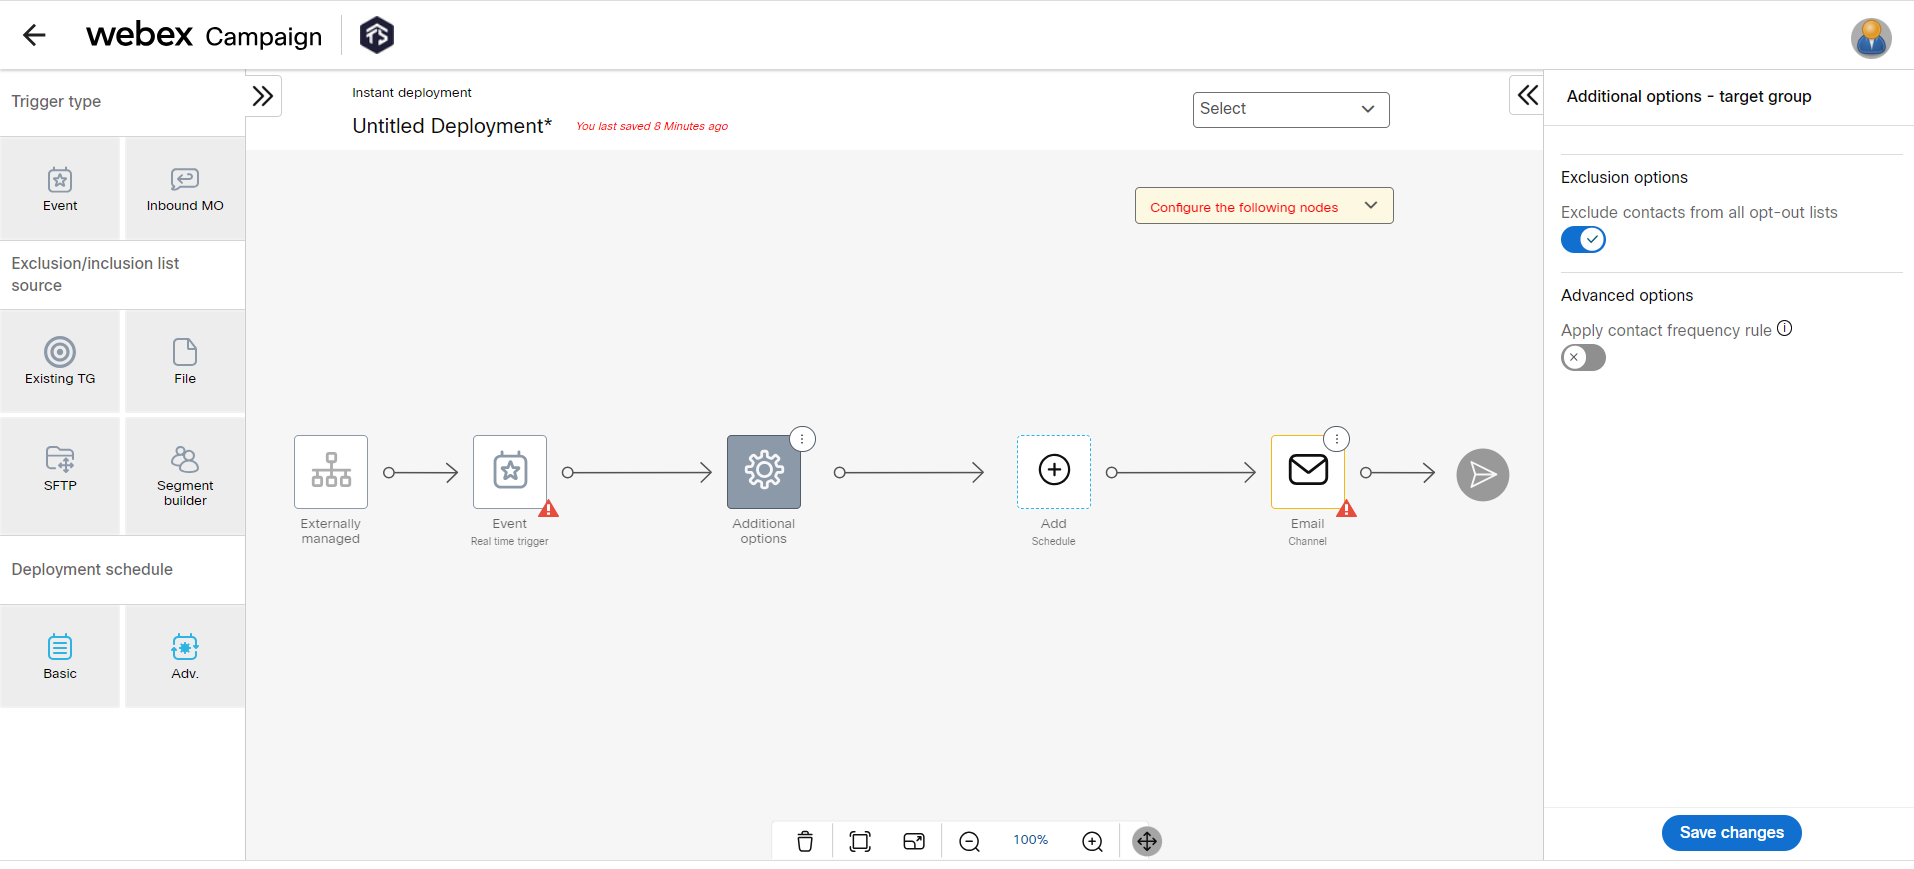
Exclude contacts from all opt-out lists
Webex Campaign provides the capability to create and apply multiple opt-out lists, enabling the filtering of contacts from Target Groups prior to sending a deployment. You can create a separate opt-out list for each communication channel. In the case of the email channel, you have the option to create opt-out lists based on category level. This functionality is utilized for the purpose of handling contacts who have unsubscribed from specific channels or specific types of communication.
This option allows you to send specific deployments to all recipients regardless of their previous opt-out preferences, ensuring comprehensive communication outreach when needed.
This option may not be available to all users. Users who have been specifically authorized to disregard organizational opt-out lists will have access to this capability. The accessibility of this feature is determined by the permission granted to individual users during their account creation.
In essence, only users with the appropriate permissions can utilize this feature to bypass opt-out restrictions and send campaigns to all recipients.
For more information refer to the Opt-out management section on creating, applying, and managing opt-out lists.
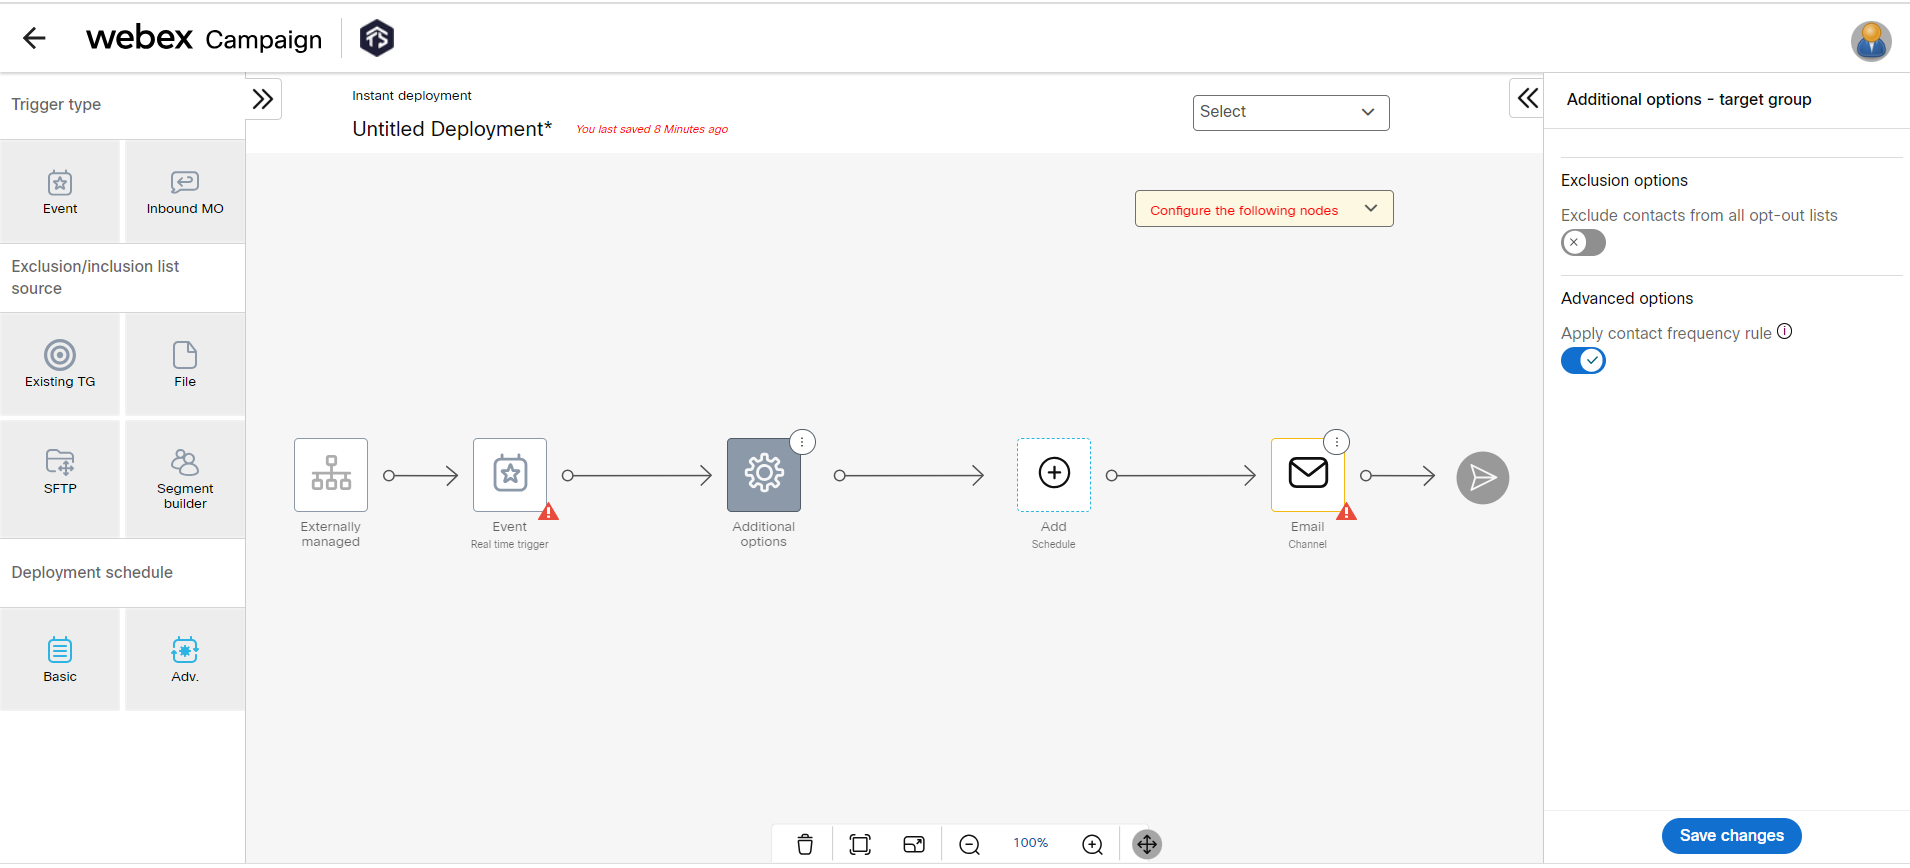
Apply contact frequency rule
A contact frequency rule is used to control the maximum number of messages sent out to audience contacts depending on the channel and message purpose for defined time windows. This can help prevent sending more than the desired number of messages to the contacts and avoid messaging fatigue.
A rule can be enabled or disabled during the creation of deployment. For example, it may be necessary to turn off the contact frequency rule when an important service message needs to be sent to all customers, regardless of their marketing communication preferences.
For more information refer to the Contact Frequency Rules section on creating, applying, and managing a contact frequency rule.
Add exclusion list
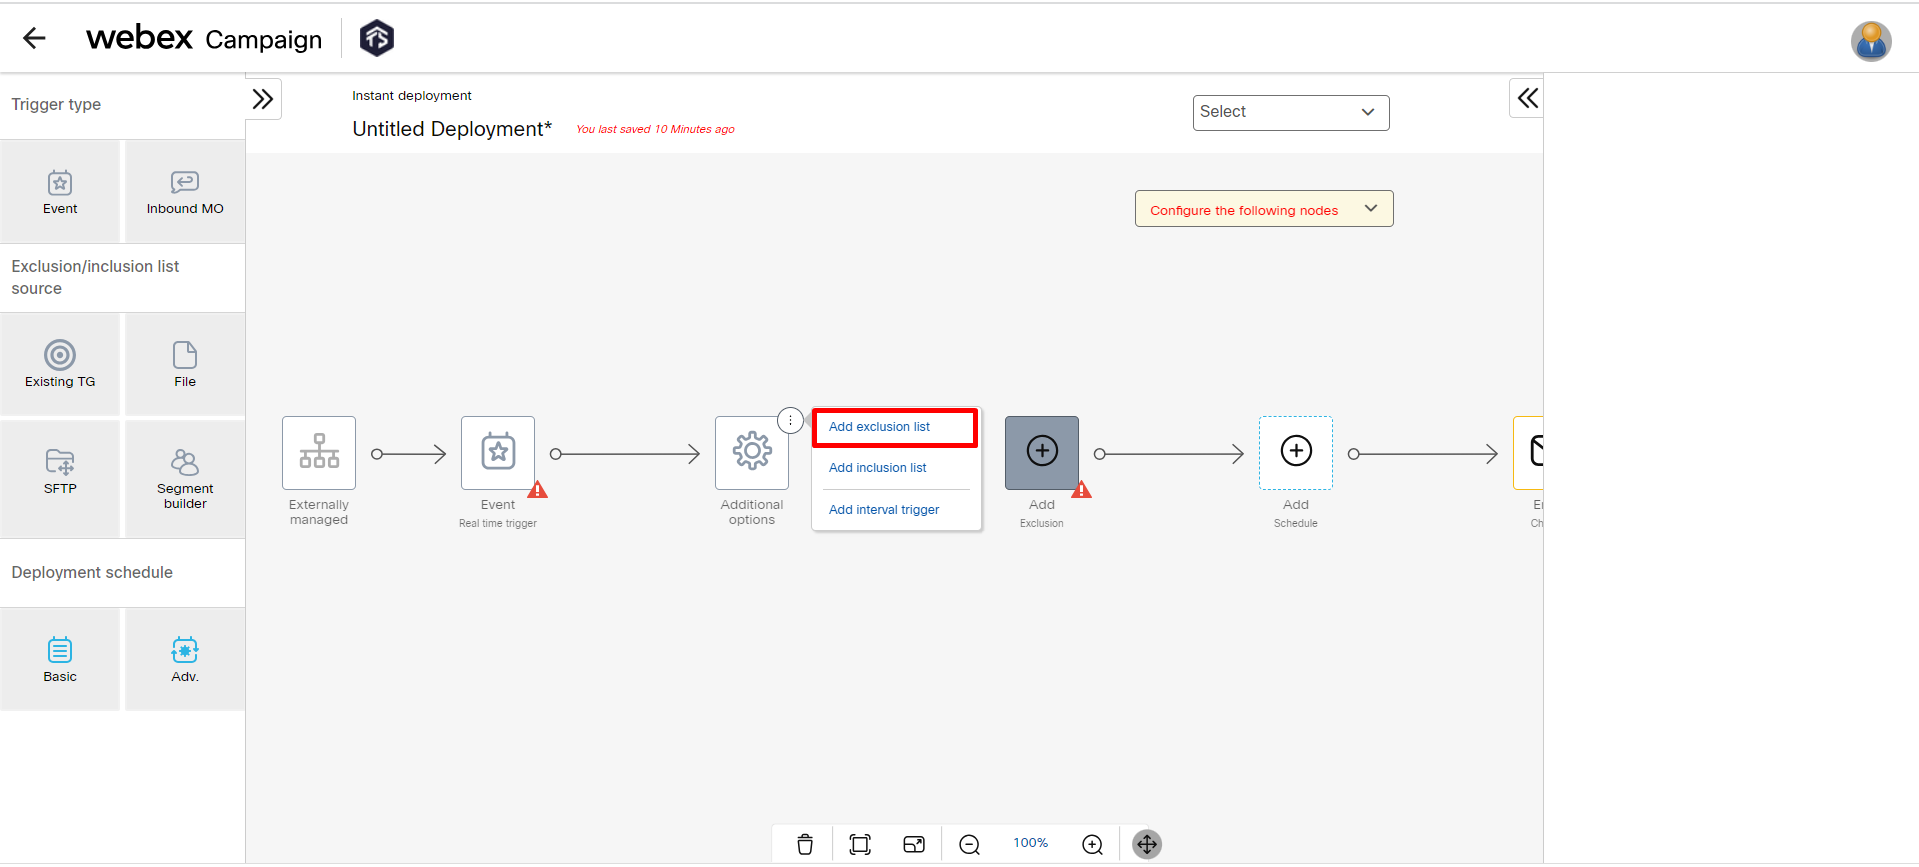
This node allows you to add exclusions. When a deployment is scheduled, the contacts in the exclusion node are excluded from the deployment. To add an exclusion node follow these steps:
- On the Additional options node, click on the ellipses icon,
- Click Add exclusion list . You can add multiple Exclusion nodes.
- Drag-drop the required exclusion list source onto the Exclusion node.
- Select the exclusion list source node and configure it from the right palette.
Add inclusion list
This node allows you to add 'inclusion lists' to an instant deployment.
An inclusion list will typically contain a number of 'message destinations', such as email addresses or mobile numbers (MSISDNs) of customers who are eligible to receive the message from this instant deployment.
When a MSISDN or email address is received as a parameter value via an event associated with this instant deployment, the system will first check within the attached 'inclusion lists' to see if that MSISDN or email address is present within those inclusion lists.
If it is found within the attached inclusion lists, then the inbound event parameters will be accepted and processed by the instant deployment.
If the MSISDN or email address is not found within the attached inclusion lists, then the incoming event parameters will not be processed by the instant deployment. In this case, those messages are reported as 'Abandoned' on the Webex Campaign Dashboard and Reports.
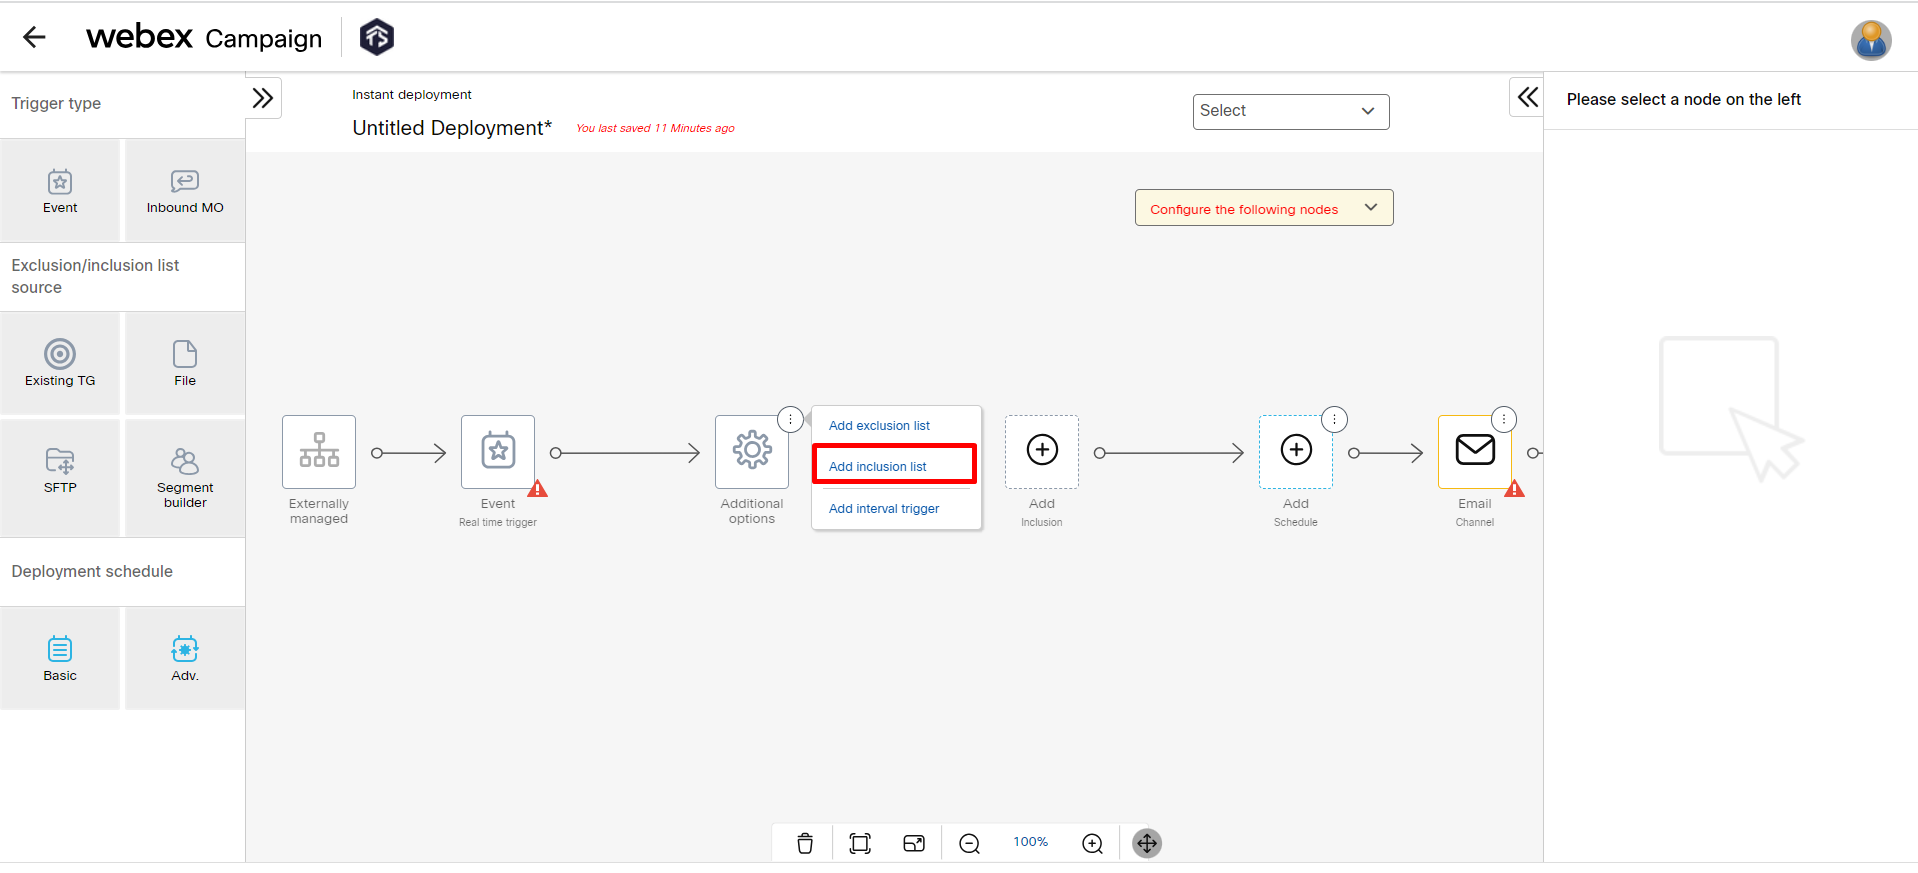
To add an 'Inclusion List' node, please follow these steps:
- On the Additional options node, click on the ellipses icon,
- Click Add inclusion list . You can add multiple Inclusion list nodes.
- Drag-drop the required inclusion list source onto the Inclusion node.
- Select the inclusion list source node and configure it from the right palette.
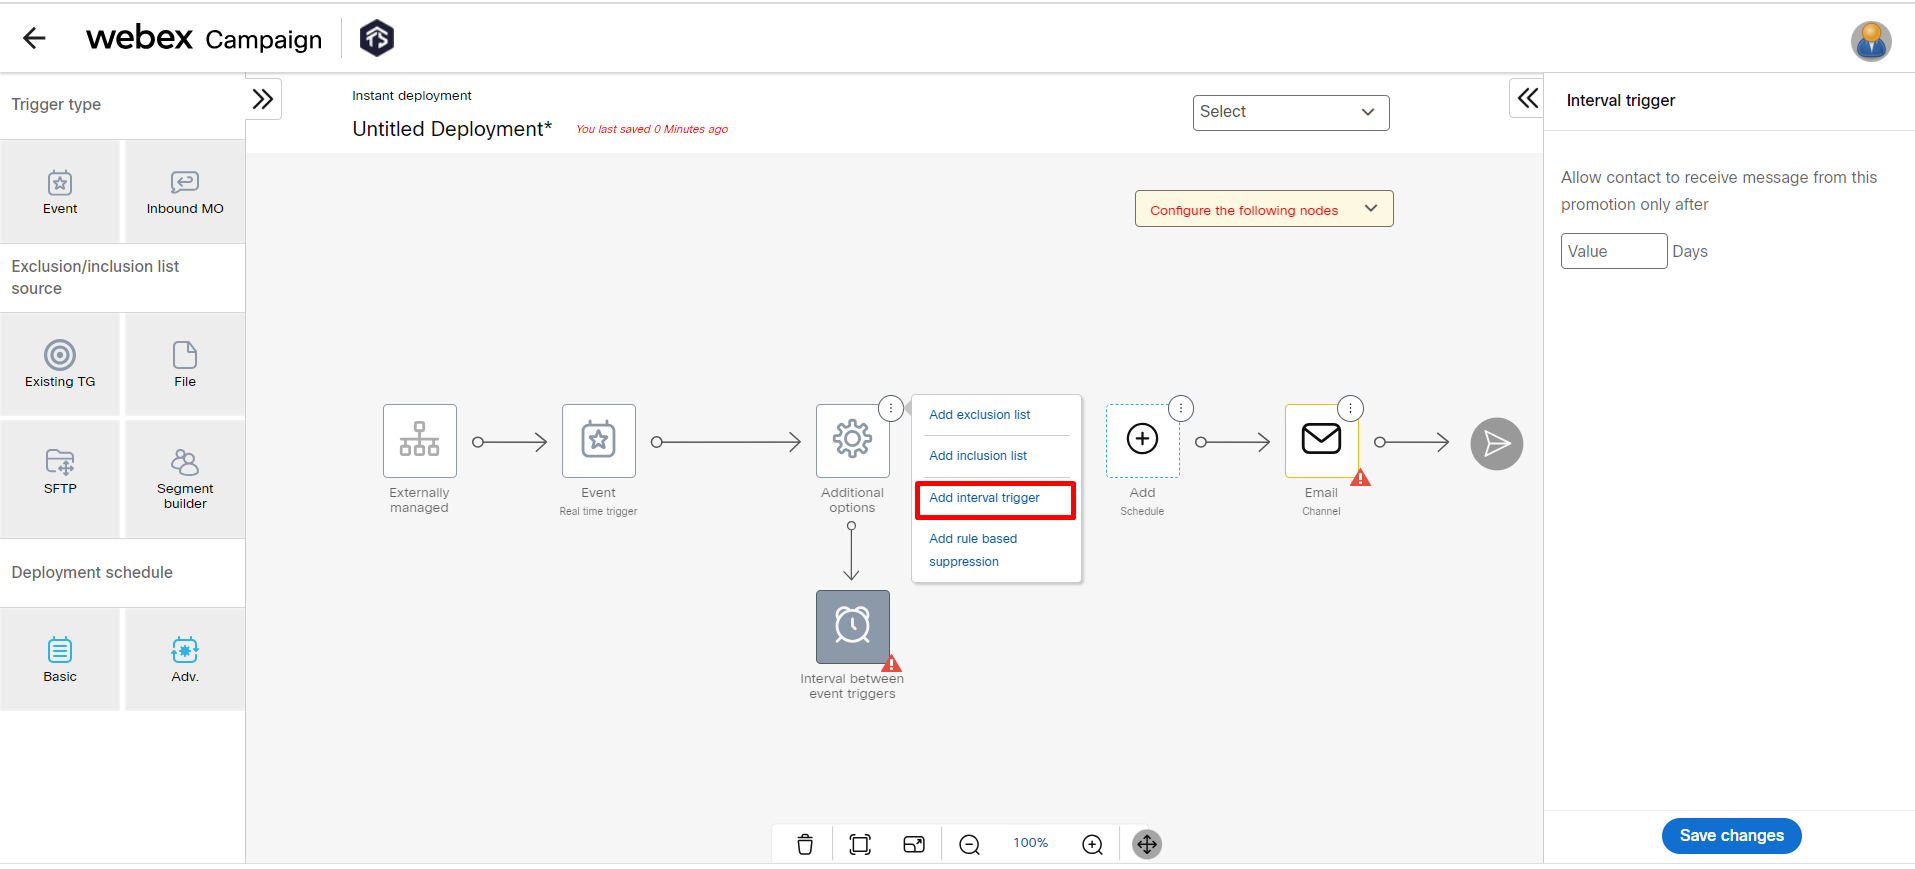
Add interval trigger
This node allows you to configure a contact to receive messages from this deployment only after the configured number of days.
Add Max events / MOs
This node allows you to configure the number of Event / MO requests that should be processed per day or whole schedule for all or a single contact.

The number of Events / MO requests that should be processed per day:
-
All Contacts: The options are:
- Unlimited: Select this option to apply no restriction on Event/MO requests.
- Custom: Select this option and enter a number in the appropriate box. After the specified Events/MOs are processed, the system will stop accepting MOs. You can configure a message that is sent as an SMS to contacts once the threshold has reached its limit.
-
One Contact: The options are:
- Unlimited: Select this option to apply no restriction on Event/MO requests.
- Custom: Select this option and enter a number in the appropriate box. After the specified MOs are processed, the system will stop accepting MOs. You can configure a message that is sent as an SMS to contact once the threshold has reached its limit.
- Only One: Select this option to set a contact to send not more than one Event/MO request. You can configure a message that is sent as an SMS to contact once the threshold has reached its limit.
The number of Events / MO requests that should be processed for the whole schedule:
-
All Contacts: The options are:
- Unlimited: Select this option to apply no restriction on Event/MO requests.
- Custom: Select this option and enter a number in the appropriate box. After the specified Events/MOs are processed, the system will stop accepting MOs. You can configure a message that is sent as an SMS to contacts once the threshold has reached its limit.
-
One Contact: The options are:
- Unlimited: Select this option to apply no restriction on Event/MO requests.
- Custom: Select this option and enter a number in the appropriate box. After the specified MOs are processed, the system will stop accepting MOs. You can configure a message that is sent as an SMS to contact once the threshold has reached its limit.
- Only One: Select this option to set a contact to send not more than one Event/MO request. You can configure a message that is sent as an SMS to contact once the threshold has reached its limit.

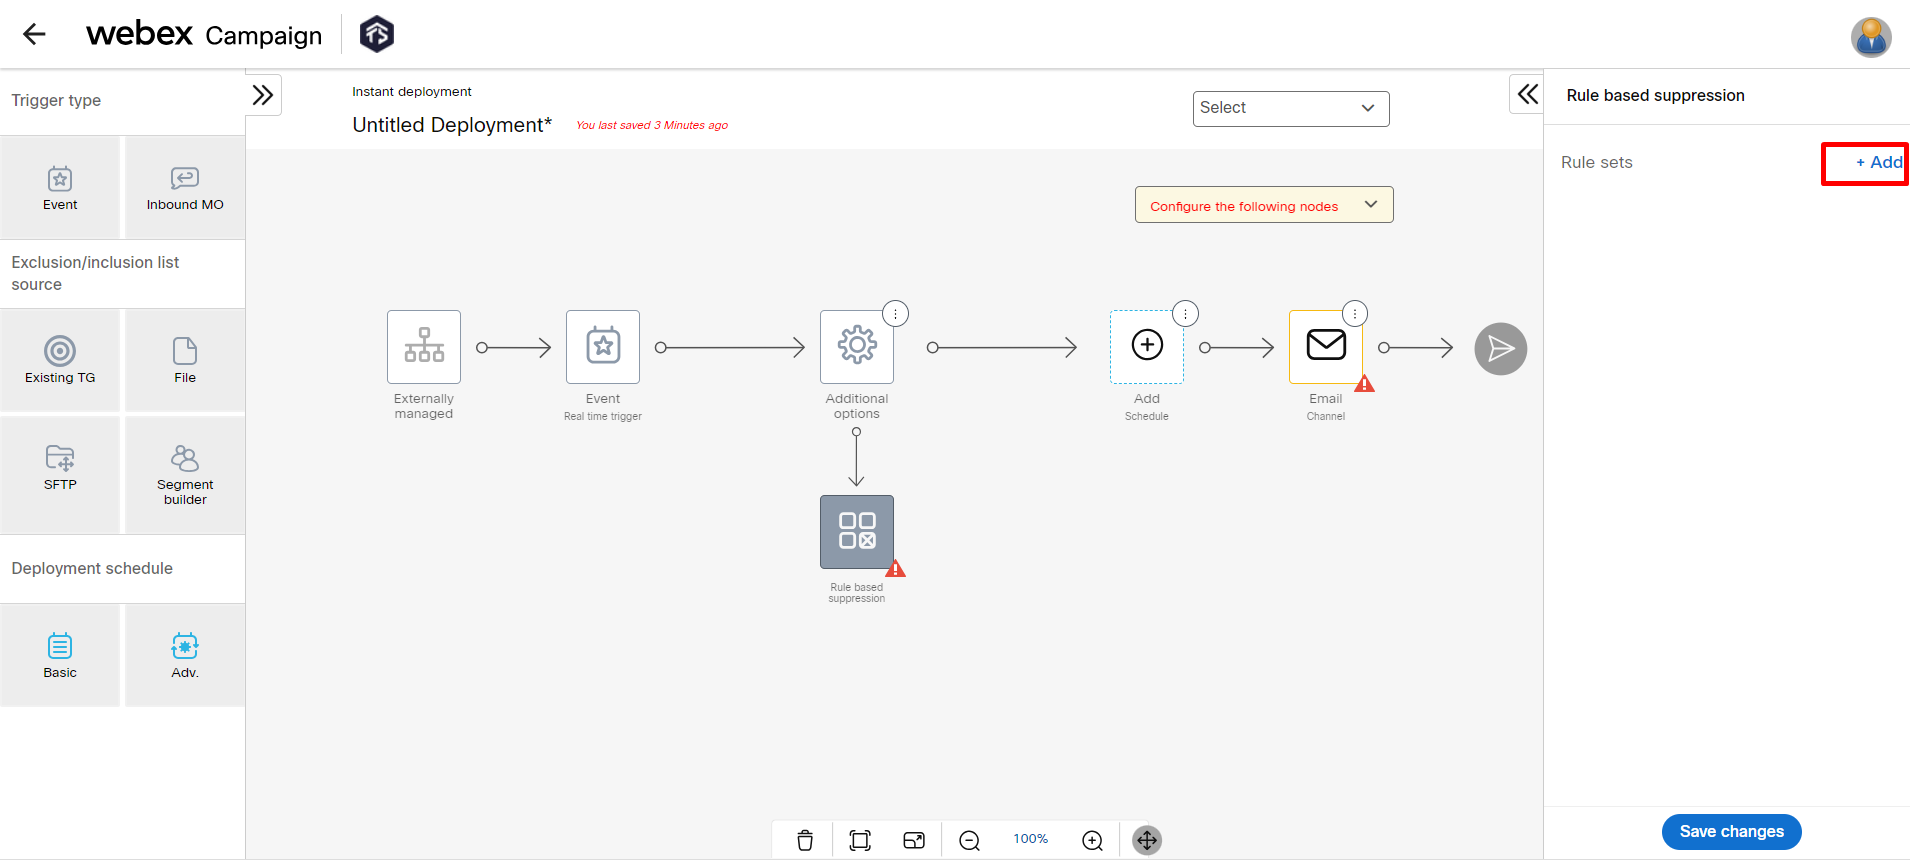
Add Rule Based Suppression
The Rule Based Suppression node is used to suppress contacts from the target group who meet defined conditions in the rules that are part of rulesets. A ruleset can contain one or more rules. To learn more about Rule Based Suppression, click here.
To add a Rule based suppression node, follow these steps:
- On the Additional options Node, click on the ellipses icon.
- Click Add rule based suppression.
- Select the Rule based suppression node. The right palette will display the applied rule sets.
- Proceed with the default rule sets set by the administrator or delete them and add a new rule set as required.
- To add a new rule set, click +Add and select the required rule sets.
Updated 8 months ago