Creating a Simple 1-Way RCS Deployment
In this tutorial, you’ll learn how to create and run an RCS deployment.
To create an RCS deployment, there are some prerequisites that need to be completed. If your username is assigned with an admin role, then you can complete all the steps to create a deployment. If your username is assigned to a role that has limited permissions, then you can create a deployment and send it for approval. Upon approval, the deployment can be activated.
Prerequisites for an RCS deployment:
- Access to Campaign management section
- A Campaign
- A target group
- An RCS flow created in Webex Connect
- A Purpose
- A P&L
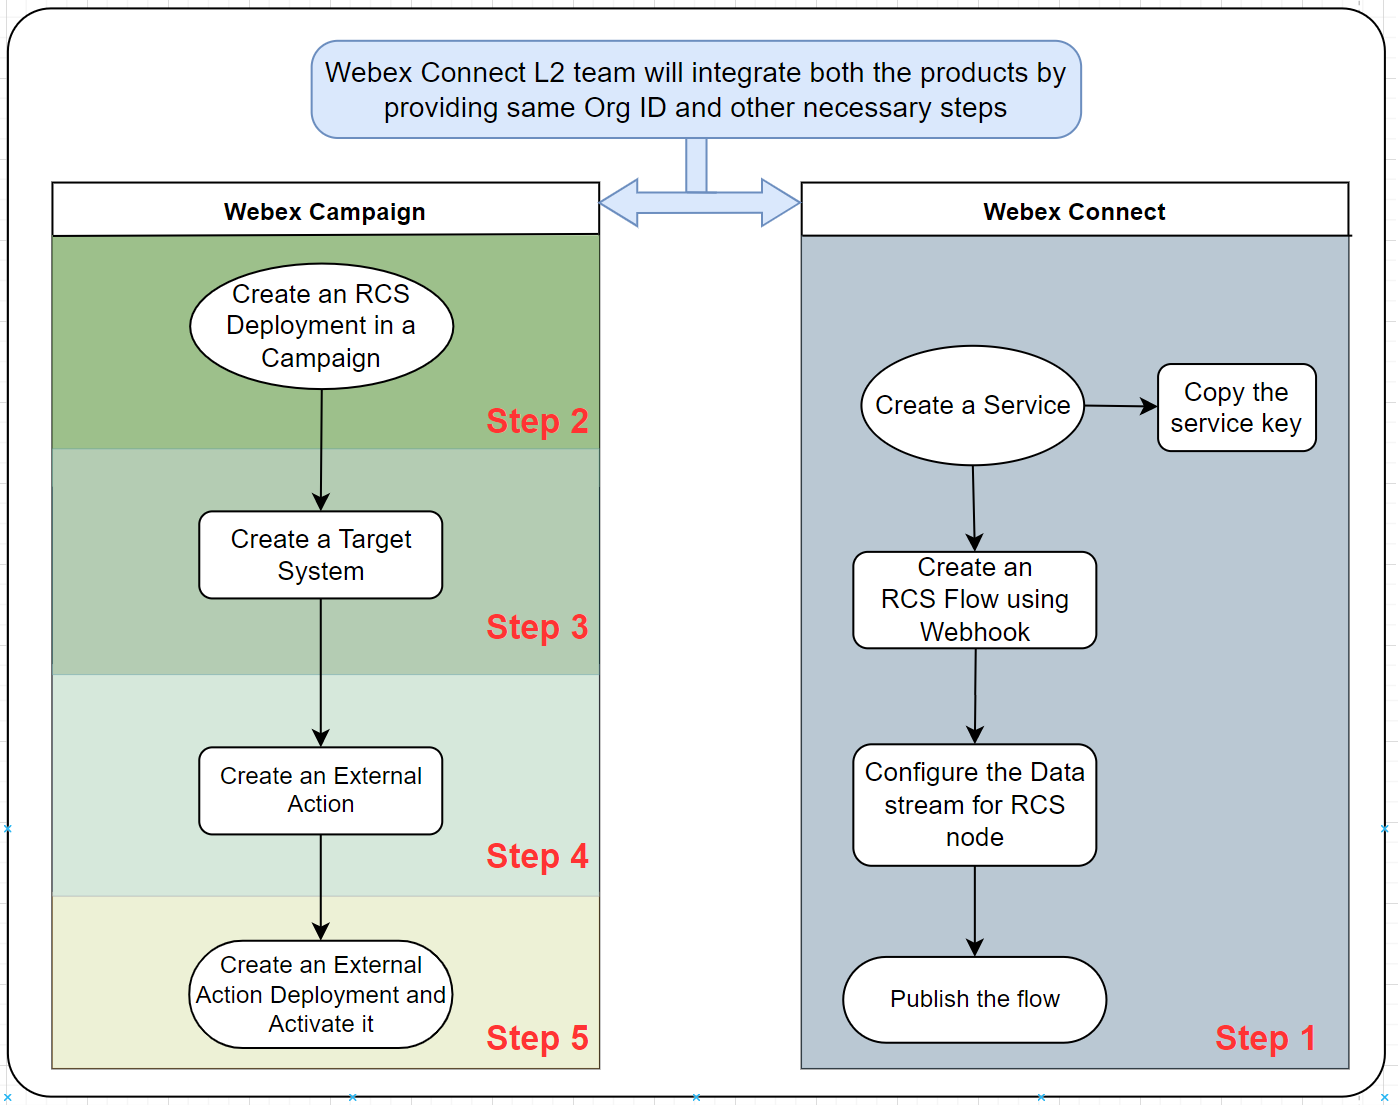
The key steps for creating an RCS application are:
- Step 1: Creating an RCS flow in Webex Connect
- Step 2: Create an RCS (shell) Deployment
- Step 3: Create a Target System
- Step 4: Create an External Action
- Step 5: Create External Action Channel Deployment
Following is the visual representation of Webex Connect and Webex Campaign integration and necessary steps to create a Simple 1-Way RCS deployment:

Updated 12 months ago