Products (Fulfilment IDs)
Due to the high availability of products or tariff plans, there would be a problem for the user to search for, select, and enter the product IDs manually. To overcome the problem, Webex Campaign holds Fulfilment IDs in a store. This allows the user to choose from the IDs which are required for a particular deployment from a catalog instead of maintaining them in a different system. These are then grouped together as needed by the user, e.g., Product ID, Offer ID or Reference ID, or similar.
The administrator can provide access to any user to add or remove Fulfilment IDs. Click on the info icon available for the respective Fulfilment Id to view additional details.

Add Fulfilment IDs
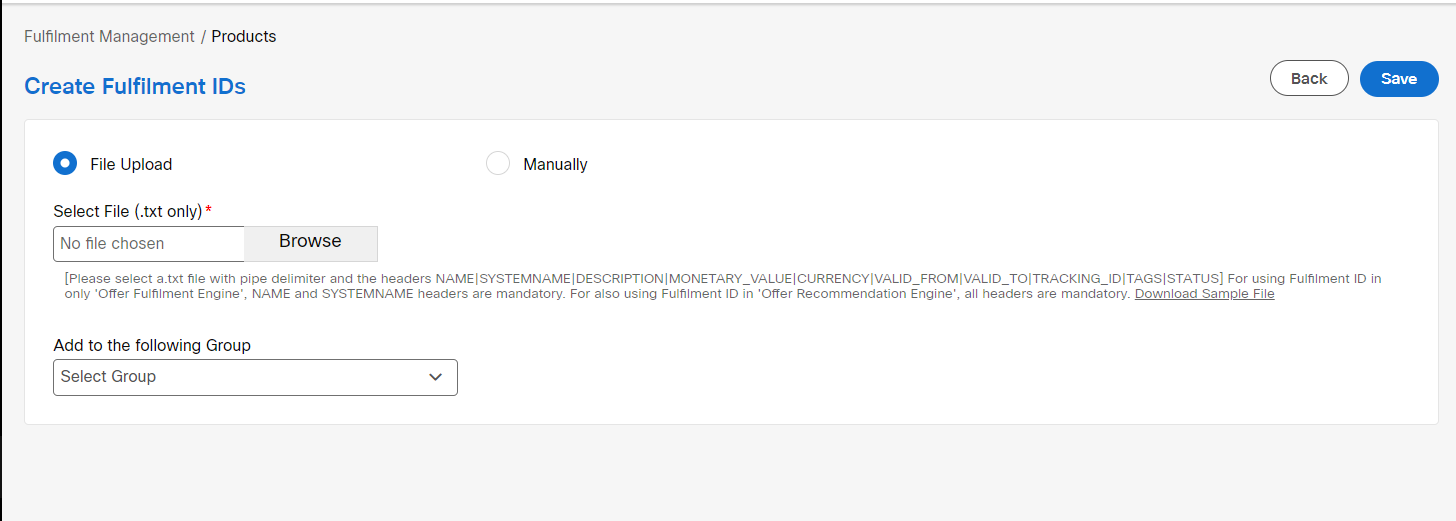
You can choose either 'File Upload' or 'Manually' to add a Fulfilment ID. If you choose 'File Upload’, the application provides an option to select a text file and add to a fulfilment group. While uploading the entries, the following needs to be considered.
- The data in the .txt file should be pipe (|) separated.
- Uploaded file needs to contain the headers NAME|SYSTEMNAME|DESCRIPTION|MONETARY_VALUE|CURRENCY|VALID_FROM|VALID_TO|TRACKING_ID|TAGS|STATUS
For using Fulfilment ID in only 'Offer Fulfilment Engine', NAME and SYSTEMNAME headers are mandatory. For using Fulfilment ID in 'Recommendation Engine', all headers are mandatory.
Follow these steps to add Fulfilment IDs:
- On the Fulfilment ID Management list screen, click +Add New. The Create Fulfilment IDs screen appears.
- Select the File Upload option to upload a .txt file.
- Click Browse and select the required text file. The file will be uploaded to the Add Fulfilment IDs.
- Select the Fulfilment Group to which the Fulfilment IDs are added to from the drop-down list.

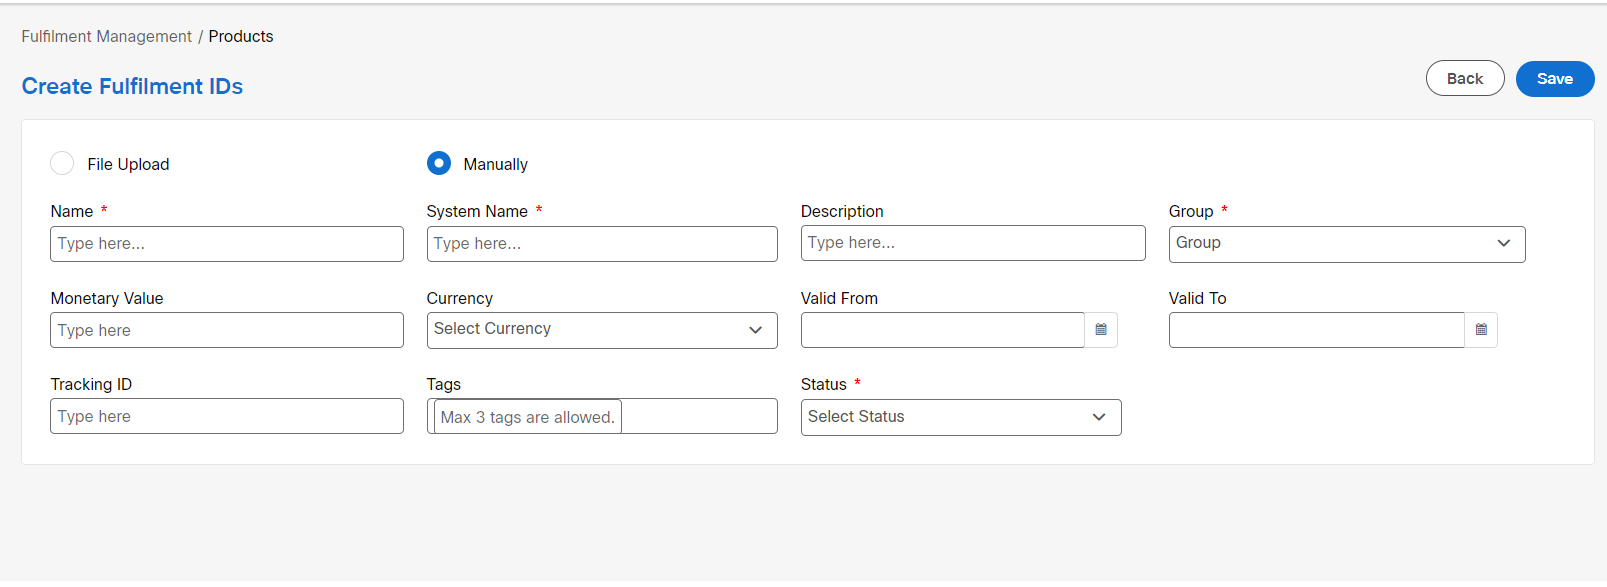
- To add Fulfilment IDs manually, select Manually option to configure the following details:
- Name: Enter the name of the Fulfilment ID.
- System Name: Enter the name of the System.
- Description: Enter a brief description for the Fulfilment ID.
- Group: Select the Fulfilment ID Group from the drop-down list.
- Monetary Value: Enter the monetary value.
- Currency: Select the currency from the drop-down for the monetary value entered.
- Valid From: Select a valid start date.
- Valid To: Select a valid end date.
- Tracking ID: Enter a tracking Id.
- Tags: Enter tags.
- Status: Select the status such as Active or In Active.

- Click Save.
Edit a Fulfilment ID
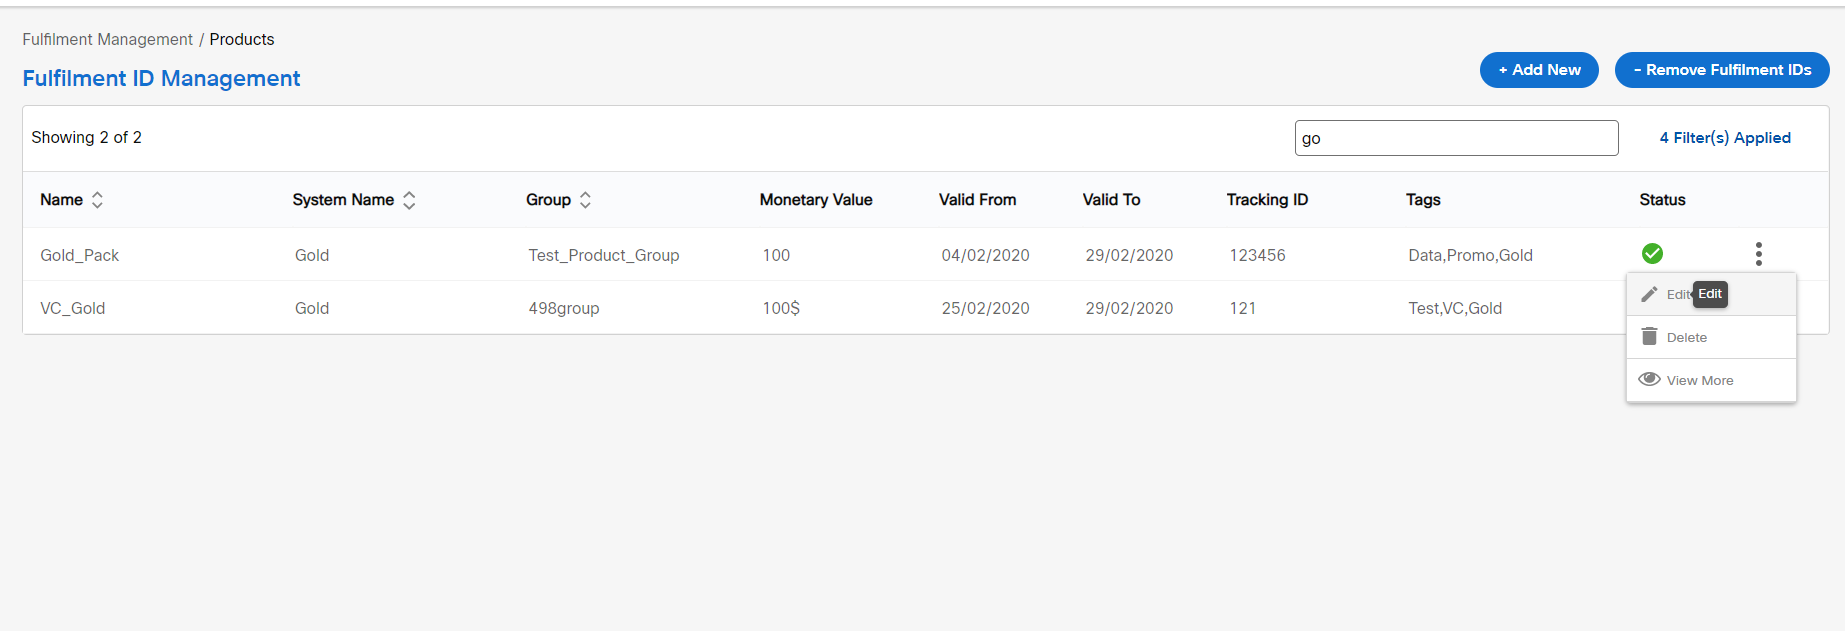
- On the Fulfilment ID Management list screen, click the ellipses icon of the respective fulfilment ID.
- Select View More to view the details such as when and by whom the details were added. Click Cancel to close the screen.

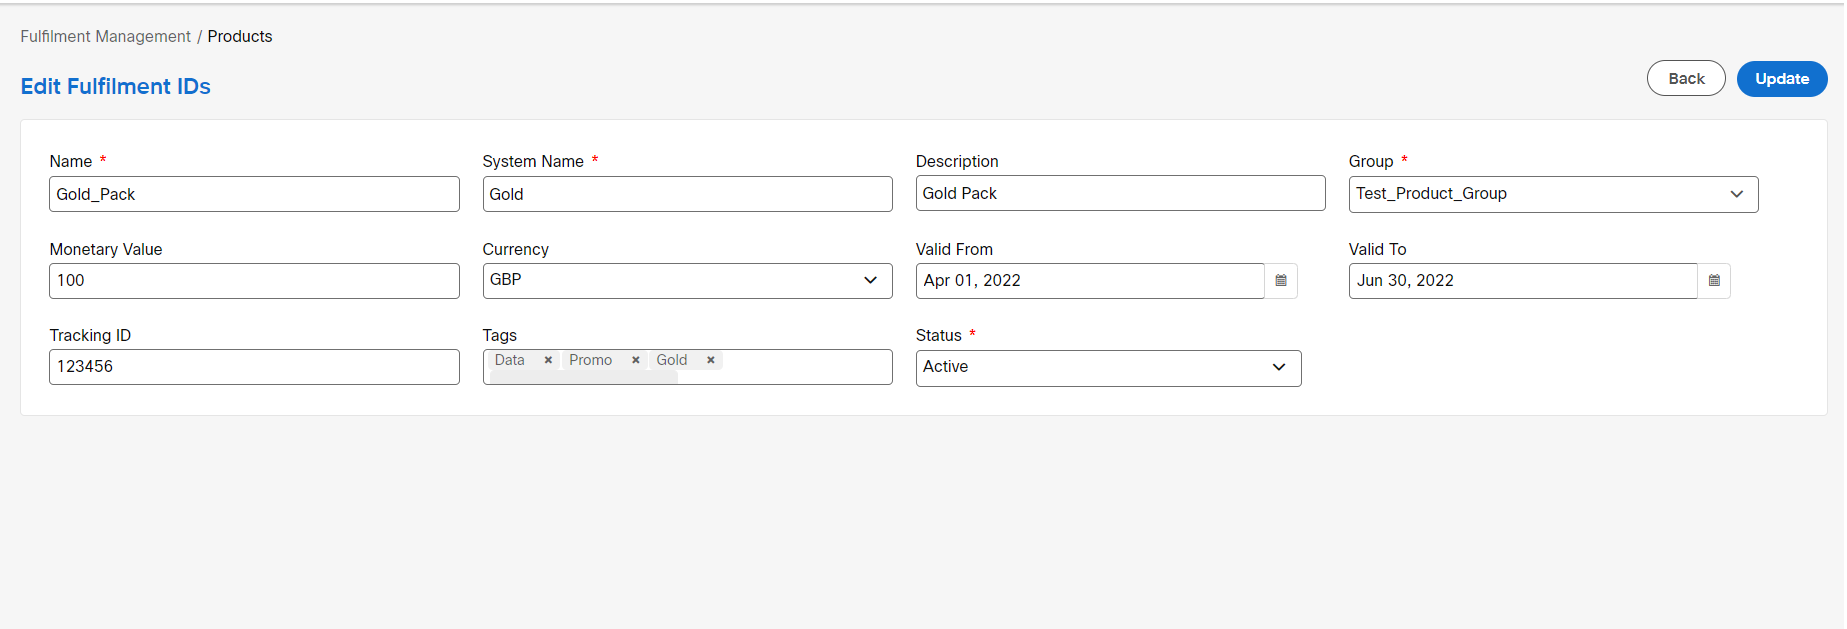
3 Select Edit . The Edit Fulfilment ID screen appears.

- Once the selected Fulfilment ID details are displayed, edit the required information.

- Click Update.
Delete Fulfilment ID
- On the Fulfilment ID Management list screen, click the ellipses icon of the respective fulfilment ID and select Delete .

- A confirmation message appears. Click Confirm to delete the Fulfilment ID.
Remove Fulfilment IDs
- On the Fulfilment ID Management list screen, click - Remove Fulfilment IDs.

- Click Browse and select the file that contains the headers and values to be removed.
- Select the group from which you want to remove the Fulfilment IDs.
- Click Remove.

Updated 12 months ago