Create a New Target Group from Contact policy allow list - Email channel
This is a tenant-specific feature; it is useful for those clients:
- who use both Webex Campaign and Webex Connect for their various marketing and non-marketing use cases and
- who use the optional module within Webex Connect called ‘Contact Policy’ to store and manage their customers’ opt-in and opt-out preferences for receiving communications via specific channels.
Pre-requisites for using this feature:
- You must have an active licensed tenant on Webex Connect.
- You must enable the usage of the optional ‘Contact Policy’ module within your Webex Connect tenant.
- You must create at least one ‘Consent Group’ with a Group Category of ‘Allow List’. This ‘Allow List’ will have the email addresses of your customers who have opted in to receive communications from you via the email channel.
- You may request the Webex CPaaS Tech Support team to associate your Webex Campaign tenant with the corresponding Webex Connect tenant.
- As this is a tenant-specific feature, you will need to request the Webex CPaaS Tech Support team to enable the ‘Contact Policy Integration’ feature on the Webex Campaign Admin Console.
Please refer to Contact Policy Groups for information on how a Contact policy allow list is created.
To create a New Target Group from Contact policy allow list for an email promotion deployment
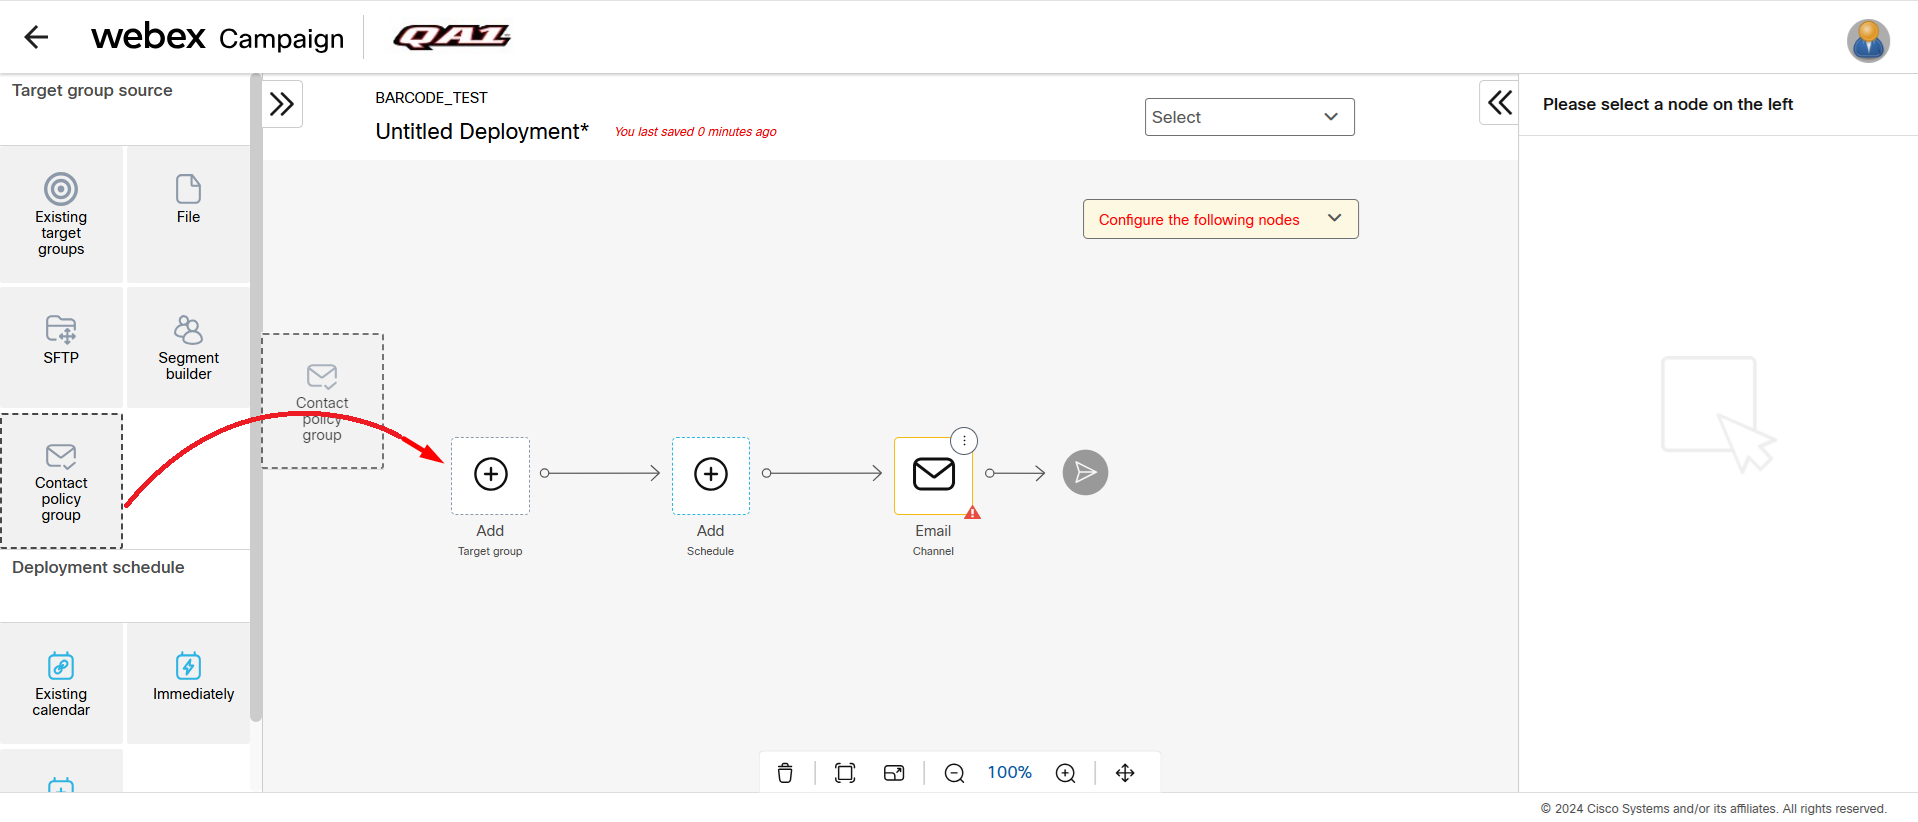
- When creating an email promotion deployment on the deployment canvas, drag and drop the Contact policy group node onto the Target Group placeholder.

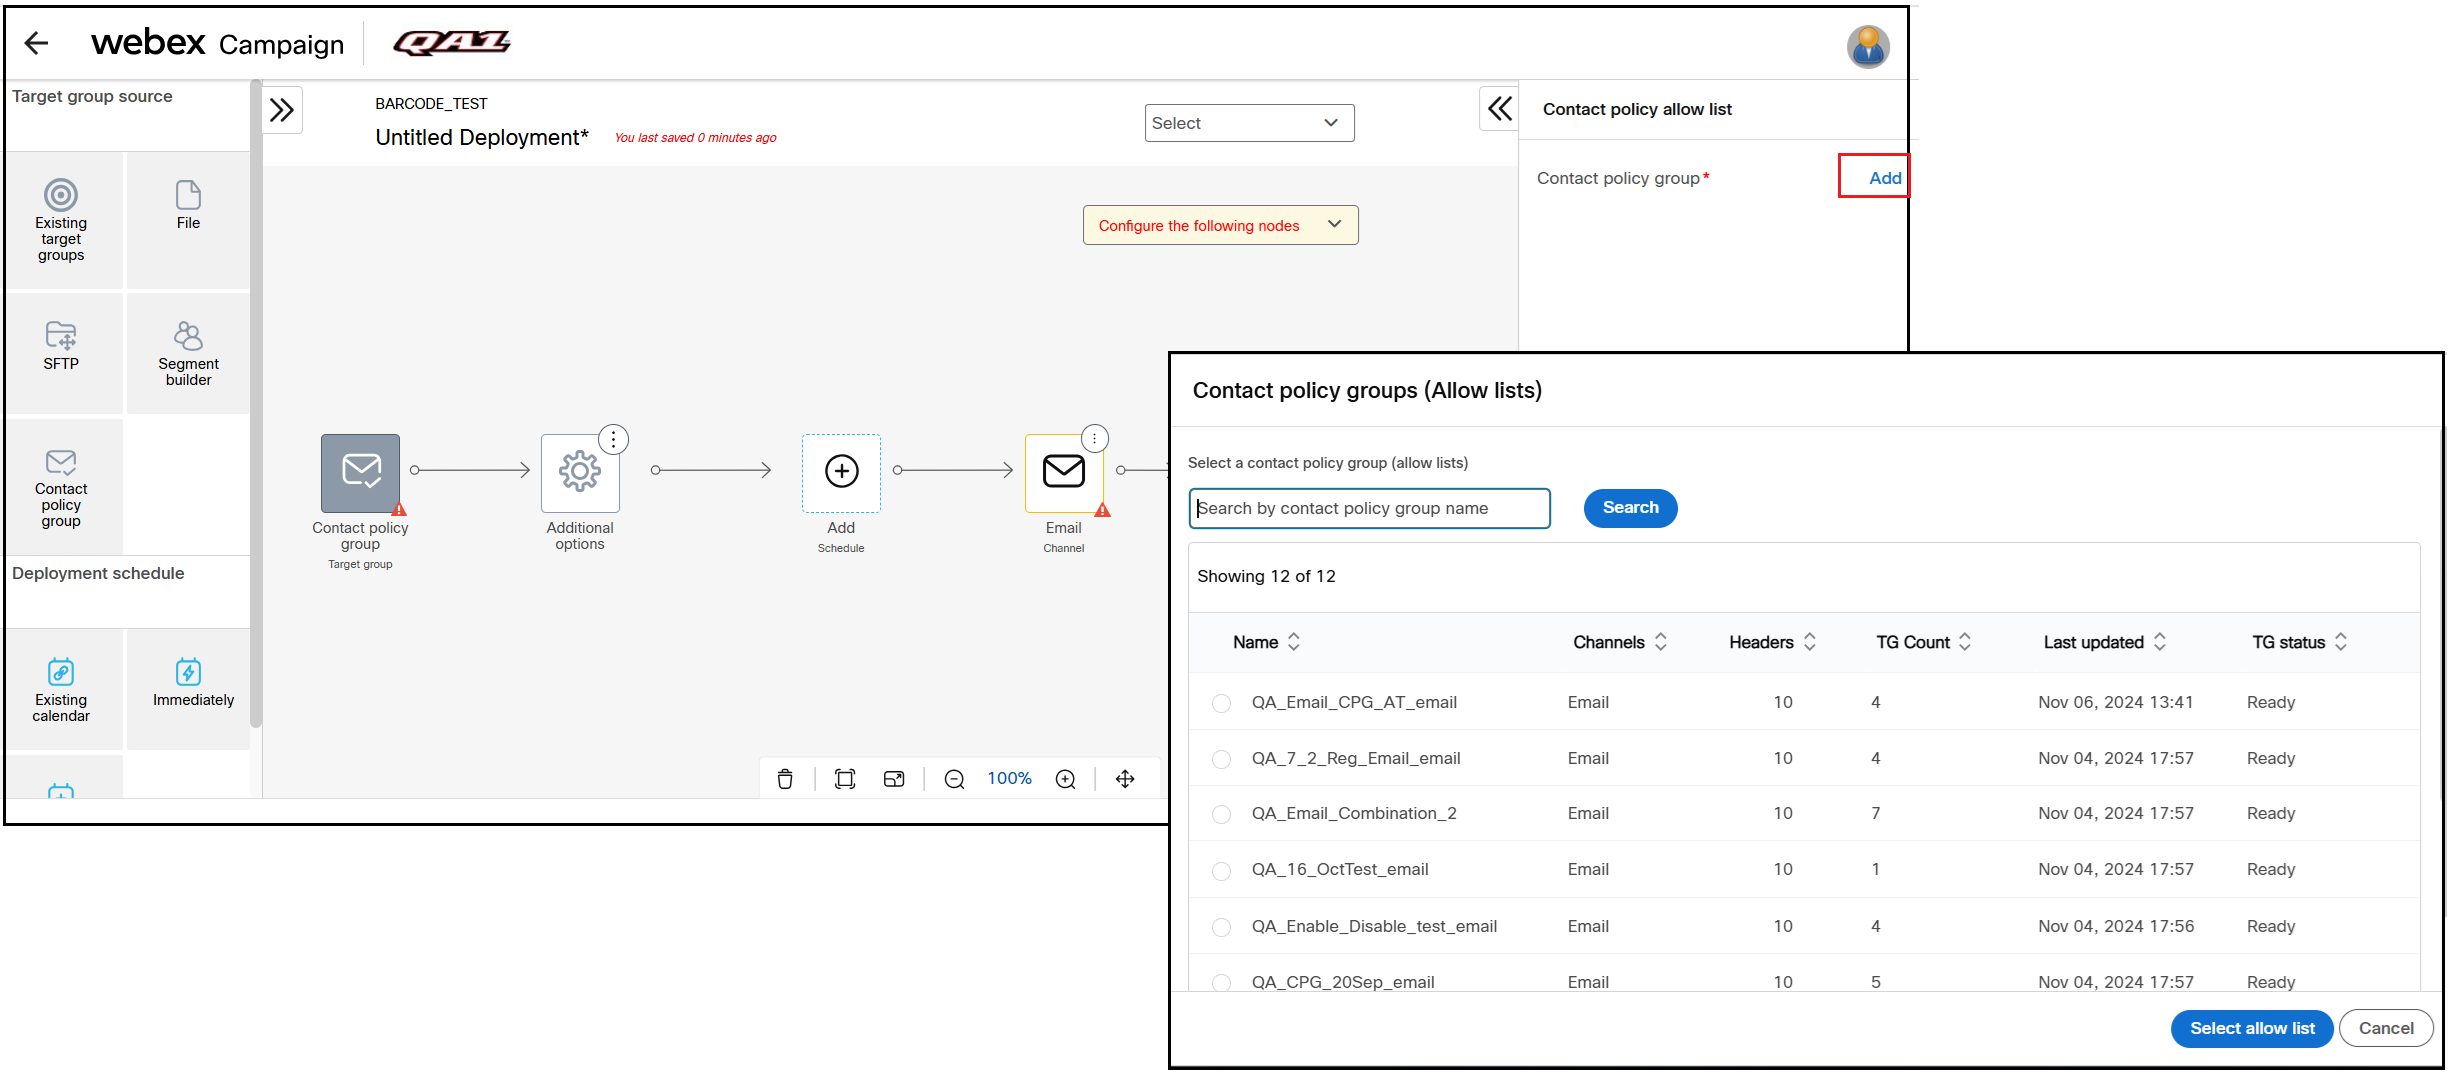
- Click the Add link on the right-side node properties panel to select one of the Contact policy groups (allow lists).

- After selecting the policy group, click Save Changes. Continue to configure the Schedule and Email content nodes, save the deployment, and activate it.
When you activate the above deployment, messages will be sent only to those email addresses which were present in the allow list (opted-in) as of ~5:15 am. Any new email addresses opted-in (and added to the ‘Allow list’) after 5:15 am, will not be part of this deployment’s target group today.
Any email addresses which have opted-out of the ‘Allow list’ after ~5:15 am, will still be part of this deployment’s initial target group. However, before every message is pushed to email gateway, Webex Campaign will check against the specified ‘Contact Policy Allow List’ that CONSENT value for each email address is still ‘true’ and the value of the ‘EXPIRES’ field is still in the future. Thus, Webex Campaign will automatically suppress the messages to those email addresses which have opted out since ~5:15 am.
Usage notes:
- You cannot use more than one ‘Contact Policy allow list’ as a Target group source within a deployment; nor can you mix this TG source with any other type of TG source.
- Webex Campaign will retrieve only ‘allow lists’ from your Webex Connect Contact Policy; i.e. You cannot use a ‘deny list’ as a Target group source.
- You can use ‘Contact policy allow lists’ only within ‘Simple Promotion’ deployments, i.e. 'Instant Deployments', ‘Follow-up Promotions’ and ‘A/B Promotion’ deployments are out of scope for this feature.
- If, due to some unforeseen reason, the specified ‘Contact Policy Allow List’ could not be retrieved into Webex Campaign in the early morning, then:
- For one-time (non-recurring) deployments which are using that ‘allow list’ as a Target group source, the status of those deployments will be changed to ‘Paused’. The deployment creator will receive the notification alert that the status of their deployment has been changed to ‘Paused’.
- For recurring deployments which are using that ‘allow list’ as a Target group source, the status of those deployments will be changed to ‘Pending’. This scenario is conceptually similar to a ‘file missing from SFTP’ scenario when the TG source for a recurring deployment is SFTP. The deployment creator will receive the usual email notification alert that the status of their deployment has been changed to ‘Pending’.
- If, due to some unforeseen reason, the specified ‘Contact Policy Allow List’ was only partially retrieved into Webex Campaign in the early morning, then, the deployments which are using that ‘allow list’ a Target group source, will run with the available (retrieved subset) of records.
Updated 10 months ago