

Exporting CAMP_OPTOUT_DATA daily to SFTP using Data Exchange
This is a tenant-specific feature. Please contact the operations team to enable this feature for you.
As you know, Webex Campaign already has a feature to store and maintain ‘Opt-out Lists’ data on your behalf. This existing feature can be accessed from the following menu: Administration > Tenant Management > Opt-out Management. Here you can create and maintain multiple ‘Opt-out Lists’ with each list being at ‘tenant-level’ or ‘channel-level’ or at a more granular level of ‘Opt-out category’. You can also download this opt-out list data to your PC by clicking on the count value under the ‘Opt-out Counts’ column. It may be a tedious process to download the out-out list for all channels and combine them on a daily basis.
To overcome this hard task, we have created an opt-out datastore ‘CAMP_OPTOUT_DATA’ that will be refreshed with the opt-out lists data from all of your opt-out lists every night at approximately 3 am system time.
Follow these steps to export your opt-out lists automatically to an SFTP location on a daily basis.
- Step 1: Create a Segment with CAMP_OPTOUT_DATA
- Step 2: Create a Schedule for the segment using the cron expression
- Step 3: Create Profile Manager File Client Setup
- Step 4: Verify the Profile Manager File Client Connectivity
- Step 5: Check Segment Execution Report and Copy the Result Path
- Step 6: Add a new Data Exchange to Export the OPTOUT Data
- Step 7: Verify the Status of the OPTOUT Data Transfer
Step 1: Create a Segment with CAMP_OPTOUT_DATA
Follow these steps to create a segment for exporting opt-out data on a daily basis:
-
Navigate to Profiles > Segment Builder screen and click Add new segment.
-
Select New and click Proceed.

- Enter a name for the segment and description.

- From the ‘Data sources’ dropdown, uncheck the Profile and Campaign data options and check only the Datastore option; then in the search box, type opt-out. Then select the CAMP_OPTOUT_DATA’datastore. Click Next.

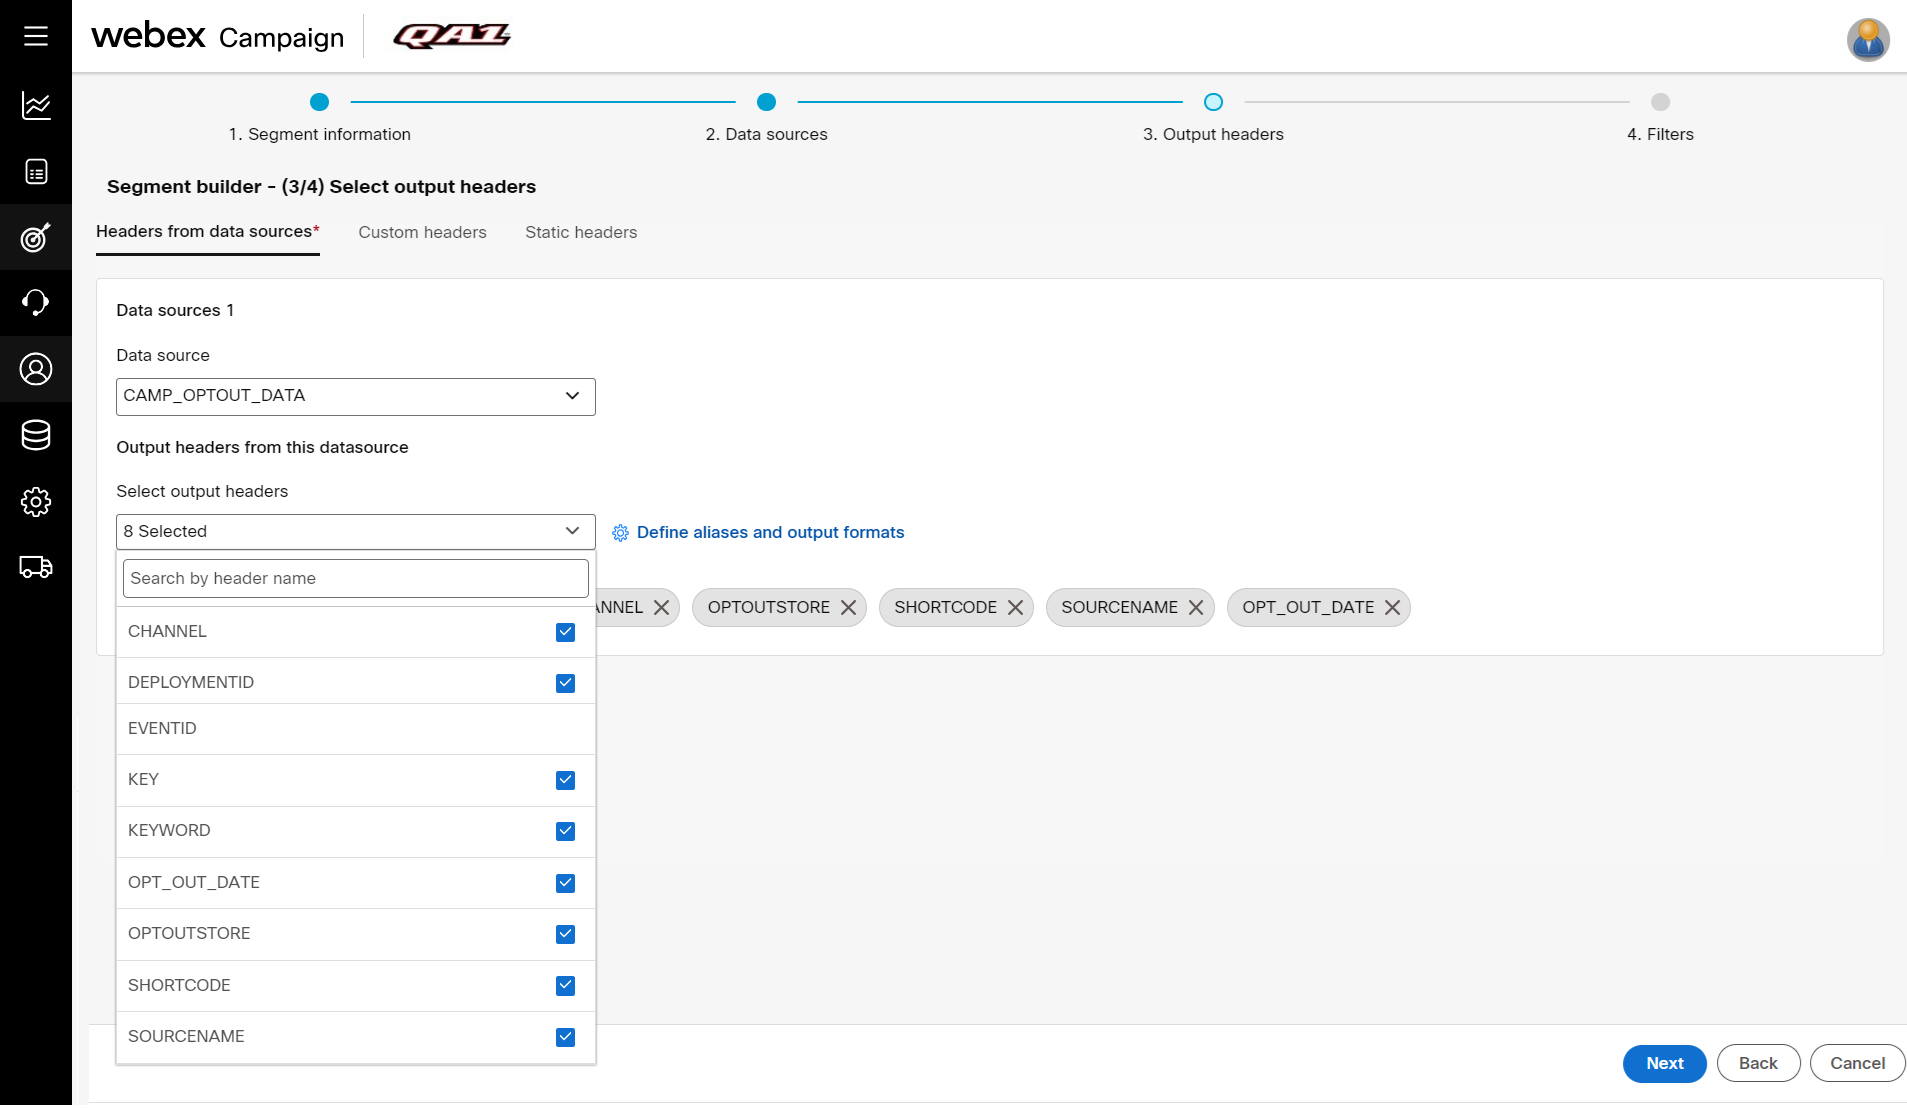
- On Segment builder step #3, select the following 6 output headers as shown in the screenshot below:
| Header | Description |
|---|---|
| CHANNEL | Enter the channel number that is used during the query to extract channel-specific data: > 0= SMS > 1= MMS > 7= Email |
| DEPLOYMENTID | The data for this header is only available when clicked on an unsubscribe link within an email. |
| KEY | Enter EMAIL or MSISDN to map the Key header. This is mandatory. |
| OPT_OUT_DATE | The data for this header will display the date and time when the opt-out record was added to the list. |
| OPTOUTSTORE | The data for this header will display the name of the opt-out list as specified on the Opt-out Management screen. |
| SOURCENAME | The data for this header will display how the opt-out was added to this list. The options are: AddedViaUI: This value will be shown if the opt-out is added through the Webex Campaign UI. OptOutAPI: This value will be shown when the opt-out is added through the API. ActionHandler: This value will be shown when the opt-out is added through an Event. Migration: This value will be shown when the opt-out data is migrated from a legacy opt-out list by the Webex Campaign support team. |
Apart from these 6 attributes, other attributes present in the datastore are not yet being populated. This work is in progress. We will also be adding more attributes to this datastore in the future.
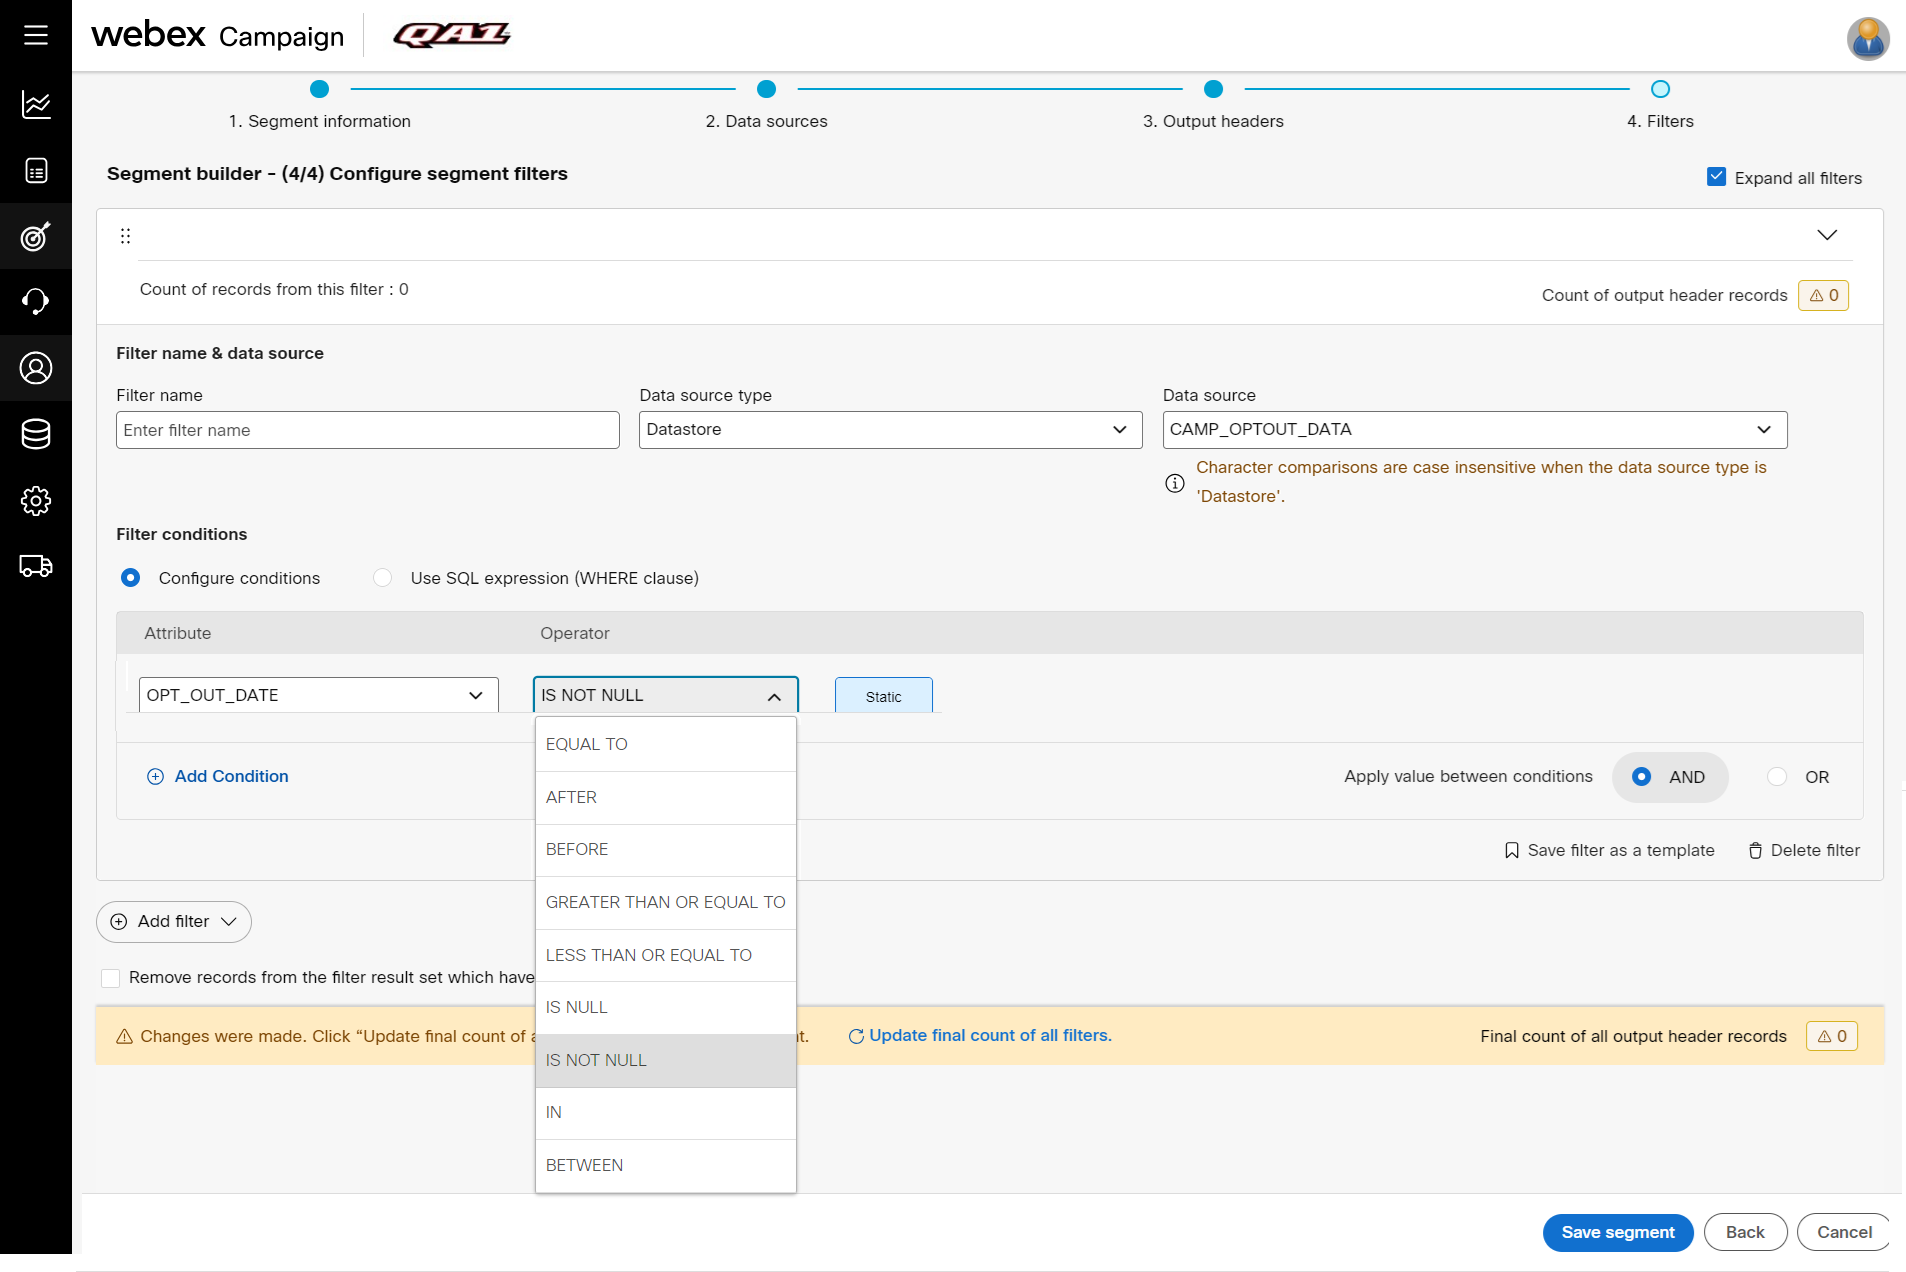
- On Segment builder step #4, use the following filter condition if you want to export all of your opt-out records every day: OPT_OUT_DATE IS NOT NULL.
If you want to export only a subset of opt-out records that were added after a specific date, then you can use other logical operators such as AFTER and then select the date filter.
- Click Save and exit.
You can also identify whether an opt-out record was added by an API user or a UI user. You can apply filter on 'SOURCENAME' column with the appropriate value as follows:
- For UI users, the value is of the format: ‘UI<display_name>’.
- For API users, the value is a hardcoded string: 'API_user'.
Step 2: Create a Schedule for the segment using the cron expression
In this step, you have to create a daily schedule using the cron expression. It will be executed automatically as configured.
The opt-out data is refreshed every night at approximately 3 am system time. Hence we recommend you schedule the segment after 3 am.
Follow these steps to configure the schedule:
- On the Segment list screen, click on the ellipses icon of the required segment. In the previous step we created the segment as DAILY_OPTOUT, hence let us configure a schedule for that segment.

- On the schedule screen, configure the values as shown below. This will execute the segment every day at 4 am.

- Click Save.
Please refer to the Configuring cron expression section if you want to execute the segment weekly or monthly.
Step 3: Create Profile Manager File Client Set up
This step is needed to configure SFTP connection details that are used to upload data to the client side. The connection details once stored can be accessed at any time.
- Navigate to Tenant management > Profile manager file clients set up and click +Add new file client.

- On the Add file clientscreen, enter details for the following fields:
- File client type: Select the protocol SFTP from the drop-down.
- File client name: Enter a name for the client. For example, DAILY_OPTOUT.
- Host: Enter the host IP address.
- Host OS: Select the OS from the drop-down list box.
- Port number: Enter the port number.
- Authentication type: Select the authentication from the drop-down list box. The options are Private key and Password.
- Username: Enter the user name to connect to the SFTP.
- Private key file: This field is displayed only when the Authentication type is selected as Private key. Click Choose file to upload the private key.
- Pass phrase: Enter the pass phrase to authenticate the private key.
- Password: This field is displayed only when the Authentication type is selected as Password. Enter the password to authenticate the user.
- Active: Select the option to make the connection active.
- Transfer type: Select the transfer type. You can configure the SFTP connection to Upload from webex campaign.

- Click Save.
Step 4: Verify the Profile Manager File Client Connectivity
This step is needed to test whether the SFTP connection is successful. If you get any error make sure you provide all permission on the destination folder.
Make sure you have Read/Write permission on the destination Home folder. Otherwise, you will see an error message, although you create the connection with valid details.
- On the Profile manager file clients set up, click on the ellipses icon of the newly added connection and click Test Connectivity.

- You will notice the connection is successful. If you get any error ensure you provide full permission on the home folder.

Step 5: Check Segment Execution Report and Copy the Result Path
In this step copy the path where the report is stored. This path has to be configured in the Data exchange. The OPTOUT data file will be picked up from this location and sent to the client's SFTP path.
- Navigate to Administration > Monitoring > Segment execution report.

- If you do not see the segment that you created, click the 2 Filters applied link and select the segment from the drop-down. Click Apply.

- By default the Result path is hidden from the grid. Click the headers icon and select Result path.

- Copy the Result path to a notepad as this path and the file name will be used in the Data exchange screen (Step 6).

Step 6: Add a new Data Exchange to Export the OPTOUT Data
- Navigate to Data Management > Data Ingestion > Data exchange and click Add new data exchange.

- Enter details for the following fields.
-
Data exchange name: (Mandatory) Enter a name for the File client.
-
Protocol: (Mandatory) Select the SFTP protocol from the drop-down menu.
-
Active: Enable the toggle to make the SFTP client active.
-
Transfer type: (Mandatory) Select the type of transfer as Upload from webex campaign . We have to select this option as we are uploading the data to some other location.
-
Profile manager file client: (Mandatory) Select the file client you already created from the drop-down menu. For example, DAILY_OPTOUT.
-
Source path in SFTP / S3: (Mandatory) If you are uploading, enter the path from where the files should be uploaded. In Step 6, you have copied the Result path. Copy and paste the Result path excluding the file name.
-
Source file name pattern in webex campaign: (Mandatory) Enter the file name that you copied from Result path in Step 6. You can add .csv to upload all files to the SFTP location. For example, DAILY_OPTOUT__.csv will upload all files .CSV files that start with **DAILY_OPTOUT**.
-
Destination path in SFTP / S3 : (Mandatory) Enter the SFTP path where you want to upload the opt-out file. For our convenience, you can configure this path such that every day a new folder will be created with the current date and then the opt-out file will be uploaded into it.
For example, if you configure the path as /home/DAILY_OPTOUT/&MM&DD&YYYY&, will create a new folder with the current date under DAILY_OPTOUT folder. It may help you verify the previous day's opt-out files also. -
Schedule start date: (Mandatory) Select the start date.
-
Schedule end date: (Mandatory) Select the end date.
-
Frequency of data transfer (seconds): Enter the interval to execute the particular job for every configured number of seconds. The minimum value you can set is 60 seconds. You can enter as 300 seconds.

Step 7: Verify the Status of the OPTOUT Data Transfer
On the Data exchange list screen, click on the View report of the required data exchange to verify the status of the opt-out data transfer.

Updated almost 2 years ago