Creating Reports using the Reports Wizard
It is possible to create aggregated summary reports using the Report wizard feature. It is not yet possible to create granular transaction reports.
The Reports wizard allows you to create your own useful report from data stored in the database and schedule the reports to be generated at periodic intervals and receive them through SFTP or to the configured Email. The reports can be generated in Excel or CSV formats.
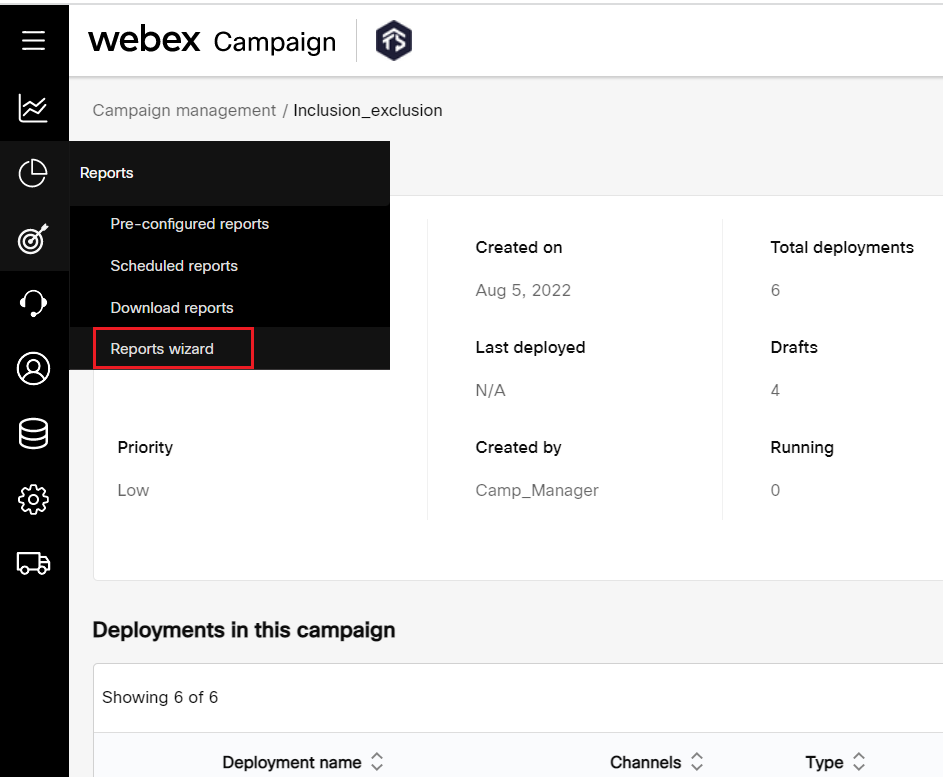
The report creation is a two-step process:
Step1: Designing a report (drag and drop the database columns on the canvas).
Step2: Scheduling the report.
Designing a Report
To design a report, follow these steps:
- Click on the Reports wizard tab, The screen will display a list of previously configured reports.

- Click Create new. The Create your own report screen appears.
- Enter a name for the report and set filters to specify Date range, Channel, Campaign Name, Deployment Name, and so on.
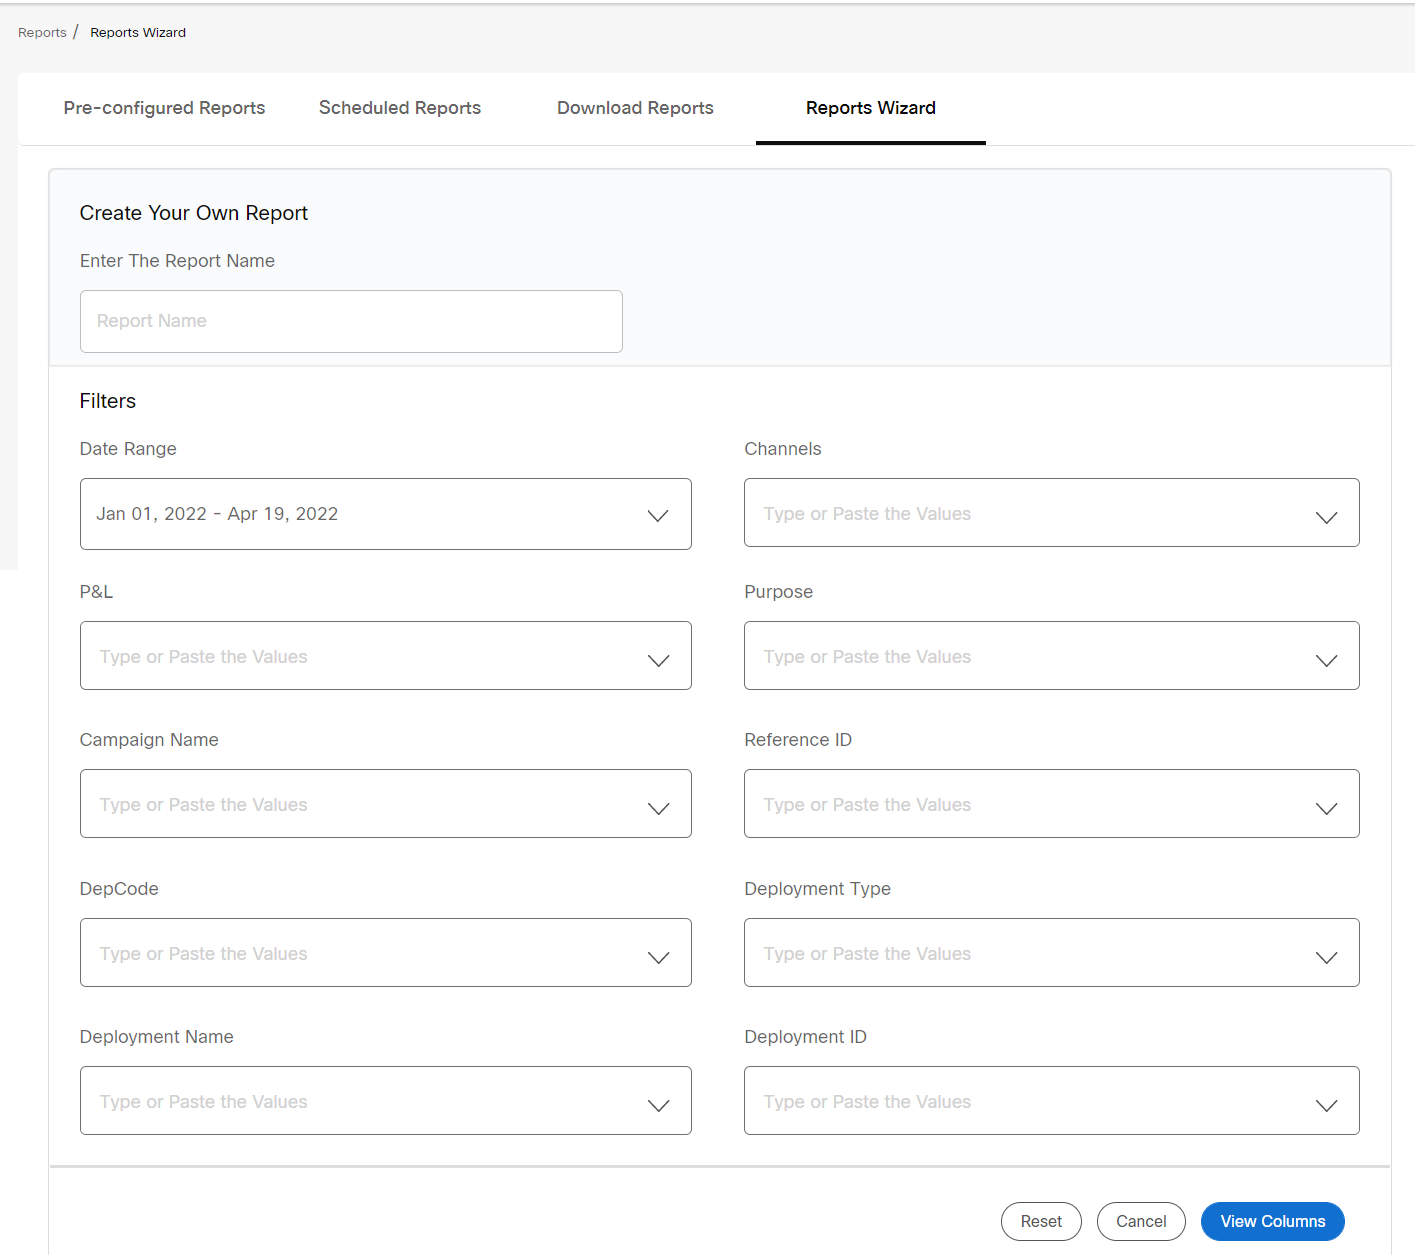
- Click View columns. The screen will display a list of columns from the database to design a report. Drag the required columns from the left side and drop them on the canvas on the right side.
You must select the absolute #column for the corresponding %column. You cannot only select % columns without their corresponding # counterparts.
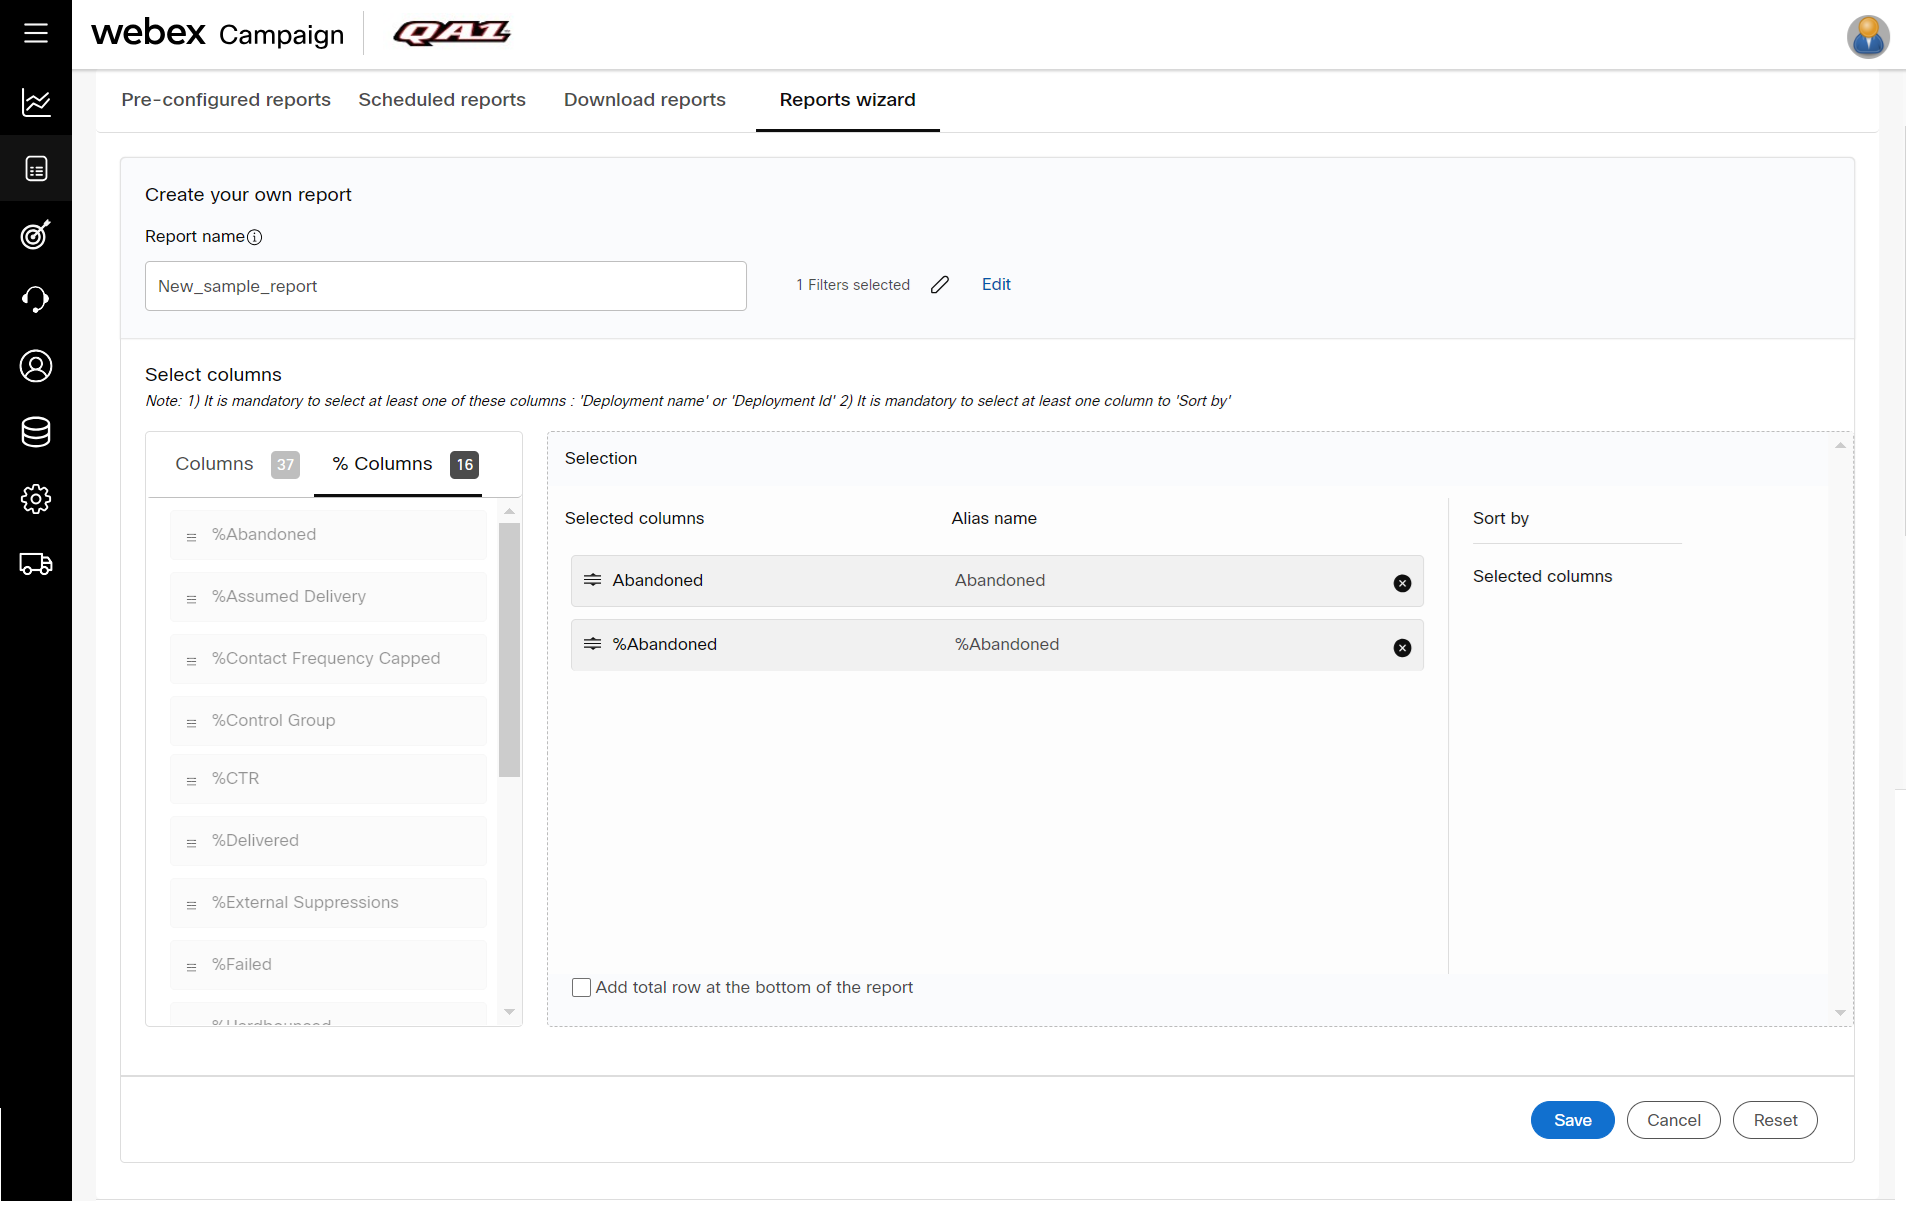
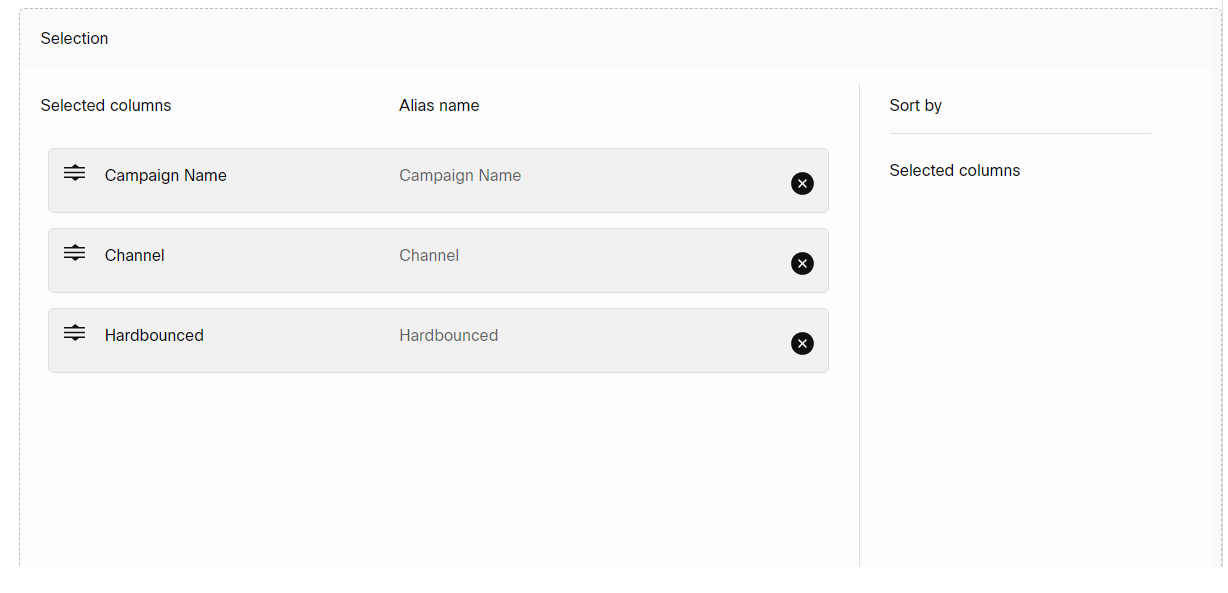
- (Optional) You can change the column name in your reports. To do so, after dropping a column on the right side, click on the Alias Name and enter a new name.
-
To sort the report data based on a column, drag and drop the required column from the left side onto the Sort By area.
-
To add a total row for the data, select the checkbox "Add a total row at the bottom of the report".
-
Click Save. The report is now displayed under the List of reports.
-
To receive the report, click on the respective vertical ellipses icon of the report and create a schedule..
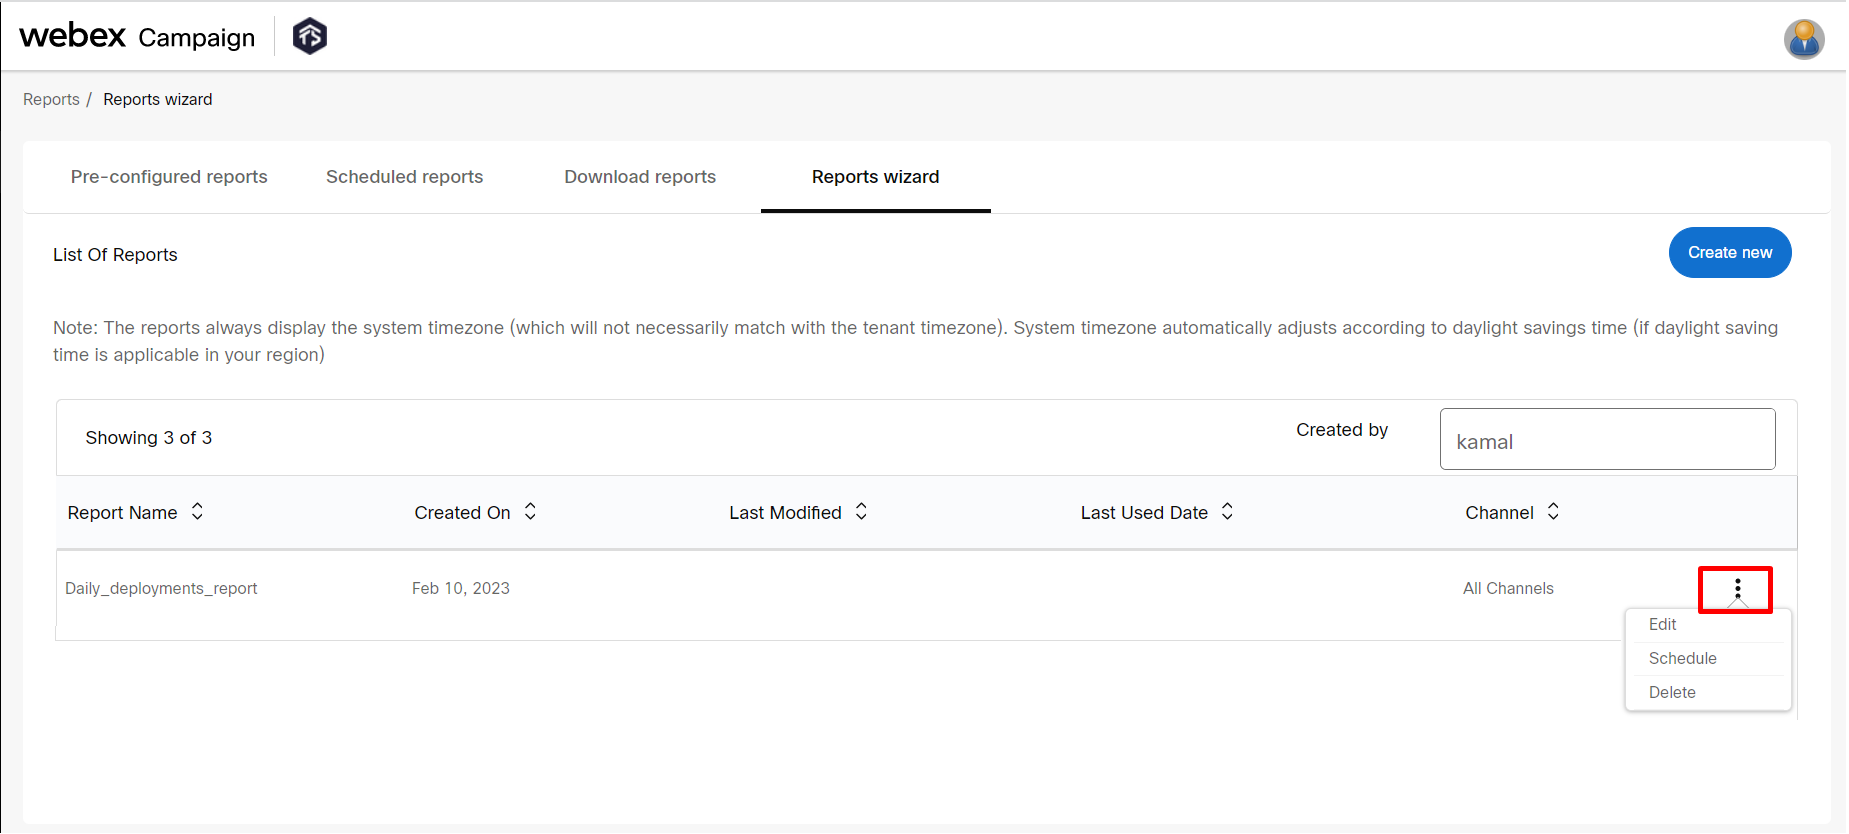
-
(Optional) To edit a report, click on Edit.
-
(Optional) To delete a report, click on Delete.
Scheduling a Report
-
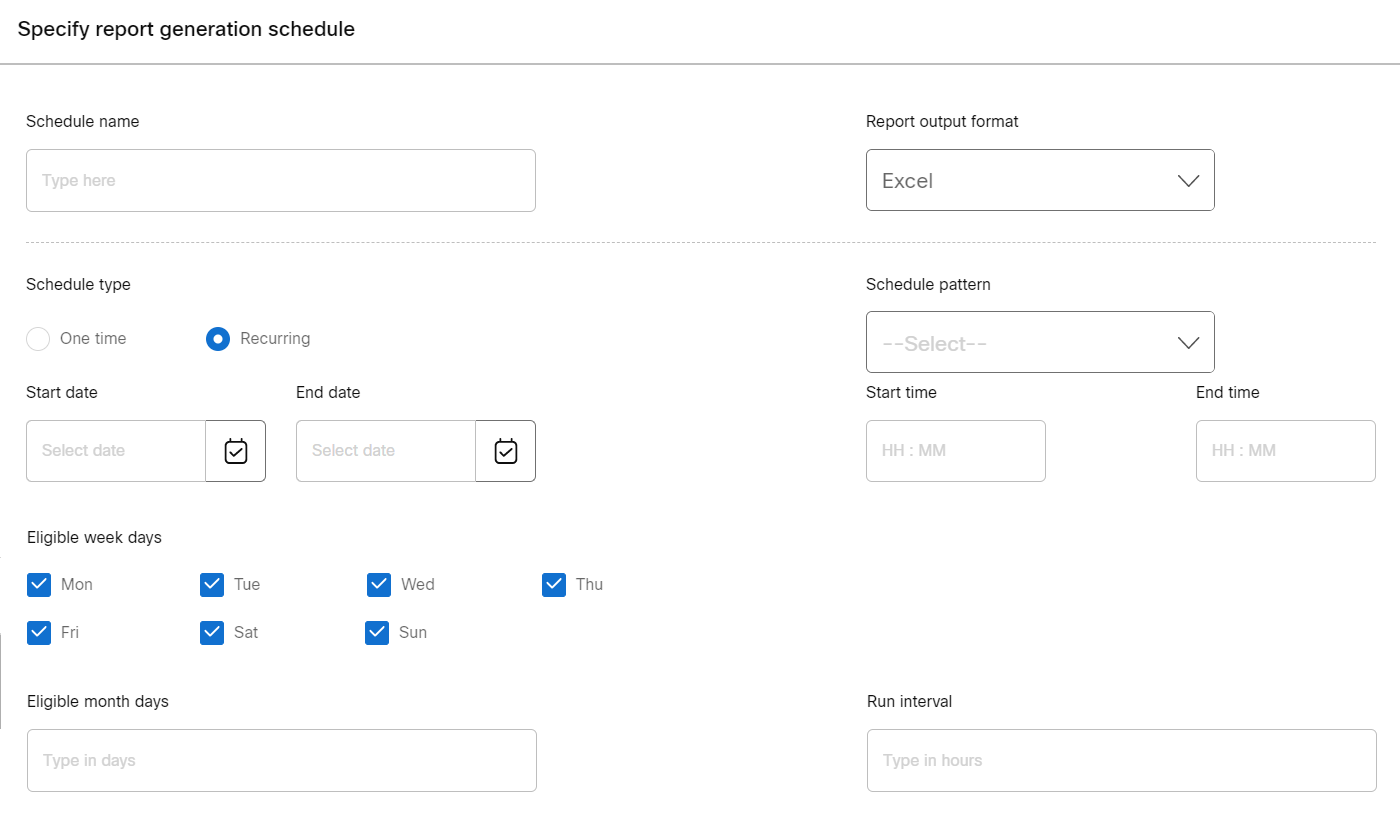
To schedule a report, click on Schedule option of the respective report. The schedule report screen appears.
-
Enter details for the following fields:
- Schedule name: Enter a meaningful schedule name.
- Report output format: Select the report format Excel or CSV.
- Schedule type: Select the schedule type, if you select One time option, then select Immediate or Specific date and Time. If you select the Recurring option, then configure additional options as required.
- Output channel type: If you select the output channel as SFTP upload, then select the SFTP server and Path. If you select the Through email option, then enter Email Address in To, Email Address in CC, Email Address in Bcc, Subject, and Mail body.
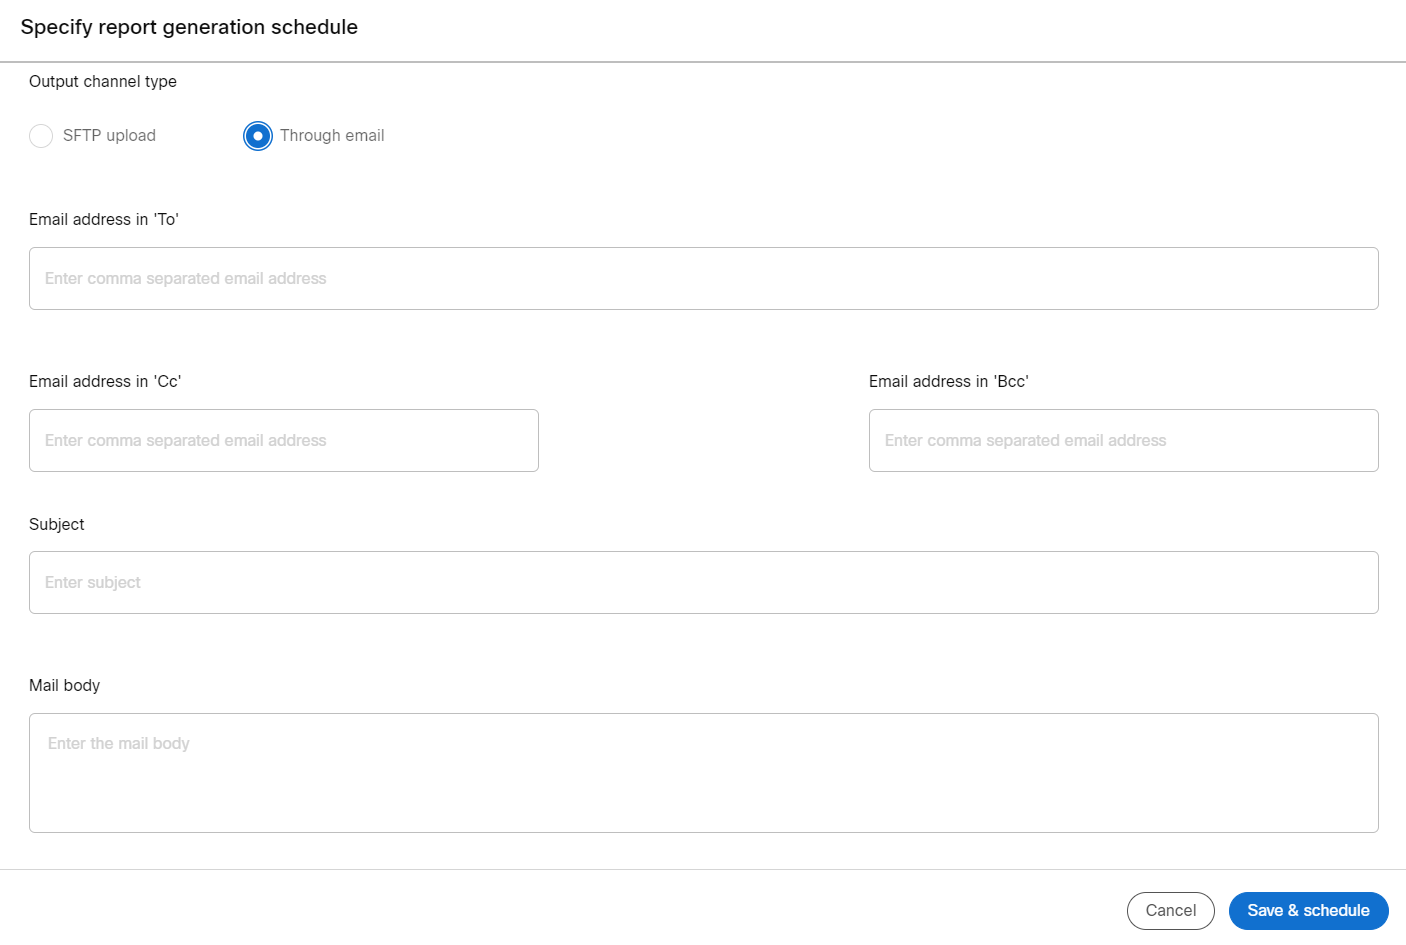
- Click Save & schedule.
Updated 12 months ago