

Applying Segment Builder Filters for Follow up Deployments
Follow these steps to create a Follow up deployment based on the Segment builder filters, You will be navigated to this screen by clicking the Apply segment builder filters.
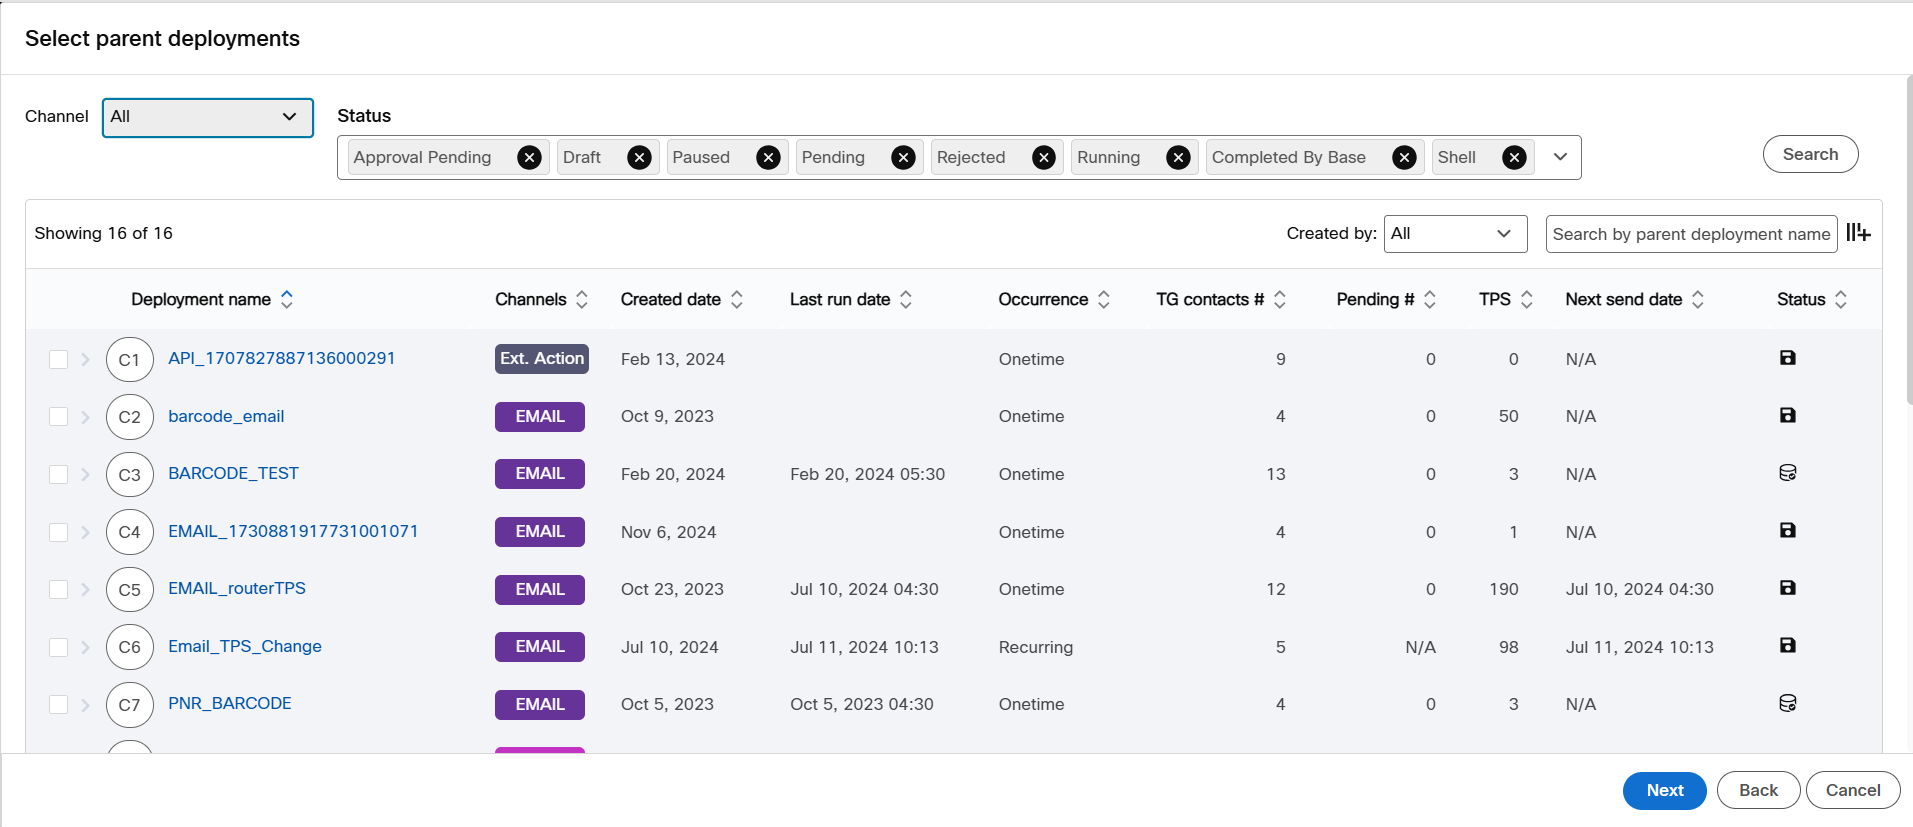
In this screen, you can create a target group by applying a filter on one or more deployments (target groups) available in the campaign.
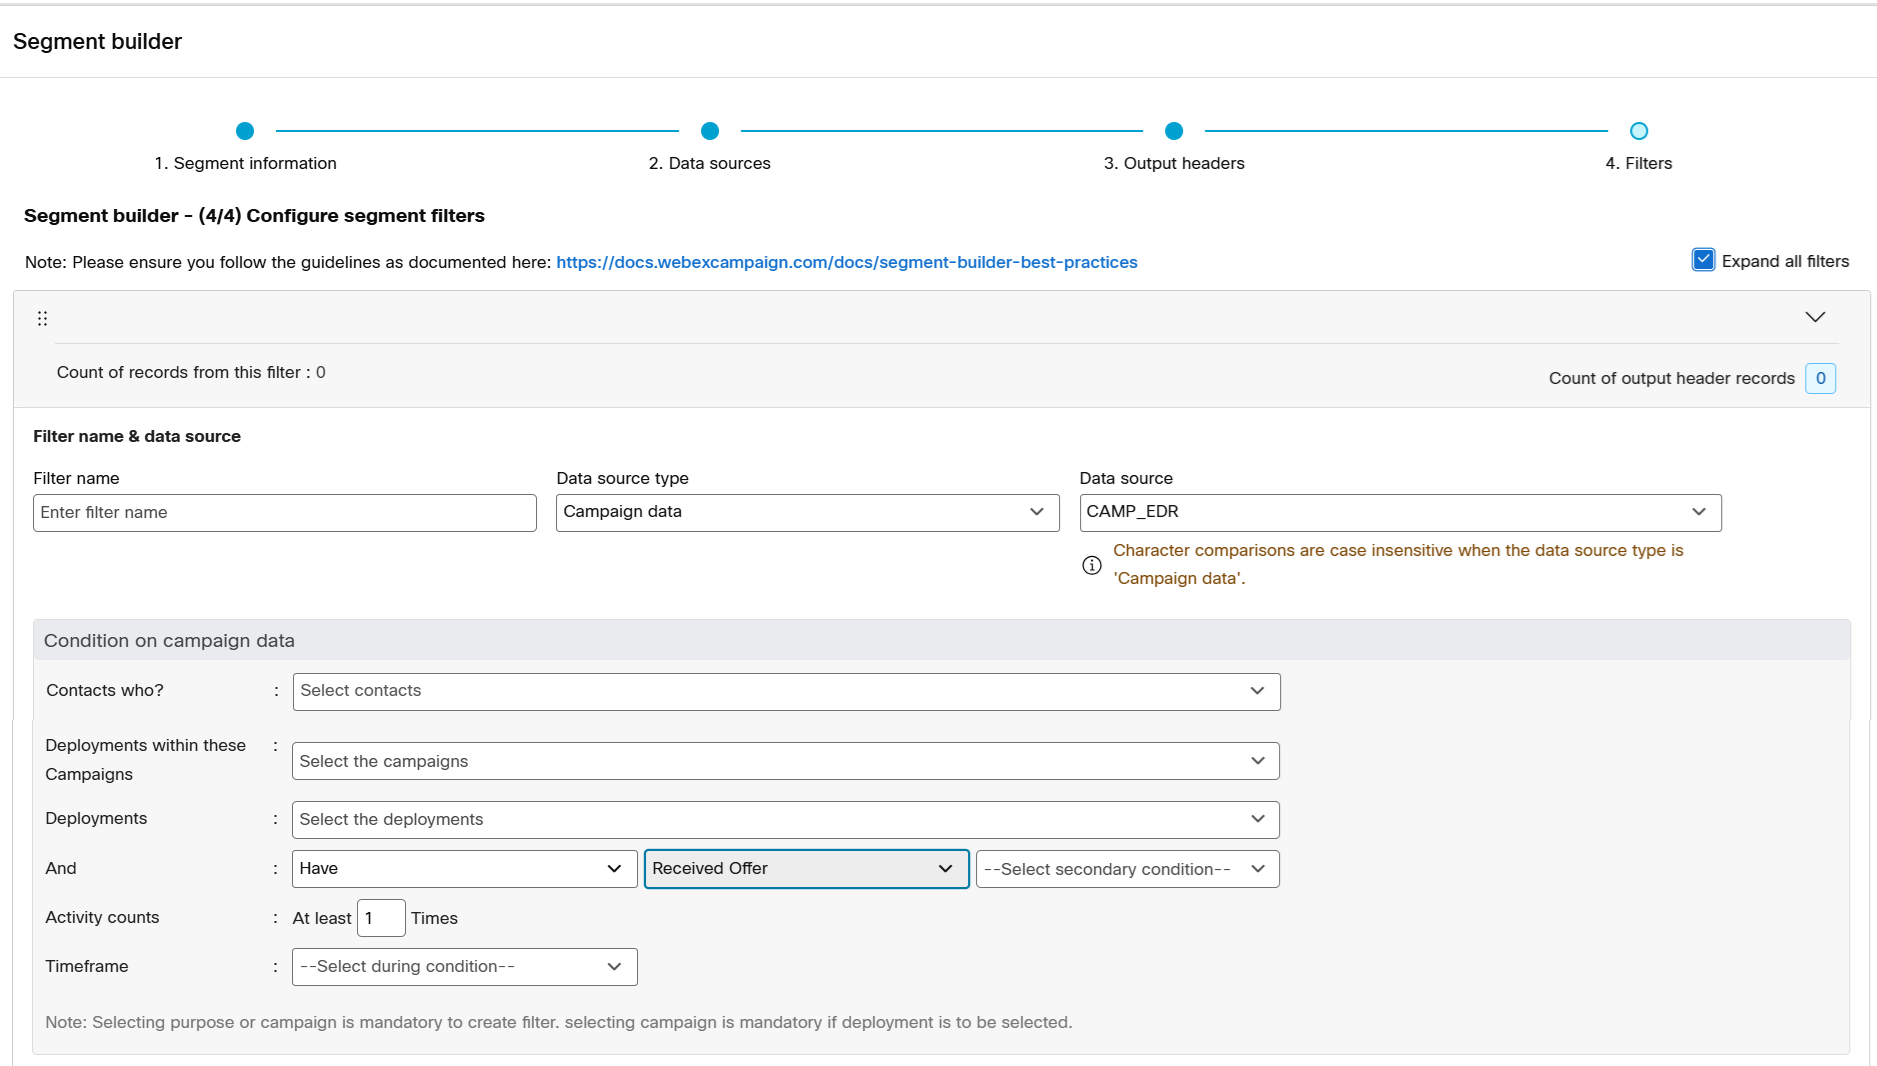
- Configure the following options:
- Filter name: Enter a name for the filter.
- Contacts who?: Select the option "Are part of".
- Campaigns: Select the required campaigns from the drop-down.
- Deployments: Select the required deployments from the drop-down.
- And: Select the Primary and Secondary conditions.
- Primary condition: The options are:
- Received Message: This option indicates that the intended recipients have received the message.
- Been Pushed Message To: This option indicates that the message has been sent from Webex Campaign to the Gateway.
- Received Offer: This option refers to the recipients who have received the offer message
- Responded: This option refers to recipients who interacted by clicking a link or replying to an SMS.
- Secondary condition: The options are:
- Part of exclusion list: This option indicates that the intended recipient is part of the exclusion list.
- Delivery receipt not received: This option indicates that Webex Campaign has not received a delivery receipt.
- Expired: This option refers to messages that could not be pushed because they have expired.
- Calendar timeout: This option refers to the message that could not be pushed due to calendar timeout.
- Controlgroup: This option refers to the intended recipient is part of the control group.
- Primary condition: The options are:
- Activity counts: Enter the count.
- Timeframe: Select the duration.
- Click Update final count of all filters. The query will be executed and the count will be displayed.
- (Optional) To use this filter in the future, click Save filter as a template.
- (Optional) Click + Add filter to apply another filter on the query. You can add multiple filters and rearrange them by dragging the filter header above or below the other filters.
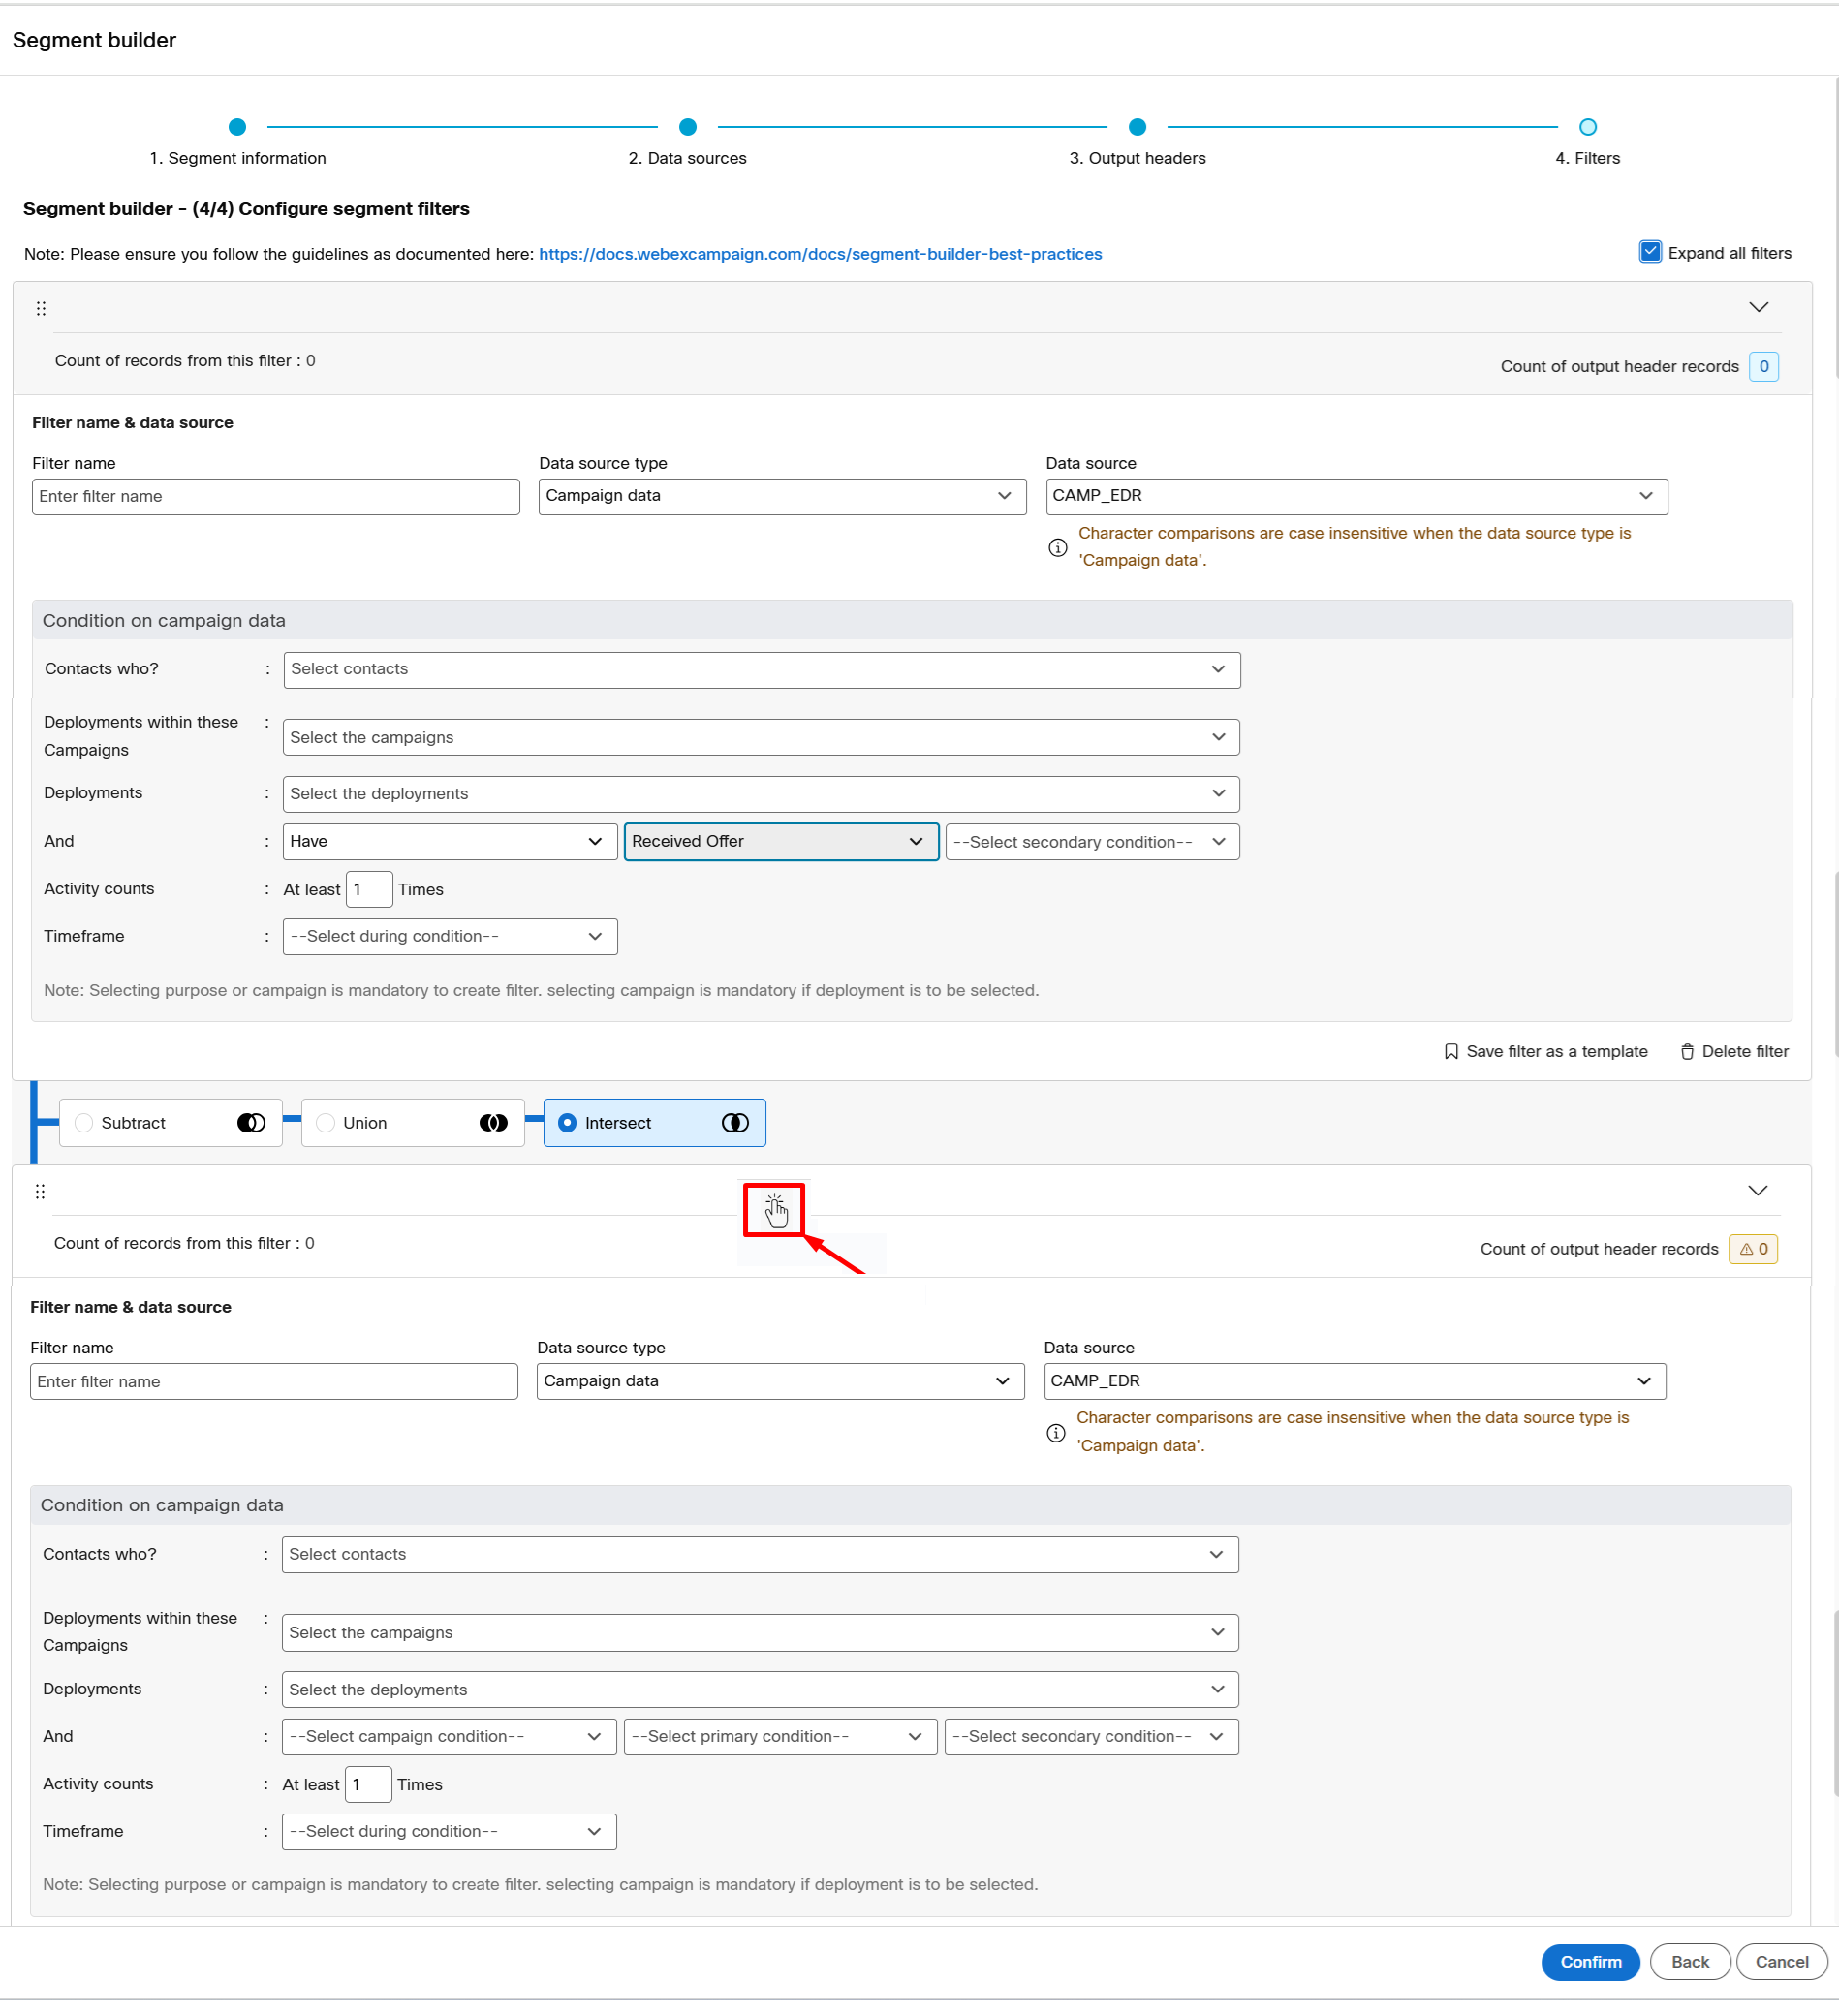
- (Optional) If you define multiple filters, select the query criteria as required:
- Subtract: Use this option to subtract records from the second filter.
- Union: Use this option to include the records from the second filter.
- Intersect: Use this option to get unique records from both filters.
- To remove duplicate records, select the checkbox “Remove records from the query result set which have the same value for this attribute”.
- Click Update final count of all filters. The query results will be updated.
- Click Confirm to save the Segment filter. The Deployment Builder screen appears.
Configure the nodes as explained in previous tutorials and activate the deployment.
Updated over 1 year ago