

Email Channel Node
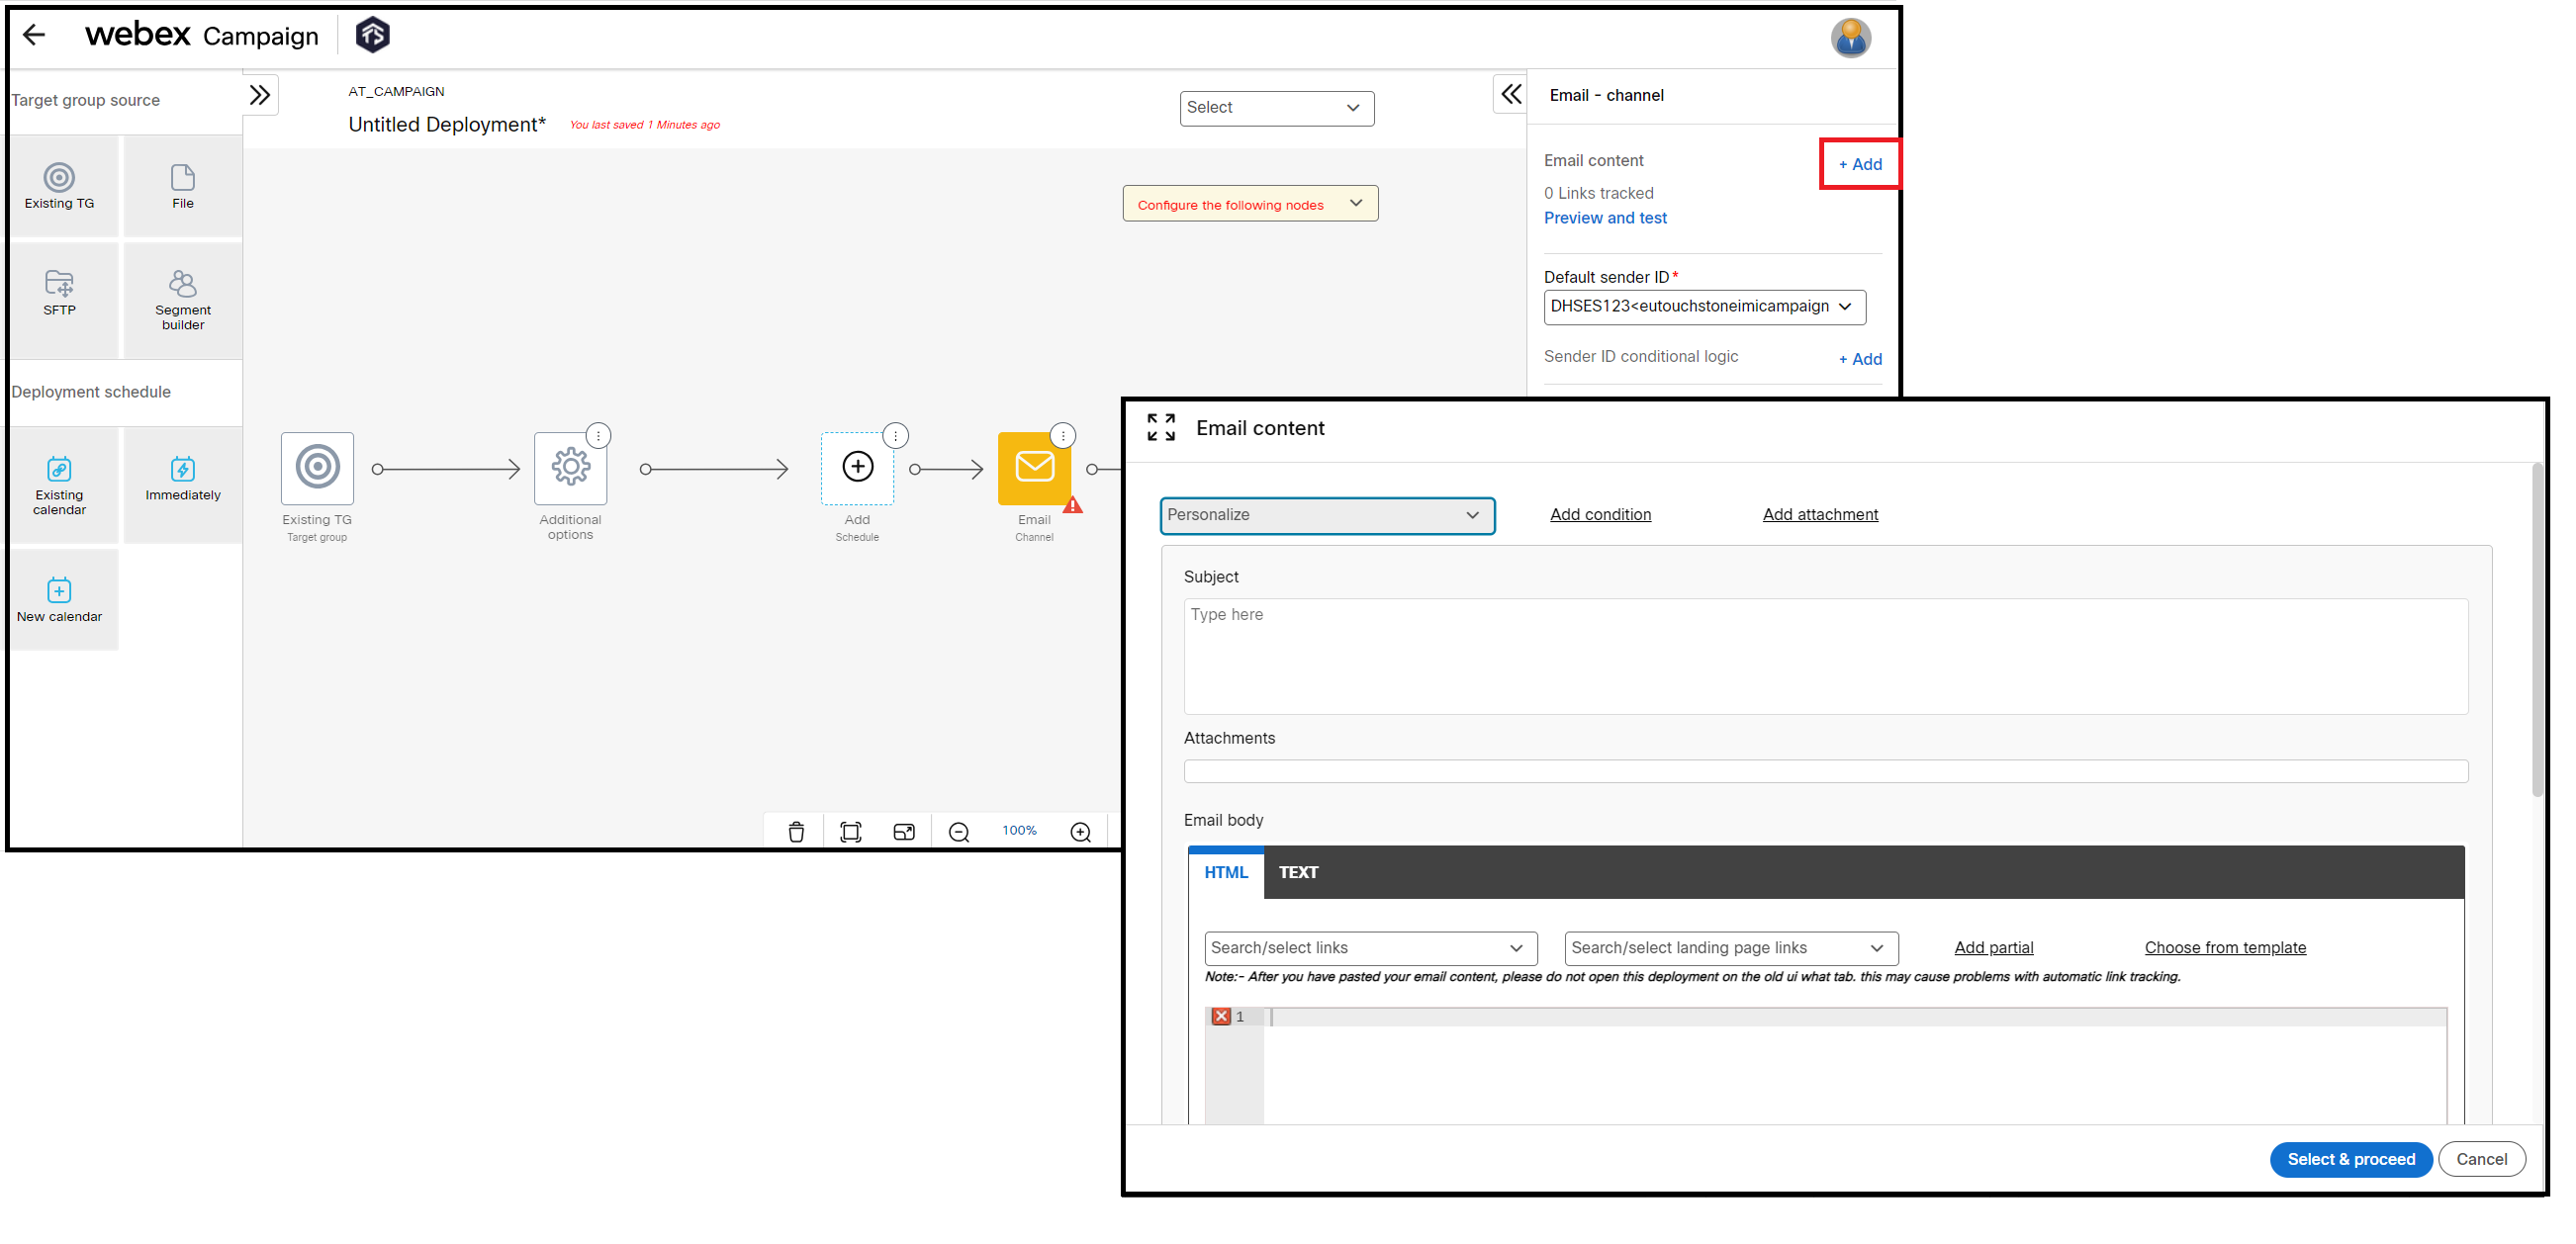
When a deployment is created for the Email channel, the deployment builder screen will show the Email channel node with a red warning symbol, indicating that it has not been configured. Once the necessary information is configured for the Email channel node, the red warning symbol will disappear.

Configuring Email Channel Node
- On the Deployment Builder screen, select the Email channel node, the configuration settings are displayed in the right palette.
- Click +Add. The Email Content screen appears.
- Enter the required fields:
- Subject: Enter the subject line. You can add personalization in the subject line.
- Email body: Specifies the email content.
- Other optional features you can configure are:
- Personalization
- Emojis in Subject Line
- Add Conditions
- Add Attachments
- Add Links
- Add Open Tracking Pixel
- Add Partials
- Choose From Templates
- Add UTM Tags
- Link Tracking
- Disable Link Tracking
- Customize Sender ID
You can pull the ‘message pushed date’ dynamically in your Email Content. You can use the system reserved parameter ‘$(sys_pushed_date)’ in your Email Subject line, Email Content, or UTM Tags and it will be replaced by the date in the MMM DD, YYYY format.
- Click Save and proceed.
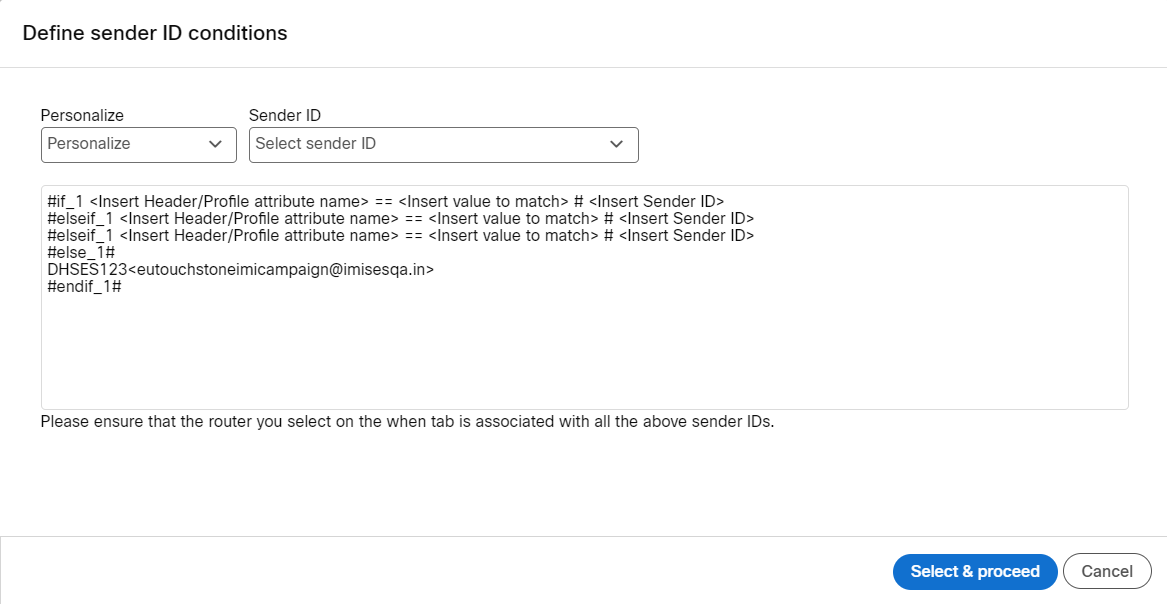
- (Optional) To define conditions to Sender ID based on the target group headers click +Add.
a. The Define sender ID conditions screen appears.
b. Define conditions using Personalize and Sender ID drop-downs.
c. Click Select & proceed.
- Click Preview and test to Preview the content and send the content to an actual test contact.
The optional features that you can configure are:
Personalize
Personalization allows you to configure individual contact-specific data into the Email subject. The drop-down list box displays all the headers available from the selected Target group. Click one of the headers to populate a Personalisation expression, which will pull through the customers’ relevant values from the data file.
For example, a sample personalization message can be configured as:
"Dear $(TG_FIRSTNAME) your personal loan application is approved", when this message is processed, it will replace $(TG_FIRSTNAME) with the actual contact name.
Emojis in Subject Line
Emojis can be used in the subject line while creating Email content and also when creating the Email template using the ‘Drag & Drop Composer’. You can preview the Emoji using the Preview and test.
We recommend copying the desired Emojis from a website such as (https://www.emojicopy.com/) and pasting them in the subject line.
a. The same Emoji may be rendered differently depending on the Email Client and the Operating System of the recipient’s device. The web resource (https://home.unicode.org/emoji/) provides many examples of how the same Emoji could be rendered differently across email clients, devices and operating systems.
b. Some Emojis may not render at all on certain email clients or certain devices.
c. Litmus Inbox Preview support for Emojis does not extend across all Emojis and all devices.
d. At present, we support the use of Emojis only within the email subject line and not within the body of the email.
We strongly recommend thoroughly testing your email to ensure it renders well across multiple devices and email clients, especially because of the wide variations of how Emojis are rendered.
Add attachment
Webex Campaign allows you to send up to 3 attachments via email to any Target Group applied to a deployment. You can also configure the delivery of attachments to certain customers, based on data values, with conditional logic.
- Click Add attachment link on the Email content screen. The Attachments screen appears.
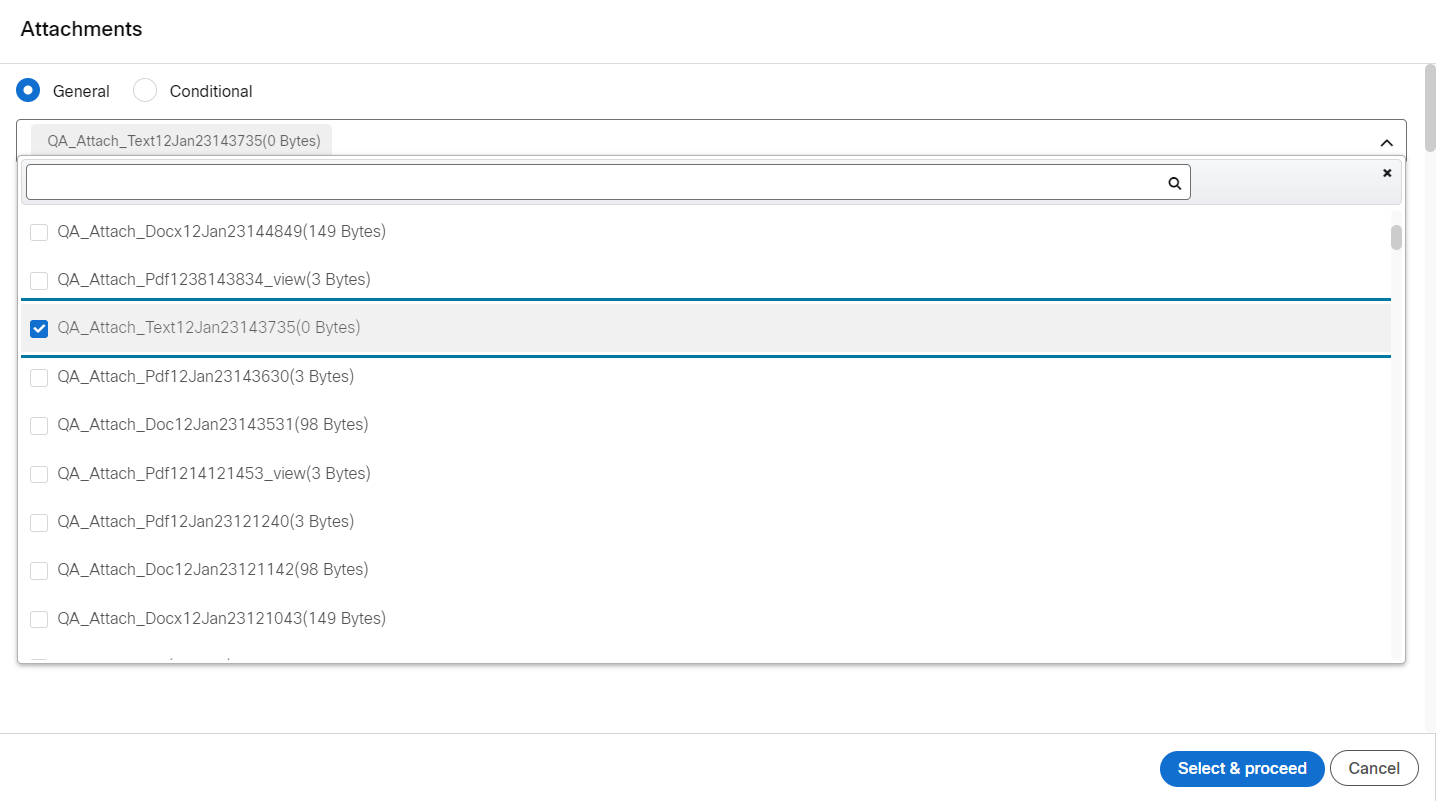
- Click in the Select attachment drop-down and select a pre-uploaded file.
- To remove an attachment, unselect the checkbox against the unwanted attachment.
- Click Select and proceed.
The maximum file size of an attachment is 300kb, but we recommend 150kb or less for better deliverability as some inbox providers may block big attachments.
Adding Attachments based on condition:
- On the Attachments screen, select Conditional option.
- Enter the details for the following fields:
- Header: Select a header from the drop-down.
- Condition: Select a condition from the drop-down.
- Value: Enter a value in the text field.
- Attachments: Select the pre-uploaded attachment from the drop-down.
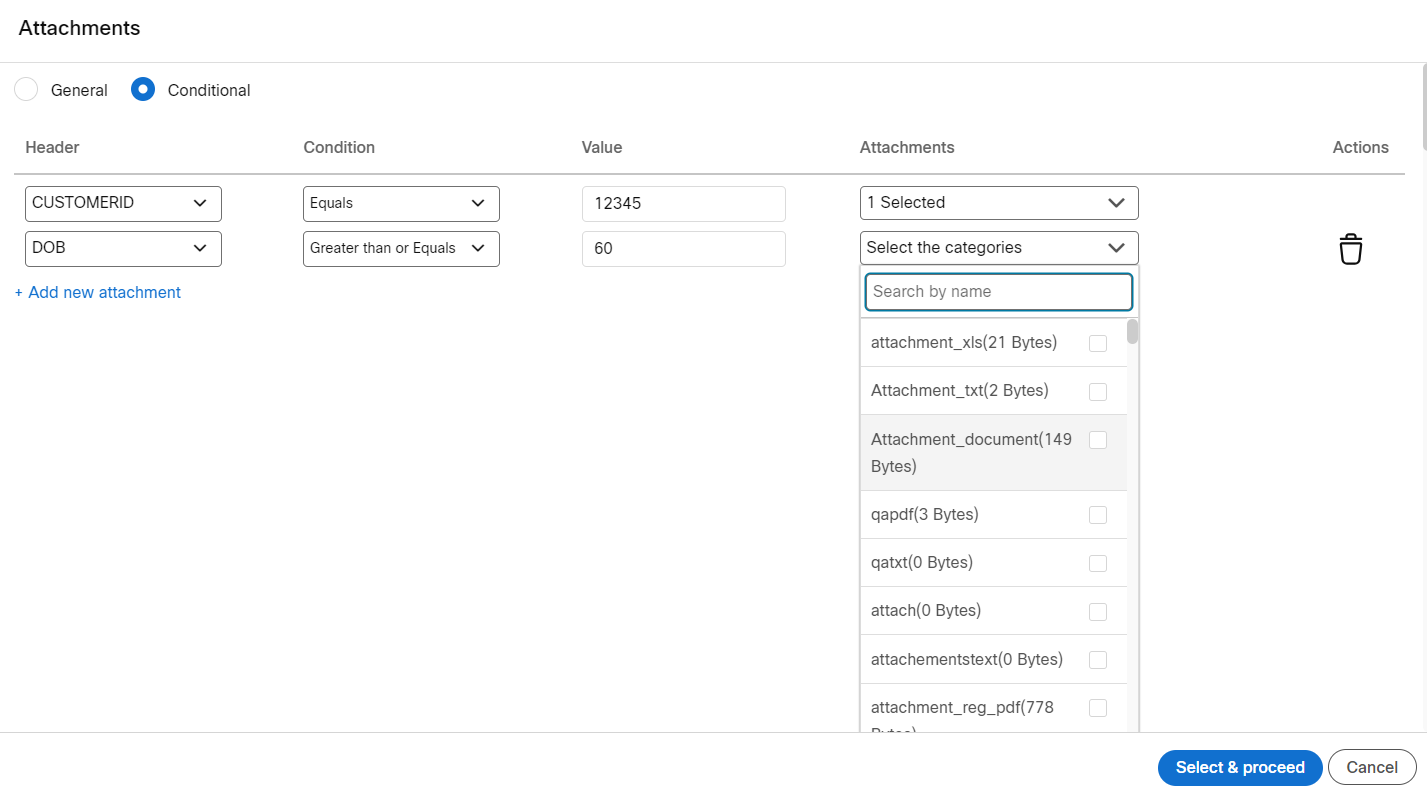
- Click +Add new attachment to add more attachments.
- Click Delete icon to remove an attachment.
- Click Select and proceed.
Add Condition
Webex Campaign allows conditional logic statements to be placed around content within a message.
For more information on Conditional Logic, refer Conditional Logic section.
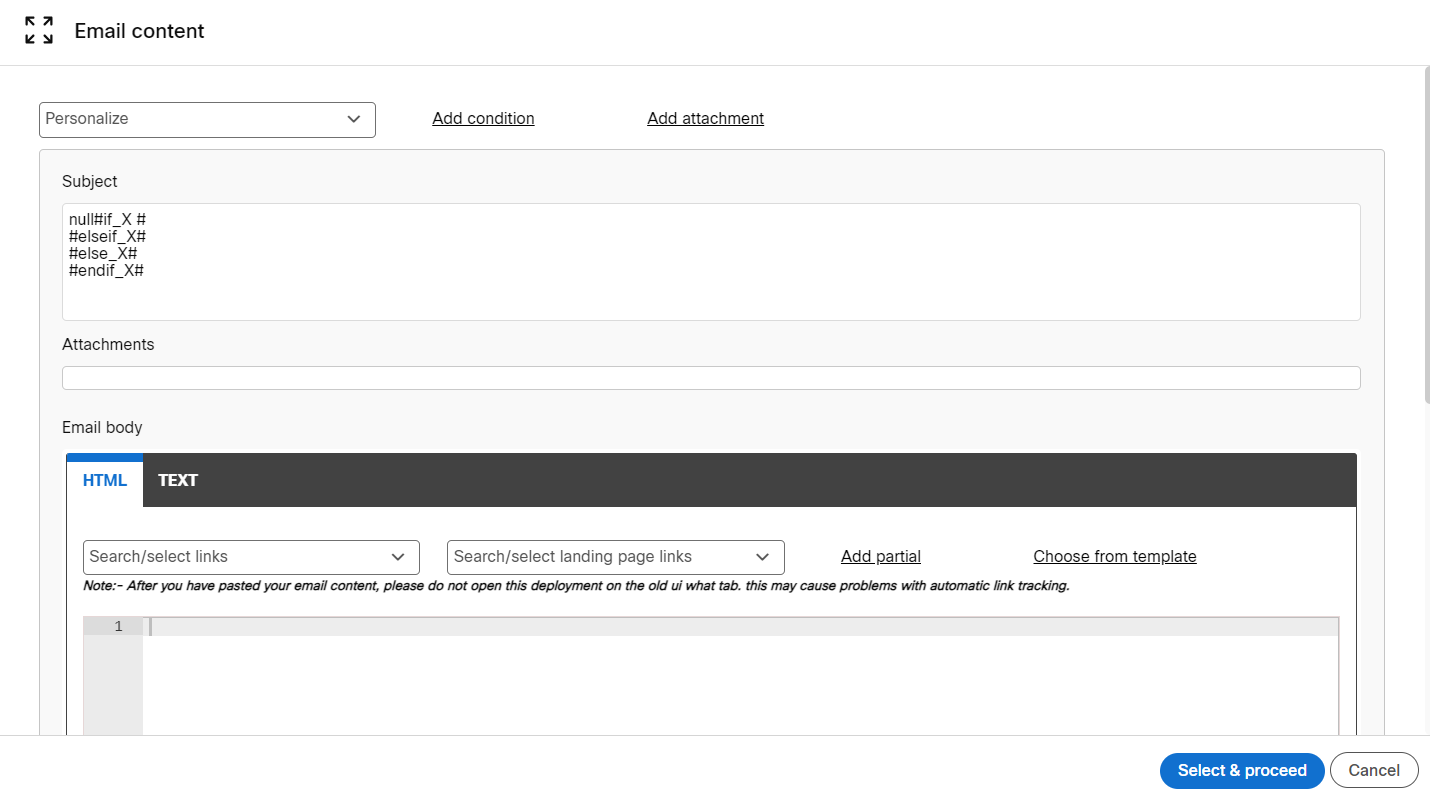
HTML
Copy and paste the HTML code of an email template or select Choose from Templates that allows you to select an HTML template, which has been pre-configured. To add additional links and images, add them from the respective drop-down list box. For more information on creating a template, refer Create an Email Template section.
TEXT
Text versions of emails are supported. The text version is a separate, text-only version of the email that is sent alongside the HTML version. They will never display together - the text version will only display on email clients that do not support HTML.
If you are using an email template created by the Email Composer tool, then a text version will have been automatically created for you. If you have brought your own custom HTML, you will need to provide your own text version.
If a text version is not specified, Webex Campaign will automatically populate the text version with the HTML version, in the background upon send.
Links
This option allows you to insert links that have already been added in Webex Campaign. For information on creating links, refer Links section under Assets.
Add ‘open-tracking pixel’ within the email HTML content
If you are using the Drag-&-Drop Email Composer for designing your emails: If you use the Pre-Header Building block, then the ‘$(tracking_pixel)’ parameter will be automatically inserted after the Pre-Header block.
If you are your own HTML template, then you can embed the parameter ‘$(tracking_pixel)’ within your HTML code and Webex Campaign will replace this parameter with the actual tracking pixel at that location.
If you do not include this parameter in the HTML content, then Webex Campaign will add the tracking pixel just after the opening tag which is shown as the pre-header when the email is viewed in the Outlook desktop email client.
For more information, refer the Links section under Assets.
Smart links display in an asset ID format in this box and are changed into a full link upon deployment (for example, {asset_links_14436097700295}).
Partial
This option allows you to insert partial. To insert a partial, key-in the partial name in the Partials textbox and select the required partial from the list that appears. For more information on partial, refer Email Partial section under Assets.
Track All Links with Webex Campaign
Once you add the email content, all the links in the email appear in the order they appear within the HTML, with an auto-generated link name. If the same URL appears multiple times within the HTML, then each link will have a unique name and is tracked separately.

Disabling Link Tracking
By default, all links will be tracked. If you wish not to track a link, unselect the checkbox against the required link.
Currently, you cannot disable a link from a Partial created using the drop-and-drop method.
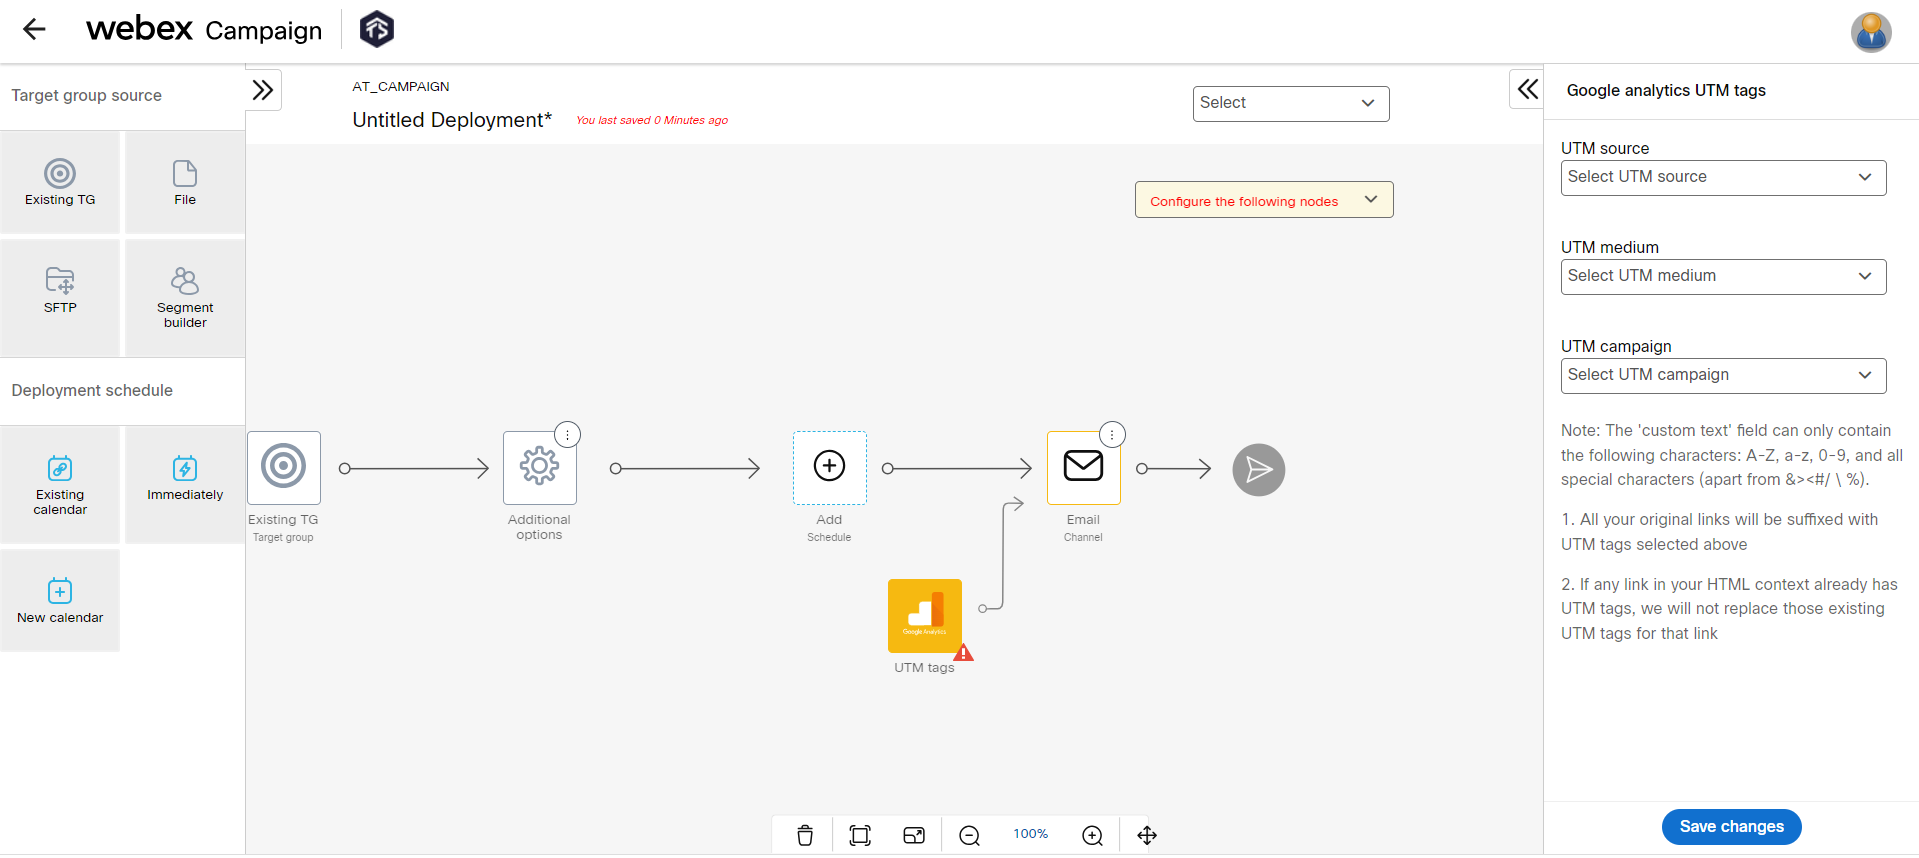
Google Analytics UTM Tags
Click here to know about UTM tags.
Customize Sender ID
You can customize the Sender ID to personalize the From name and Reply-to details of the Email. If you customize the sender ID, it will overwrite the default Sender ID details.
For example, in a Bank, some banking customers are assigned a Personal Advisor. When an Email promotion is sent to the banking customers, it can be configured as if it was sent by the Personal Advisor. When the customer initiates a reply it will be received at the configured Reply-To Email address.
Following are the options that can be configured for a Sender ID:
- From name (Personalized): Select the From name header from the TG that you wish to display to the end customer.
- Reply-to name (Personalized): Select the Reply to name header from the TG that would be displayed when the email recipient tries to reply to the email.
- Reply-to email (Personalized): Select the Reply-to email header from the TG that would be displayed when the mail recipient tries to reply to the email.

Updated 8 months ago