

Creating an A/B Promotion
A/B Promotions testing is a way to compare up to 6 variants of the same message to determine which one performs better. Marketers often use A/B Promotions testing to validate the effectiveness of a particular message content. For example, to understand whether a message with an image performs better than a text-only message. Following are the different variations you can create based on the selected channel.
| Variation | Applicable Channels |
|---|---|
| Sender ID | SMS MMS |
| Subject Line | Email MMS |
| Content (Message Body) | SMS MMS App |
When setting up an A/B Split Promotion Deployment, within one channel based on content, subject lines, or sender IDs, the respective nodes will display fields to configure each of the variants. Depending on the variable selected to create the A/B variant, only a few fields are editable for variant nodes, the other fields are not editable. For example, for the email channel, if you have selected the variant to be on Subject Line, then you can configure HTML and Text content in the channel node and Subject Line in Variants nodes. In the variant nodes, you can only add or edit subject line other fields are disabled from editing.
A/B Promotion for Email Channel
Follow these steps to create an A/B Promotion deployment for the Email channel:
- On the Campaign details screen, click Create deployment.
- On the Create deployment screen, select A/B Promotion.

-
Select the type of A/B promotion. You can create the following combinations of deployments:
-
Select promotion type as Simple promotion , mode as Onetime , and, content type as Message. Select the number of A/B variants as 2 and click Next.

- Select the channel as Email and select the variation as Subject line from the drop-down.

- Click Create. The deployment builder screen appears.

- Configure the following Nodes:
- Target group node: Drag-drop a Target Group node and configure the target group.
- Additional options node: (Optional) You can skip this node configuration. If you want to add any additional nodes such as an additional Target Group, Control Group, Seed List, or Exclusion list, you can add and configure them.
For A/B deployments, a Seed List is only available for Email channel deployments based on Email Content (Message Body) or Subject Line criteria. In a future release, we will add this capability for other channels.
- Schedule Node: Drag-drop a schedule node and configure it.
- Exclusion Day/Times Node: (Optional) You can skip this node configuration. Configure this node if you want to add a custom exclusion or change the default exclusion day or times.
The Days and times exclusion values for the winner deplyment are inherited from the days and times exclusion values of the variants.
- A/B Split Node: Select the node and enter the Contact size to be split for the selected variants in terms of percentage or absolute value. The application will guide you to calculate based on the Target Group and variants selected. Enter a value in the Contact Size and click Calculate. Based on the calculations, enter the value and click Save changes.

- Select Email channel node. From the right panel, click +Add and add the HTML content. You can copy and paste a HTML or select a HTML template. The Subject Line field will be disabled as the variant was selected based on the Subject Line. You can enter different Subject Lines in the Variant Nodes. You can configure Link Tracking.

- Enter different Subject Lines in both Variant A and Variant B nodes, You can only add the Subject Line in the variant nodes. For example, the subject line in Variant A as 50% off on Mobiles and Variant B as Best Offers on Mobiles. You cannot add or edit content (Email Body) in these nodes. Click here to create subject lines using 3rd party artificial intelligence system:

Variant A
- Select Winner node. From the right panel, click +Add and configure the Winner Identification criteria.

- Add a Schedule node on Schedule winner node and configure the schedule. This schedule is to identify the winner variant in the configured schedule. The schedule should not be configured before the deployment schedules have been completed.
- The Exclusion Day/times node is not configurable. Even if you configure it, it is not honored. The Days and times exclusion values for the winner deployment are inherited from the days and times exclusion values of the variants.
- Configure Deployment meta-tags and then click Save and exit.
- On the Deployment list screen, click Activate.

Get suggestions for email subject line variants (BETA)
This feature will help you generate attractive subject lines for your A/B email deployments. When you provide a sample subject line, the system will generate innovative and engaging subject lines tailored to your needs.
This feature is developed using 3rd party artificial intelligence system. Cisco Systems is not responsible for the wording of this content. Depending on how busy the 3rd party AI system is currently, sometimes there may be delays in the system response.
Follow these steps to generate creative subject lines using 3rd party artificial intelligence system:
- Select the Email node and configure the email content and sender ID.
- Click Get suggestions for email subject line variants (BETA) The AI-generated wording suggestion screen appears.

- Enter a subject line under 40 words and select a value for 'temperature' (level of randomness in the AI-suggested wordings).
- Click Get wording suggestions. The system will generate the subject lines and display in the wording suggestions text box.
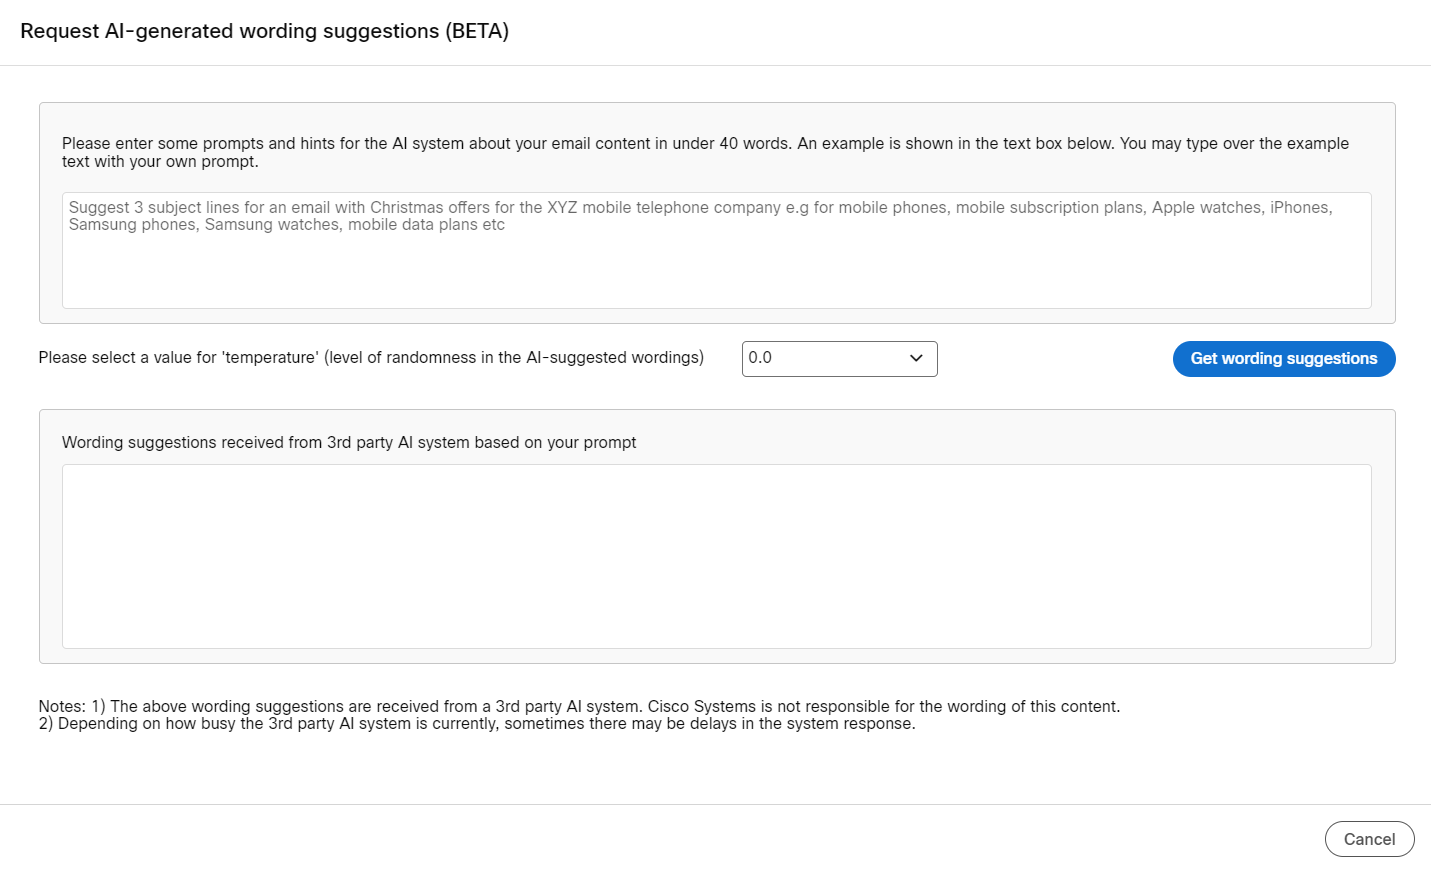
You may copy the subject lines and use them in the variant nodes.
Updated almost 2 years ago