Creating One Time or Recurring Follow up Deployment
One Time Follow up deployments are created on top of already executed deployments. The target group of a One Time follow-up deployment can be a subset of the already executed deployment. For example, a deployment is sent to 10,000 customers, and delivery is failed for 20% of the customers due to some reason. Using filters, you can send a follow-up deployment to those 20% of customers who did not receive delivery.
Recurring deployments are the deployments that are sent to a target group with a defined frequency for a specific period. You can pause a recurring deployment at any time before the end date.
For a recurring deployment, a dynamic target group can be replaced with another dynamic target group if they both have the same headers. A target group can be changed before it is processed. A target group is prepared 1 HR prior to its actual scheduled time. For example, if a recurring deployment is scheduled to run every day at 9:00 AM for 1 week, then after the 1st run, a target group can be replaced with a new dynamic target group before 8:00 AM.
You cannot replace a target group for deployments other than recurring Deployments with a Dynamic target group.
The designated mandatory header should already be present in the existing Target Groups used by ongoing Recurring deployments. Once a header is designated to be mandatory for the tenant, any Target Groups not having the header will be rejected.
For SMS, MMS, and Email channels, certain changes are allowed for a recurring deployment after it is activated and before the preparation of a dynamic target group. A campaign must be paused to apply the changes such as Rule based Suppression's, Control Group, Contact Frequency Rules, Remove Duplicates, Limit Contacts, and Seed List. The changes can be applied after any number of runs. For example, if a recurring deployment is scheduled to run every day at 9:00 AM for 1 week, then after 1st run, the above mentioned changes can be applied after pausing the campaign.
The above mentioned changes are not applicable for the following:
- One Time Deployments with Static and Dynamic Target Groups
- One Time Follow ups with Static and Dynamic Target Groups
- Recurring Deployments with Static Target Groups
Follow these steps to create One Time or Recurring Follow up Deployment:
- Navigate to Campaign management > Campaign list screen and click on the campaign in which you want to create a deployment.
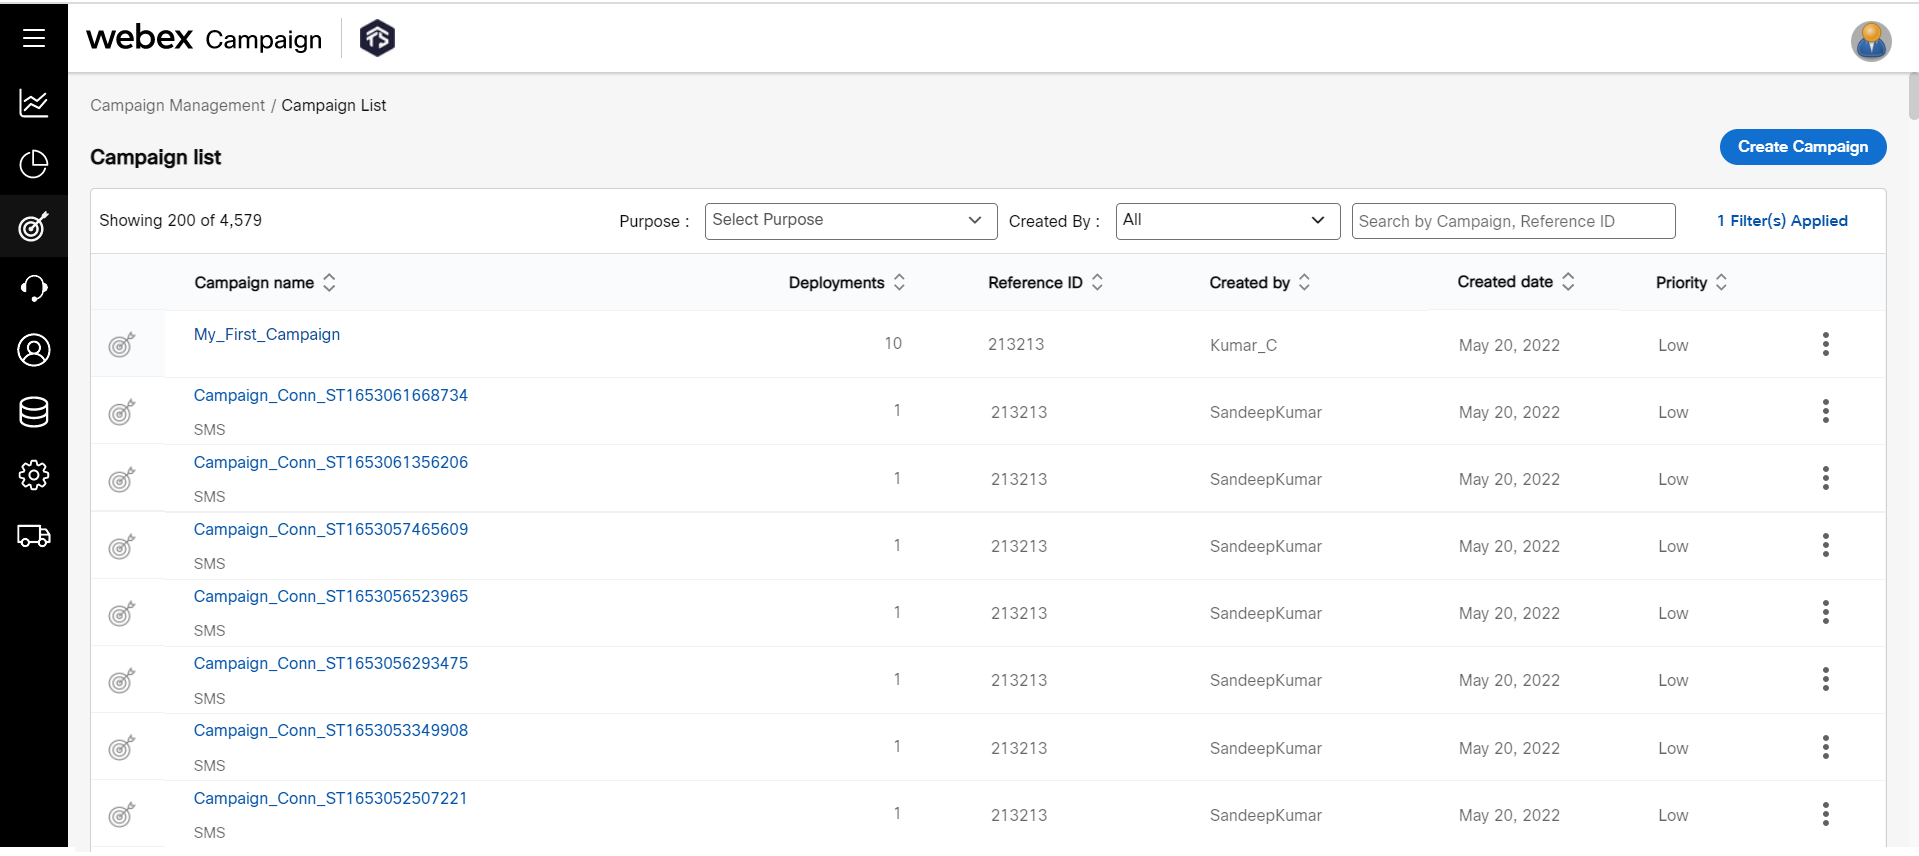
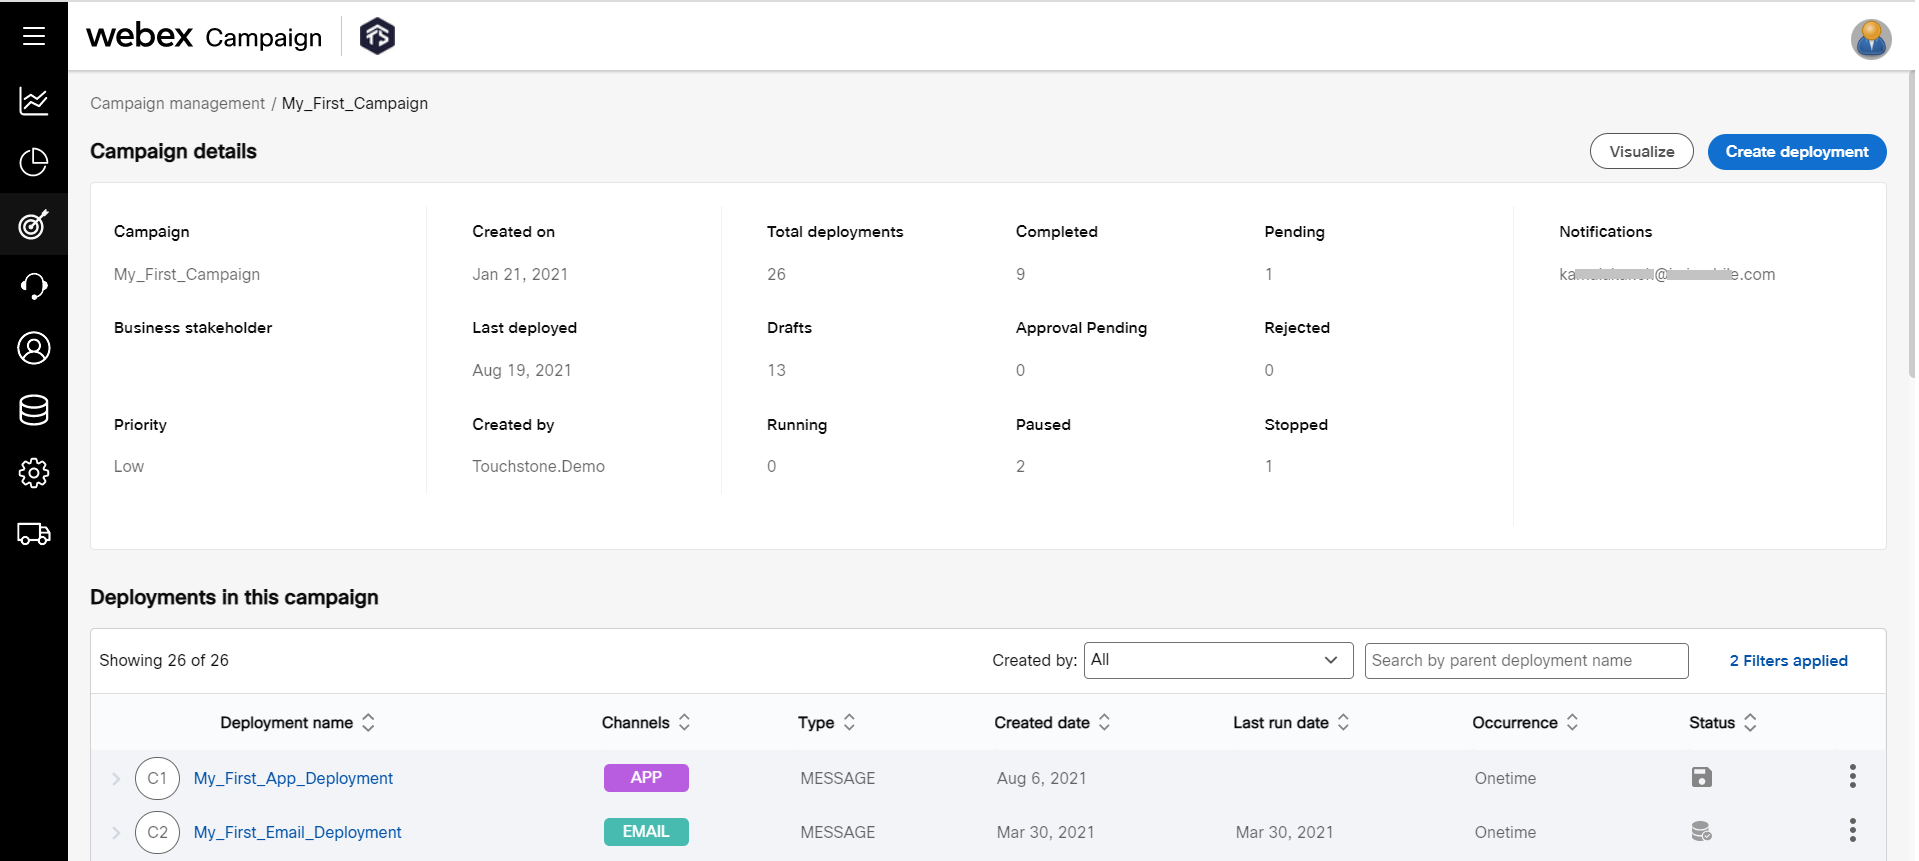
- Click Create deployment on the campaign summary screen that appears. The campaign summary screen will display the status of all the deployments of the campaign.
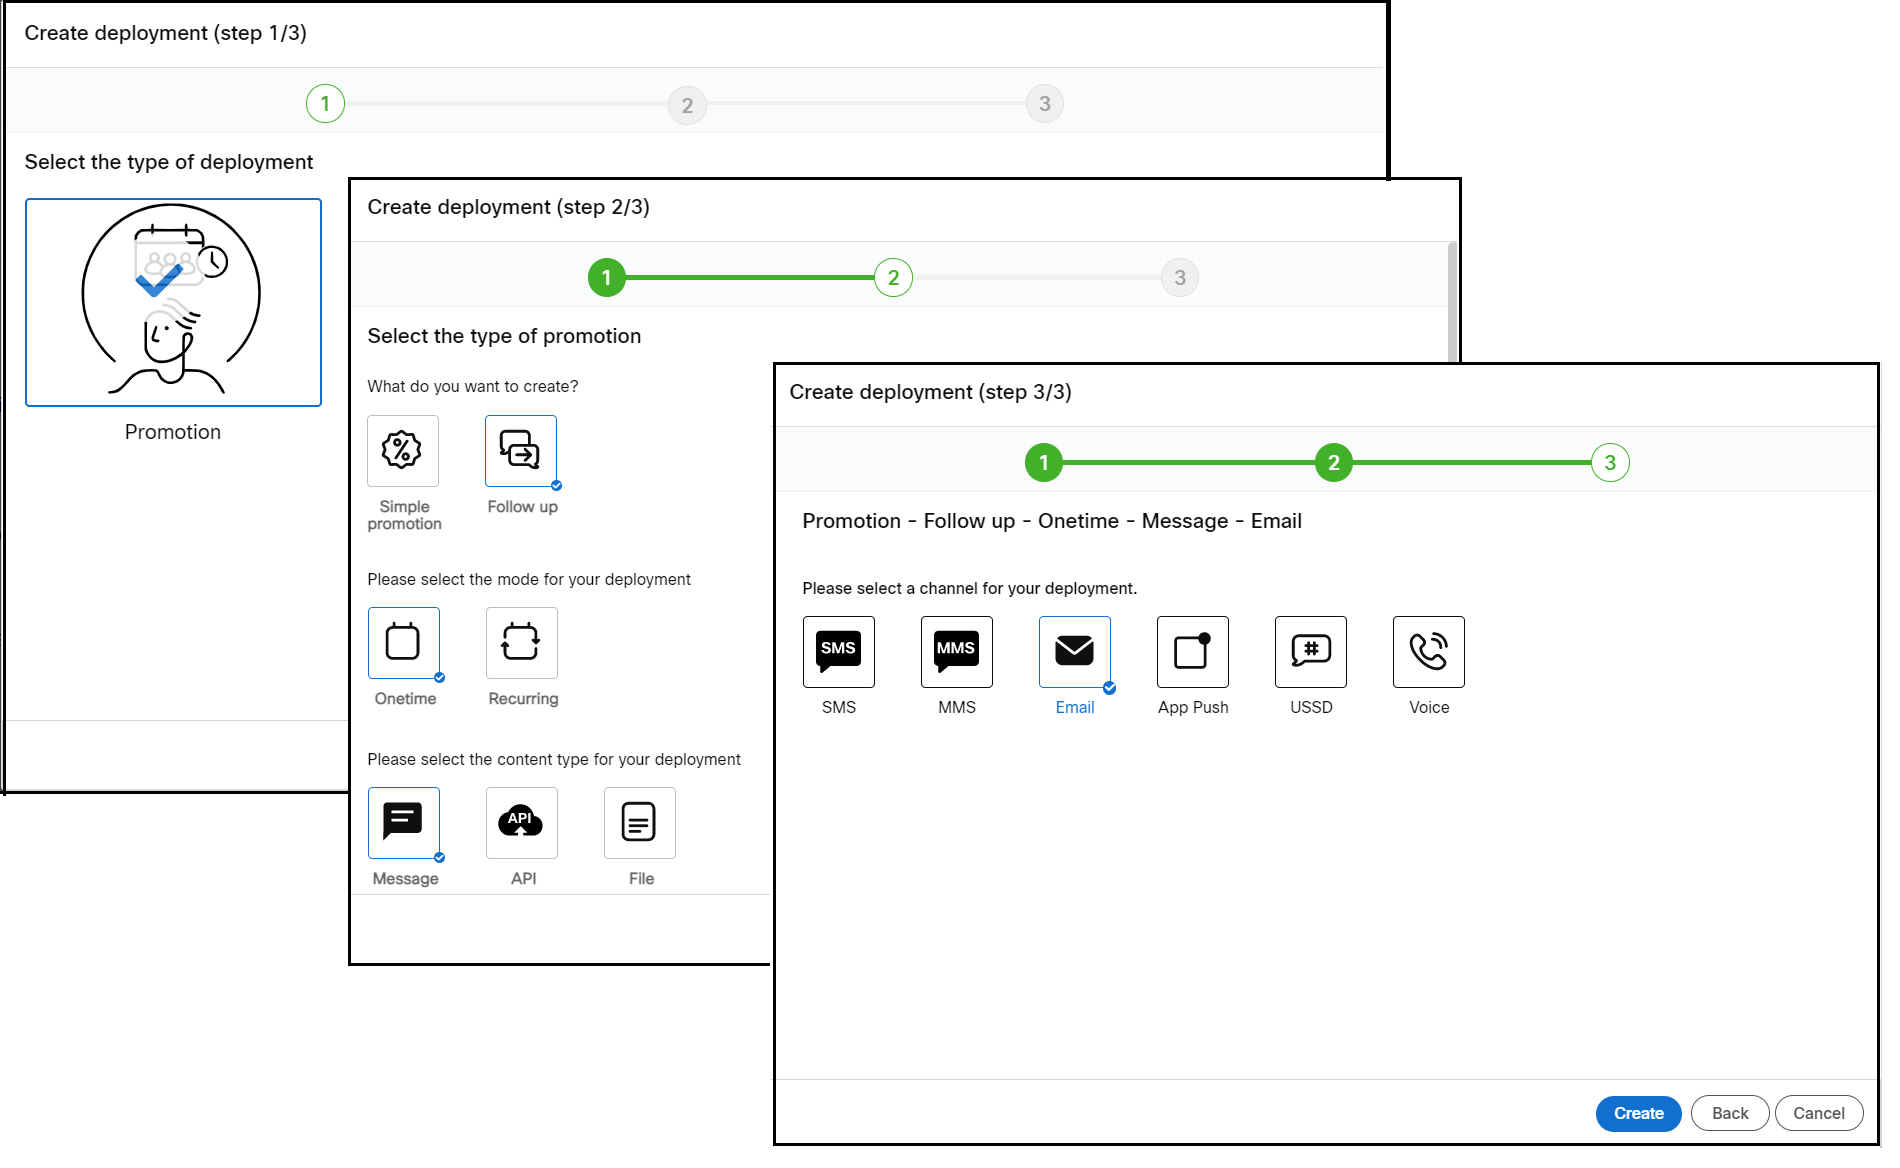
- Select the deployment type as Promotion.
- Select the type of promotion as Follow Up, mode of deployment as One Time or Recurring, and content type as Message.
- The Select parent deployments screen appears. Select the deployment on which the Follow up deployment has to be created.
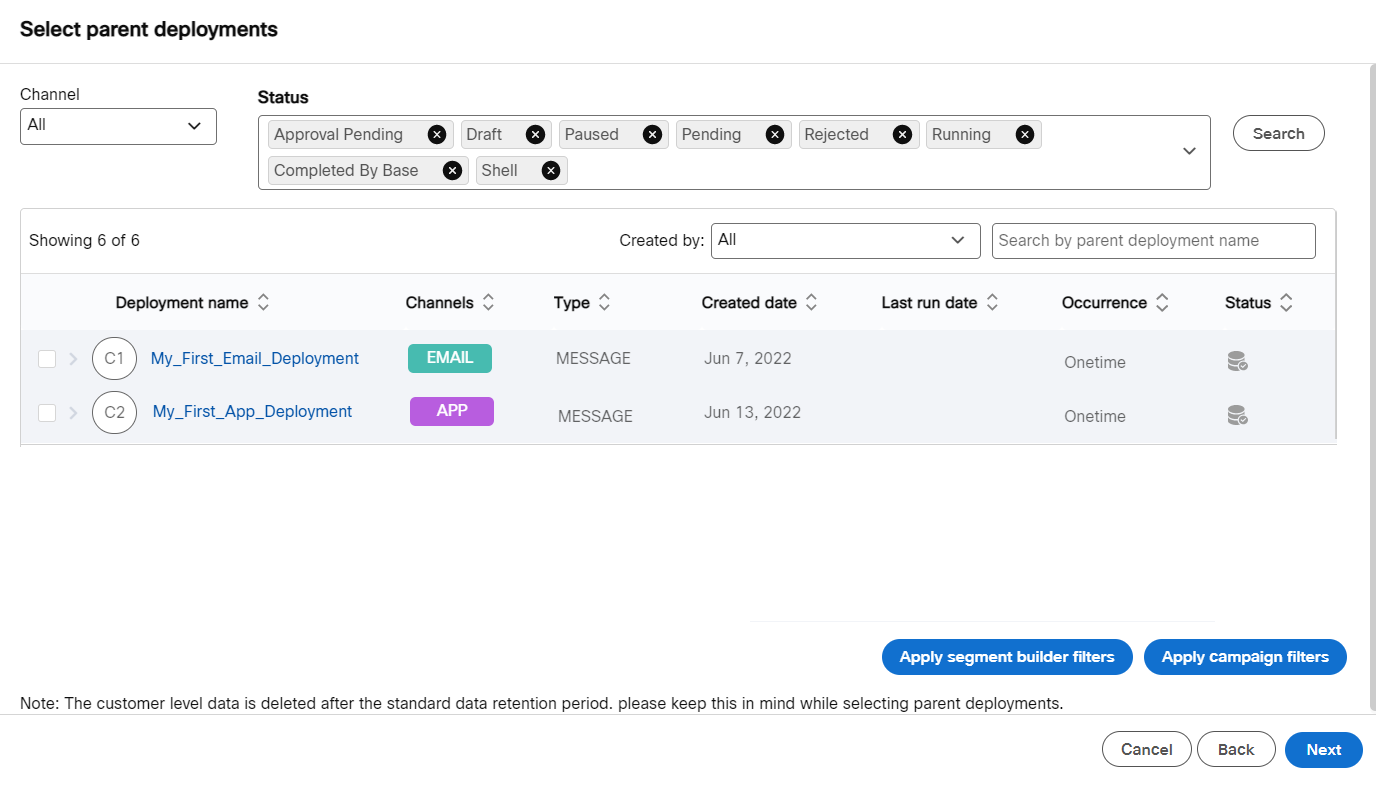
- Click one of the below options to proceed.
-
Apply campaign filters: Select this option to create a target group by applying a filter on the target group that was used for the parent deployment.
-
Apply segment builder filters: Select this option to create a target group by applying a filter on one or more deployments (target groups) available in the campaign.
Apply campaign filters
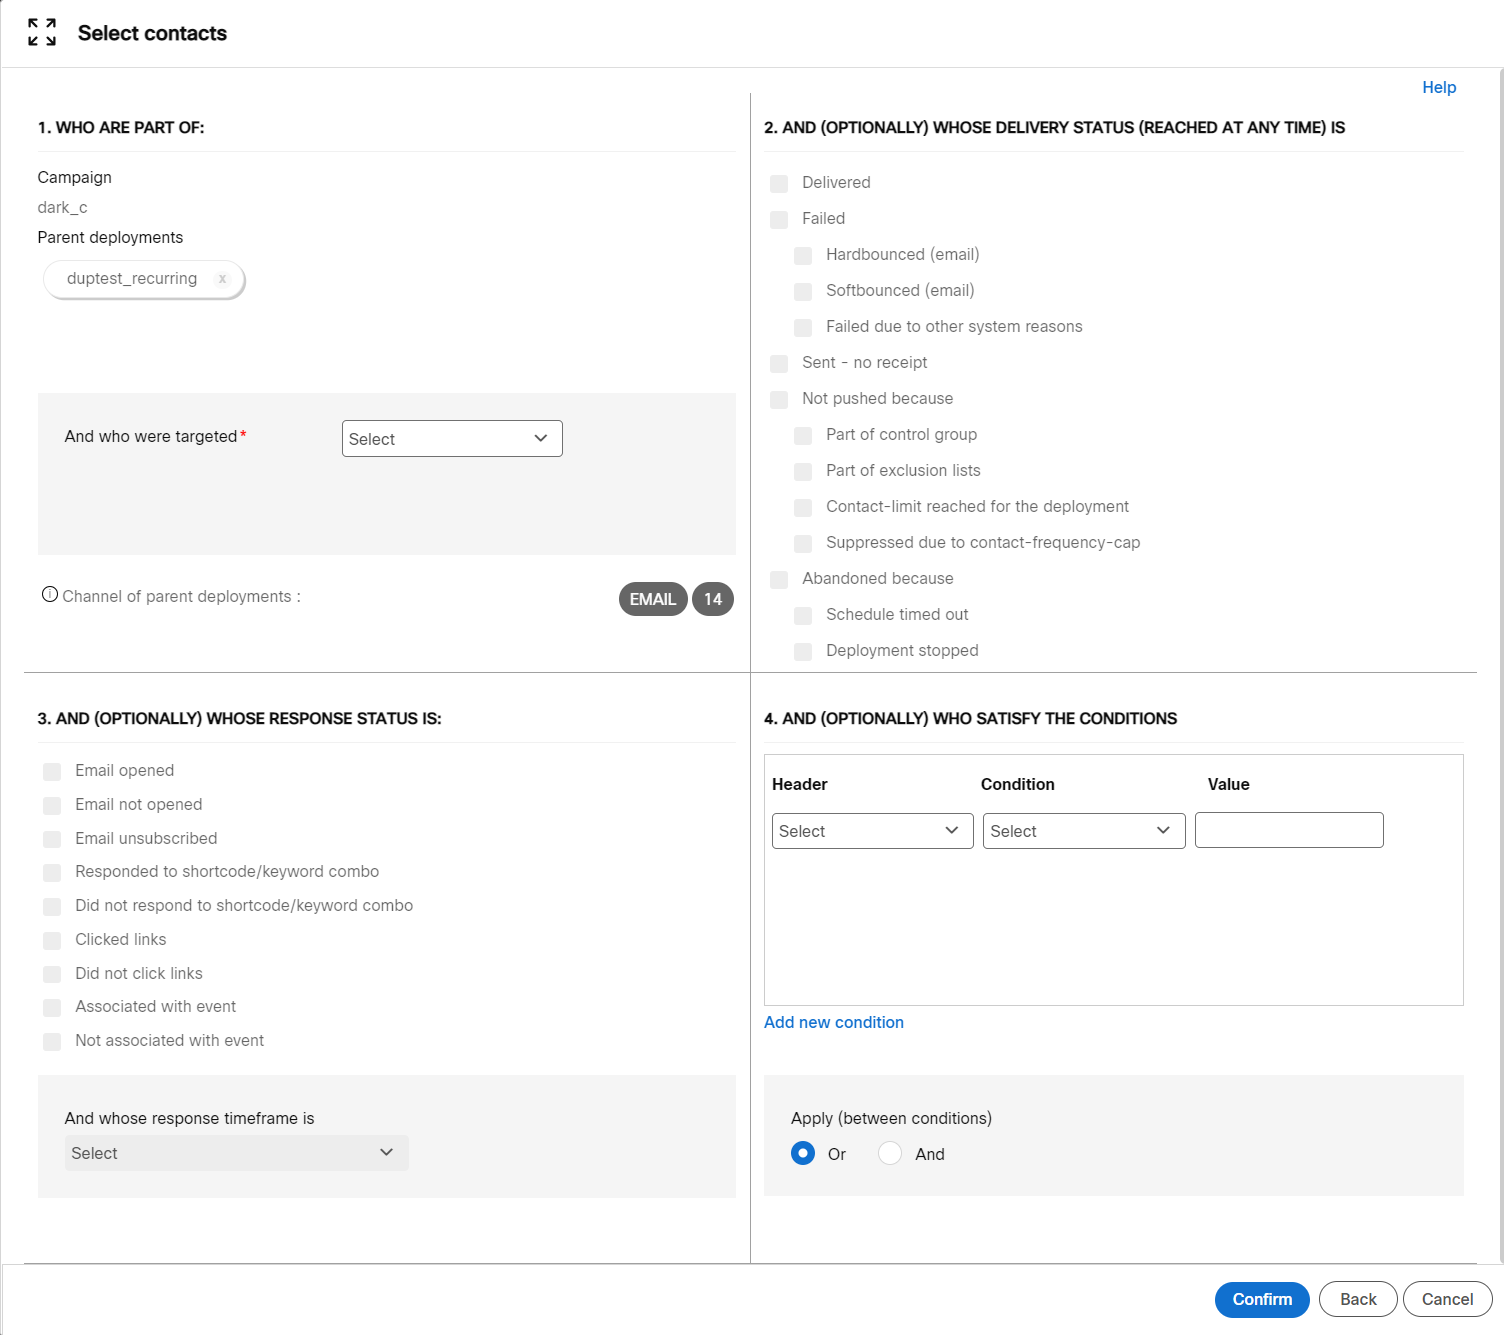
This screen has 4 quadrants. The screen will display the 'Parent' Campaign Deployment on which you are setting up the Follow-Up deployments. If you want to change the parent deployment, click Back button and select or deselect the required deployments.
a) WHO ARE PART OF: This is the first quadrant. Depending on the time frame of the initial communication(s), select a condition from the drop-down to further fine-tune your selection of contacts from the 'parent' deployment who should qualify for the follow-up communication. The contacts identified in this quadrant will have an AND condition with the criteria specified in the other 3 quadrants.
b) AND (OPTIONALLY) WHOSE DELIVERY STATUS (REACHED AT ANY TIME) IS: This is the second quadrant. You further fine-tune your selection of contacts depending on the delivery status of the initial parent deployment to those contacts. Select the required delivery status.
c) AND (OPTIONALLY) WHOSE RESPONSE STATUS IS: This is the third quadrant. This quadrant will only be enabled if 'Delivered' is checked in the second quadrant. The criteria in this quadrant have an AND condition with 'Delivered' status. Select the required response status and apply a filter to trim down the response further based on the time frame of customer responses to the delivered messages from the parent deployments.
d) AND (OPTIONALLY) WHO SATISFY THE CONDITIONS: This is the fourth quadrant. The criteria in this quadrant have an AND condition to the criteria in the other 3 quadrants. Please note that the criteria in this quadrant apply to the initially promoted contacts (from the parent deployments) and not to the contacts chosen for the follow-up deployments. You can add one or more filters. The filter conditions in this quadrant are OR-ed by default.
Select the required headers (target group headers of the parent deployment); apply the required operation to be performed on the field for the specified values to generate a final filtered list of promoted subscribers.
For example, let MSISDN, AGE, PLACE be the headers available in the original target group of customers. Now, to get the customers whose AGE is greater than ‘30’, belong to a PLACE equals to ‘LONDON’, filtering can be applied to the Target Group fields.
-
Header: The drop-down list box displays the list of headers available in the target group for the selected Comm. Select the required header, on which a condition is to be added. (From the above example, MSISDN, AGE, PLACE are the headers and can be selected as explained above).
-
Condition: The drop-down list box allows the user to select the required conditional operation to be performed on the data retrieved for the selected header. Select the required conditional operator to perform an operation on the selected field data. For example, the Operator drop-down list box displays options like Equal to / Greater than / Less than, etc.
-
Value: Enter the value on which the condition is to be evaluated. (From the above example, ‘30’ is given as a value to evaluate age condition; ‘LONDON’ is given as a value to evaluate PLACE condition).
After selecting the required conditions from the above list, AND / OR logical conditions can be applied to generate the final customer response target list. If AND is selected, the target list is created if all the selected contact response conditions are satisfied. If OR is selected the target list is created if any of the selected contact response conditions are satisfied.
- Click Confirmto save the filter. The Deployment builder screen appears.
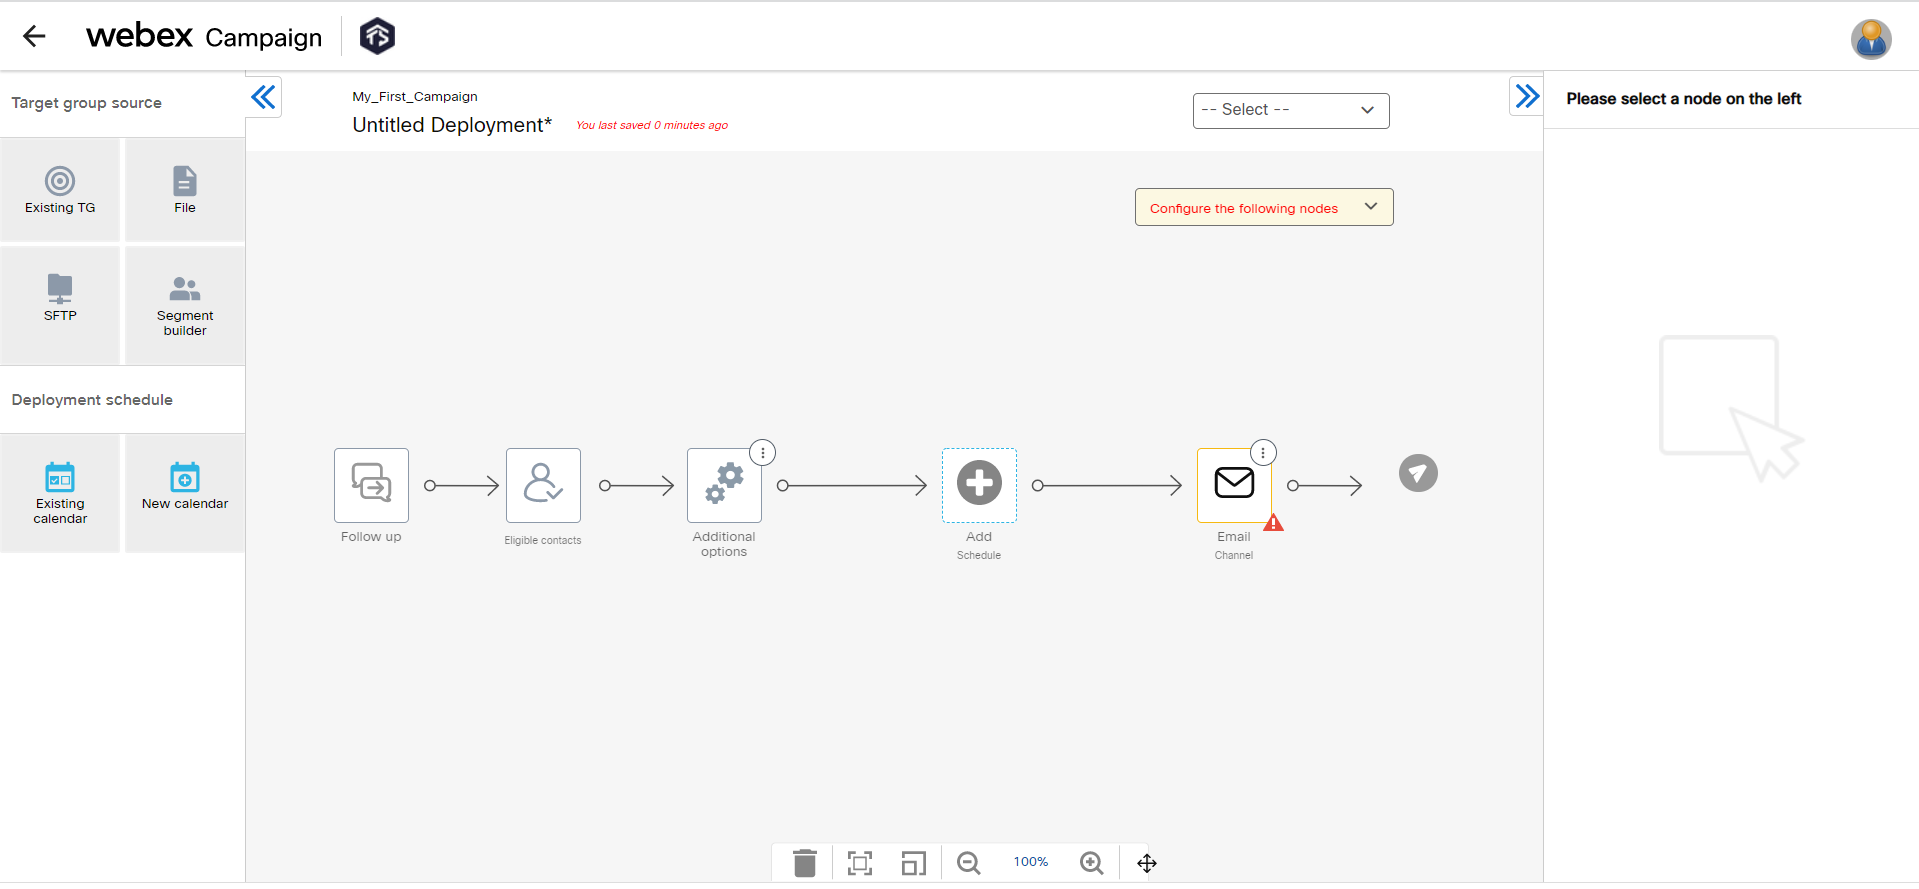
- Configure the Schedule Node. The below nodes are applicable based on the mode of the deployment:
| Schedule Node | One Time | Recurring |
|---|---|---|
| New Calendar | Yes | No |
| Existing Calendar | Yes | No |
| Daily Recurring | No | Yes |
| Weekly Recurring | No | Yes |
| Monthly Recurring | No | Yes |
- Configure channel node and Activate the deployment.
Updated about 1 year ago