Email Sender IDs
Overview
Email sender IDs are comprised of 3 parts, a sender ID, a from address and a domain. If we take an example:
Webex CPaaS [email protected]
We can break it down to its constituent parts:
- Sender ID - "Webex CPaaS"
- From Address - "webexcampaign@"
- Domain - "mail.cisco.com"
The Sender ID part of the email can be configured within the Webex Camapign UI without any assistance from our technical support team. See the guide below for more details on how to configure a new sender ID.
From addresses and domains need to be configured by our technical support team. If you require a new one to be set up, please contact your CSM for guidance.
New From Address
New From Addresses for existing email domains can be added on request by our Tech Support team. Please reach out to Webex CPaaS Tech Support and let them know which email domain you would like a new From Address added to and the name of the new From Address.
If you need a new From Address and a new domain, the domain will need to be setup first.
New Email Domains
New email domains must first be configured by our Tech Support team in our Amazon SES gateway, under the Amazon SES account we will have created for you. When a new domain is registered, SES will generate some DNS records that your IT team (or respective domain controller) will need to configure on the domain. See our guide on Email Domain Setup and Authentication for more information on these records and requirements.
This process typically takes between 3-5 business days to complete end-to-end but may take longer depending on the turnaround times of your IT team/domain controller.
Please contact your CSM to get a new email domain set up. Depending on your requirements relating to how many new emails you are expecting to send from this domain, it might be appropriate to provision new dedicated IPs to facilitate a higher TPS throughput.
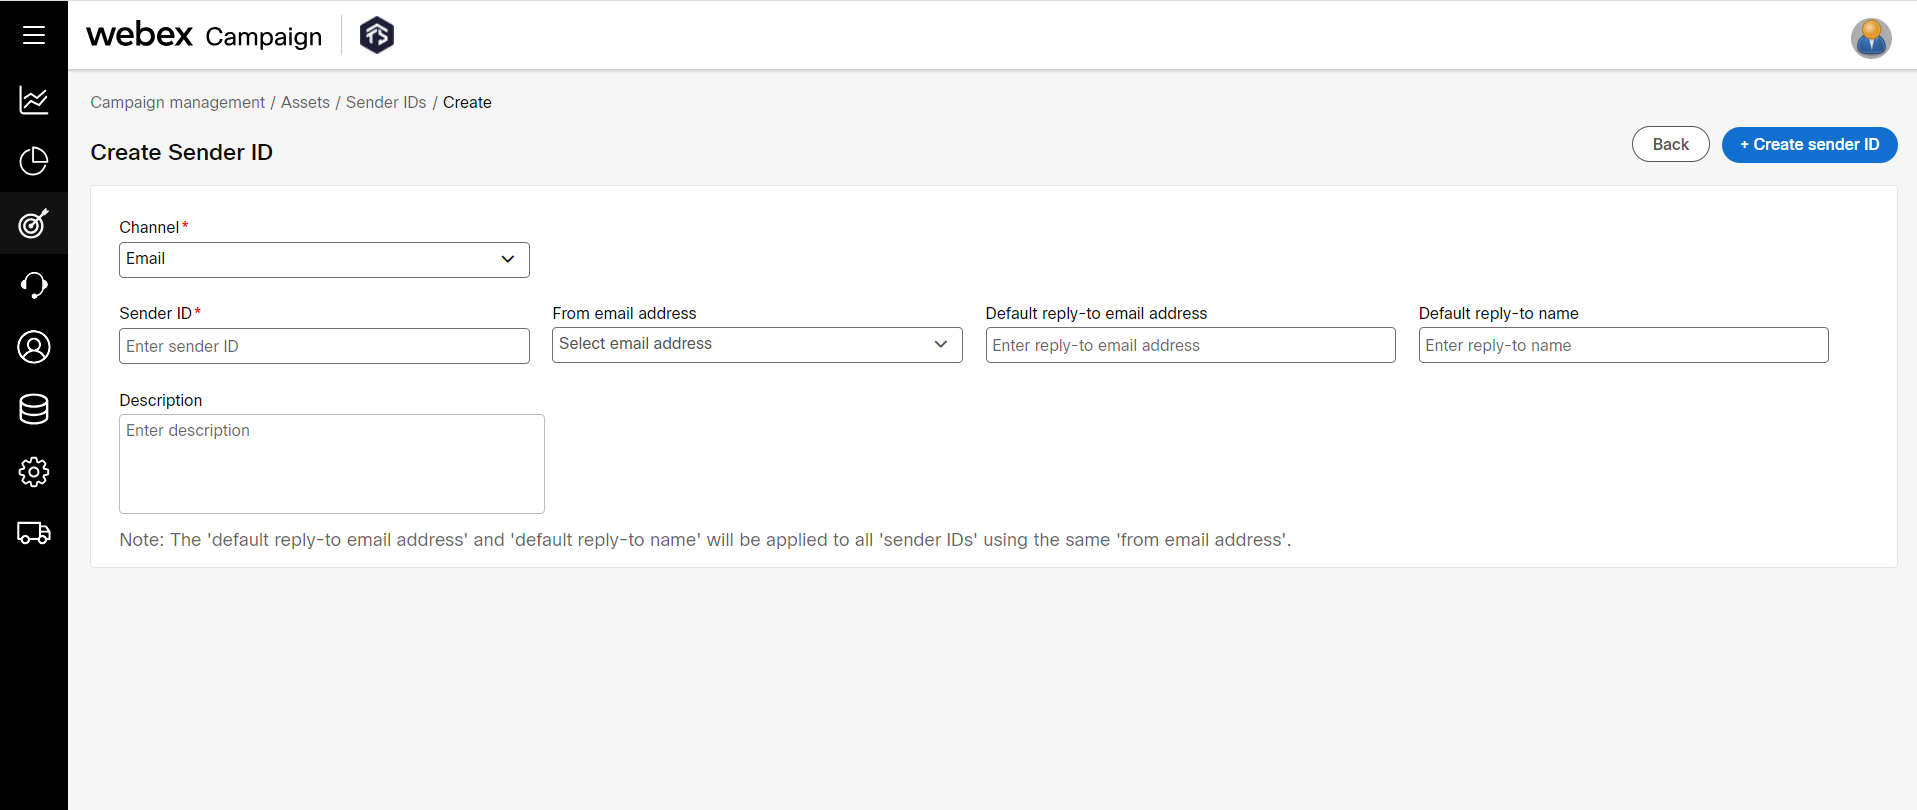
Add a Sender ID for the Email Channel
On the Sender IDs screen, click +Add new.
- On the Create Sender ID screen, select the Email channel from the drop-down and enter details for the following fields.
- Sender ID: Enter a Sender ID. For example a brand or company name.
- From email address: Select the Email ID of the person or company you wish. The email recipients will receive the emails from this address.
- Default reply-to email address: By default, From email address will be shown as the Default reply-to email address. However, this field is editable, and you can enter a valid email address of the person or company you want recipients to reply to. This Email ID will be applied to all 'Sender IDs' using the same From email address.
- Default reply-to name: Enter a valid name of the person or company you want recipients to reply to. This Email Name will be applied to all 'Sender IDs' using the same From email address.
- Description: Enter a meaning description.

- Click + Create sender ID.
Now the Sender ID is ready to be used in Email Deployments.
Updated 2 months ago