

Creating and Applying Filters
The Campaigns list screen is displayed when one or more P&L groups are selected and viewed for more details. This screen displays all the campaigns and deployments deployed under the selected P&L group or groups.

On the Campaigns list page, you can see the top-level filter with the following values:
- All deployments
- Promotions
- Instant deployments
- A/B promotions
- Workflow deployments

You can also click on the triangle icon on the right side to drill into a specific campaign. This will open up a card showing all the deployments within that campaign and their respective counts, channels, status, etc. against a campaign name to view the deployment list.

You can filter the deployments based on the type of deployment, channels, and date. The filter can also be saved for future use.
Creating and Applying a Filter on Campaign List
Follow these steps to create a filter:
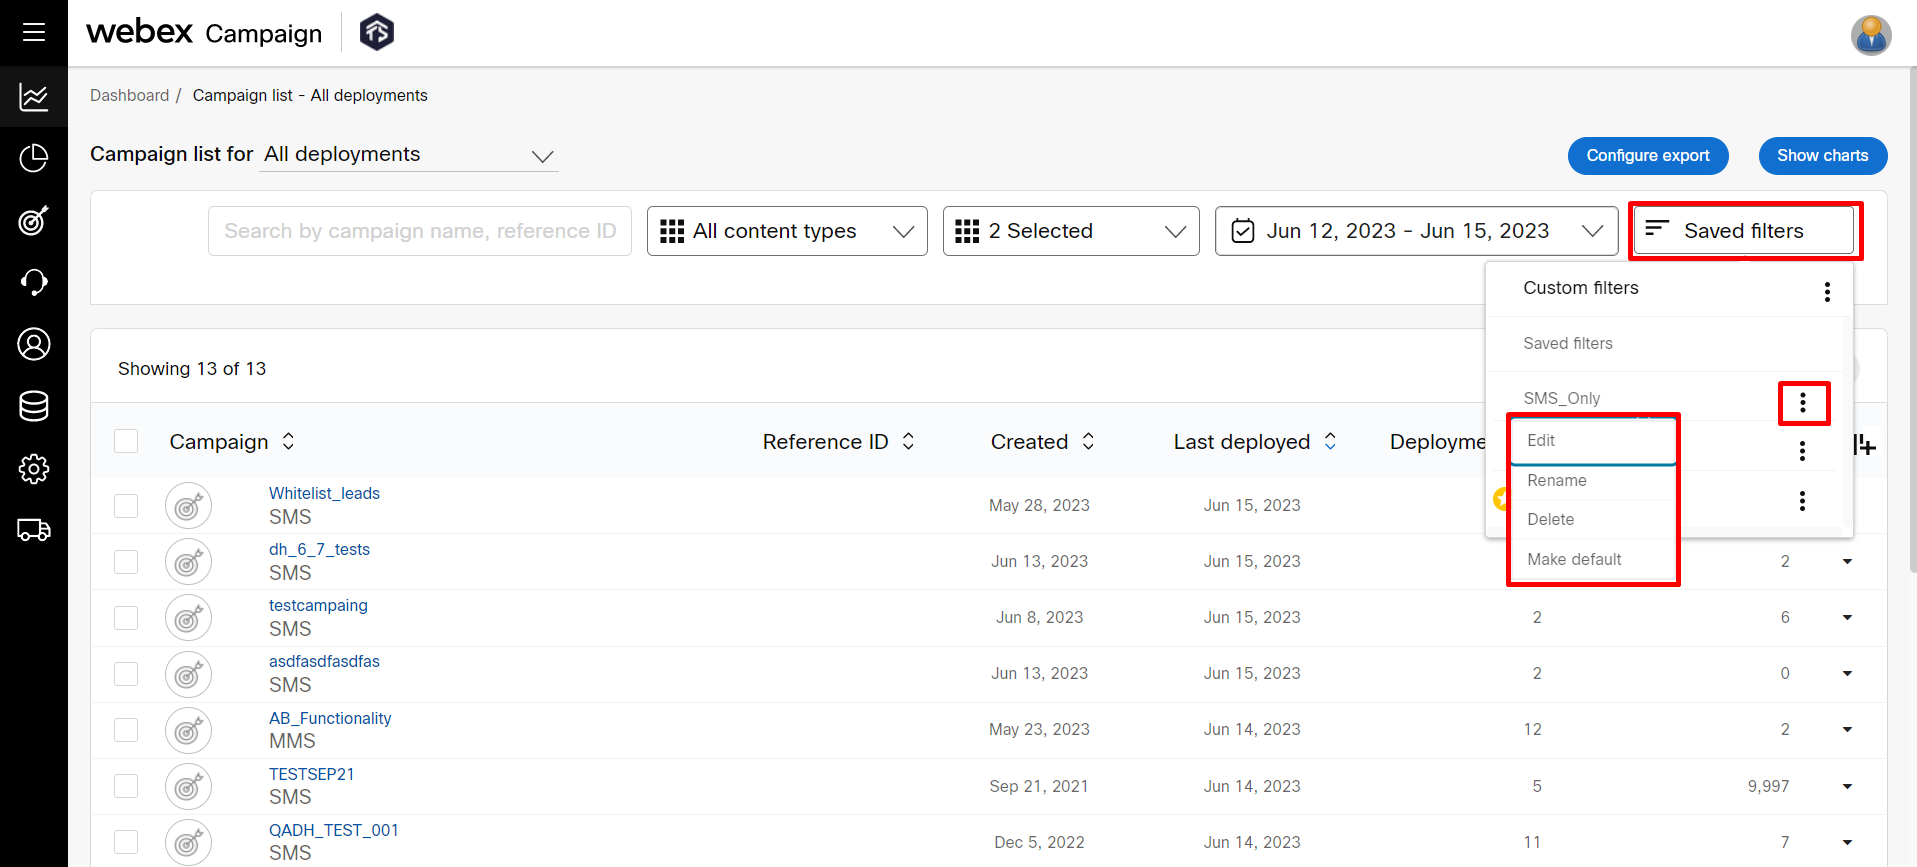
- To create a new filter, select the desired date range and channels. The screen will display the filtered results. To save the filter, click on Saved filters and then click the ellipsis icon and click on Save.

- The Save filter screen appears. Enter a name and click Save . The currently applied filters such as channels and date range will be saved as a filter.

- (Optional) To apply an already saved filter, click the ellipsis icon and click on the desired filter from the list.

- To make a filter default, click the ellipses icon of the required filter and click ‘Make Default’. Your default filter will be indicated with a ‘star’ icon next to it.
The next time you log in, your default filter will be automatically applied.
However, on screens where it does not make sense to apply all the sub-filters within the default filter, only the date-filter portion of the default-filter will be applied, e.g. If your default filter is configured to show only SMS channel deployments during the previous month, and if you navigate to the ‘Dashboard home’ page, then only the ‘previous month’ portion of your default filter will be applied on that page because there is no possibility to apply the SMS channel filter on the Dashboard home page.

- To Edit, Rename, or Delete a filter, click the ellipsis icon against the filter and click on the desired action.
- You can also hide or show the columns that are displayed on the screen. To do so, click on the icon as shown below and select/deselect the checkbox against a specific column.
- Click on Update. The selected columns will be shown in the campaign list view.

Editing a Filter
To edit a filter, follow these steps:
- Click the ellipsis icon against the filter and click on Edit. The edit filters screen appears.

- Add or remove the selected values from the filter.
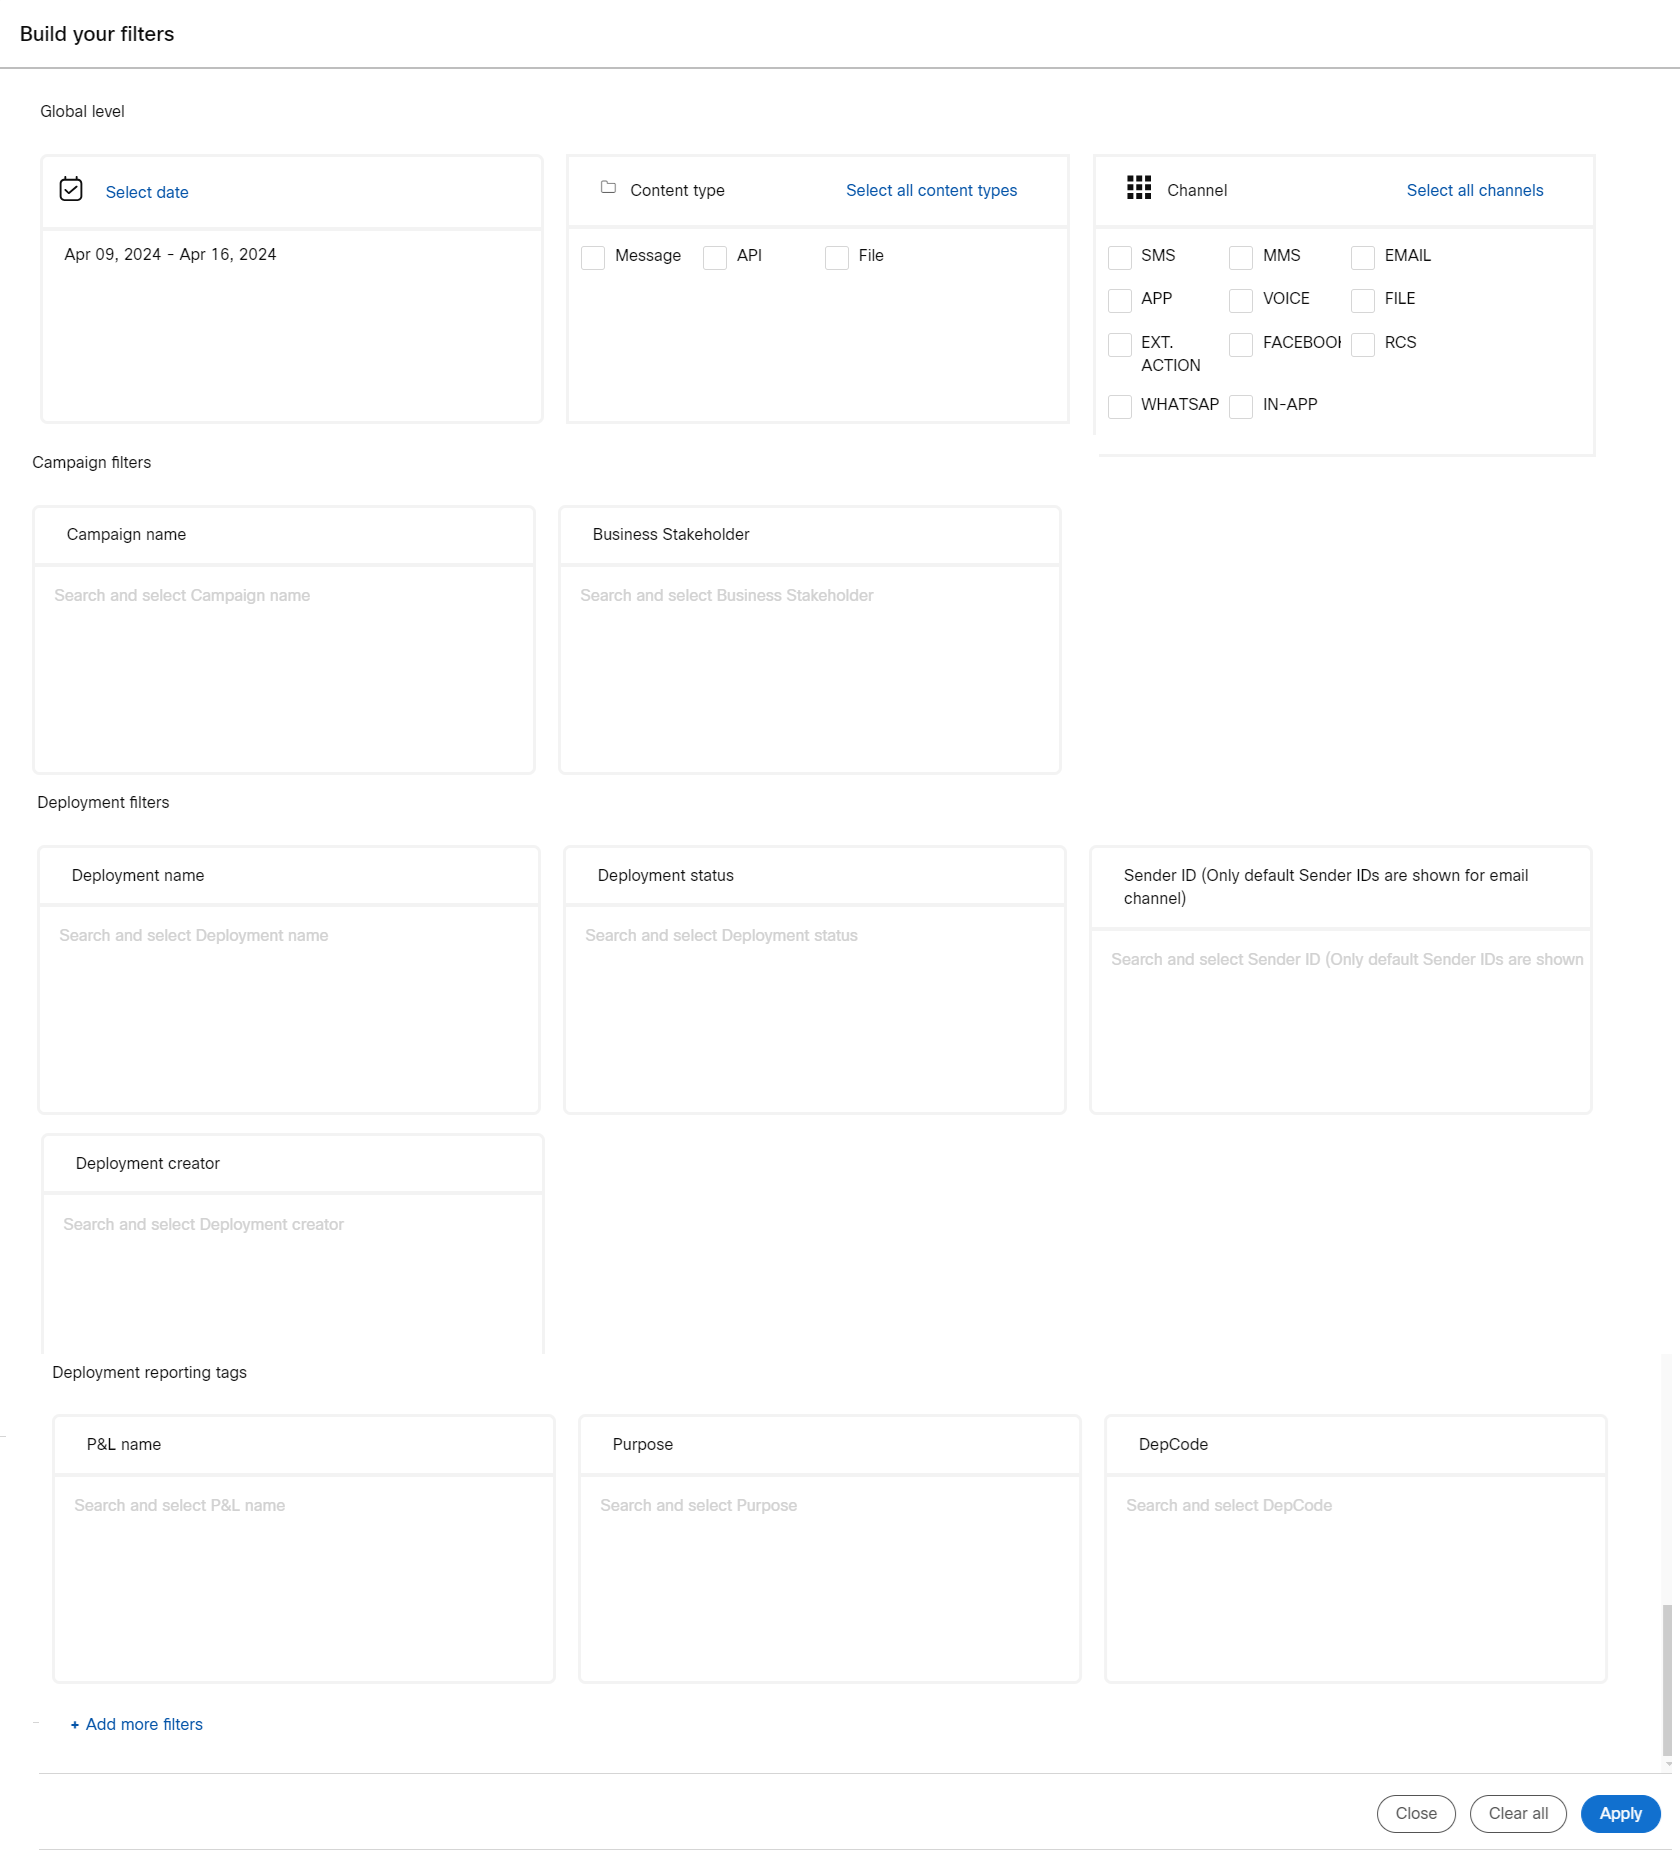
- To change the date range, click on Date and select the required date range.
- To select or deselect a content type, click on the required types. To select all content types, click on Select All Content Types.
- To select or deselect a channel, click on the required channels. To select all channels, click on Select All Channels.
- To add or remove a P &L, click in the P& L name drop-down and select the required P &L. To remove a P & L, click the x icon next to the P &L.
- (Optional) To add more filters, click + Add More Filters. Select the required filters and click Add. The newly added filters will be displayed on the screen.
- Select the appropriate values from the respective drop-down filters.

- Click Apply.
Updated over 1 year ago