External Actions
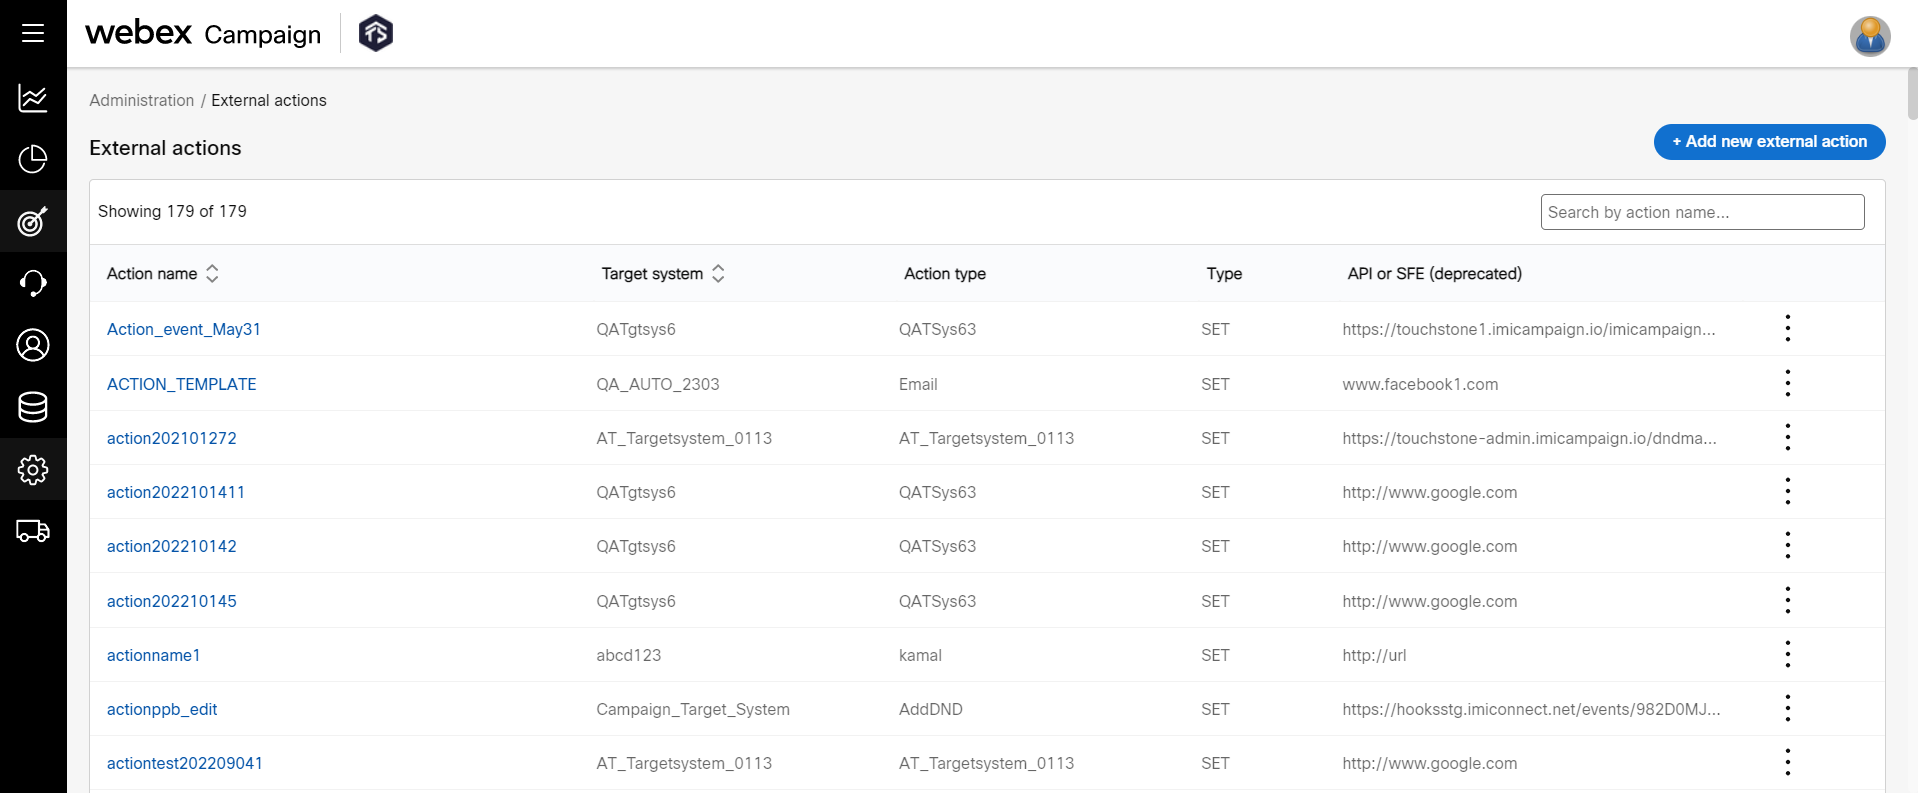
Actions are the activities that allow a user to configure the execution of an API or workflow, calling one or multiple 3rd-party or internal systems, which are preconfigured as target systems within Webex Campaign. These can be triggered by an inbound SMS or an Event raised to Webex Campaign. Every action is associated with a pre-defined set of input and output parameters which are passed through the API to the 3rd party system that Webex Campaign is interacting with.
For example, the Actions configured can be used in Follow-up Comms to invoke the defined actions for various customer responses received as events and MOs.
Add an External Action
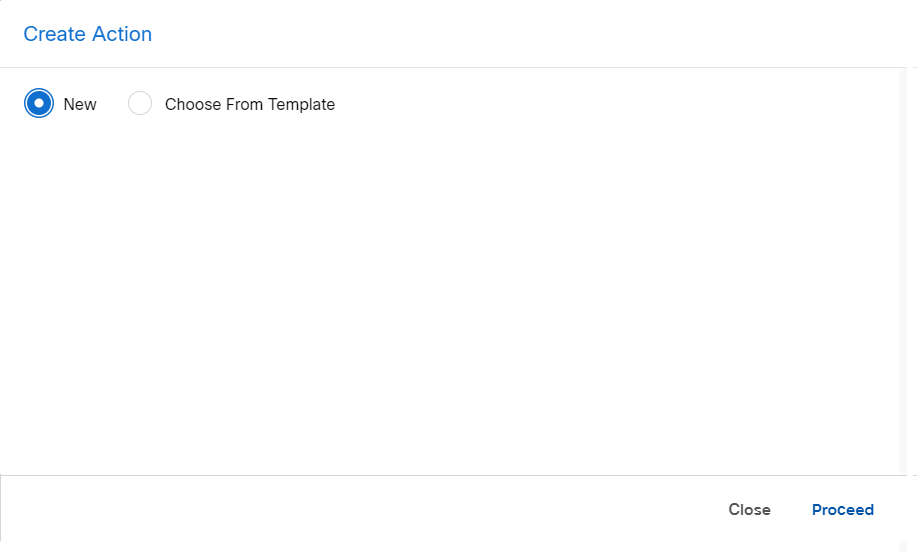
Webex Campaign provides an option to create a new action or choose from saved action templates. When the template option is chosen, the system provides filtering options by Target System and Action Type whilst selecting the template. For templates, they are pre-populated as per the template chosen.
Follow these steps to create an External Action:
- Navigate to Administration > External action list screen, click + Add new external action.
- The Create external action screen appears. You can choose to create a new action or select an action which is saved as a template earlier. Select New to create a new action and click Proceed.
-
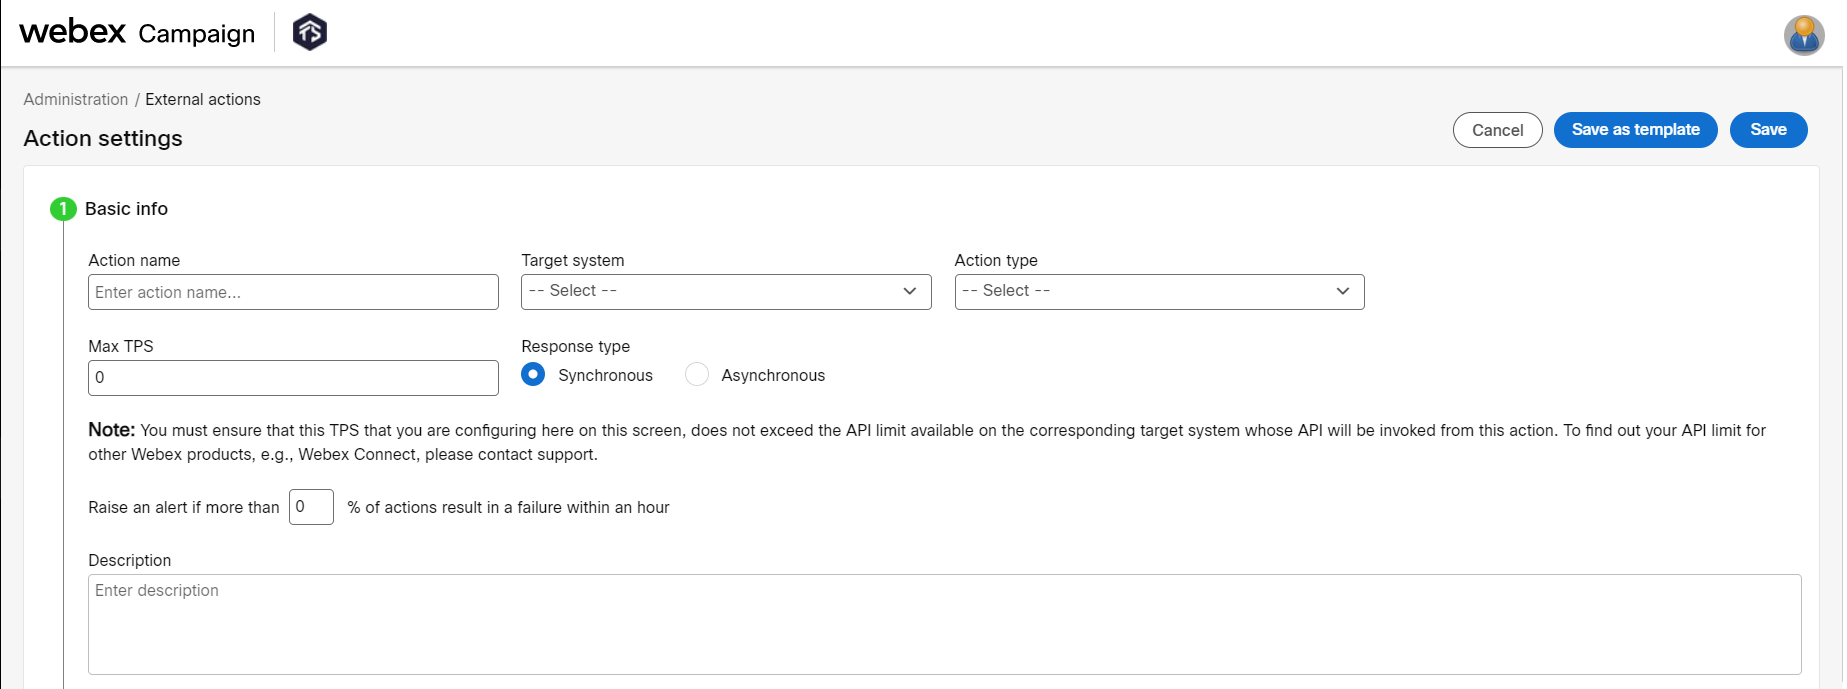
On the Action settings screen, enter details for the following fields:
-
Action name: Enter a name for the action.
-
Target system: Select a target system associated with the user from which an action is to be retrieved. When a network event is triggered, the application connects to the system(s) to fetch and performs the corresponding configured action dynamically in real-time.
-
Action type: Select the action type associated with the target system.
-
Max TPS: Enter the maximum TPS.
-
Response type: Select the data transfer method in which the action is to be performed.
◘ Synchronous: The action is processed synchronously. For example, if an action received is from
the target system then it is processed in real-time.◘ Asynchronous: The action is processed asynchronously. For example, if an action type is received, from the target system then it is processed offline. -
Raise an alert if more than: Enter the percentage of actions that result in failure within an hour to raise an alert.
-
Description: Enter a meaningful description for the action.
-
- Click Mode accordion and enter the following details:
The following options are applicable for API mode:
- API URL: A single URL that performs an action by connecting with the target systems.
- Method type: Select the applicable method type from the drop-down.
- Action handler: Select the name of the handler that invokes the action.
- Action timeout: Maximum period the system should wait to receive an action response before logging it as failed.
Any change to an Action definition takes 5 minutes to be updated in the back-end databases.

The following options are applicable for Webex Connect Workflow:
Prerequisite: The user can create fulfilment workflows via user interface or utilize workflows created upfront by him or other users. Whenever the contact responds with MO or an event is triggered, Webex Campaign executes the Fulfilment Workflow. You can view the fulfilment results via the Dashboard.
A Fulfilment Workflow can consist of a number of API calls to the same or multiple systems which have been grouped as the Target System. Depending on the outcome of each API, the flow can execute different following APIs calls before returning a final response which is logged for that initial trigger.
- Webex connect service: Select the Webex Connect service.
- Webex connect flow: Select the Webex Connect flow from the drop-down.
- Flow webhook URL: Enter the Webhook URL.
- Method type: Select the applicable method type from the drop-down.
- Action timeout: Maximum period the system should wait to receive an action response before logging it as failed.

- Select the Authorization type. Enter details for the following fields:
- Token: This option is applicable if the Authorization type is selected as Bearer Token. Enter the token.
- Username: This option is applicable if the Authorization type is selected as Basic Auth. Enter the username.
- password: This option is applicable if the Authorization type is selected as Basic Auth. Enter the password.
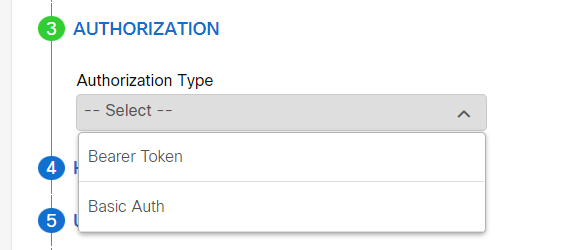
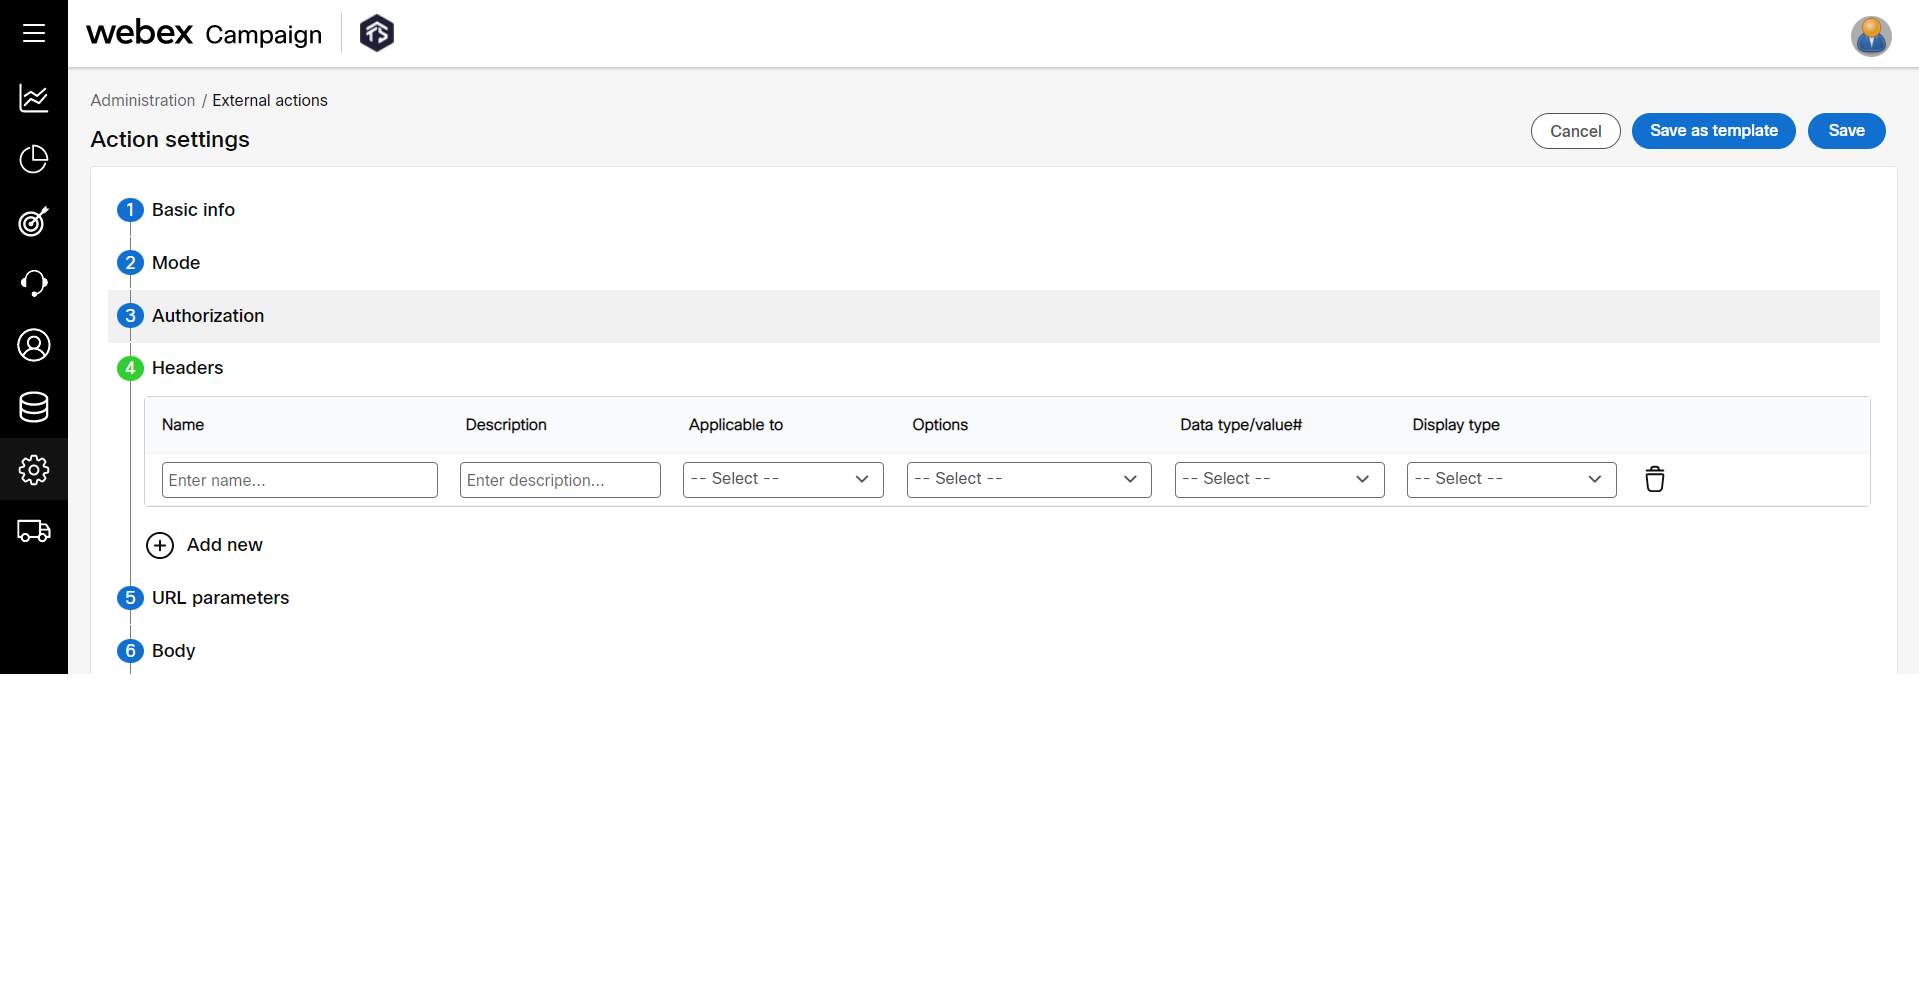
- Click Headers accordion and click +Add new and enter header details as required.
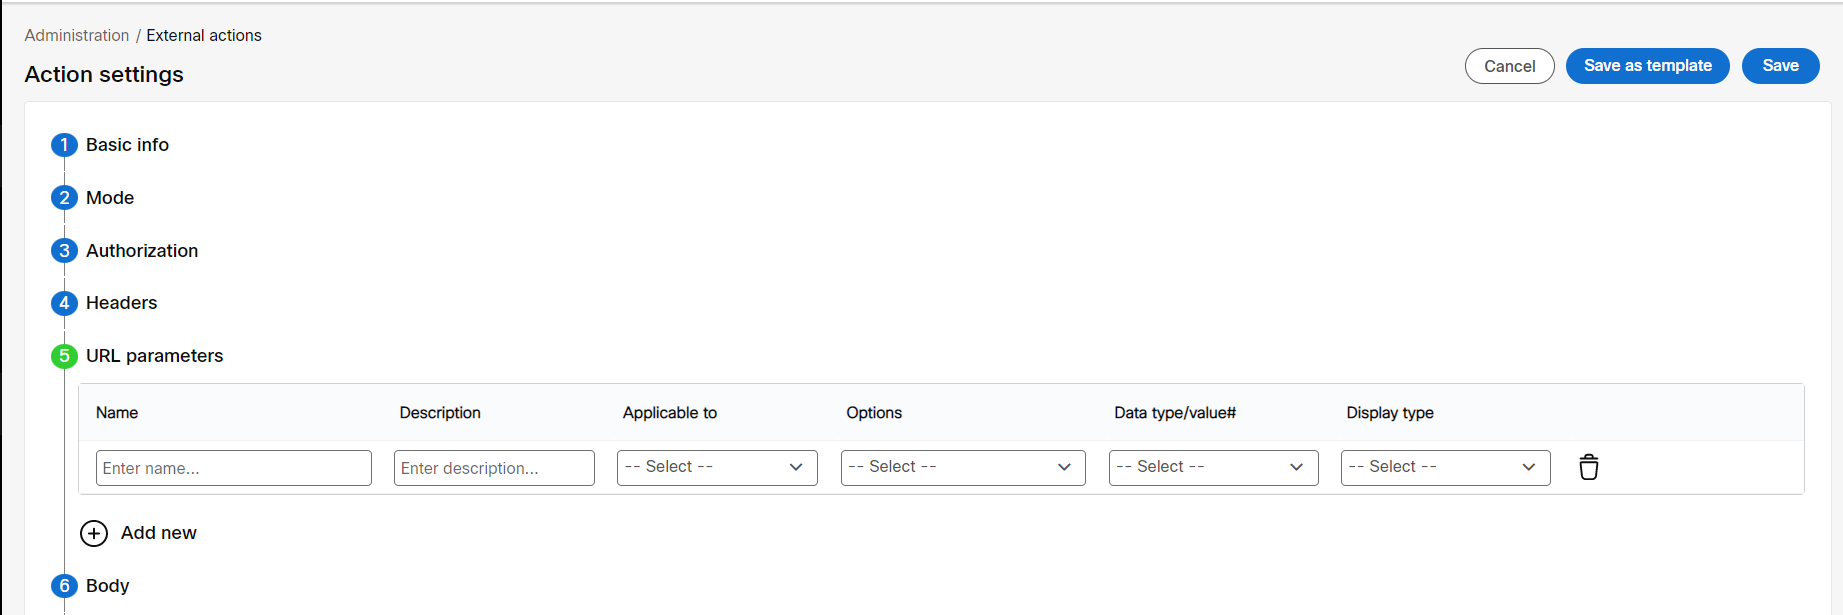
- Click URL parameters accordion and click +Add new and enter URL details as required.
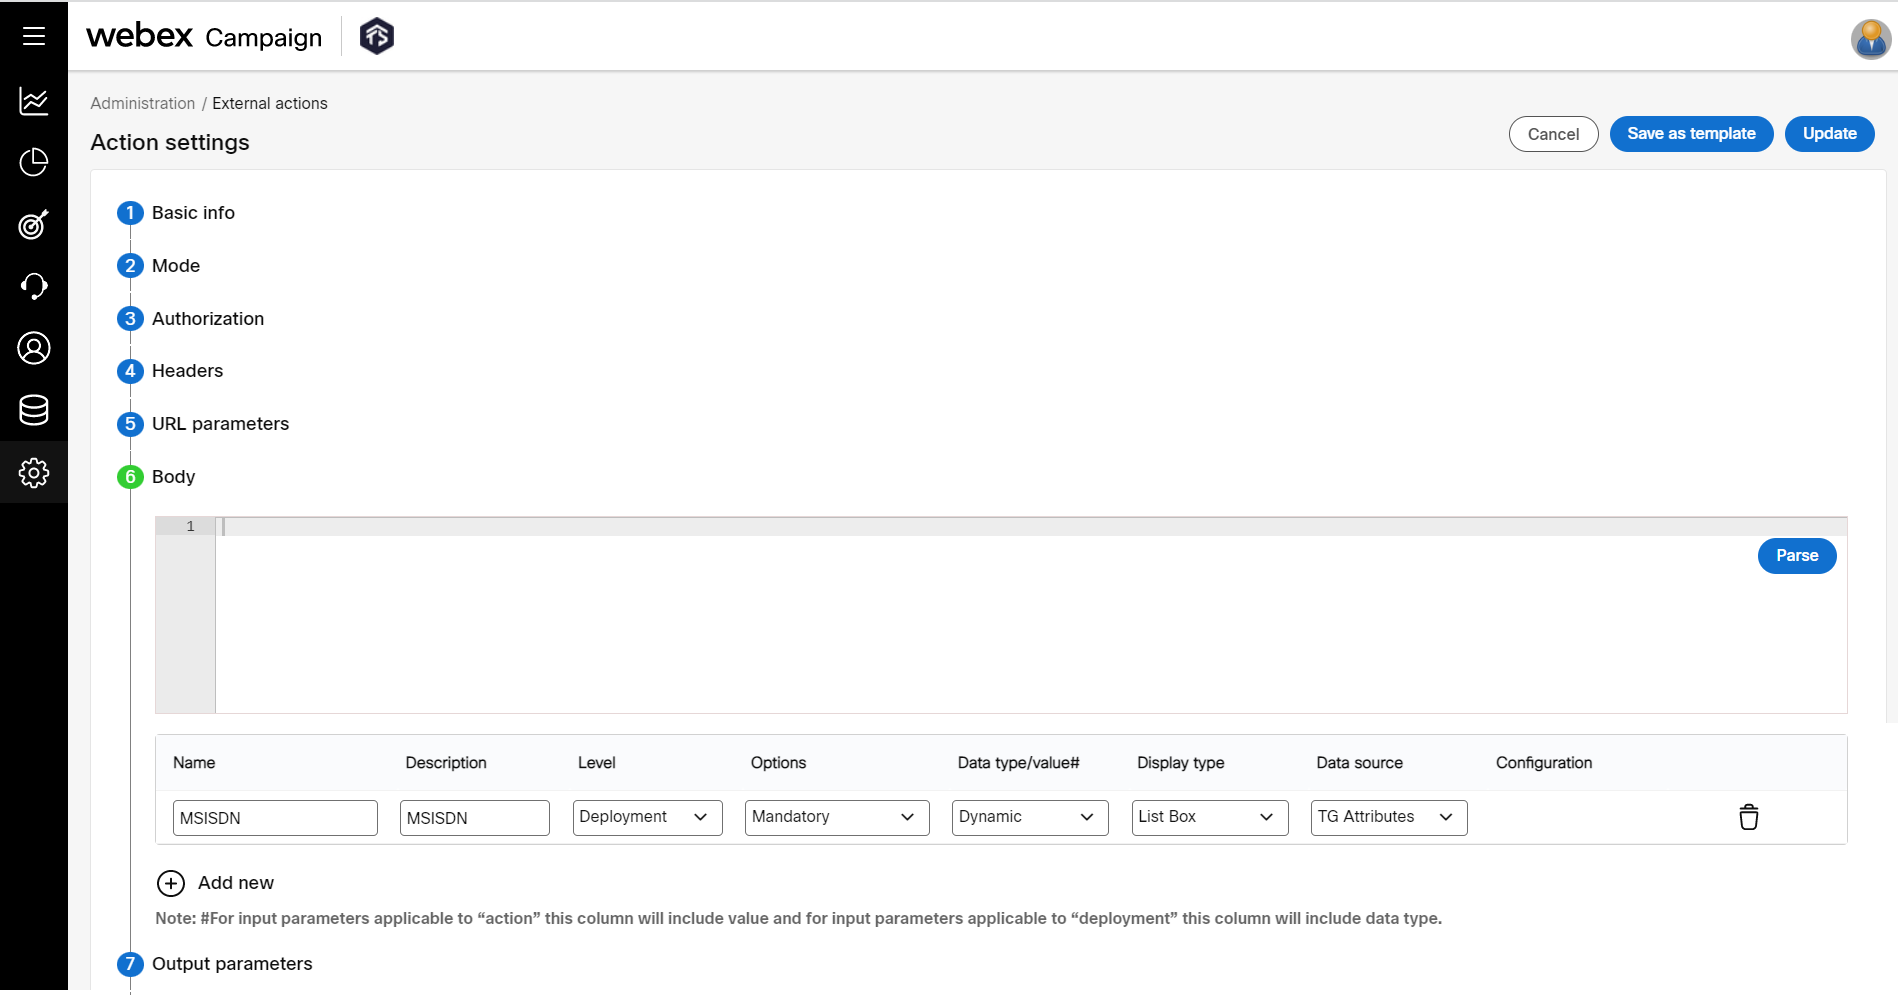
- Click Body accordion and click +Add new and enter the details as required.
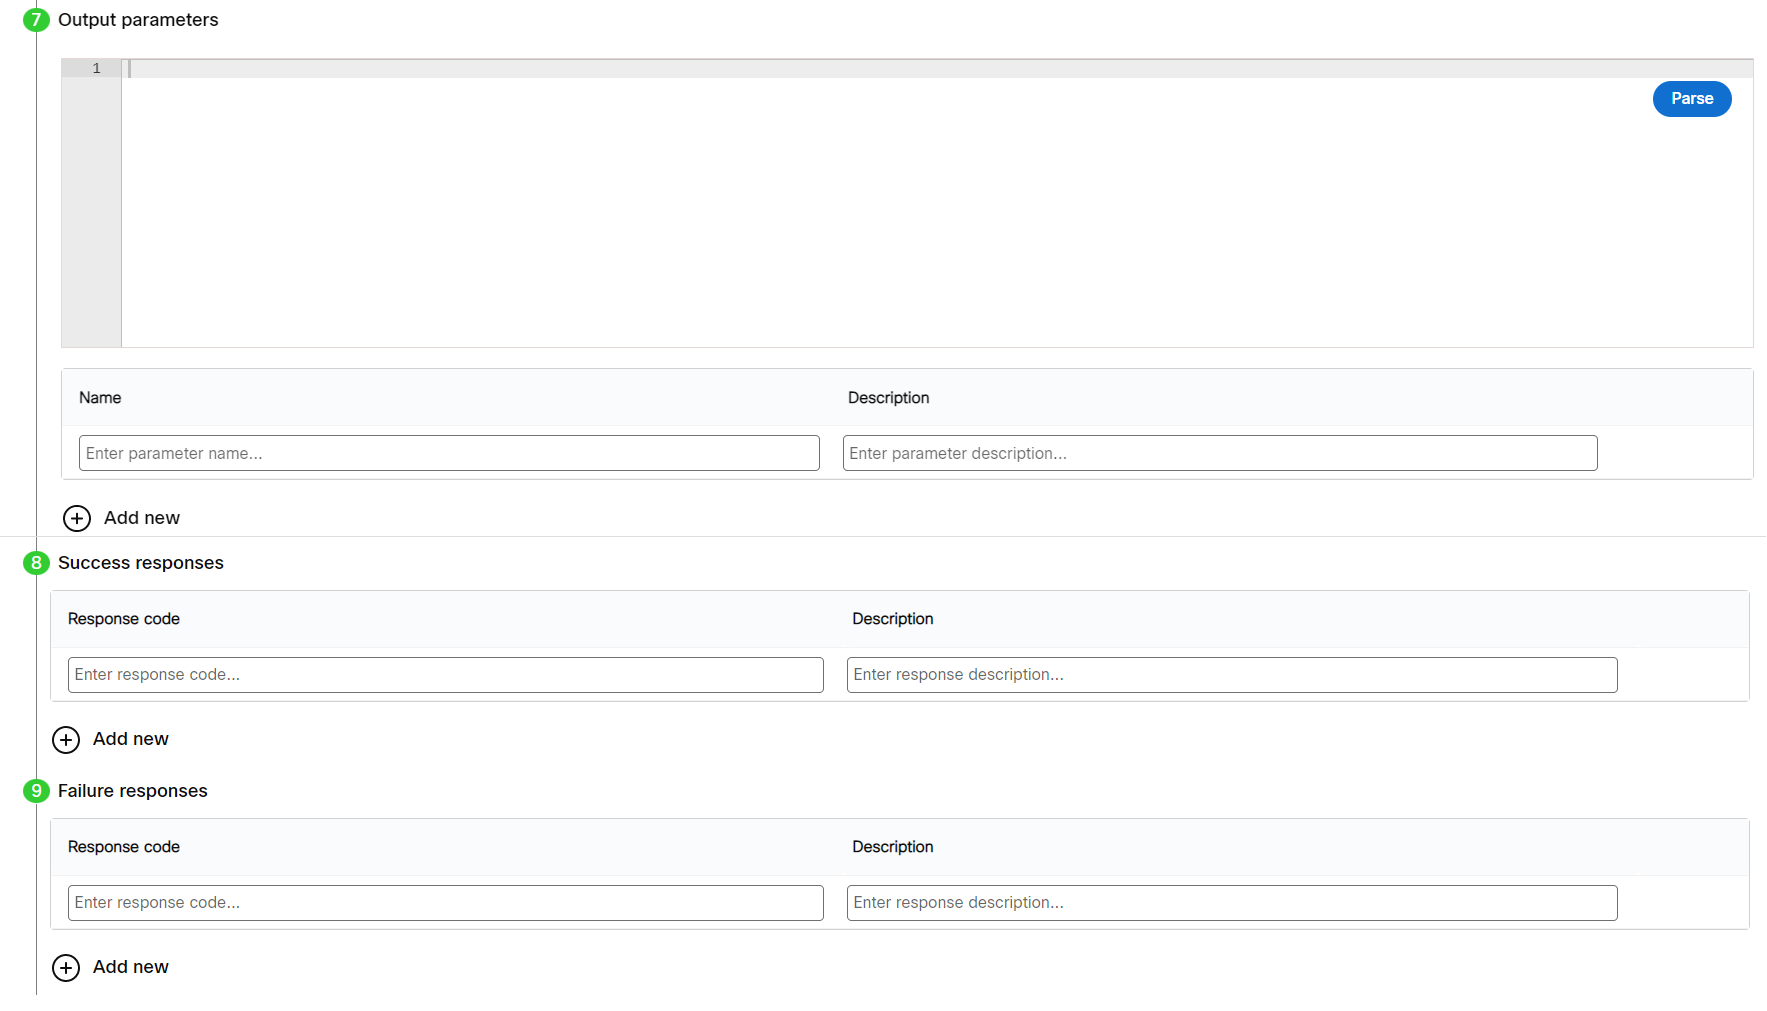
- Enter details in the Input parameters, Output parameters, Success response, and Failure response accordions as required.
- Input parameters: Enter the parameters that are required to invoke an API request in the Target system.
- Output parameters: Enter the parameters that are returned by the API as a response from the Target system.
- Success response: The parameters (status codes) that are classified as a success and trigger any success message that is configured within the deployments.
- Failure response: The parameters (status codes) should be classified as a failure and trigger any failure message that is configured within the deployments.
Click + Add new to add more parameters in the above accordions.
-
(Optional) Click Save as template to save this as a template to reuse it in the future or to create similar actions.
-
Click Save.
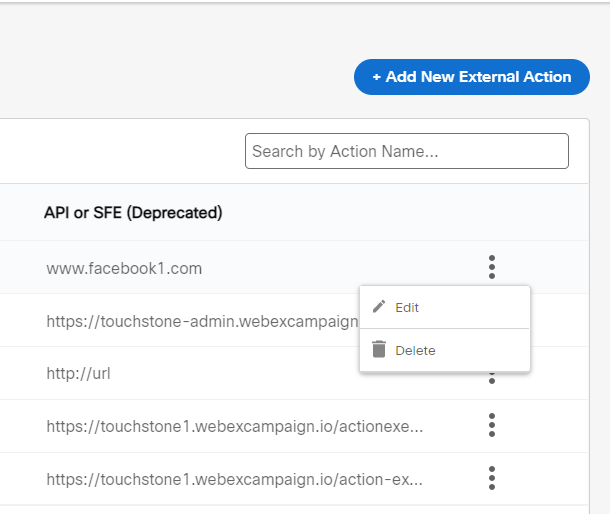
Edit or Delete an External Action
- To edit an External action, click the ellipses icon of the required external action and click Edit.
- Make necessary changes and click Update.
- To delete an External action, click the ellipses icon of the required external action and click Delete .
Updated about 1 year ago