

UI User
Creating new UI Users
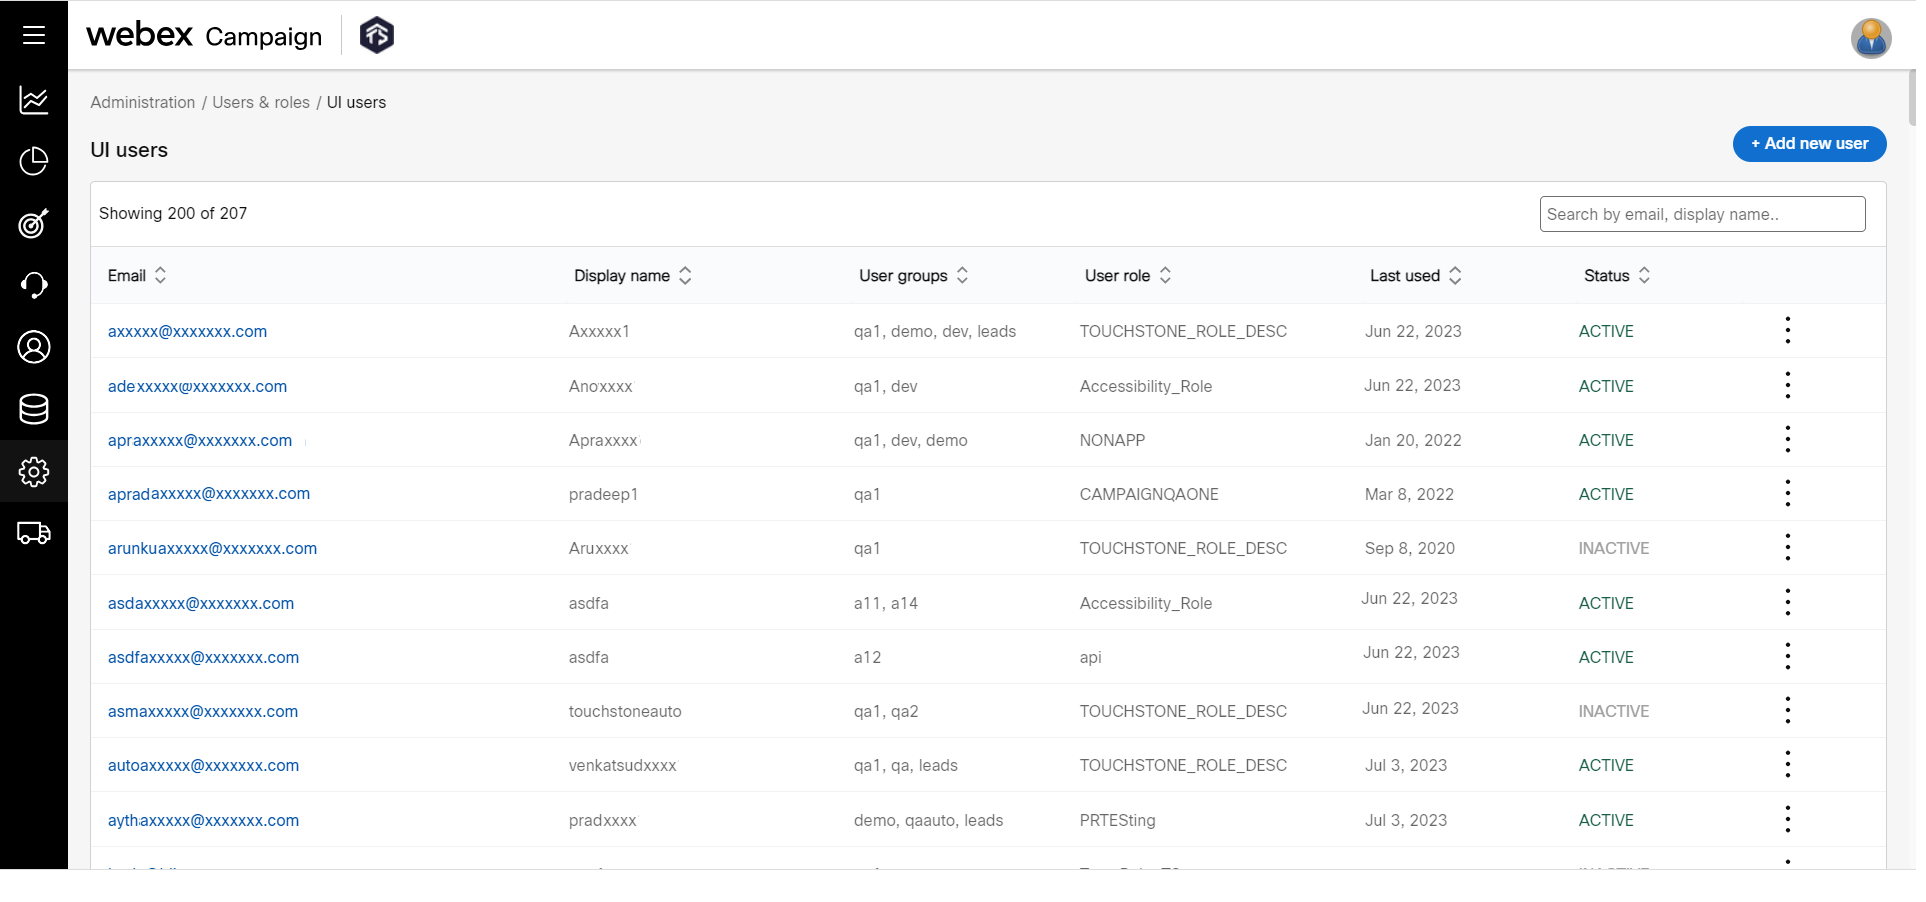
The UI User list page displays a list of users along with information such as their role, status, and last login date.
Add a User
This feature allows you to create UI User accounts assigning them to pre-defined user roles and configuring further access permissions and restrictions related to the building and running of campaign deployments.
The pre-requisite for creating a new user includes being an Admin or having ‘Create User’ permissions.
Follow these steps to add a UI User:
- Go to Administration > Users & roles > UI users list screen and click + Add new user. The Create user screen appears.
- Enter the personal details of the user. The fields marked with a ‘*’ are mandatory.

-
Click User credentials accordion and enter the user credentials that determine the user’s access to Webex Campaign. This includes assigning a user role with its pre-configured permissions and rights. During user creation, additional control parameters are created at the user level:
- Email: Valid Email id with which the user is allowed to log in.
- User name: Enter a valid user name with which the user is allowed to log in.
- Password: Password with which the user is allowed to log in for the first time. This should contain a combination of upper and lowercase letters, numbers, and special characters.
- User role: Type of a user role, which gives the access permissions to the user as defined in the user role.
- User groups: The User Group under which the user is to be created. You can search and select an existing group name or create a new group. You can associate a user with 30 groups simultaneously. There is no restriction on the number of user groups you can create. When users are associated with multiple groups, they can switch from one group to another group using the Switch User Group option. For more information on user groups refer to User Groups and Hierarchy.

- Approval teams: Enter or create an approval team the user belongs to. A user can be part of a maximum of 30 groups. When this user creates a deployment, the approvers mentioned here will have to approve the deployment without which the deployment cannot be run.
- Timezone: The time zone in which the user can create, run and view campaign deployments.
- Allowed hosts: The list of hosts (separated by a comma) allowed for the user to access.
- Notifications: Based on the option selected, the user can receive SMS/Email notifications on campaign deployments.
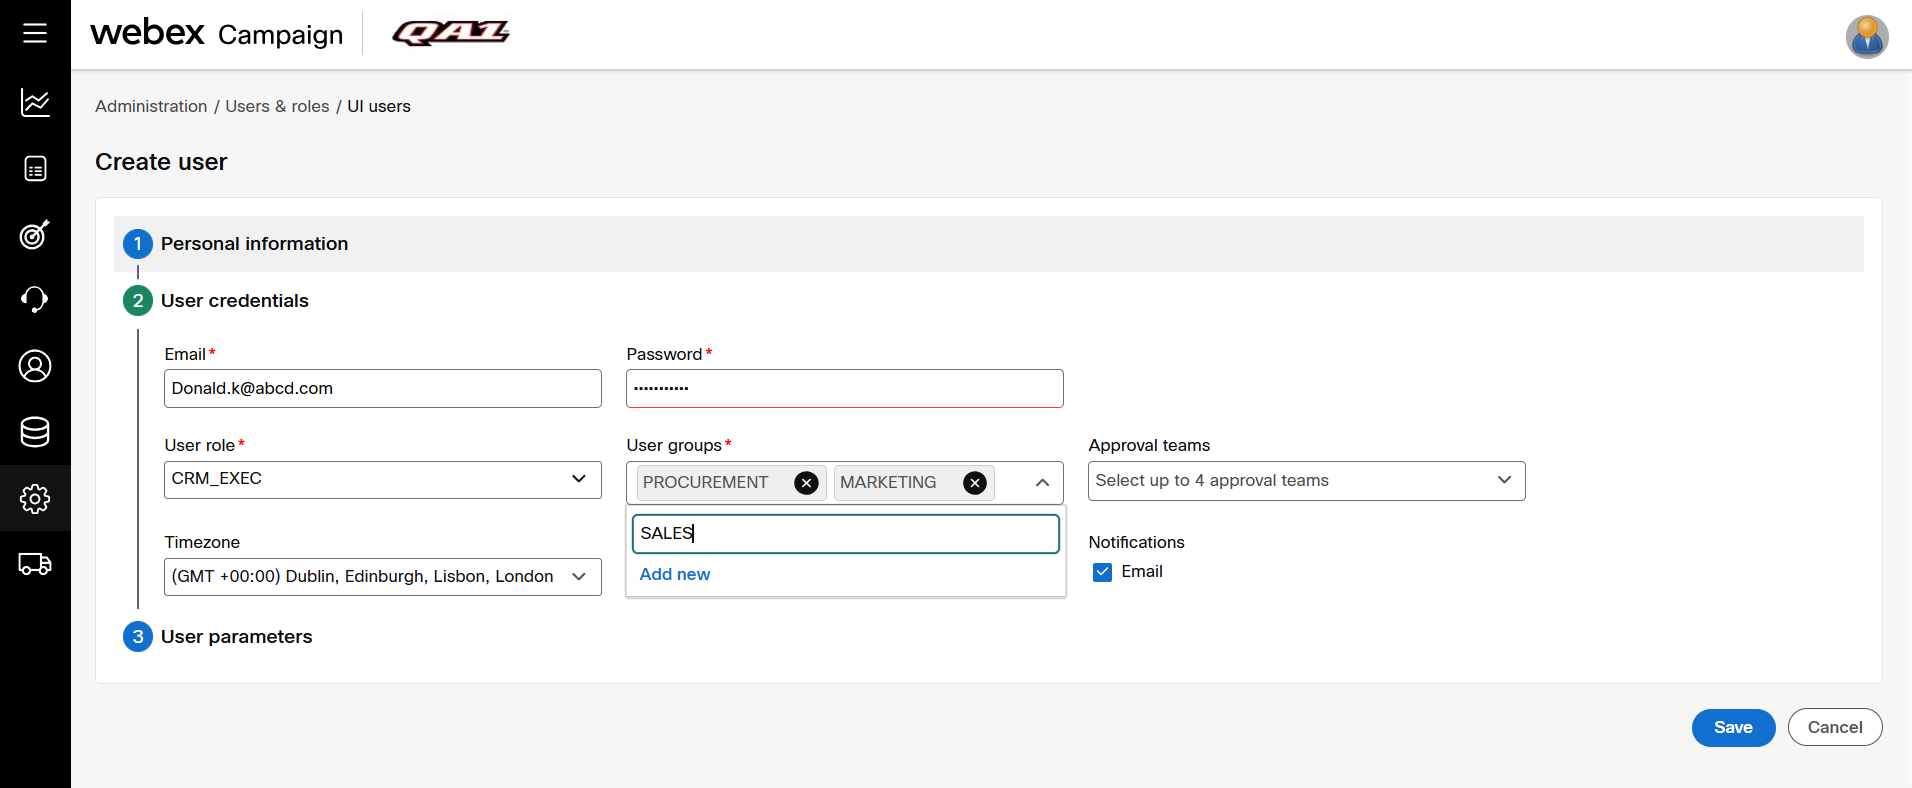
- To create a new user group, type the new user group name. The Add new link will be displayed. Click the Add new link. The user will be associated with the new user group.
After adding a new User group, you can have click Save or Update, Then only the user group will be created.
- Click User parameters accordion and enter user parameters that define and limit what a particular user is able to do in Webex Campaign. Enter the Channel usage limits for the user.
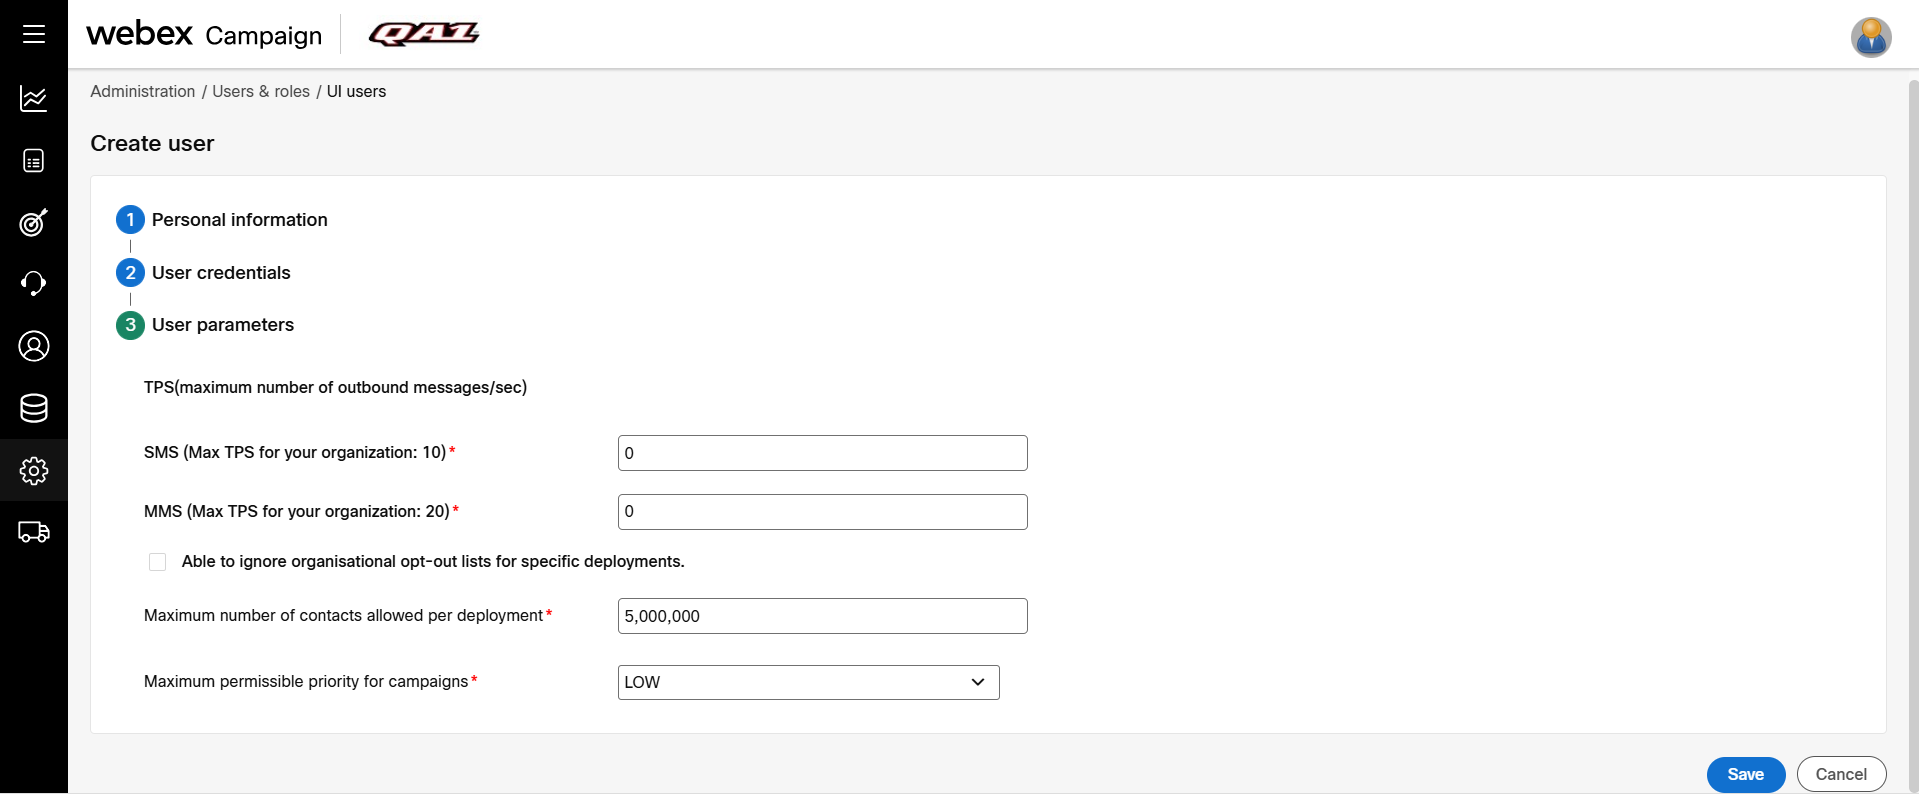
TPS(maximum number of outbound messages/sec): Configure the maximum number of messages, the user is allowed to send per second through each channel. Remember, platform TPS is shared across all users’ campaigns scheduled at the same time.
- SMS (Max TPS for your organization: 10): Configure the TPS for SMS channel
- MMS (Max TPS for your organization: 20): Configure the TPS for MMS channel.
- Able to ignore organisational opt-out lists for specific deployments: Select the checkbox to ignore organizational opt-out lists for specific deployments. If the checkbox is checked, then that user will be able to set to NO the option for Exclude contacts from All Opt-out Lists on the Deployment Canvas Additional options node. For more information, refer to Additional options node.
- Maximum number of contacts allowed per deployment: Configure the max number of contacts a user is allowed to target in a deployment. The default value is 5,000,000.
- Maximum permissible priority for campaigns: Configure the maximum priority a user is allowed to set for campaigns.
- Click Save
Edit or Activate or Delete a User
- On the UI Users list screen, click on the ellipses icon of the required user and click Edit.
- Make necessary changes and click Update.
- To deactivate a user, click on the ellipses icon of the required user and click Deactivate.

- To activate a user, click on the ellipses icon of the required user and click Activate.
The Activate button will unlock a user account that got locked out due to invalid login credentials. Once the account is Activated the old password can be reused or initiate the Forgot password to reset the password.
- To delete a user, click on the ellipses icon of the required user and click Delete. A user in an Active state cannot be deleted. Only an Inactivate state user can be deleted.
While any campaigns created by a user are in an active state, such user cannot be deleted.
Updated 3 months ago