Media
Media are the Image, Audio, Video, and attachments such as pdf, and text files are added to the Assets of Webex Campaign for deployment creation purposes.
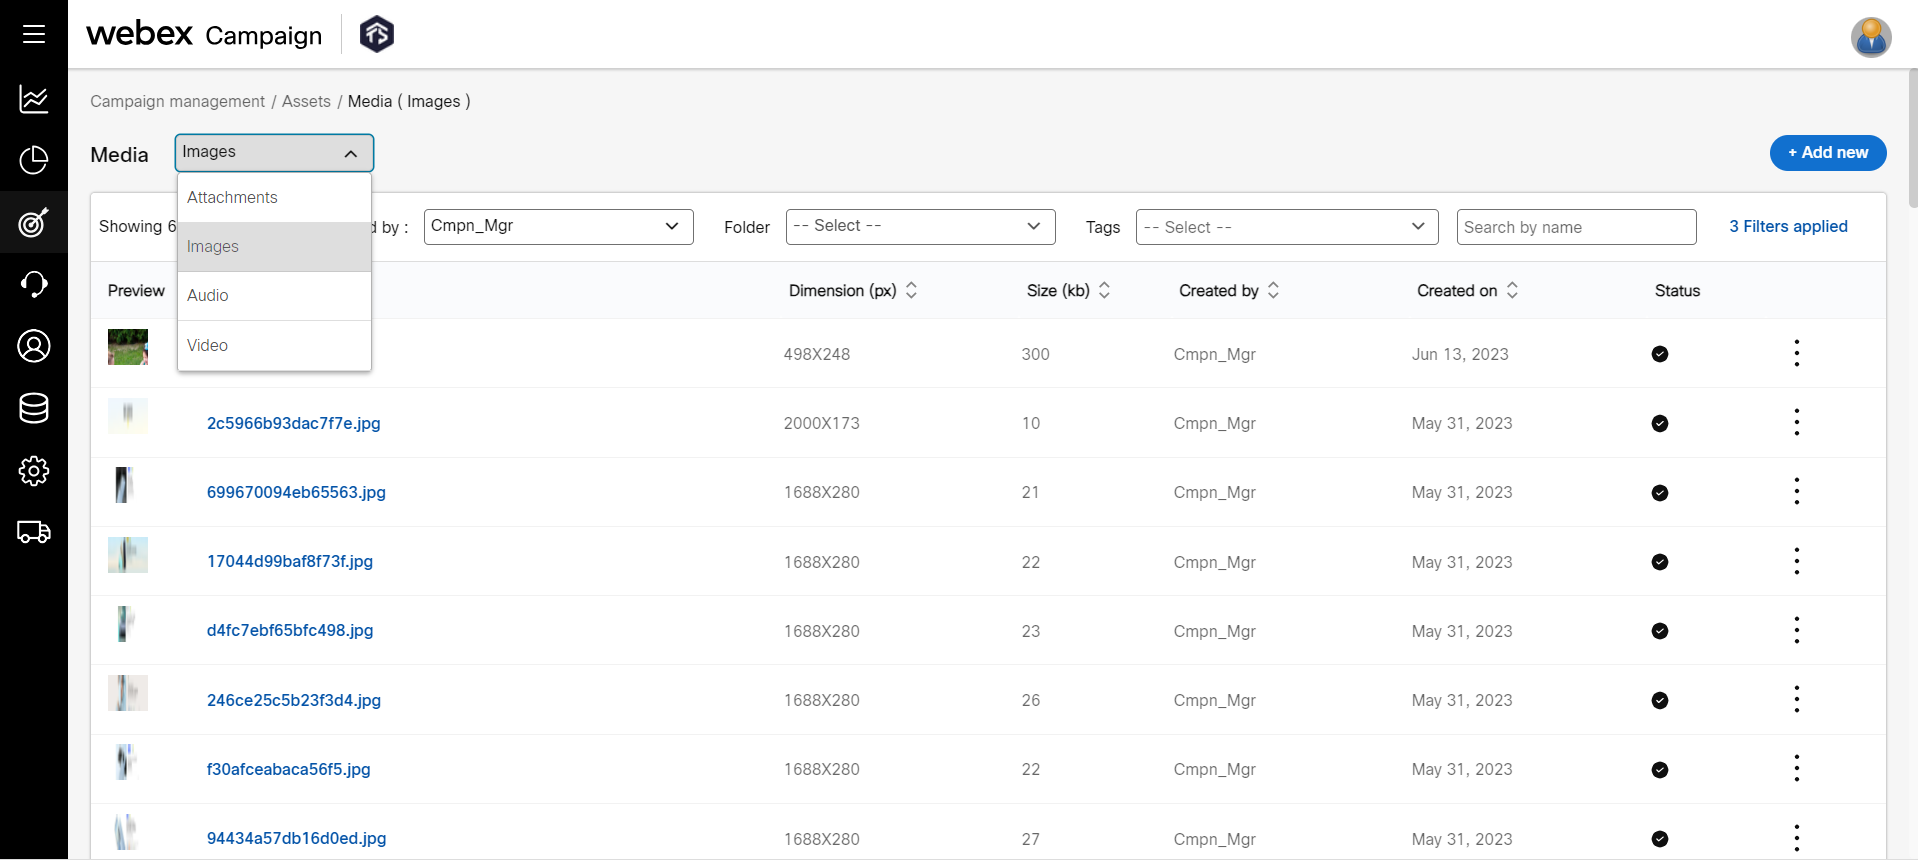
Supported Media Files
Following are the supported file formats of different media:
| Media | Supported File Formats | Allowed size |
|---|---|---|
| Images | .jpg, .jpeg, .png, .gif, .bmp, .svg | 10,240 (KB) |
| Audio | .mp3, .wav | 10,240 (KB) |
| Video | .mp4, .m4v | 2048 (KB) |
| Attachments | .pdf, .doc, .docx, .ics, .txt, .xlsx | 10,240 (KB) |
Supported assets and their size by channel
Following are the supported assets by channel
| Channel | Assets | Size |
|---|---|---|
| Image: .jpg, .jpeg, .png, .gif, .bmp, | The email size, including images and text, should be less than 25MB. There is no limit on the number of images in an email. | |
| MMS | Audio: .mp3, .wav Video: .mp4, .m4v Image: .jpg, .jpeg, .png, .gif, .bmp Note: SVG format is not supported for MMS channel | - Video - 300 kb - Image - 1024 kb The MMS message size, including video, images, and text, should be less than 2MB. |
| RCS | Audio, Video, and Image | The assets are configured in WxConnect. Please refer to WxConnect documentation for size limitations. |
Create an image asset
Follow the below steps to add an image asset:
You can upload Gif images of size 480x560 up to 100 frames in it.
- On the Media screen, select an asset type as Image from the Asset type drop-down list box. Click +Add new.
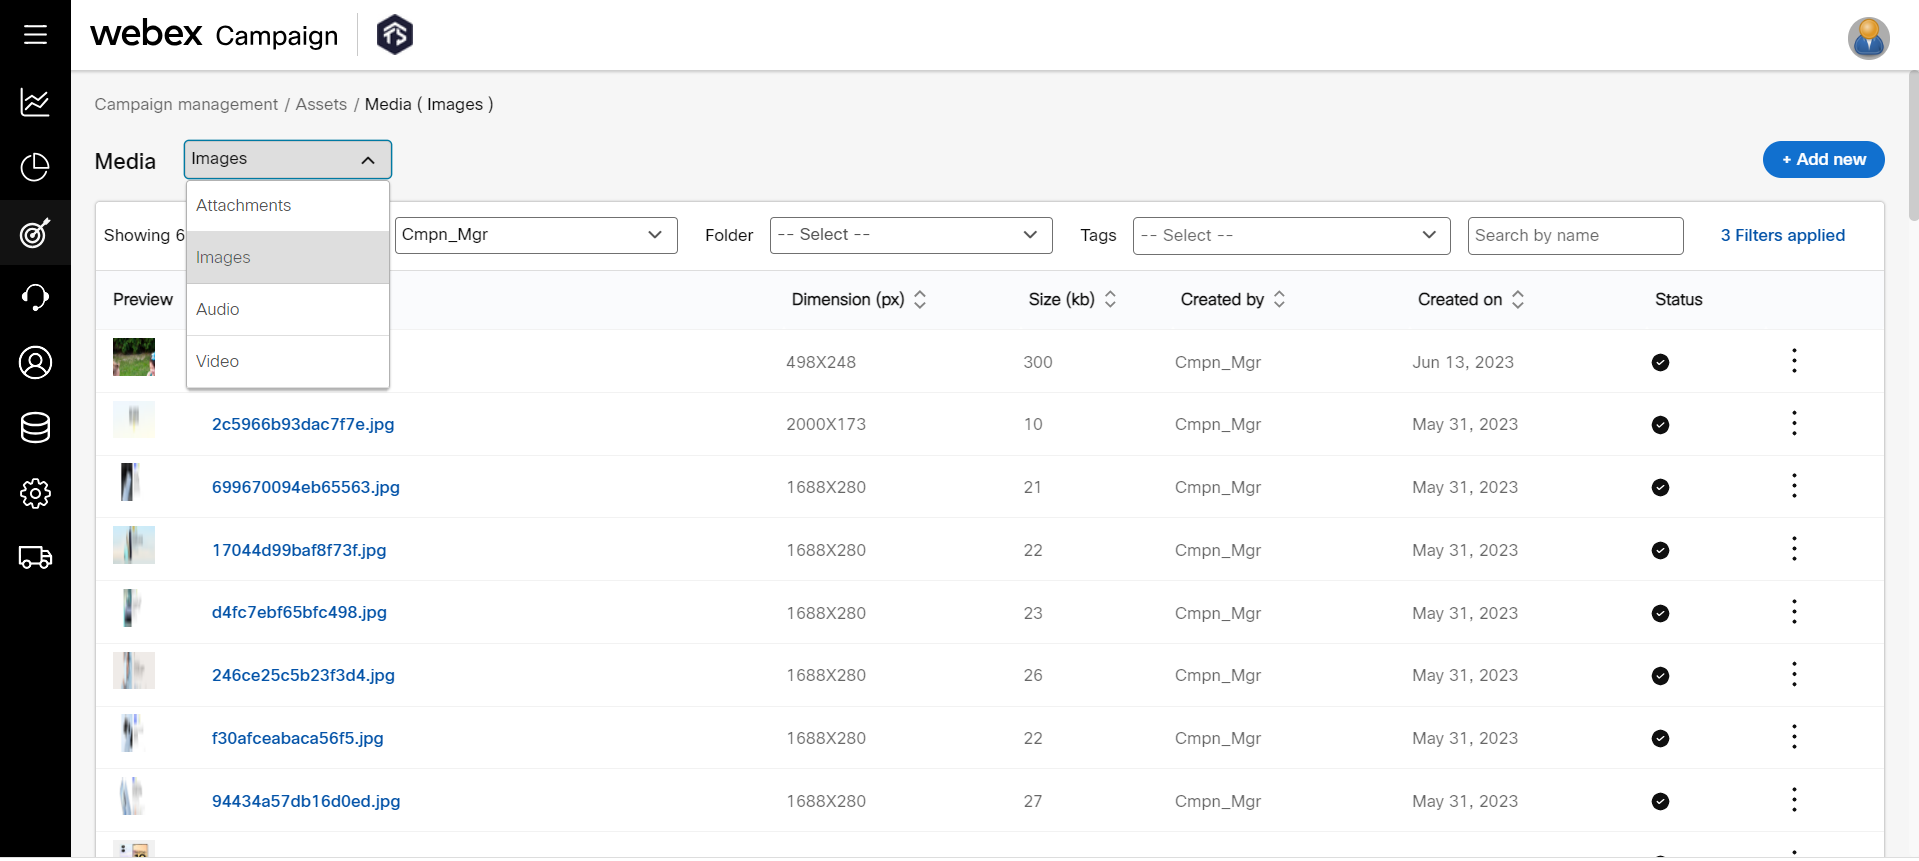
- On the Create Image asset screen, enter details for the following fields.
- Image files: Click Choose file and select one or more images you want to upload.
You can select upto 15 images to upload. It may allow more depending on the size of the images. However, we recommend you to select upto 15 images.
- Tags (max 3): Enter tags for the image. You can enter up to 3 tags. These tags are useful for searching the images later in time.
- Folder: Enter a folder name. This folder is useful for categorizing the images. You can use Folders to filter and search the images.
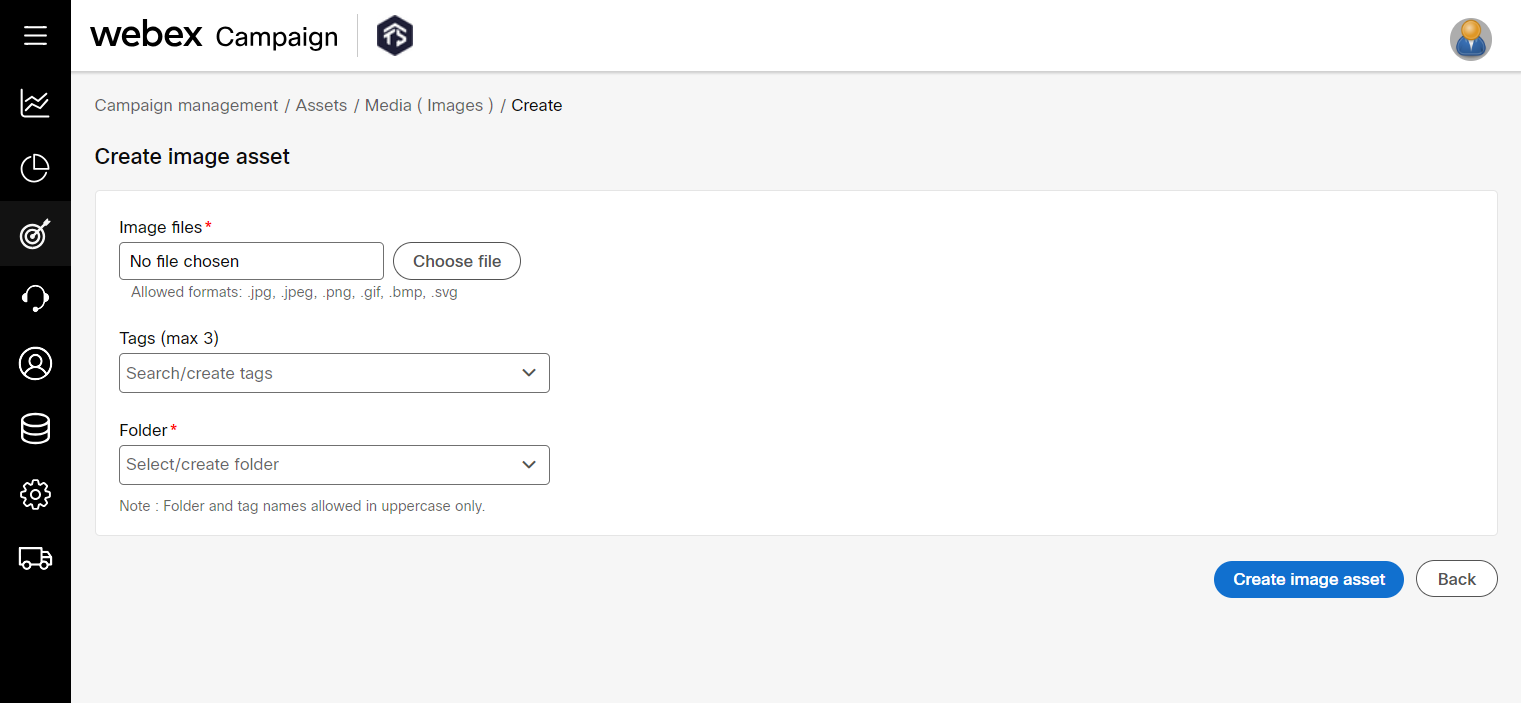
- Click Create image asset.
- (Optional) Once the asset is created, from the ellipses icon of the respective asset, click download to download the image.
- (Optional) Click the Info icon to view the image information such as Folder name, Tags, Size, Created on, Status, and so on.
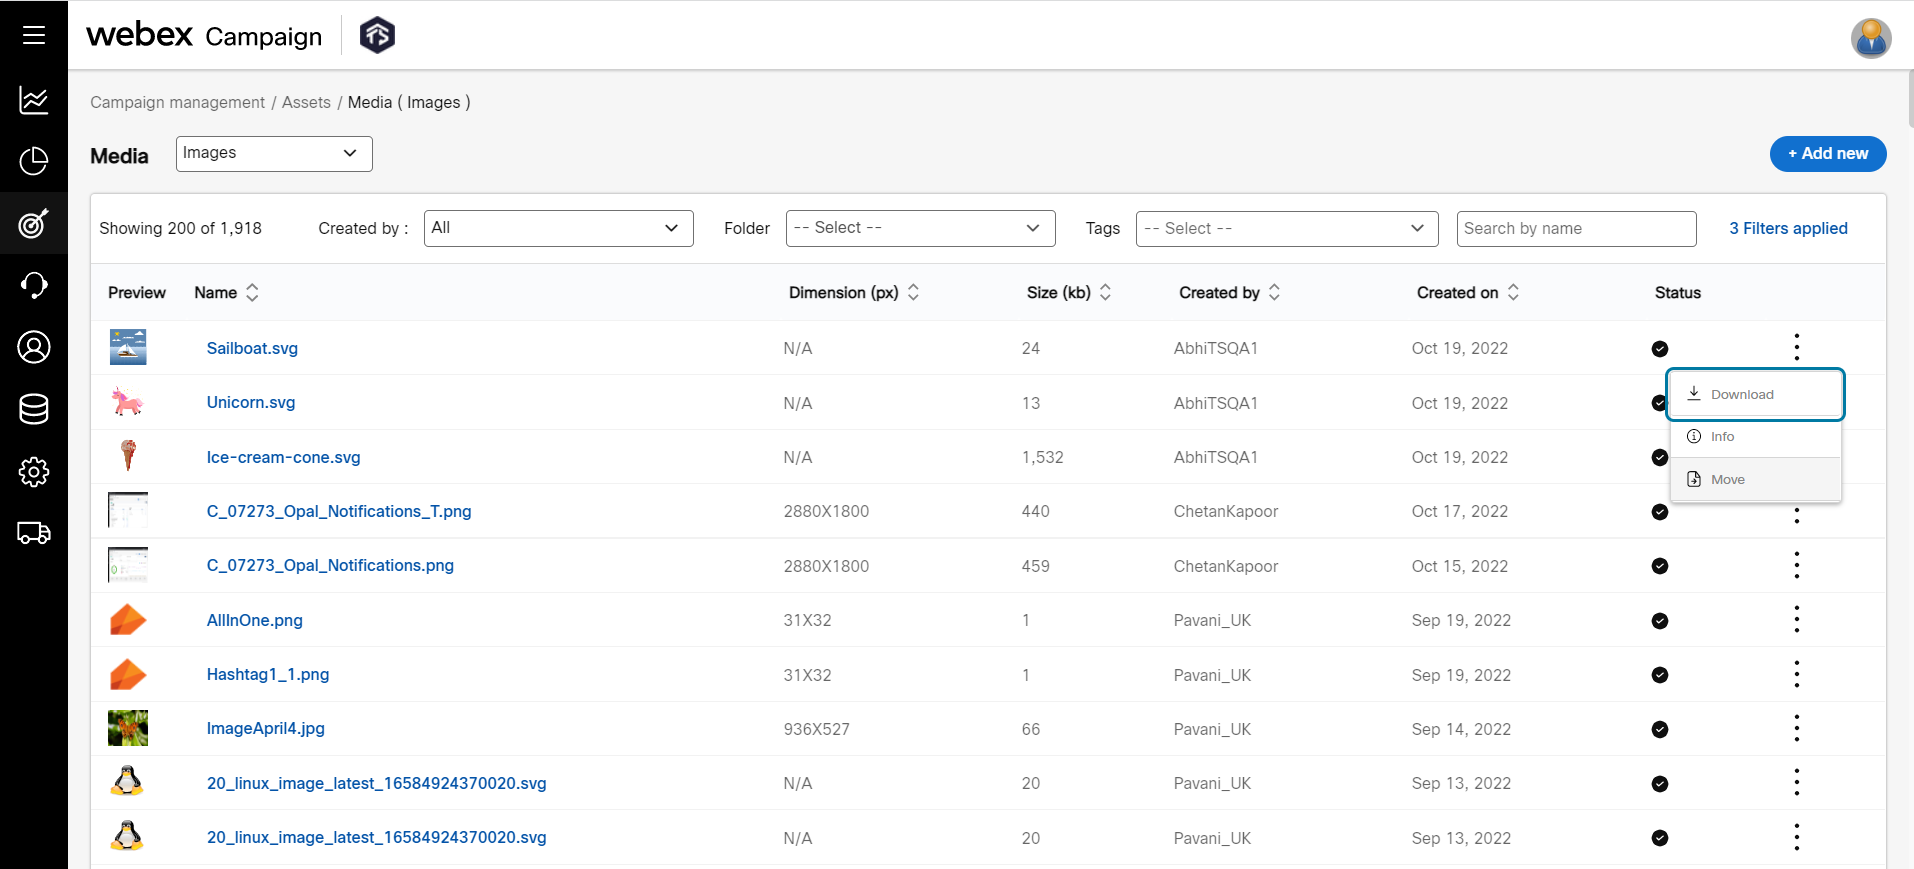
- (Optional) Click the Move icon to move the images from one folder to the other. You can also move images to the UNCATEGORIZED folder.
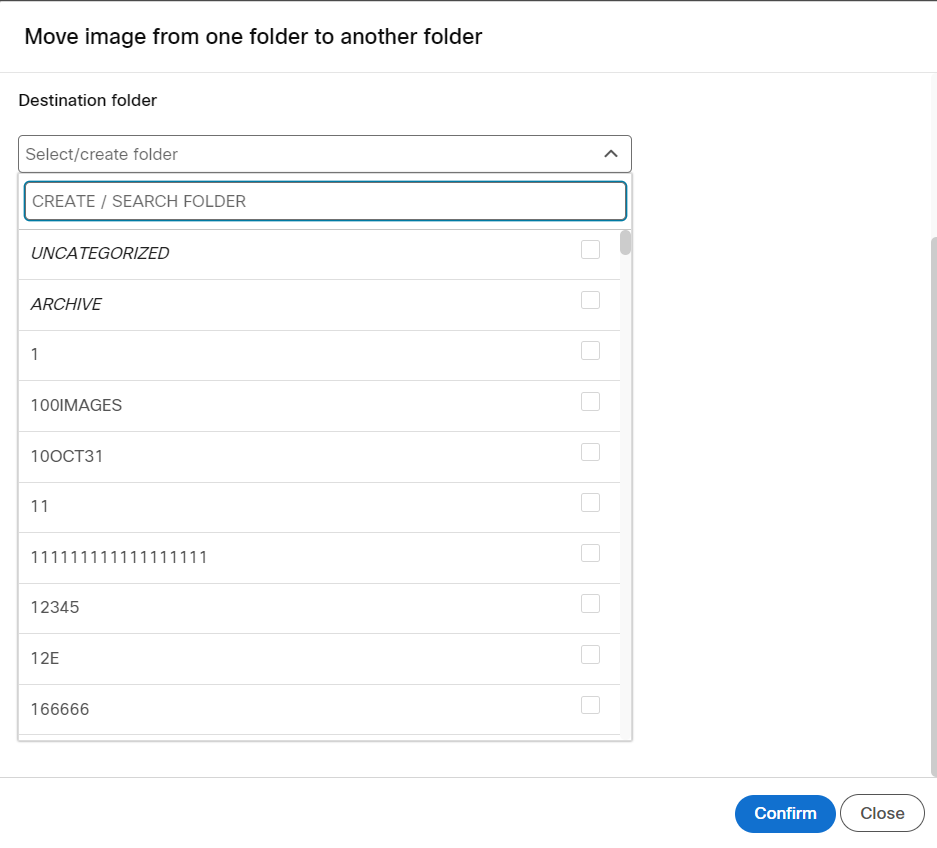
- (Optional) To delete an image, move the asset to ARCHIVE folder. The archived images will not be displayed in search results.
Empty folders and tags not associated with any image will be deleted automatically.
Create a video asset
Follow the below steps to add a video asset:
- On the Media screen, select an asset type as Video from the Asset type drop-down list box. Click +Add new.
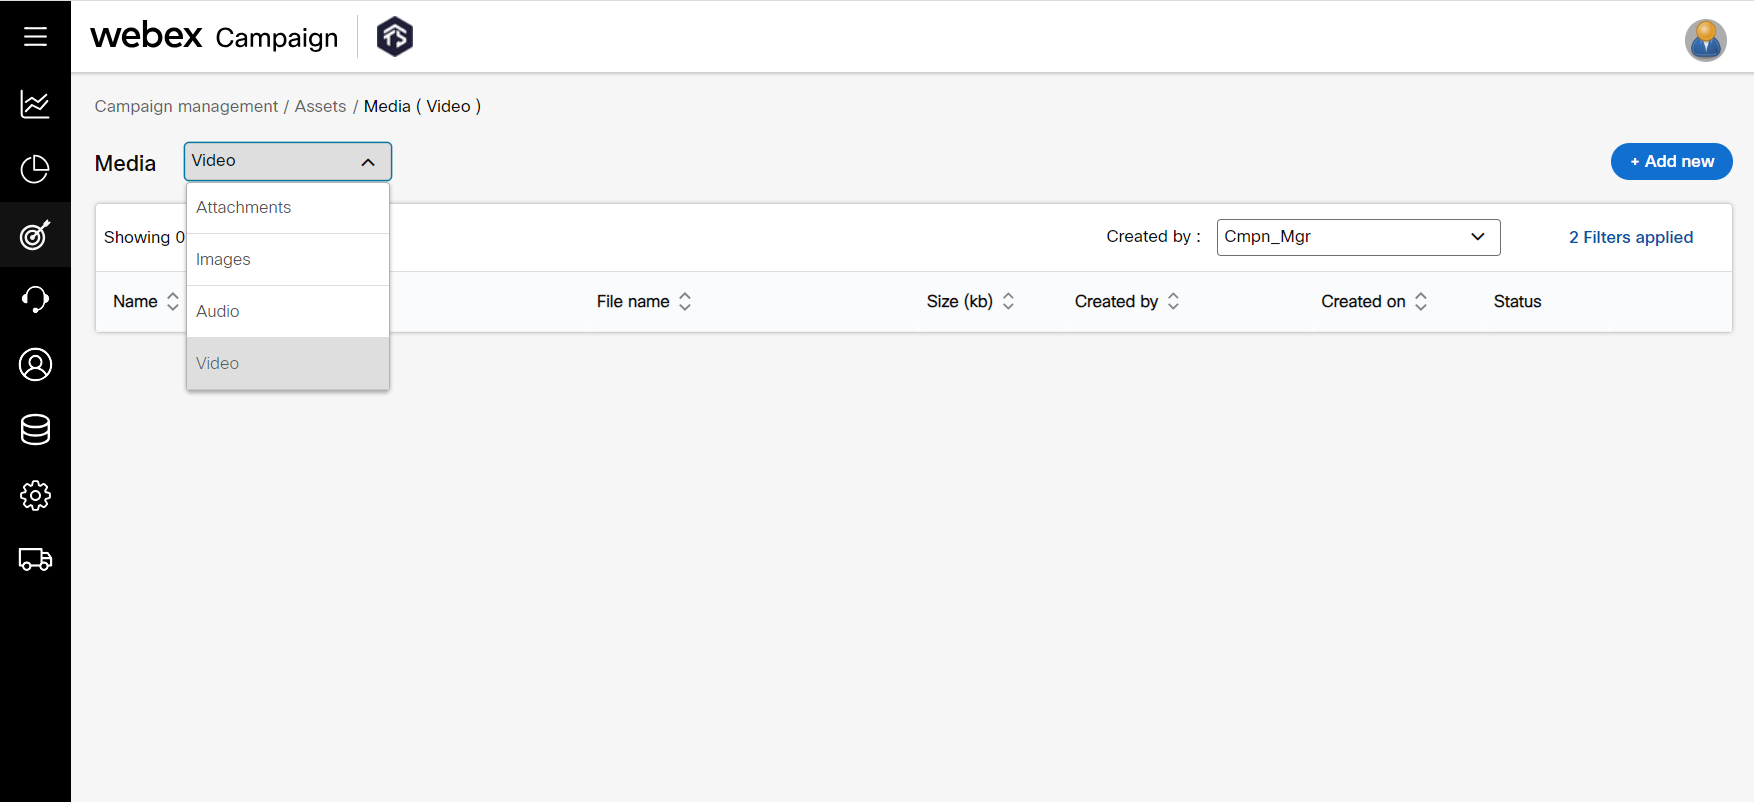
- On the Create video asset screen, enter details for the following fields.
-
Name: Enter a name for the asset.
-
File: Browse for a file to upload.
-
Campaign: Select the campaign from the drop-down list box to restrict the asset to be used in the selected campaigns. To use the asset across all campaigns, select All from the drop-down list box.
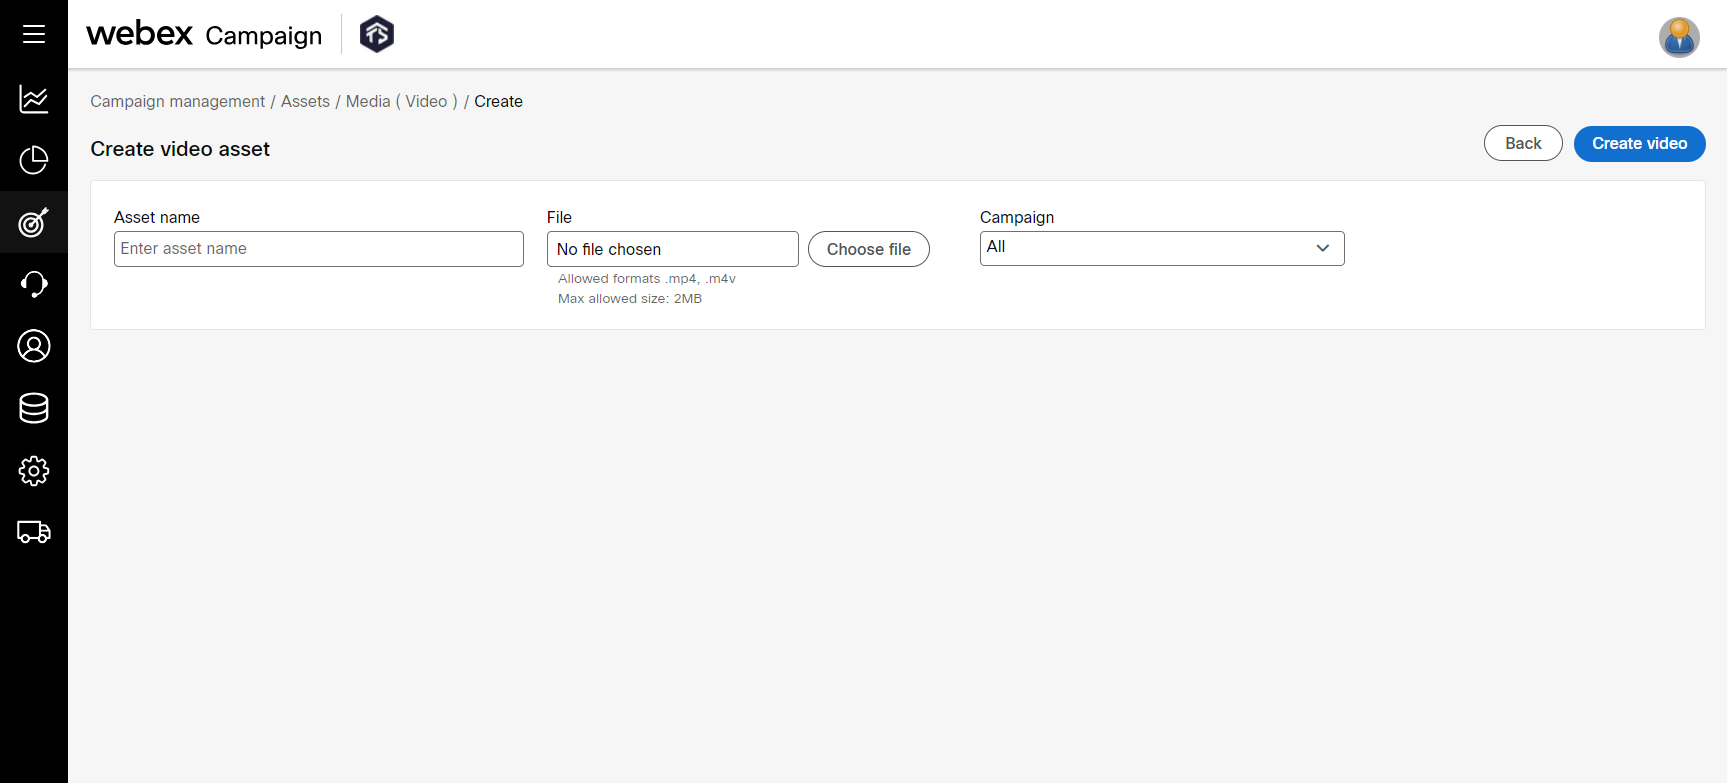
- Click Create video.
- (Optional) Once the asset is created, from the ellipses icon of the respective asset, click download to download the video.
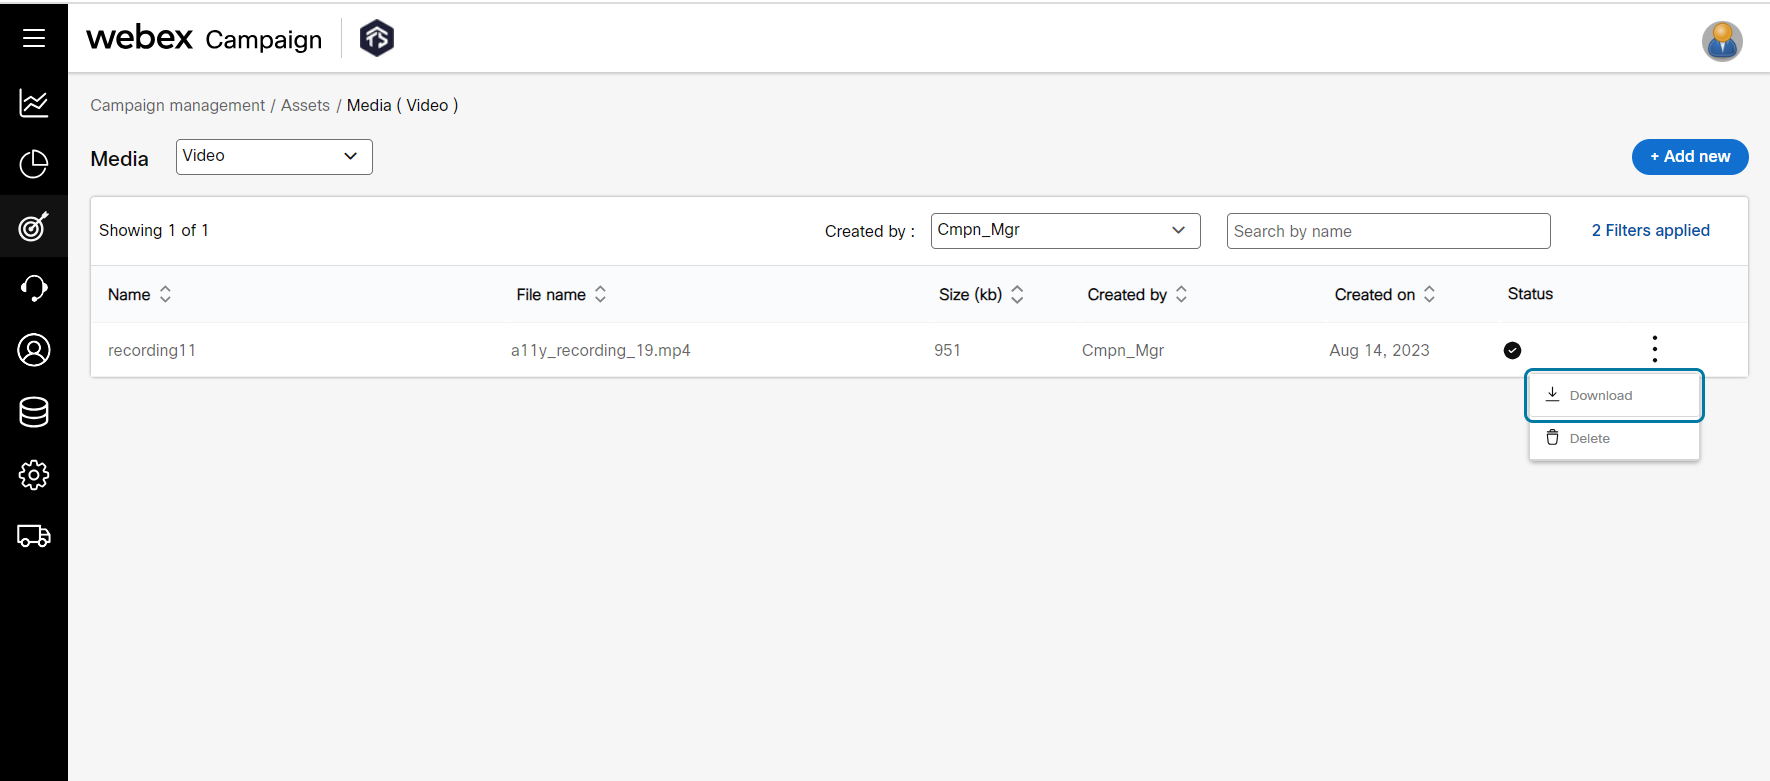
- (Optional) To delete a video, from the ellipses icon of the respective asset, click delete .
Create an attachment asset
Follow the below steps to add an attachment asset:
- On the Media screen, select an asset type as Attachments from the Asset type drop-down list box. Click +Add new.
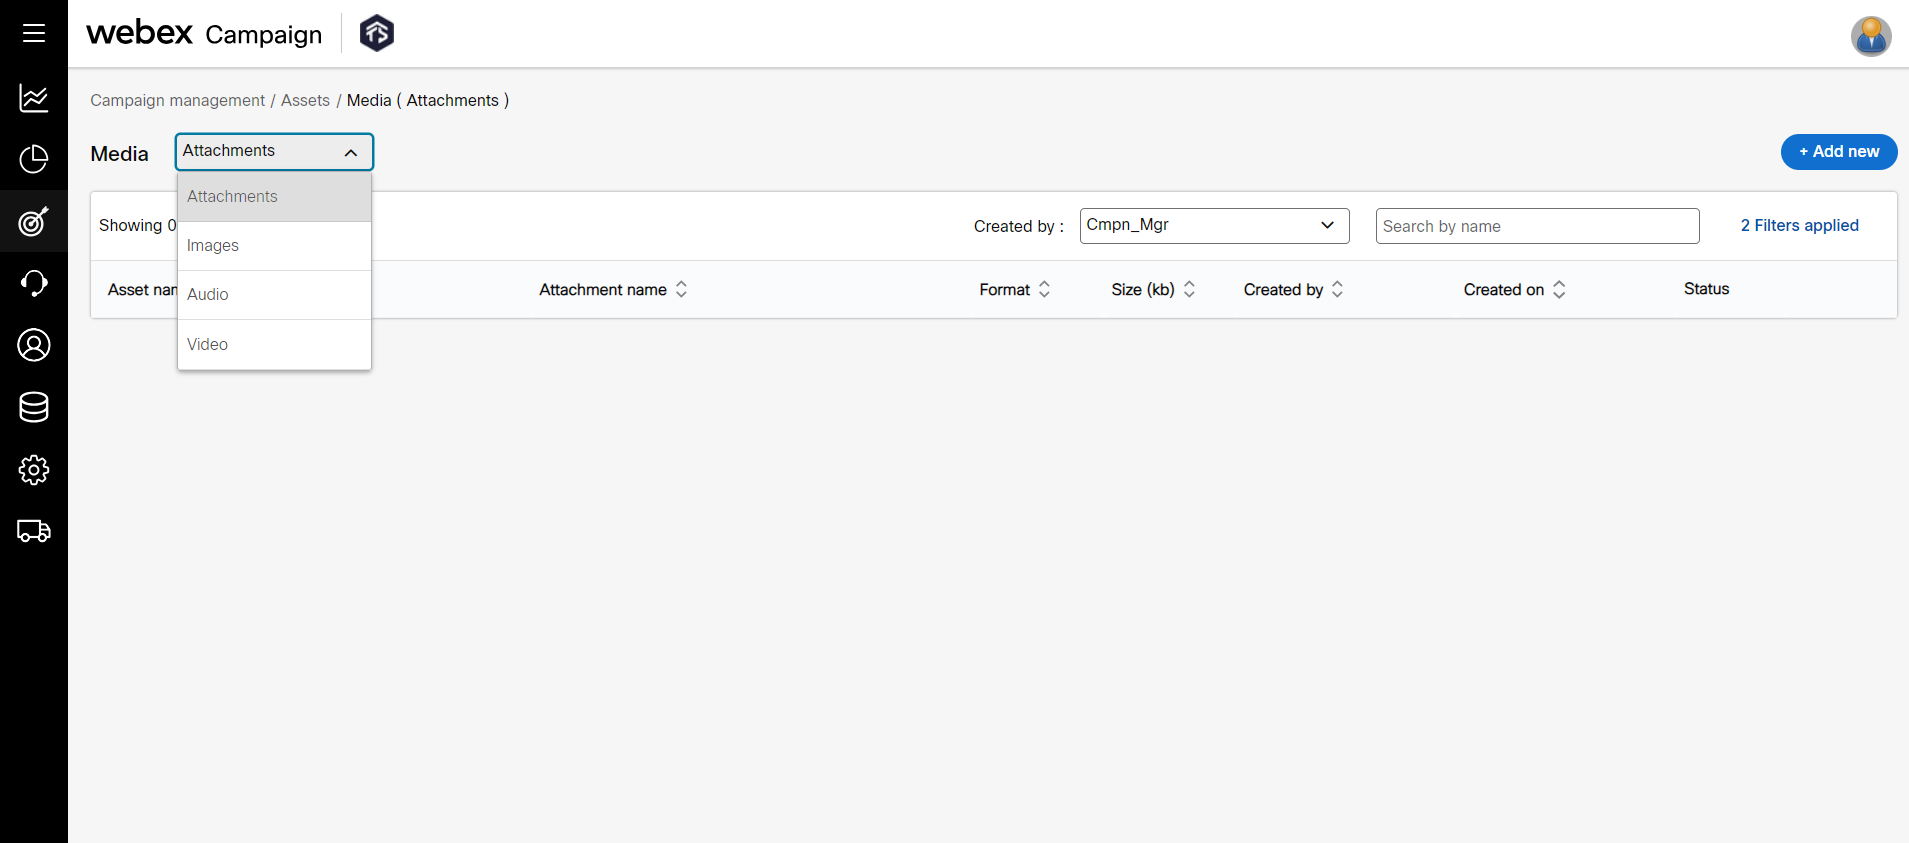
- On the Create attachment asset screen, enter details for the following fields.
-
Name: Enter a name for the asset.
-
File: Browse for a file to upload.
-
Campaign: Select the campaign from the drop-down list box to restrict the asset to be used in the selected campaigns. To use the asset across all campaigns, select All from the drop-down list box.
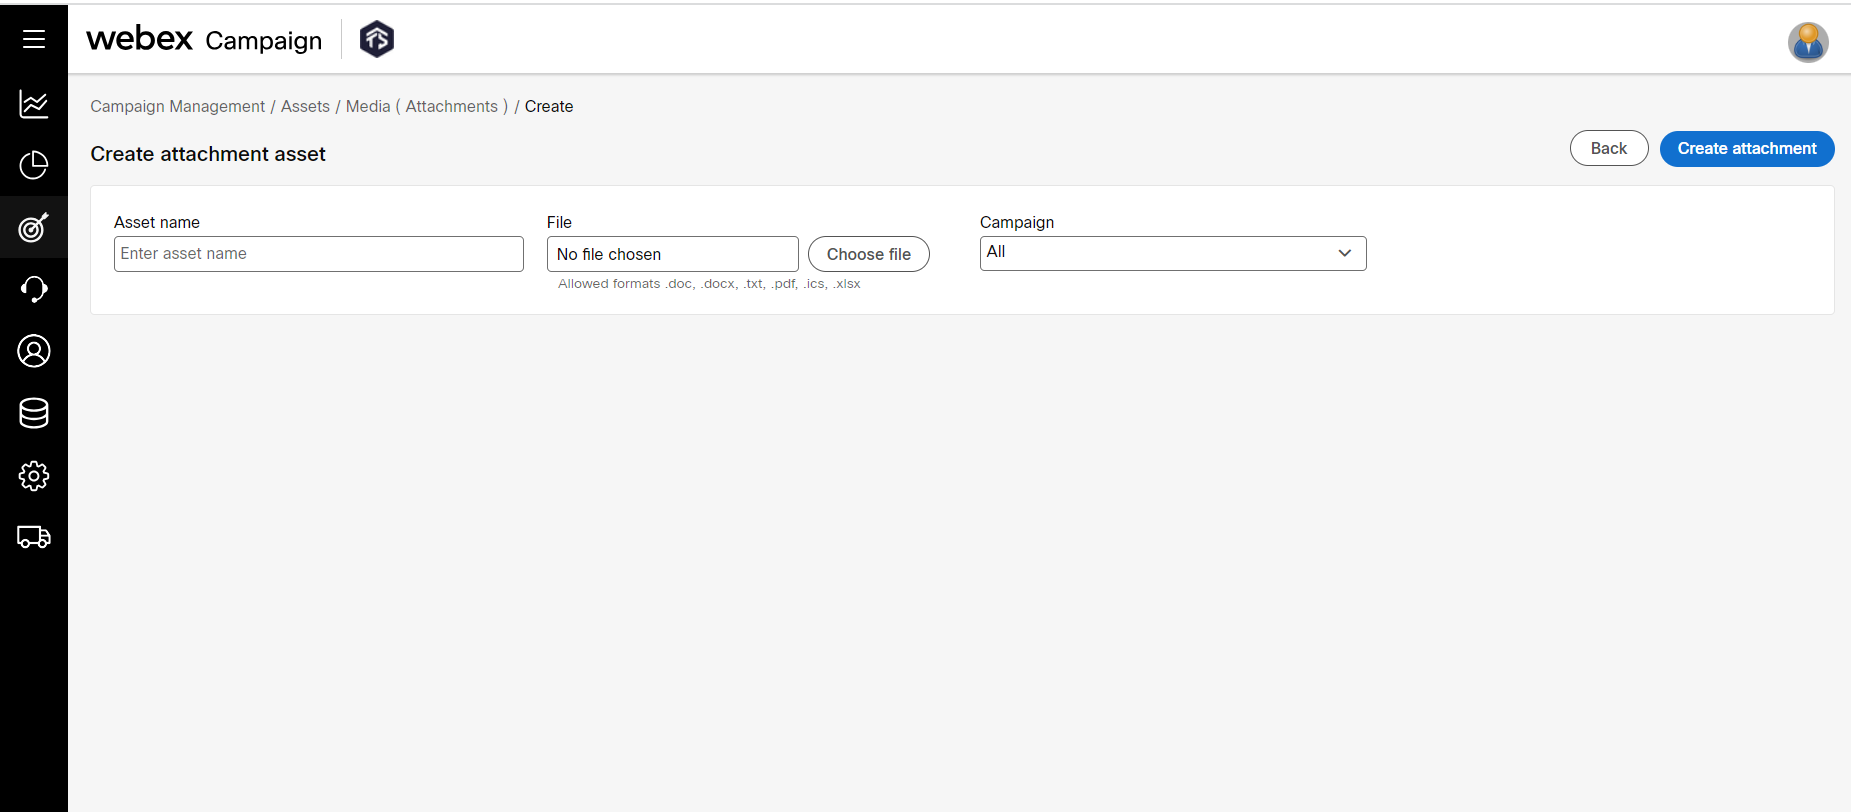
- Click Create attachment.
- (Optional) Once the asset is created, from the ellipses icon of the respective asset, click download to download the attachment.
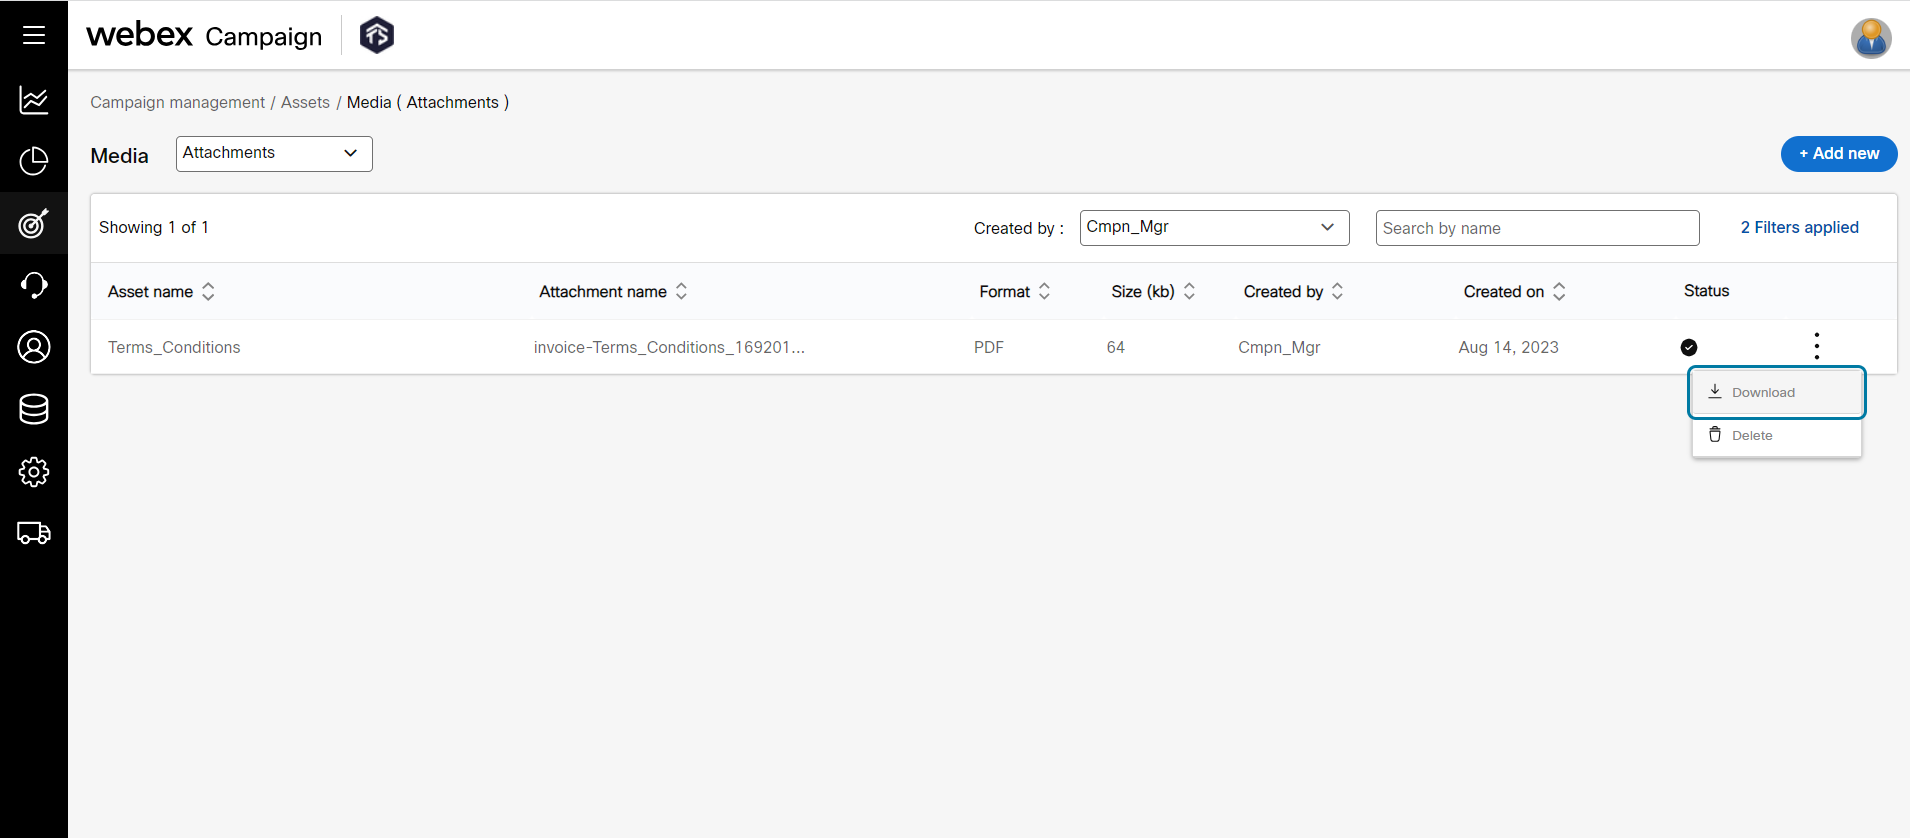
- (Optional) To delete an attachment, from the ellipses icon of the respective asset, click delete .
Create an audio asset
Follow the below steps to add an audio asset:
- On the Media screen, select an asset type as Audio from the Asset type drop-down list box. Click +Add new.
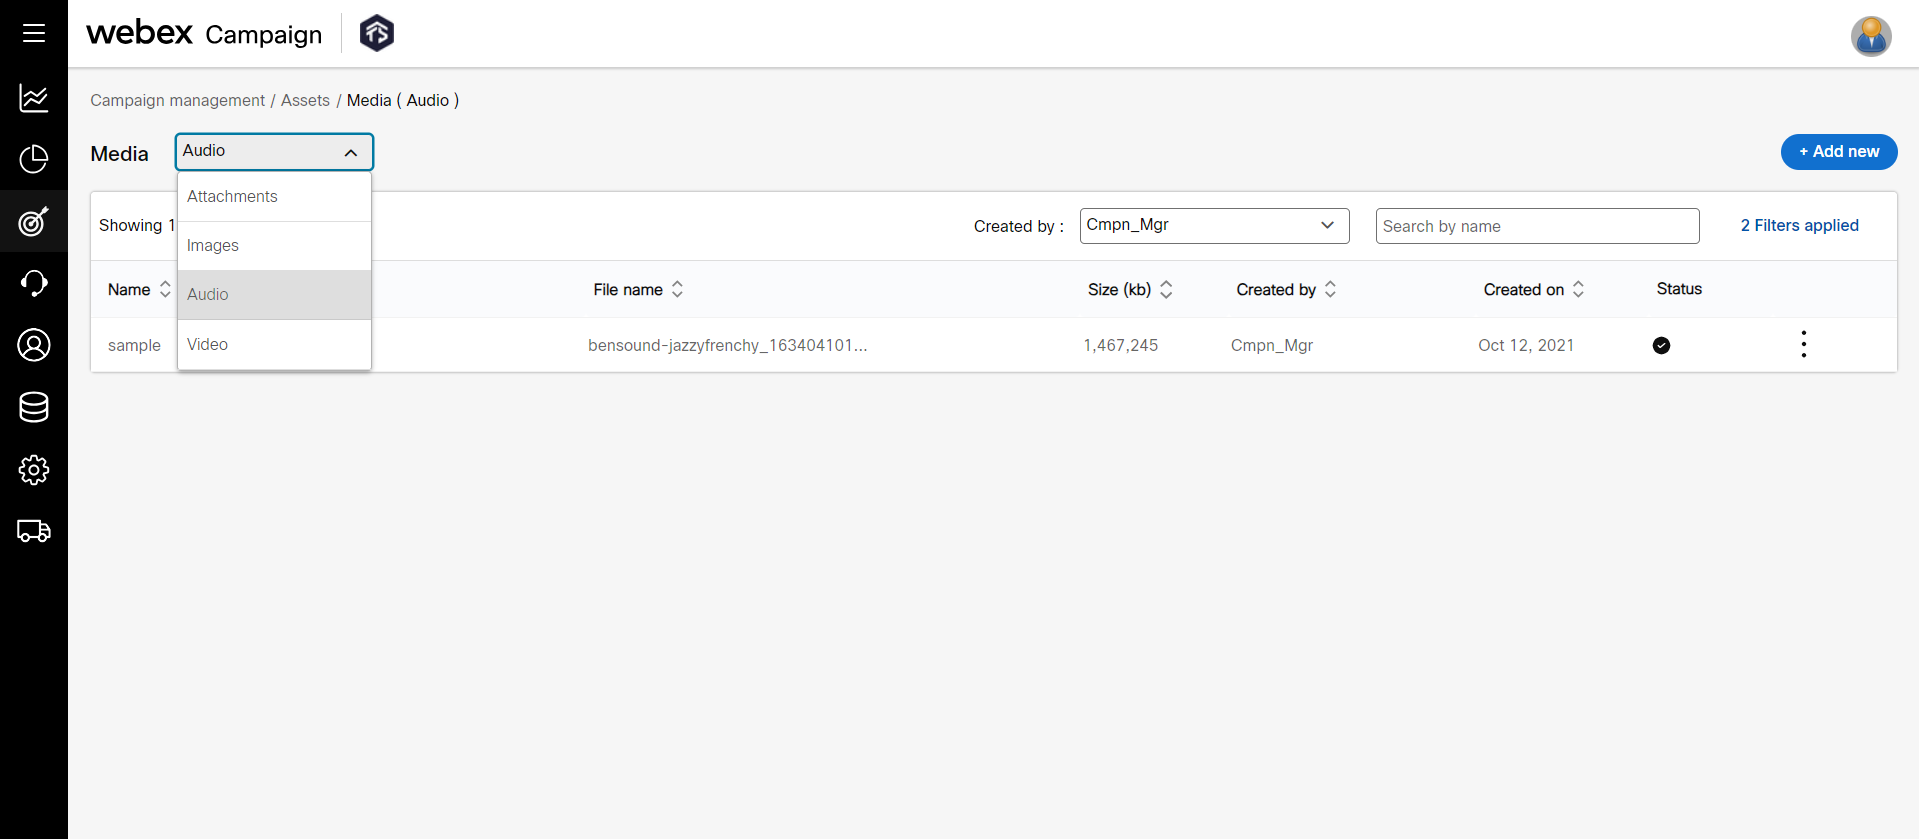
- On the Create audio asset screen, enter details for the following fields.
-
Name: Enter a name for the asset.
-
File: Browse for a file to upload.
-
Campaign: Select the campaign from the drop-down list box to restrict the asset to be used in the selected campaigns. To use the asset across all campaigns, select All from the drop-down list box.
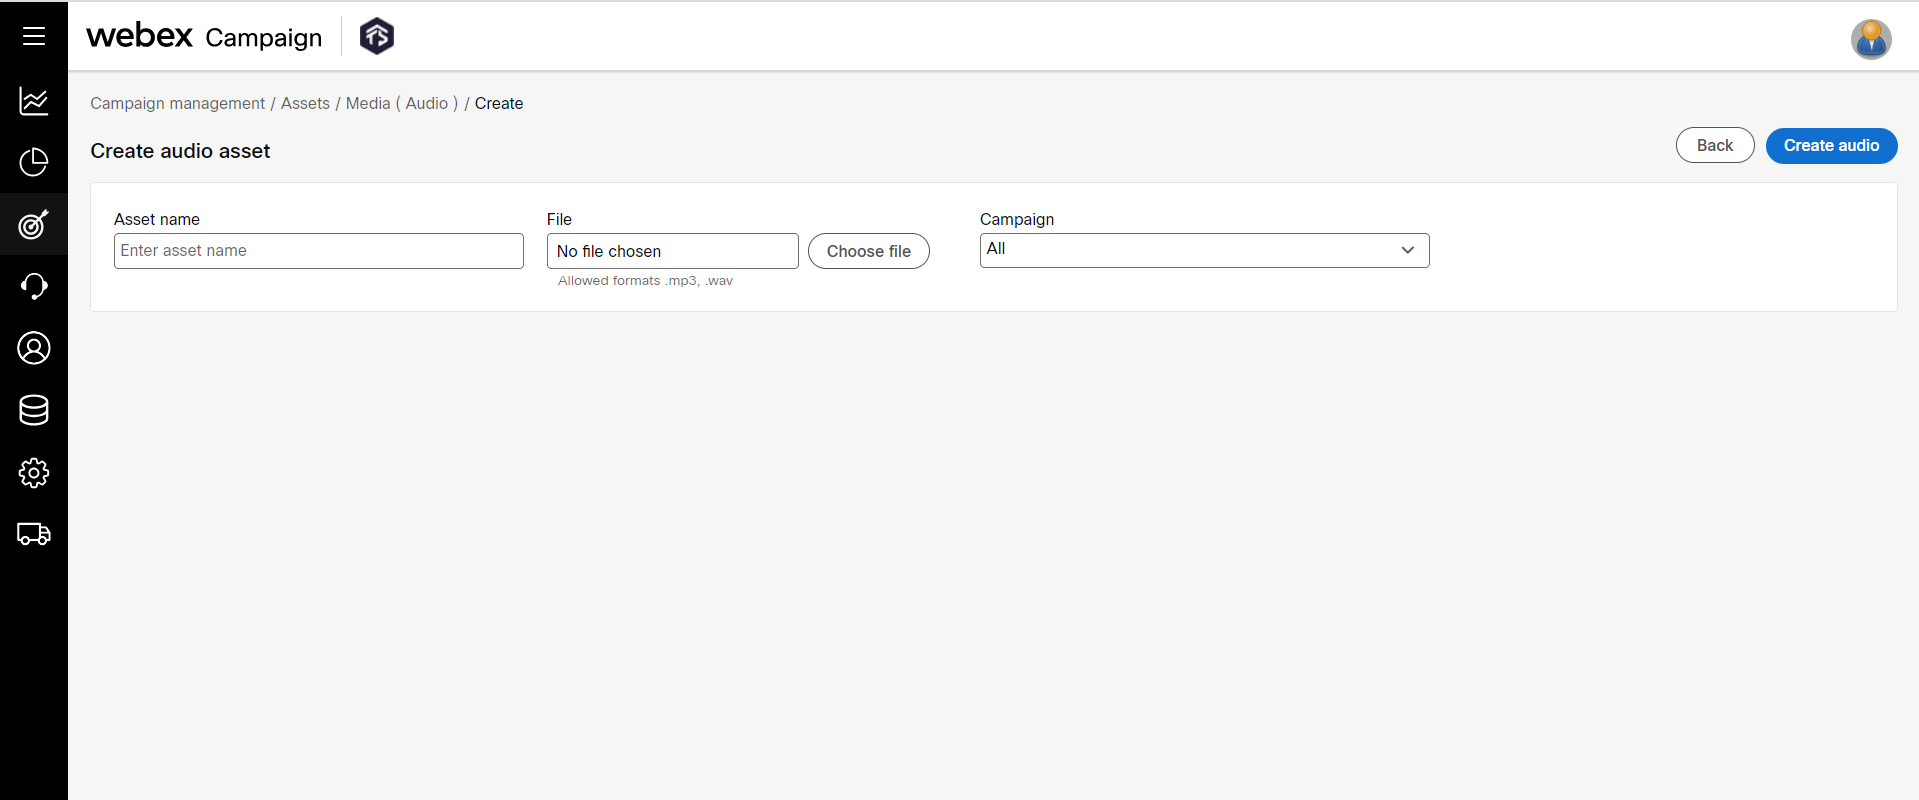
- Click Create audio.
- (Optional) Once the asset is created, from the ellipses icon of the respective asset, click download to download the audio.

- (Optional) To delete an audio, from the ellipses icon of the respective asset, click delete .
Search for an image asset
To search for an image asset, follow these steps:
- On the Media screen, select the required Asset type as images from the drop-down list box.
- Enter the asset name in the Name field. You can also filter the images by Tags, Folder, or Created by using the respective drop-down list boxes.
- Click the Search.
Updated 3 months ago