Manage Message Templates
Webex Campaign allows a user to create, update and manage email templates. The templates can be used during deployment creation to ensure version control and aid in the efficiency of the setup process.
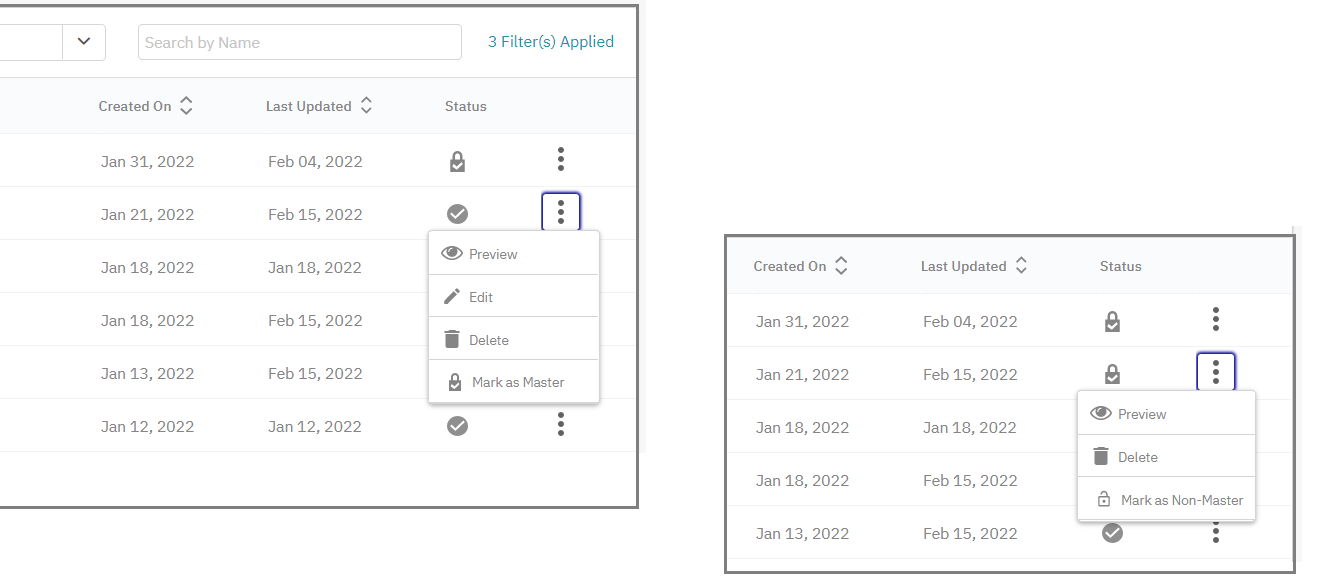
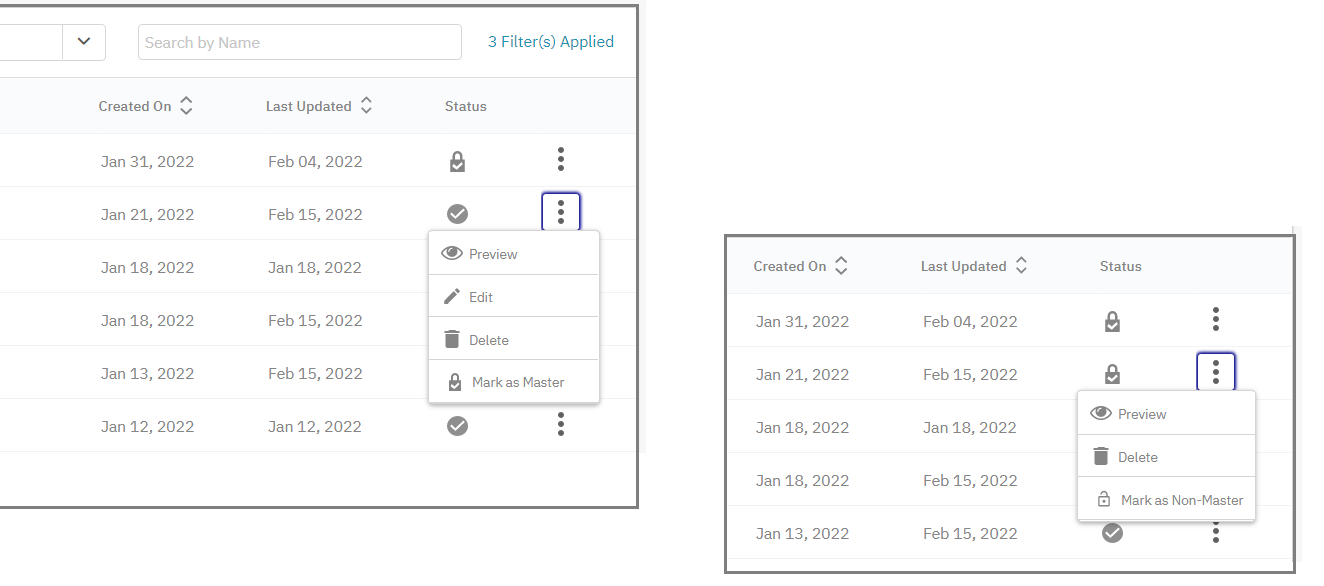
The actions that are available for a template when the template is made as master and non-master are shown below.

Approve a Message Template
- On the Message templates screen, click the ellipses icon of the required template and click Waiting for approval . This action requires appropriate approval rights.
- After the approval templates are ready to be used in deployments.
Reject a Message Template
To reject a Message template:
- On the Message templates screen, click the ellipses icon of the required template and click Reject . This action requires appropriate approval rights.
- The template will be sent back to the creator.
Edit a Message Template
- On the Message templates screen, click the ellipses icon of the required template and click Edit.
- Make necessary changes to the subject or Personalization and click Update and proceed.
- Make necessary changes to the template and click Save & exit .
Delete a Message Template
- On the Messages templates screen, click the ellipses icon of the required template and click Delete .
- Click OK on the confirmation message that appears.
Search a Message Template
- On the Messages templates screen, enter the name of the template in the search box.
- The Templates will be displayed that match the search text.
Mark as Master Template
This option is applicable only when the Asset Type is selected as Email.
- On the Messages templates screen, click on the ellipses icon of the required template and click Mark as master .
- A lock symbol is displayed for the template as shown below. Once locked, a template cannot be edited.
To edit a master the template it must be made as Mark as non-master.

Preview a Template
This option is applicable only when the Asset Type is selected as Email and MMS.
- On the Messages templates screen, click on the ellipses icon of the required template. and click Preview .
- Click on the Preview icon of the required template. The preview screen appears.
For Email templates, Preview will not be shown if the template is in Draft state.
-
This step is applicable for Email templates only. Click on the Test email. The Test Email template screen appears.
-
This step is applicable for Email Templates only. Choose the contacts and router from the respective drop-down boxes and click Send.
The Email Template will be sent to the selected contacts.
Updated 3 months ago