
Email Composer mini-release 2019 March 27th
Here’s the list of enhancements in this release:
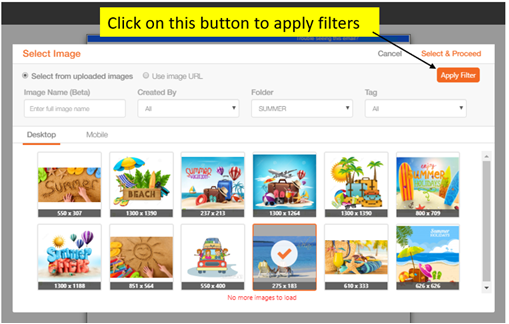
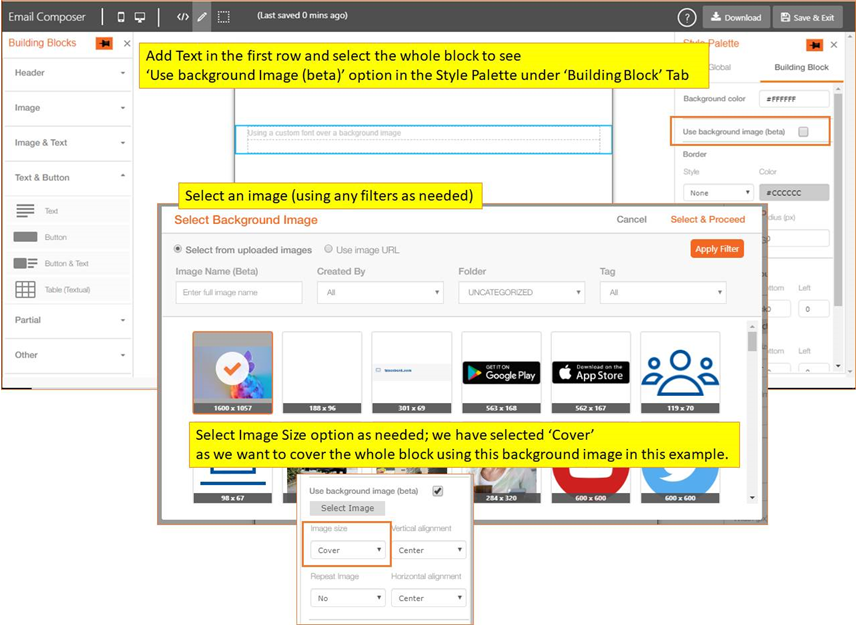
1. Image Selector pop-up : New-look UI & ability to filter images
We have added following filters in Image Selector pop-up :
- Image Name (Beta) : At present, you will need to enter the full image name; we will improve this in the future to allow filtering by parts of an image name.
- Created By : This drop-down will show the list of users from the same User Group as that of the logged-in user.
- Folder :This drop-down will show the list of folders which were created by users within the same User Group as that of the logged-in user. The ‘Archive’ folder will not be shown in this drop-down. Also, when you select ‘All’ folders here, any images from the ‘Archive’ folder will not be displayed. This has been done to improve the speed of response of the UI.
- Tag : This drop-down will show all the tags assigned to images filtered using ‘Created By’ and ‘Folder’.
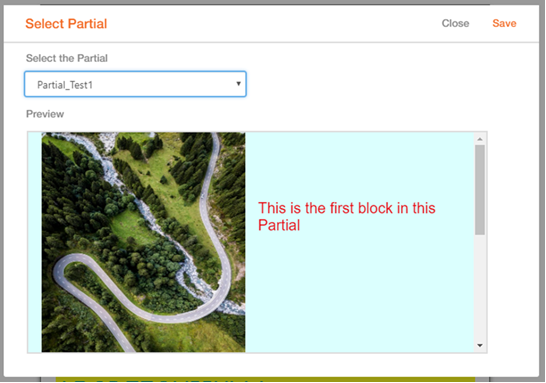
2. Preview Email Partials within the Email Composer
Whilst selecting an Email Partial, you can now see its preview. This enhancement is applicable for both ‘Partial’ and ‘Editable Partial’ building blocks.
3. Bug Fix
Fixed a bug which was causing an extra
tag to be removed in the auto-generated HTML (INC9668700 / PRB0042738). This enhancement will be effective for newly created email templates. If you have any existing email templates affected by this bug, then you should just re-open those email templates within the Email Composer and save them again. This action will automatically apply this bug-fix to those existing email templates.
4. Bug Fix
Fixed a bug which was causing a Button to be rendered with square edges (instead of rounded edges) in the iOS native email app , if both ‘border’ and ‘radius’ properties were applied to the button . (INC9702608). This enhancement will be effective for newly created Button blocks going forward. For already existing Button blocks (which have both ‘border’ and ‘radius’ properties ), you should delete the old Button blocks and recreate them.
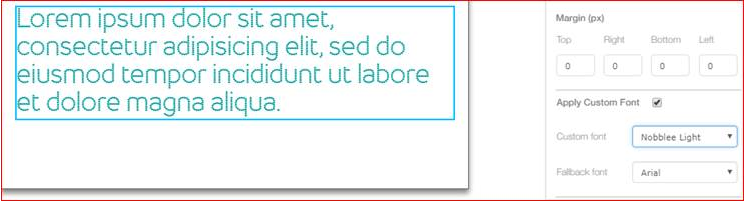
5. Use of Custom Fonts within Text (Beta)
You can now use the following custom fonts within various Text blocks :
- Nobblee Regular
- Nobblee Light
- Rubrik Light
- Rubrik Regular
- Rubrik Semibold
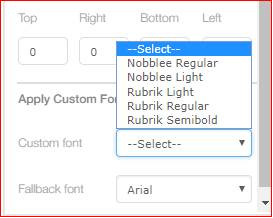
You will need to select one of the following fonts as the ‘fallback’ font for each piece of text where you have used a custom font :
- Arial
- Helvetica
- Times New Roman
HOW TO USE CUSTOM FONTS WITHIN THE EMAIL COMPOSER :
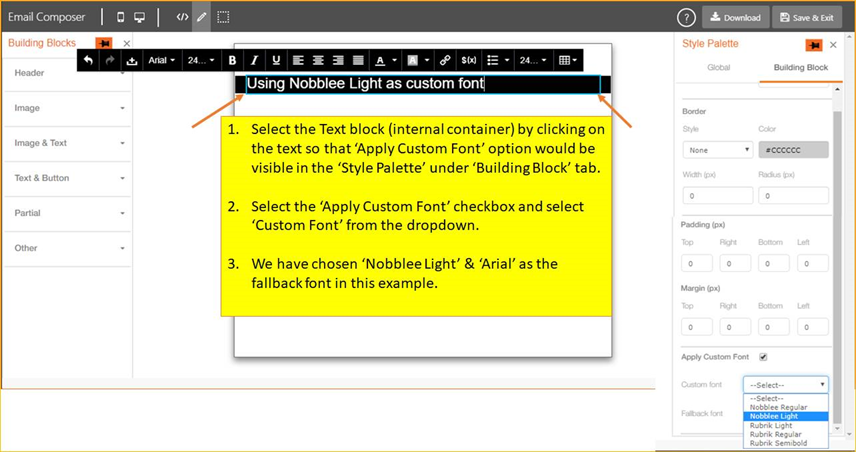
a) Select the text portion of the block where you want to apply the custom font (bluish colour border is visible when it is selected).
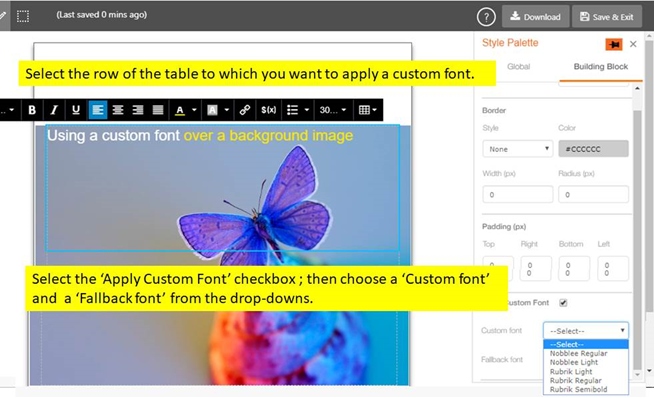
b) You will notice the newly introduced checkbox in the ‘Building Block’ tab under Style Palette.
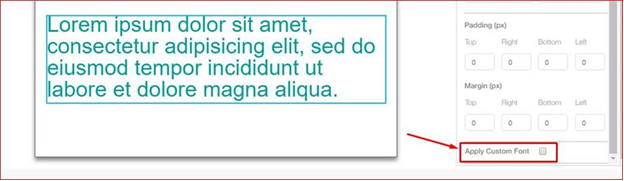
c) Select the checkbox named ‘Apply Custom Font’. Select one of the custom fonts and one of the ‘fallback’ fonts from the 2 drop-downs.
Custom Fonts Usage Notes:
- Custom fonts are not supported by all the email clients. So please test thoroughly using our Litmus Inbox Preview and also by sending to test contacts.
- For devices/email clients which do not render custom fonts, you should always select a ‘fallback’ font. Note that Outlook on desktop (Windows) clients overrides the selected fallback font and will always render the text in ‘Times New Roman’.
- Un-select the “Apply Custom Font” checkbox if you change your mind and don’t want to apply a custom font to a piece of text.
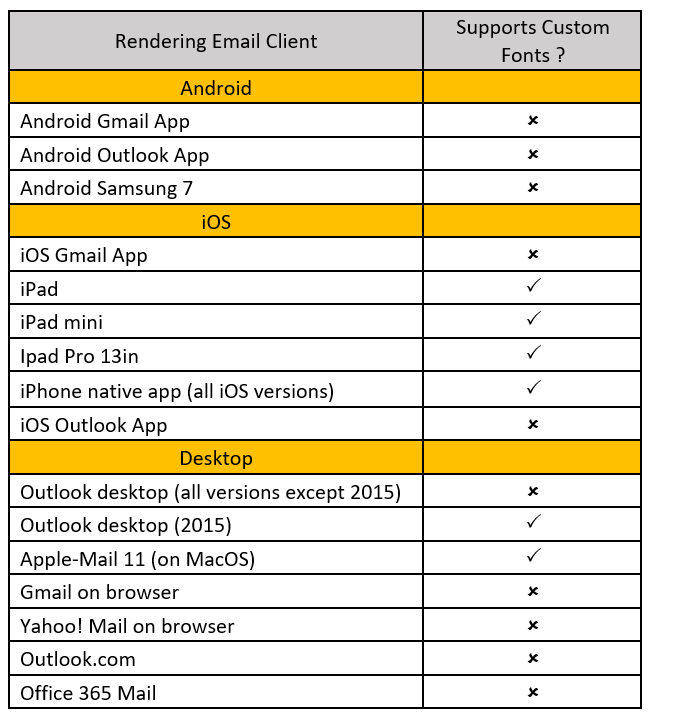
- The following table shows which email clients support custom fonts at present. Of course, this may change in the future as email inbox providers are continually updating their products.
A STEP-BY-STEP MINI-TUTORIAL : USING CUSTOM FONTS ON TOP OF A BACKGROUND IMAGE:
STEP 1: Add a ‘Table (Textual)’ block in the canvas and create a table with 2 rows.
STEP 2: Add some text in the first row and select a background image.
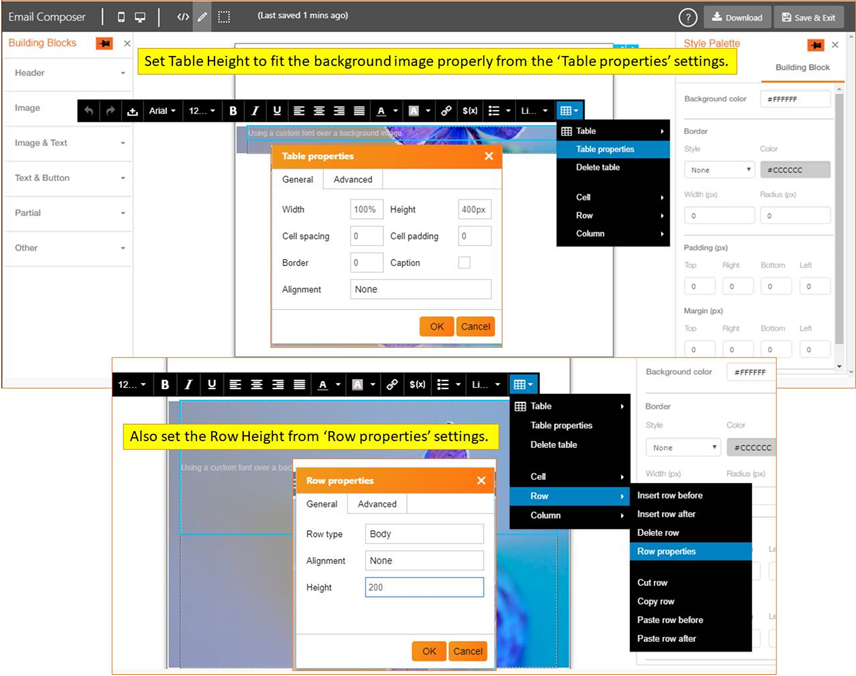
STEP 3: Set the Table Height and Row Height to fit the background image properly.
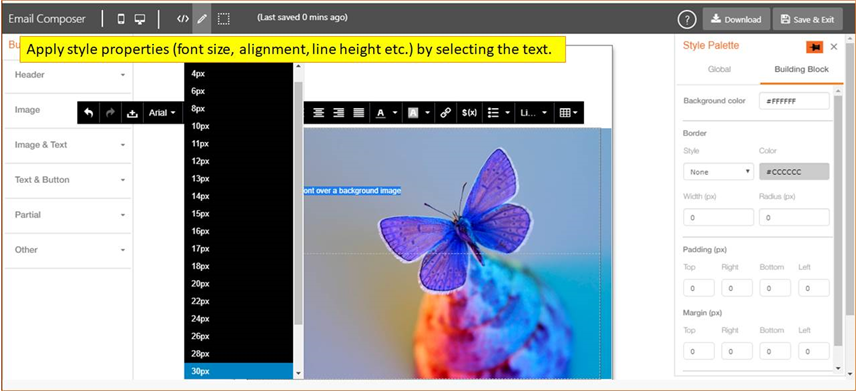
STEP 4: Apply styles (font size, line height, alignment etc.) by selecting the text.
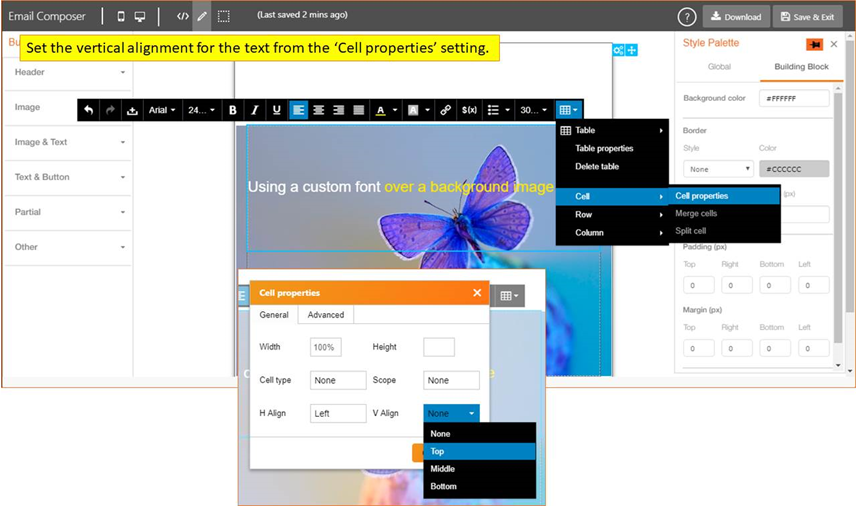
STEP 5: Set vertical alignment of the text from cell properties
STEP 6: Select the table row and apply a custom font and a fallback font:
That’s all there is to it ! You now have your first block ready with text using a custom font 😊 !
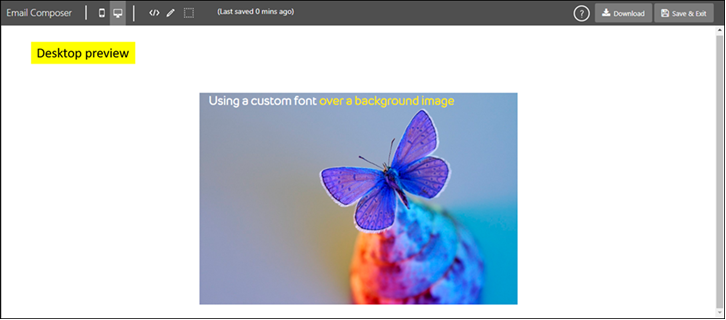
TUTORIAL 1 Desktop preview:
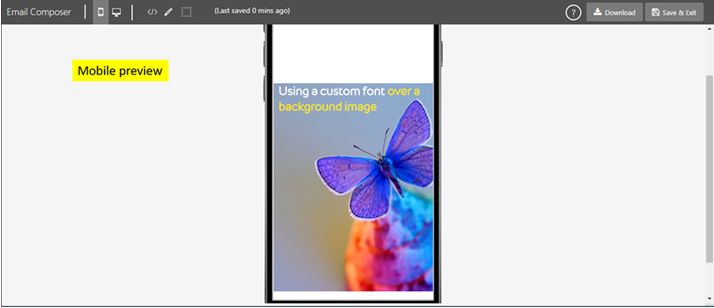
TUTORIAL 1 Mobile preview:
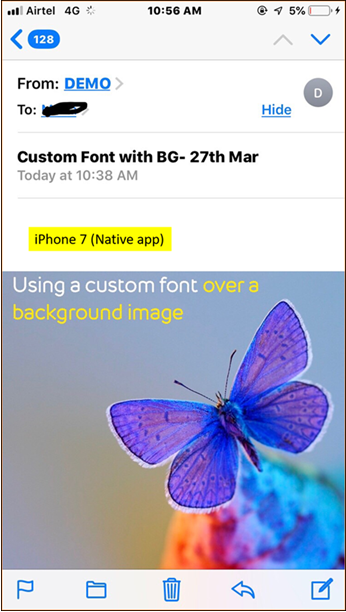
Here are some screenshots from a few popular email clients:
- TUTORIAL 1 iPhone native email app : Custom font (‘Nobblee Regular’) is rendered.
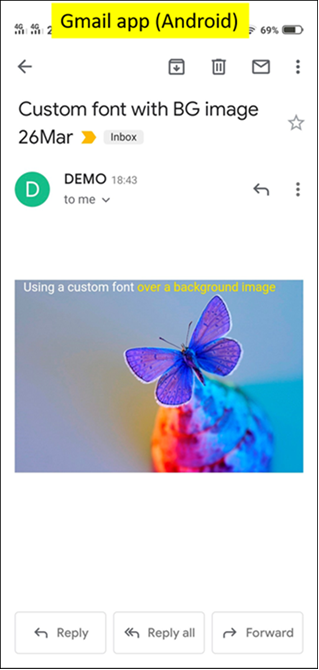
- TUTORIAL 1 Gmail app (Android) : Fallback font ‘Arial’ is rendered.
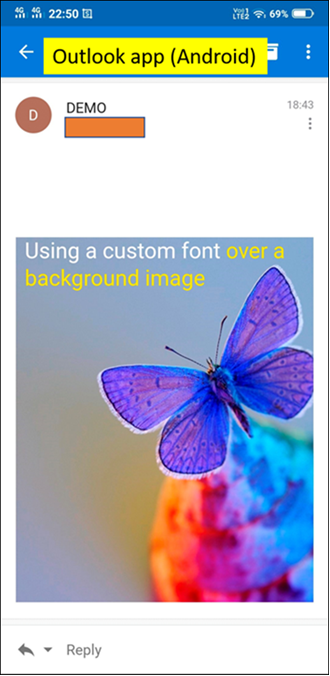
- TUTORIAL 1 Outlook app (Android) : Fallback font ‘Arial’ is rendered.
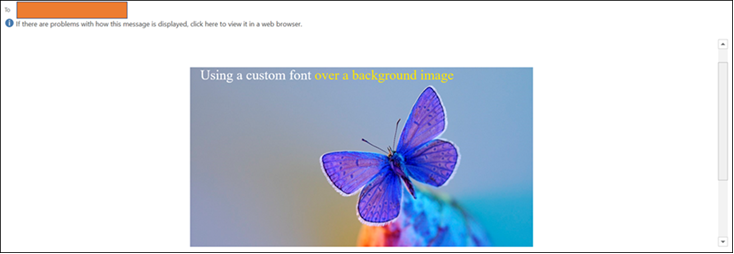
- TUTORIAL 1 Outlook on desktop (Windows) : ‘Times New Roman’ is rendered (The designated fallback font is ignored by Outlook).
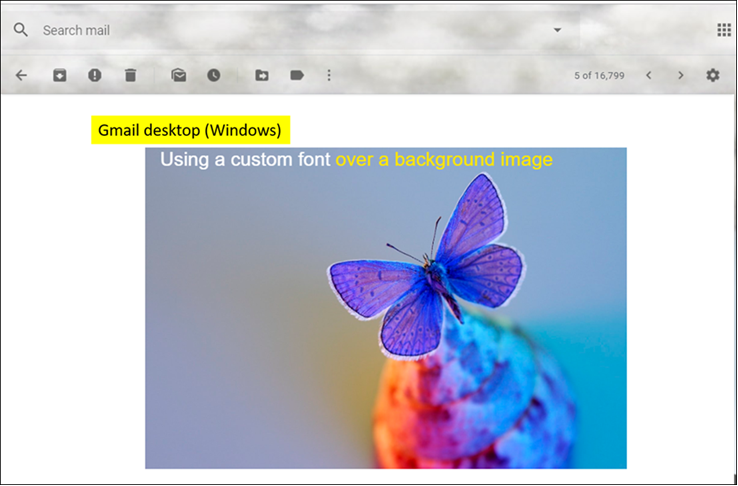
- TUTORIAL 1 Gmail on browser (Windows) : Fallback font ‘Arial’ is rendered.
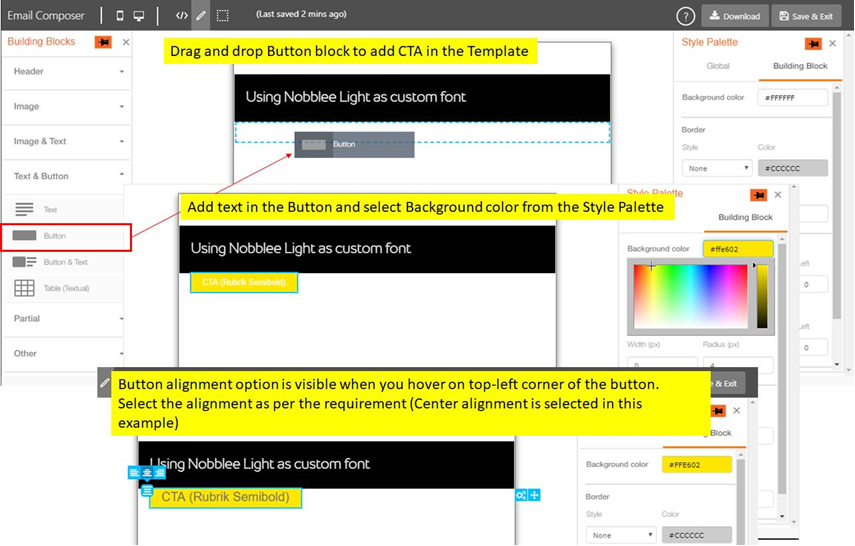
Here’s another mini-tutorial with 2 custom fonts in the template (‘Nobblee Light’ for the headline and ‘Rubrik Semibold’ for the CTA button ):
STEP 1: Add Text block in the template and select Custom Font and Fallback Font from the Style Palette:
STEP 2: Add Button block and set alignment of the button :
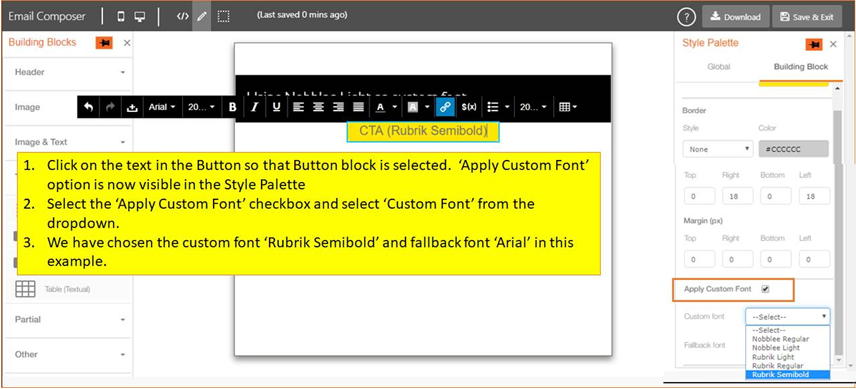
STEP 3: Add a custom font to the Button:
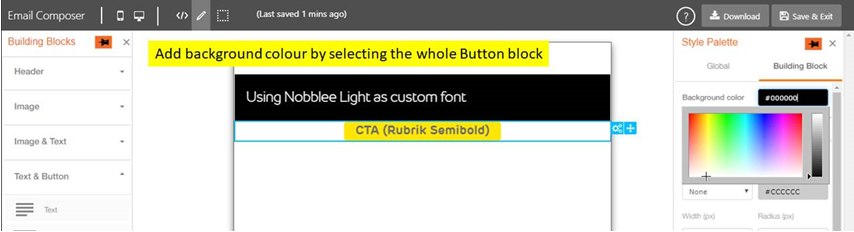
STEP 4: Add background colour the whole Button block:
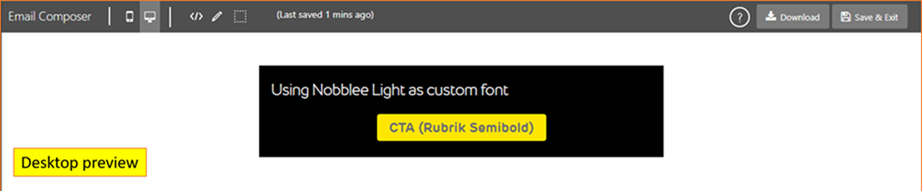
TUTORIAL 2 Desktop preview:
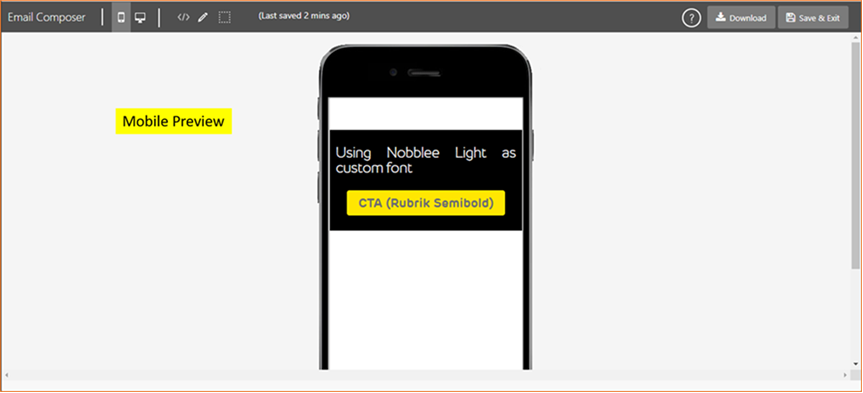
TUTORIAL 2 Mobile preview:
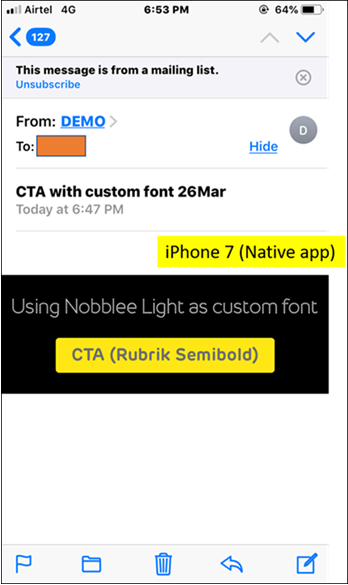
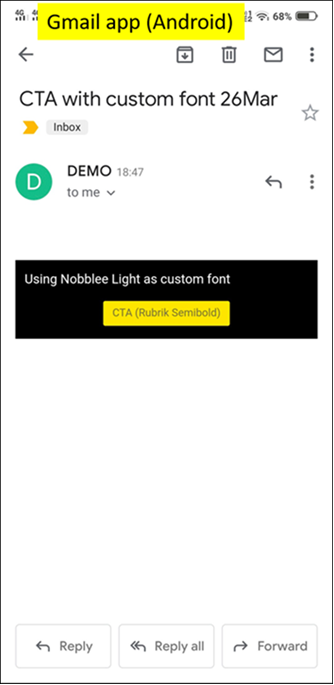
Here are some screenshots from a few popular email clients:
- iPhone native email app : Custom font (‘Nobblee Light’) is rendered.
- Gmail app (Android) : Fallback font ‘Arial’ is rendered.
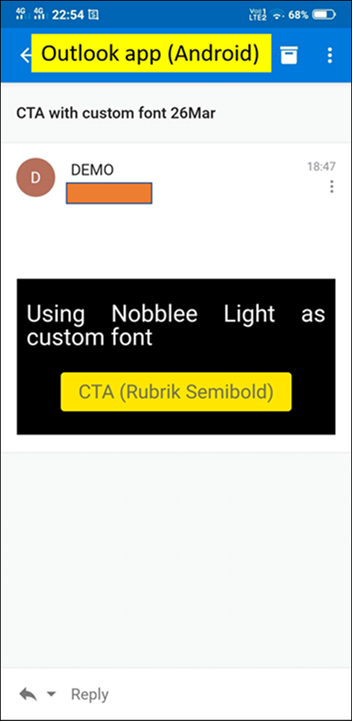
- Outlook app (Android) : Fallback font ‘Arial’ is rendered.
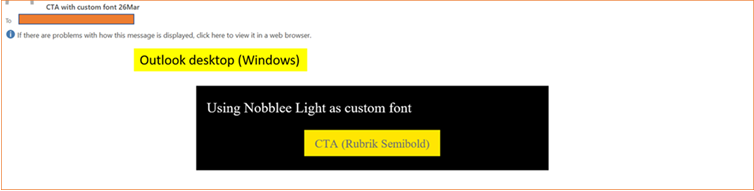
- Outlook on desktop (Windows) : ‘Times New Roman’ is rendered (The designated fallback font is ignored by Outlook).
- Gmail on browser (Windows) : Fallback font ‘Arial’ is rendered.